Cody42
-
Posts
98 -
Joined
-
Last visited
Content Type
Profiles
Forums
Gallery
Articles
Everything posted by Cody42
-
Looks great! Can't wait to see it in person
-
SE-44C with Electronics (Work in Progress)
Cody42 replied to Cody42's topic in Weapons of the First Order
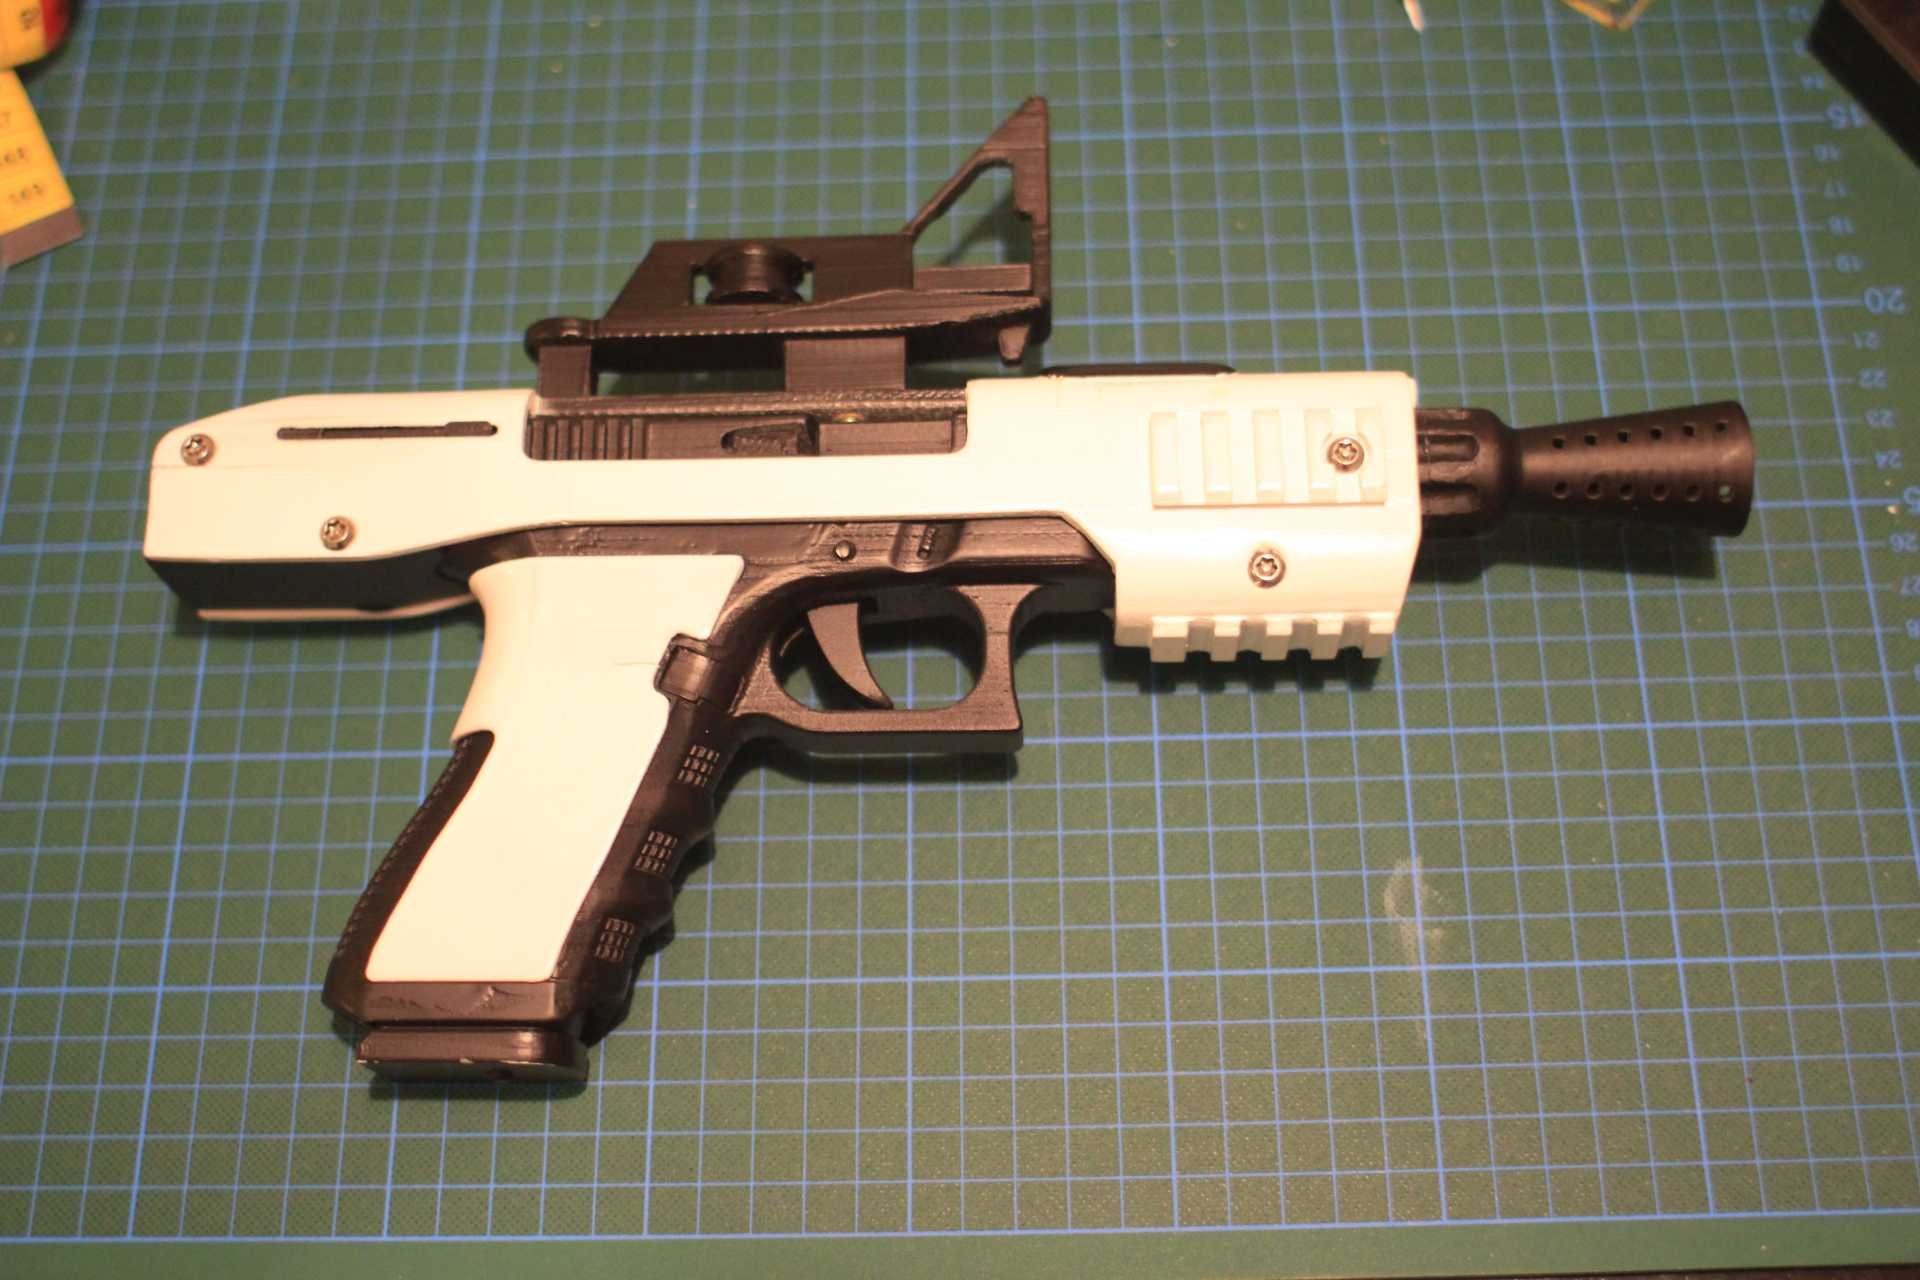
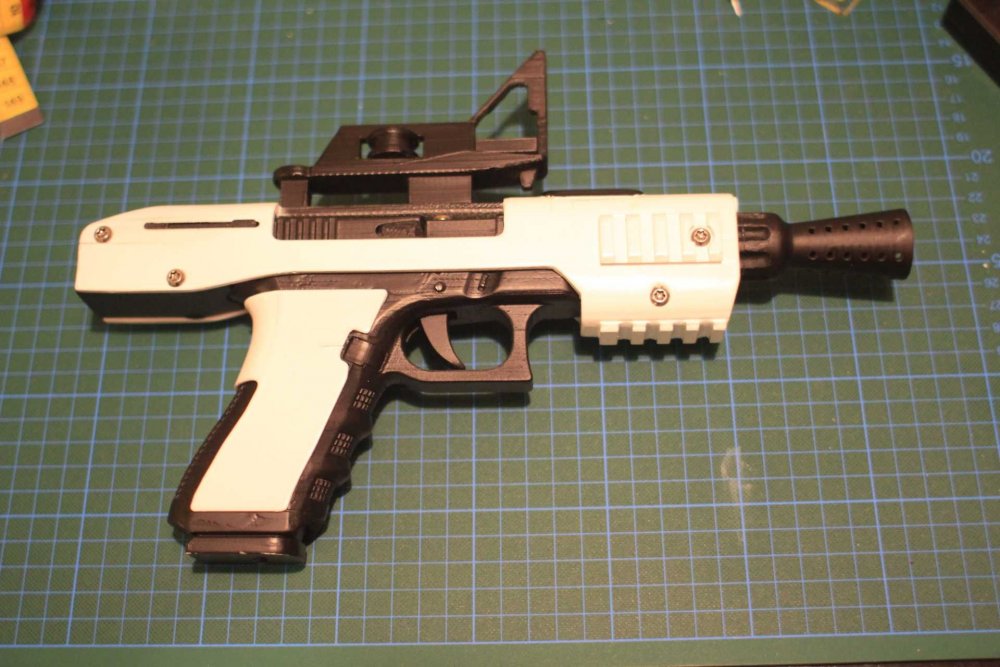
A lot of soldering of components and crimping connectors later, the main electronics are done. To have easy access to the battery, I printed a new mag. There is a small spring in the bottom, which holds the battery in place. Here you can see all the parts of the new mag: There are connectors glued in place inside the main body and the mag, which connect once the mag is fully inserted. So Glock closed with all electronics inside: Unfortunately the sound is not very loud from inside the blaster. But if it is not too loud around, you can still hear it go pew pew. For such a small blaster, I am satisfied with the result. Blaster fully assembled and operational: -
SE-44C with Electronics (Work in Progress)
Cody42 replied to Cody42's topic in Weapons of the First Order
PCBs arrived today. I'm amazed by the stellar quality of the fabrication. First fitting test with the actual pcb: perfect. Next up: soldering and functional test. -
SE-44C with Electronics (Work in Progress)
Cody42 replied to Cody42's topic in Weapons of the First Order
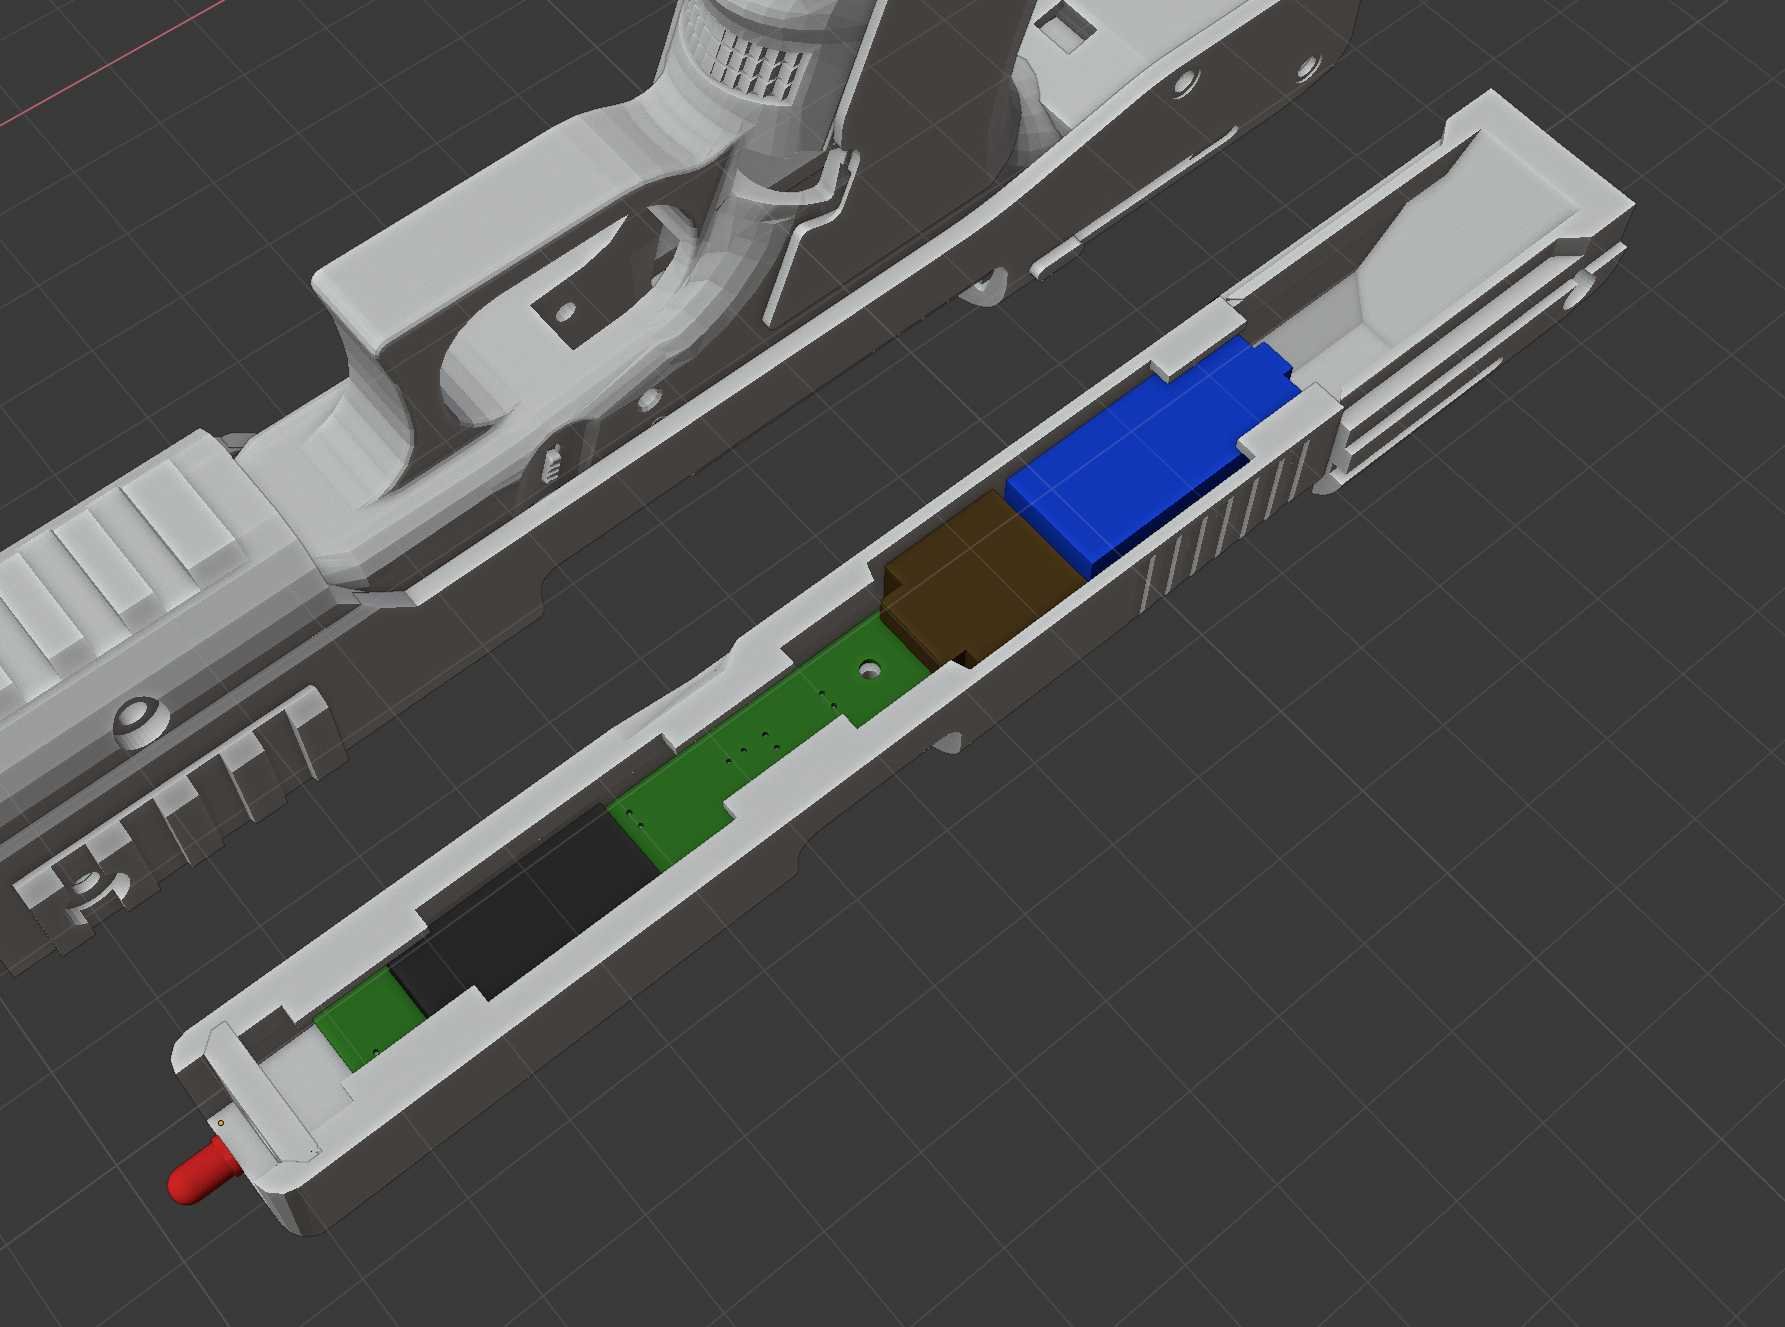
After some iterations on the pcb and the new slide and some failed prints the slide is now successfully printed. I made a lot more space inside, by making it a single piece instead of having a separate ejector and barrel end. Inside you can see the mock pcb mounted with a single screw. Fitting test of all components. Everything fits in. Finally a screenshot of the final pcb design. It is currently being manufactured and should arrive sometime next week. -
SE-44C with Electronics (Work in Progress)
Cody42 replied to Cody42's topic in Weapons of the First Order
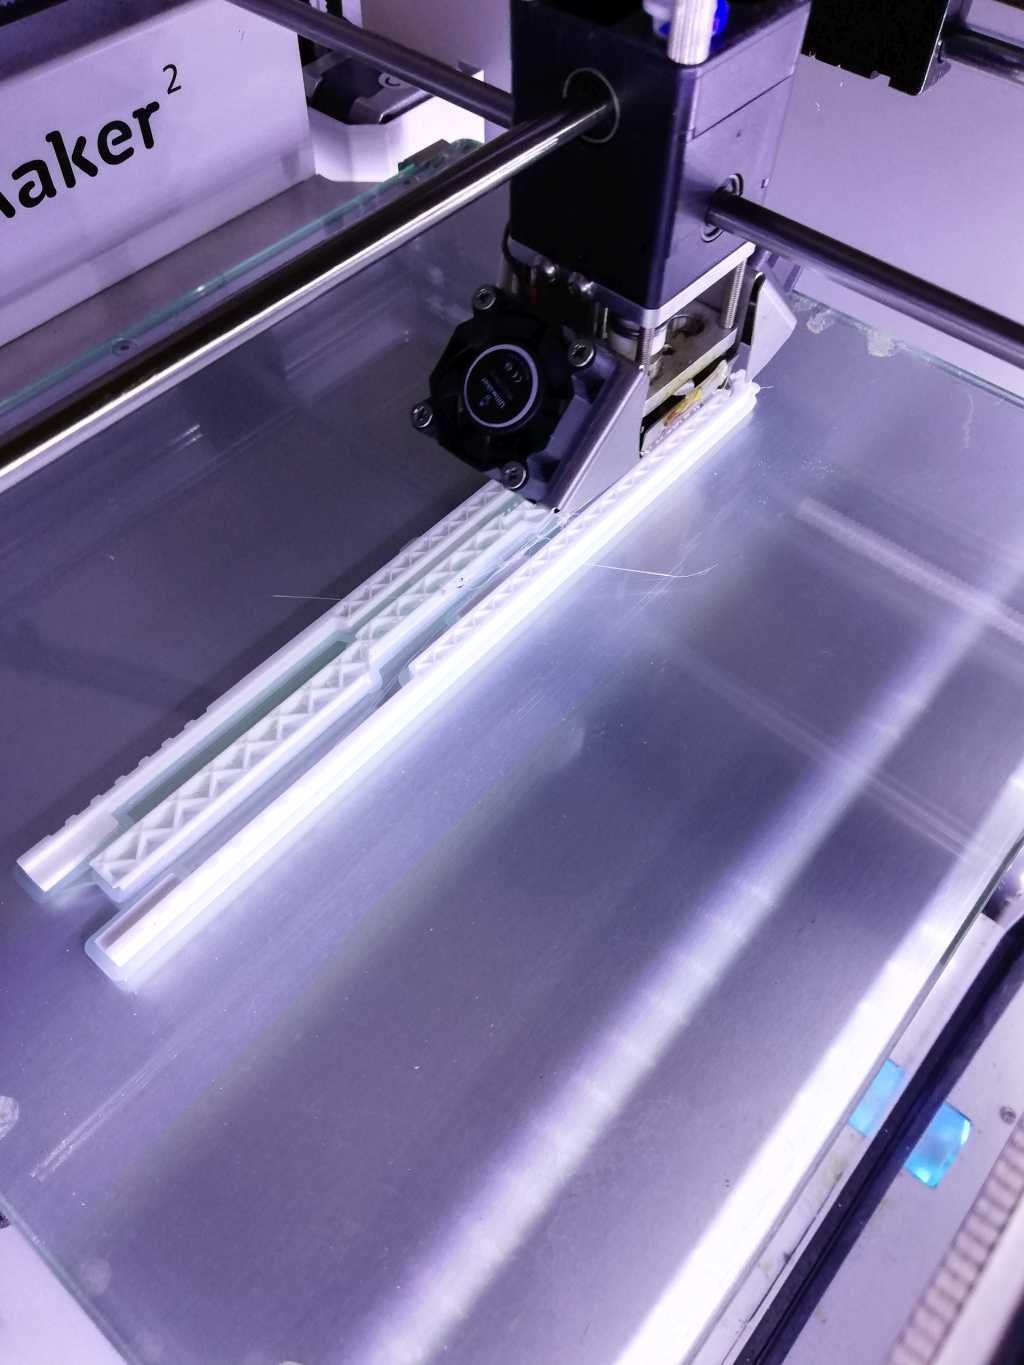
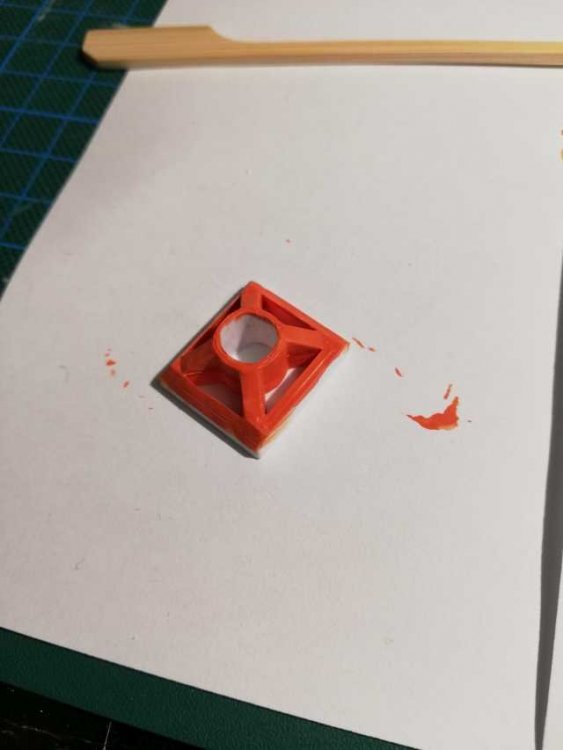
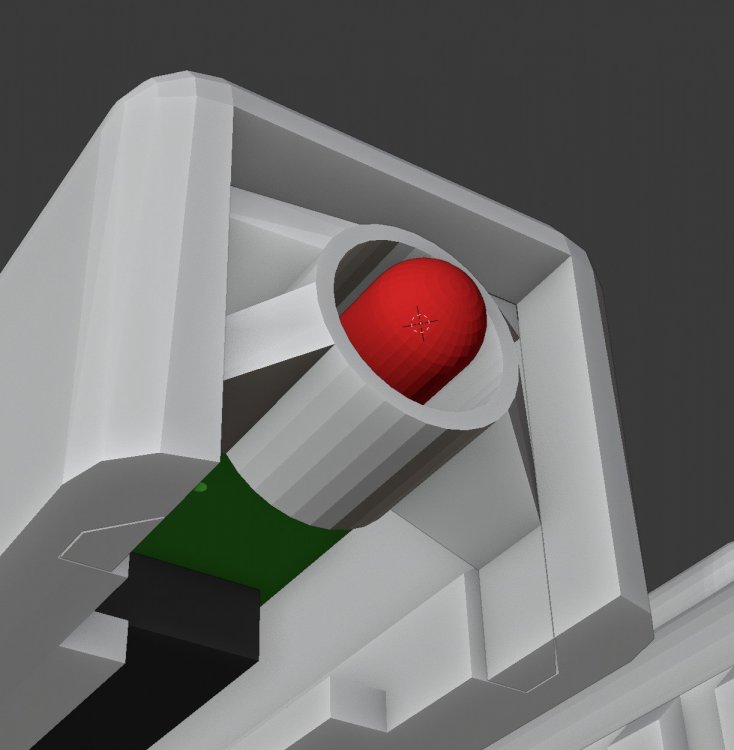
Yes that would be nice to know. However, I doubt that we could replicate that. With a professional workshop and access to more advanced materials and electronic components it probabily is a lot easier. I'll just use a regular 5mm square led as the indicator light. Not the most accurate solution, but at least it will glow nicely. Of course you will get to see it. Hopefully quite soon. That looks and sounds great. I'll be quite happy if my results are similar. I've also got a tiny update. The printer is currently printing the new slide: This morning, I already printed and painted the muzzle led holder: ...just to notice, that it is too large and I won't be able to assemble the blaster. So, back into blender and adapt the model: That's it for today.
-
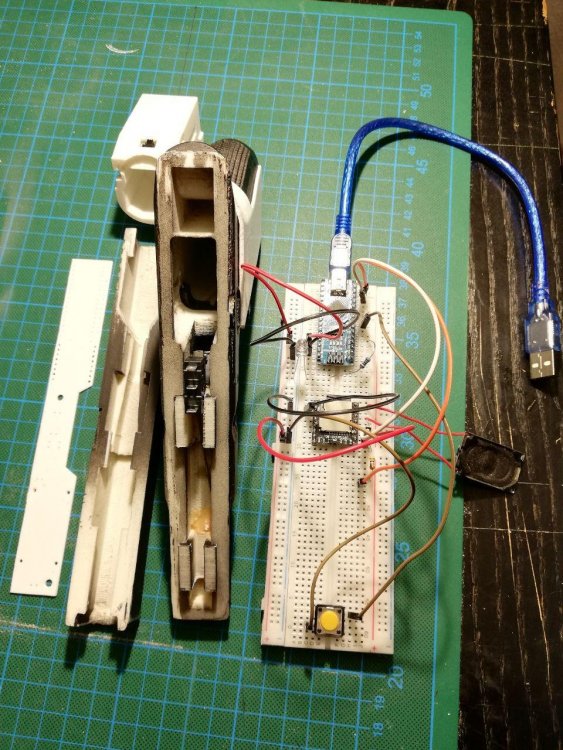
Back when The Force Awakens hit the cinemas I built my own SE-44C Blaster. It is still the only blaster I have that goes with my First Order Stormtrooper. A few days ago I got the idea to build electronics that fit inside the small blaster. I printed it hollow, so there is some room for electronics. However, space is very limited inside. I will reprint some parts to maximize the available space. Additionally I'll get a pcb made which will hold the main components and keep things clean an organized. Having a mess of cables inside the small space would make things even more complicated. So this is where I currently am. From left to right: Mock up of the pcb to test sizing, current Glock sled with new hollow end cap behind it, Glock receiver with microswitch for the trigger installed, electronics on a breadboard. Currently I'm finalizing the new sled to fit all the main components:

-
Yes, but now we have the answer also here... it looked so much like an open question.
-
I've already posted the answer somewhere around this forums... You can clearly see the attachment in a sequence right after Chewie captures Phasma. http://caps.pictures/201/5-starwars-force/full/sw-force-awakens-movie-screencaps.com-11516.jpg
-
Anovos First Order Stormtrooper Helmet Mic Tip
Cody42 replied to StarWarsTom's topic in TFA Stormtrooper
None of the two helmets is completely accurate. I have to agree with Dan, the supposed original looks very much like anovos and not like an actual production used helmet. The angle of the mic tip on the anovos standard line however is quite accurate, though the shape and positioning is still a little bit off. Look at this helmet for example: http://cdni.wired.co.uk/1920x1280/d_f/EP7_IA_117198.jpg -
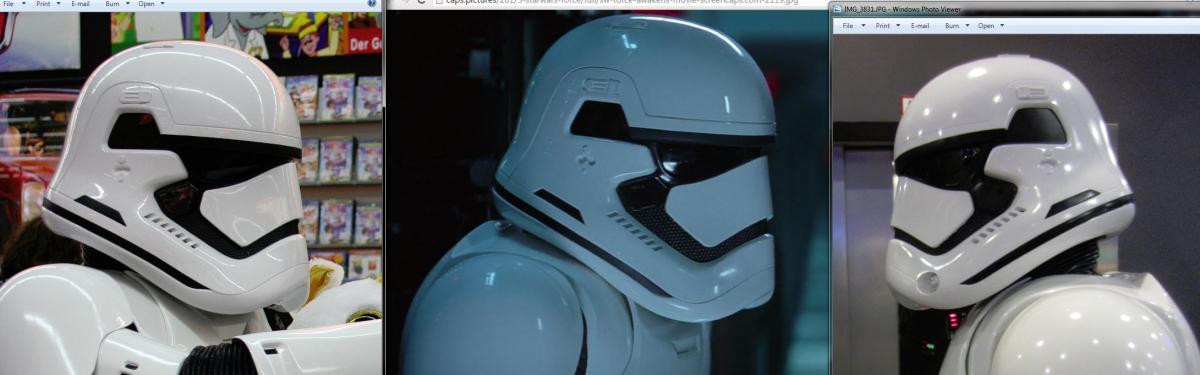
Which Anovos helmet are you refering to? The standard (plastic) and premier line (fiberglass) differ quite a bit. While the standard line has the cheaper materials and looks "cheaper" than the premier, my current impression is that the standard line helmet is more accurate. The _/\_ is much more pronounced on the standard line (at least my impression). I will get some side by side pictures of the front this weekend, if no one else is faster. For now I have one side by side comparision of standard line (left), movie (center) and premier line (right). Please note that the image quality of the premier line is a bit inferior, so it looks worse than it is in the small details.
-
I just returned from thecinema where I rewatched the movie and paid special attention to the TK variants: I haven't noted any trooper with vest and pauldron and only one with a Backpack (see the screenshot posted in this thread. But other than that there seems to be every configuration in the movie. What is fairly consistent: Most (not all) troopers wearing a vest have an F-11D with the extended stock. Most standard troopers carry the F-11D and no sidearm. Notable examples:
-
I can't recall that there was any trooper wearing a vest armed with something smaller than an F-11D with mounted stock (like Phasma's blaster). I'll pay attention to that when I re-watch the movie tonight.
-
Two CRLs will give rise to consistency problems and more "housekeeping". If anything changes on the base trooper, then the HWT has to be updated too. The only benefit I see is that the base trooper CRL is "cleaner". Also, you missed that the riot gear trooper carried a blaster. The trooper drops blaster and shield before drawing the tonfa from the holster.
-
One CRL for the FO Stormtrooper sounds reasonable. Leave the weapons, vest, backpack etc. as optional accessories. Having a configuration that precisely matches a trooper from the movie could still be added as a L2 or L3 requirement later, as we have it for the sandtroopers.
-
I'd love to have FN in front of my number. Who stops me from calling myself FN-4172? Nobody I assume. As long as FN ist not an official designation for differen 501st costumes I don't see a problem. Just my official costume designation is and will be TK-4172. When trooping in theaters since the premiere it made sense to me to answer children who ask me "What's your name" with "FN-4172" as a direct reference to Finns FN designation which is mentioned prominently in the movie. Also the box where I keep the armor has a label that says FN-4172 just because I didn't want to reuse the TK-label of my old stromtrooper (now sandtrooper) armor. As for the official designations, Clint's arguments make sense to me. A lot of extremely different costumes already share the same identifier and for everyone who wants to build a stormtrooper this should be the place to go to and not yet another forum.
-
I have velcro sticked all along the inside of the two recess lines of the td that connects to velcro on the ab piece. That effectively keeps it from moving out of place and helps keeping the edges of the ab piece aligned.
-
Bryanmc's Build Thread - Complete Newbie
Cody42 replied to Bryanmc's topic in Build Threads Requireing Maintenance
Your gaskets look like fabric to me... but yeah, the Anovos ones are definitly to short. I just compared your pictures to mine and tried to measure the distances. I'm only about 5'9" and my shins and thighs are about an inch further apart than yours. My initial impression was wrong, you are absolutly right: you need longer gaskets. Higher boots, like the TFA boots from IB, might also do the trick. To me it looks like that is where Tony gets his extra height. -
Bryanmc's Build Thread - Complete Newbie
Cody42 replied to Bryanmc's topic in Build Threads Requireing Maintenance
Amazing! Looks great. I'm not sure if you need longer knee gaskets. Just play around a bit with moving the leg pieces around a bit to find a position where it looks good and is comfortable. Also, if the shins don't want to slide over the boots, try to put some white tape around the very top of the boots to tighten them up. That might improve the look a bit if you have a problem there. -
Congratulations! Great to hear that you got approved and can reach your helmet now. And yeah, this suit squeaks, the classic ones rattle.
-
TK 4172, Requesting Detachment access, please. http://www.501st.com/members/displaymemberdetails.php?userID=11506 Thanks!
-
Looks great! You might want to fiddle a bit with the position of the shins and forearms, small adjustments make big difference in mobility on this one. I wear the shins a few inches higher and most importantly I rotated my forearms so that the cutout on the coverpiece (the one with the rail greeble) lines up with the elbow crease. I managed to reach my helmet that way.
-
Bryanmc's Build Thread - Complete Newbie
Cody42 replied to Bryanmc's topic in Build Threads Requireing Maintenance
True! That's an important note. I went with the same fit as the classic TK at first, but have to re-adjust. -
Bryanmc's Build Thread - Complete Newbie
Cody42 replied to Bryanmc's topic in Build Threads Requireing Maintenance
Here are my thoughts how you could improve the fit: 1. You are missing the detonator in the back That should push the back plate up and forward, rotating around the arm. I'd line up the edge of the chest plate under the arm with the rear edge of the rectangle on the sides of the back plate. Then the chest should line up way better with the contour of the yoke. The neck hole should turn out square. 2. See above, should fit better once you lined up back/yoke and chest. Most people have a strap connecting the two yoke parts across the chest with a snap in the center, that connects to the chest. 3. I don't have perfect fit there yet. The butt plate should be a little higher, relative to the kidney plate. The belt sits on the "step" of the but plate and overlaps the kidney plate just a little bit (1/8" or so). Also, I'd mount the cod plate onto the extension of the ab plate, not below. I have adjustable suspenders on the ab/kidney assembly, adjustable straps on the thighs and now experiment where it looks best. -
Bryanmc's Build Thread - Complete Newbie
Cody42 replied to Bryanmc's topic in Build Threads Requireing Maintenance
I had it stick out a bit. When glued in place fill the gaps and sand everything flush. Make sure to get this spot really perfect as the paint will make any imperfections stand out. On my armor you can tell the seam between abs plate and detail piece if looking closely from some angles. -
Bryanmc's Build Thread - Complete Newbie
Cody42 replied to Bryanmc's topic in Build Threads Requireing Maintenance
Don't be too scared of the glue, but scared enough not to rush things 1. Had the same problem. I left it the way it was and just filled it a bit with abs paste and bondo. The side box mounting area will be covered by the box itself. 2. Yes, I had to force some parts to fit or heat and bend them. But be extra cautious if you heat the parts up, it is dangerously easy to screw up and have them lose shape!