

maxsteele
-
Posts
865 -
Joined
-
Last visited
Content Type
Profiles
Forums
Gallery
Articles
Everything posted by maxsteele
-
Take a tape measure to that thermal detonator. I'm finding out my NE TD wasn't quite up to measurements out of the box. You want the gap between the end-cap and the control panel to be 1/2", with the total end-cap to end-cap length between 7 1/4" and 7 1/2". Control panel should be around 4 3/4", end-caps should be about 3/4". Cover strips are looking good.
-

TK-42430 requesting ANH Stunt EIB status [NE][402]
maxsteele replied to maxsteele's topic in Request Expert Infantry Status
Alright, figures time! Control Panel - 4 7/16" End Caps - 11/16" each Gaps - 15/16" each Tube length - 7 1/2" Adding up my current lengths of pieces and gaps (minus tube length), I get 7 11/16". When I measure end-cap to end-cap, I have 7 1/2". I'm gaining 3/16" with the end-caps on, because of the thickness between the outer part of the end caps and the cuts that the tube fits into. Here are the two options I see: I can cut 1/8" from each side of my tube. This gives me: Gaps - 13/16" (1/16" over 3/4") End-cap to end-cap length - 7 1/4" I can cut 1/4" from each side of my tube. This gives me: Gaps - 11/16" (1/16" under 3/4") End-cap to end-cap length - 7" Neither option gets a 1/2" gap between end-cap and control panel. The smallest gap I can get is 11/16", which makes my total TD length 7". A 13/16" gap makes my TD 7 1/4" total length. -
Yep, definitely. I wouldn't modify the tops of your thighs until you get the top torso completely fitted. I found the best way for me to get the over-all fit was to first attach the ab to the kidney, get the fit around the waist on both sides, then get the kidney flush to the back plate. Once you're able to wear those pieces, you know how the ab / kidney are supposed to fit on you, which also puts the back plate in the right spot. Then you can put the chest plate up to your ab and see where you want the bottom of the chest to line up with the ab, and that shows you how much of a gap you're going to have between the chest and back plates at the shoulder area. That tells you how long you need to have the elastic that connects your back and chest plate. You can fit the butt plate flush with the bottom of the kidney at any time before or after this is done. Once all of this is done, then get the thighs on with the top half. Now you'll know exactly where the thighs are in relation to the cod and the butt plate, and can better determine how to cut the thighs, if you need to at all. Also, look at my EIB application to see how I did the internal strapping: http://www.whitearmor.net/forum/topic/28156-tk-42430-requesting-anh-stunt-eib-status-ne402/
-
I'm not exactly familiar with AP assembly, but the information I have been given with forearms is line them up at the elbow end and cut off excess at the wrist end. However, do not cut off excess that would remove any of the molded dimples. You'll also need to take the return edge off completely on the wrist ends. I also took the return edge off completely on the inside elbow, and trimmed the return edge on the outside elbow down. As for cutting to fit on your arms, You have a nice molded ridge there for the fronts of your forearms. Measure 7.5mm from the start of the raised part back toward the edge, then cut off the rest on each side, so you have a measured 7.5mm raised part on each piece. That will give you 15mm when you bring the two pieces together for laying down a 15mm cover strip right in the middle of the cut. Then tape together, wrap the pieces around your forearm, find a comfortable fit, tape it off, slip it off, find the mid-point by measuring across from the cut line in front, mark that on both pieces, then cut off the excess, put another 15mm cover strip down, and forearms are done. Do the same measurements for the biceps. Also, make sure to take off the return edges you're going to remove before you do rear sizing. It will throw off your sizing if you fit the pieces before removing the return edges.
-
Definitely worth a try. I kept the outer return edge, but I have seen builds that get rid of the whole return edge at the top and it's not noticeable.
-
Interesting. Thanks for the info on the Exec Time. I just had an exec time of 5.28 when I clicked for "New Content" on the site.
-
Yep, not just you, Derrek. I've noticed intermittent times where pages on whitearmor.net will never load, then refreshing the page will make it load. This morning, however, there's a big issue with loading up pages. It isn't the network connection that the forums are on, because I get a constant 50ms ping to the server. There is an issue with the database that the forums are using, either software-based or hardware-based. I hope the IT guys running this site are able to find it.
-
Yep, I had to take apart my biceps, re-size, cut, and re-glue them. I also removed the return edge on the inner part of my thighs and trimmed them down at the inner tops so they would stop catching on my cod and be able to pull them up to close the gap between the cod and the thighs. What are you using for a strapping system on the thighs?
-
This is Vader's lightsaber: This is his backpack:
-
Dan, a holster is needed for base approval. As Steve said, what matters is which TK you are doing. If you are making an ESB TK, then your holster is good as-is. If you are making an ANH TK, you will need to make the modifications Steve has listed and mount it as the diagram shows that Eric posted.
-
Alright Jeffrey! Your build was certainly one I followed for helping me out with my NE build! I'm happy to see you've picked it back up and looking forward to your submission photos!
-
TK-42430 requesting ANH Stunt EIB status [NE][402]
maxsteele replied to maxsteele's topic in Request Expert Infantry Status
I got home this evening and measured my TD. From end-cap to end-cap, it is 196mm. That's 7.72 inches. That makes it over by just under .22 inches. However, the gaps between the control panel and the end-caps are certainly almost 1 inch. I think my overall length is ok. If I wanted to do this by the numbers, I would need to take .11 inches off of each end, or 2.8mm. However, that would still only close the gap between the control panel and the end-cap to approx. .75 - .8 inches. If I wanted to close that gap more, I would have to make my TD shorter than 7.5 inches end-cap to end-cap. The control panel and end-caps shipped to me at the dimensions they currently are. I'm not sure the best way to proceed with this. -
TK-42430 requesting ANH Stunt EIB status [NE][402]
maxsteele replied to maxsteele's topic in Request Expert Infantry Status
Thank you very much Steve! What a world this would be if TK builds we're making local news! I know you want those snaps and rivet to be on my armo, and I do promise I will get them there. After a year, I was just done with this build. Yes, I believe I will cut the sniper down. I have felt some rubbing there and hopefully that is the spot it's coming from. I had been seeing other NE builds with no mention of modifying the pipe for a shorter length. I'm pretty sure I was at the 7 1/2 in mark from end cap to end cap, but I will absolutely check when I get home ( currently on a weekend vacation in SLC). If it is too long, that will be the first change I make. I'll figure out how to cut that pipe! Thanks to everyone for the congrats and following my build. It was a crazy year and gave me much more confidence in my ability to take on a project like this again! -
Fuumantroop's AM armor build
maxsteele replied to fuumantroop's topic in Build Threads Requireing Maintenance
With the way the brow trim dips a bit in the middle, the helmet looks sad. -
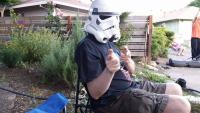
Oh no, I know this isn't one of ours. I believe they were in the square area around the Space Needle. This was yesterday, 8/6. You know, for tourists to take their pictures with Darth Vader and the poor crippled Stormtrooper.
-
A friend of mine is visiting Seattle, and she found this horribly disfigured TK by the Space Needle. And I believe Vader is wearing.... a backpack?
-
Not a problem guys! I asked hundreds of questions making my build, and received a lot of assistance from the guys here. I'm happy to relay the answers I received. I honestly don't know how to handle the measuring / cutting if there is no marked area for the front cover strips. I hadn't really seen any tips regarding that. I'm curious how that should be measured and cut.
-
AM 2.0 build (ANH Stunt) by Rystan
maxsteele replied to Rystan's topic in Build Threads Requireing Maintenance
You don't need to add that extra ABS plastic in-between the folded elastic. Just folding it over is enough. I used a cheap soldering iron to burn the hole into the elastic for the snaps. I'd like to give you some advice on how to proceed with your cuts, but for my kit, I had raised edges on the front cover strips, so I knew exactly how much to have on each side (7.5mm), and laid down the 15mm cover strip. The measuring / fitting / cutting I had to do was only for the rear cover strip, which I overlapped the extra, found the mid-point across from the front's cut, and that told me where my cut lines should be. I am not sure how you determine where to cut for the front cover strip when there isn't any mold indicator. -
Ryan's AM Build!
maxsteele replied to Shank_O_Potomus's topic in Build Threads Requireing Maintenance
For straight cuts, I measured and drew my lines, then I taped down a metal ruler on the line I wanted to cut, and ran an xacto blade down against the ruler 4-5 times. Then I removed the ruler and snapped the plastic off at the score line. Nice clean lines. If there was any issue with that, I cleaned it up with some sandpaper. -
starsaber25's MTK ANH Stunt Build
maxsteele replied to starsaber25's topic in Build Threads Requireing Maintenance
I had a problem with my forearm closure as well. Here's what I did: First, I used a U-clamp on each end of the forearm to keep the ends tightly in place. Next, I put strips of painter's tape down across the strip, pulling them as tight as I could. After that, I put magnets on along the strip and clamps between the magnets where I could reach. Finally, I wrapped an elastic band around each end of the forearms and pulled them tight, which pulled the two pieces in and gave some more downward force to let the glue adhere better. Here's a photo without the elastic bands tied: -
Let me see if I understand what you're saying - are you saying that you used the same measurements for each piece? If that is the case, what you want to do is cut the pieces to fit your body. The left and right forearms are shaped differently. That's just the way they are. You'll possibly need to cut more from one arm than the other arm. If you haven't already done so, you trim the front pieces of each forearm to 7.5mm on the raised or straight edge that you'll lay the cover strip down on. This makes a 15mm cover strip sit half on one piece, half on the other piece. Once that's done, tape those two pieces together, then wrap the pieces around your forearm. When you find a good fit from your wrist up to your elbow, tape it off, and remove your forearm to make sure you can still get your hand out. Now that you know the extra you need to cut off, use a ruler or another measuring tool to match up the cut in the front to where it will be straight across in the back. Mark at the wrist and elbow ends on your overlapped pieces, and that's where you're cutting. Then you lay down another 15mm cover strip, and your forearm is complete. I'm not sure how AM marks where the cover strips should go, but here's what the front cover strip area on my NE kit looked like before I put down the cover strip. I had already measured and cut so it was 7.5mm on each raised end: Next, I wrapped it around my forearm, found a good fit, and this is how I marked where I was cutting: See how the cut lines are directly across from the front cover strip cut? And I mark the same spot on both pieces, as well as marking it on the wrist side in the same fashion. Then I drew a connecting line down the length of each piece from the wrist mark to the elbow mark, and that was my cut line for each piece. And finally, a finished forearm:
-
AM 2.0 build (ANH Stunt) by Rystan
maxsteele replied to Rystan's topic in Build Threads Requireing Maintenance
I bought a pair of these from Home Depot: http://www.homedepot.com/p/Grease-Monkey-Neoprene-Large-Long-Cuff-Gloves-23403/202188317?N=5yc1vZc5r1Z12kx They come about half-way up my forearms. I just tuck the extra underneath my undersuit sleeve. I also put my gloves on first, then pull my forearms over them. I find this better for me because otherwise I'm having to stuff my gloves underneath the forearms, which never works out well. For your belt, it's the bottom belt type with the bottom rivet covers that you do not have cut out yet. -
Ryan's AM Build!
maxsteele replied to Shank_O_Potomus's topic in Build Threads Requireing Maintenance
Nah, he couldn't have used the whole tube on just the thighs. I will say I used 2 full tubes that size for my entire build. That includes everything that needed gluing - snap plates, strapping, cover strips, belt rivet covers, sniper plate, and the thigh battery pack (for stability). -
Are these gloves approvable?
maxsteele replied to TK Rome's topic in Boots, Soft Parts, and other Accessories
Do the only come in that two-tone color? They would need to be solid black. Honestly, you don't have to go that expensive for gloves. These neoprene gloves from Home Depot work, and they have the diamond cut pattern on the finger tips like screen-used gloves: --------- -
Fuumantroop's AM armor build
maxsteele replied to fuumantroop's topic in Build Threads Requireing Maintenance
Yeah, teeth look great Andrew! I probably spent at least 10 hours filing those damn teeth. What you'll find is you file them, and you think, "I could file them some more", then you file them some more and think, "I could probably file them a little more," then you have to make yourself stop. Once you paint the frown grey, you'll say: "Wow! I didn't realize the holes were that big!" It's a good thing to have that thought.