

maxsteele
-
Posts
865 -
Joined
-
Last visited
Content Type
Profiles
Forums
Gallery
Articles
Everything posted by maxsteele
-
Woo hoo for test fits! I still remember my first test fit when I looked in the mirror and thought, 'Wow, I'm turning this pile of plastic into a Stormtrooper!' Alright, critique time! Here's where it becomes a size and placement game. Your chest plate is much too low. The neck line should be up at your neck. Here's what my chest looks like. I also cut away the return edge around my neck line. It's not strangling me, it's just up where my neck is. You'll notice that the curved tabs on each side are up on my shoulders and nestle down onto the front of my shoulder: As you've already discovered, your back plate is too far up. I'm thinking this may just be a matter of how you're hanging the pieces right now. If you bring the chest plate up, that will bring your back plate down, and you may not have to correct anything with your elastic straps connecting the chest and back. Here's a side shot so you can see where the curve of the top of the back meets and follows the curve on the back of my shoulder: And here's a rear shot so you can see where the top edge of the back plate is sitting on my back. I had to cut off those pointy ends on the tabs of the back plate and do a smooth transition with sanding. The inside return edge wasn't as important as the outside, and when you have the shoulder bells up against the chest / back tabs, they do a good job of hiding any trimming that needs to happen for comfort. Alright, I'm going to get a bit graphic in my next part, as I'm going to be talking about the cod area. I positioned my cod so the rounded cup part is fit just like a jock strap cup. It's right up snug against my boys, but not going up past them so the edge is digging in. Once I found the good spot for my ab, that in turn determined the spot that my kidney would sit at on my lower back, which then put my back plate in the right spot, which then let me fit the chest plate in the right spot. I did not make my chest-to-back straps until I had my ab / kidney / back 100% in-place and strapped in. That then allowed me to see what I was working with on placement of my chest, where I wanted the bottom of the chest to be in relation to the ab, and then determine how long the straps would be. The bottom of the back plate needs to be touching the top of the kidney, and getting those straps in place first will give you a much better time at getting the chest plate in place where you want it. Your current shoulder straps may be fine if you're able to bring that ab plate up, which brings the kidney up, get the back plate down, and then you know how you're going to place your chest. But I repeat that you should get your back strapped to your kidney before you move on to chest placement. One other thing - make sure you're wearing your neck seal when you work on chest placement. The gap between your neck and the chest plate will increase when you're wearing the neck seal.
-

Fuumantroop's AM armor build
maxsteele replied to fuumantroop's topic in Build Threads Requireing Maintenance
Painting inside the helmet is 100% preference. I didn't paint the inside of mine. I would think that it would be easier to paint inside the helmet before piecing it together, otherwise you're having to get the paint literally inside your helmet. If you do it when it's still in pieces, you have more control on where the paint is going. -
TK-42430 requesting ANH Stunt EIB status [NE][402]
maxsteele replied to maxsteele's topic in Request Expert Infantry Status
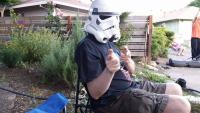
Thanks Zixx for your extremely kind words! Thank you for the notice on the helmet painting. I do not consider myself artistically-minded at all, and I kept track - it took me over 20 hours of painting to get the results I have. I am fortunate my patience paid off. I will absolutely get the rivet / snaps installed, as well as the elastic bands to hold down the shoulder bridges in the back. Yes, I do have the black elastic arm bands. You can see one of them on my right shoulder in my action shot. I mentioned in my build thread that I'm going to "take a break" working on this armor, as it took me almost a year to get to this point. I do promise to go back to it and get those details added for a Centurion application. The forearm gap is a puzzle for me. I was struggling with getting the proper elastic positions between the forearms and the biceps, and I found a few builds that gave some good measurements. I feel the distance between the top of the forearm and the bottom of the bicep is at a really good spot, and I have full range of movement when I bend my arms with no armor pinching. Dropping the forearms would certainly require pulling up the elastic and re-gluing them, and I have a concern that I'd lose my mobility. The gloves I have certainly bunched up at the wrist end of my forearms, but I believe that happened in part to my biceps' / forearms' lack of connection to my shoulders. I went with the "free float" method, and I'm currently gluing in bicep hooks, which I did not have for these photos. I'm hoping those hooks will keep my forearms more stable, which will lower the attention drawn to the gap at the gloves. I've also seen commentary which said it's better to have a gap at the wrists than a gap at the elbows. This might be a case of exactly that. I'd also like to figure a way to keep my glove ends tucked nicely under my forearms so that bunching is minimized / eliminated. I haven't seen any mention of how people handle that, or if it's even a problem for others. EDIT: Something that may be making that gap at the wrist end look larger are my handguards. I do not have them attached to my gloves. I'm using elastic glued inside them and sliding them over my gloves. It looks like they're not back as far on top of my gloves as they should be, which is the only distance comparison the eye has to go on when meeting up with the wrist end of the forearms. I think one of the first accessories I need to get are the flexible hand guards and get them attached to my gloves. That may resolve my gap issue right there. EDIT #2: I'm not fully suited up, but I believe I fixed that wrist gap. I got the hand guard to sit in the proper location on my glove, I tucked my glove into the sleeve of my undershirt to keep it from bunching out, and I have my bicep held in place with a hook around the shoulder elastic. It's not the best quality, but I think you can get the idea: -
You have extra flashing on the ends of the butt plate that you shouldn't need to have there: Before: After You don't show it, but if you haven't already, there's extra on the ends of the chest plate to cut off as well:
-
I have direct experience in the "super glue vs e6000" debate. I had some small gaps in my finishing strips on my biceps. I used superglue to close them. 5 months later, I realized my biceps were too big and I had to take them apart. If it had been straight superglue that I used, I would have had a problem taking them apart without damage. Fortunately for me, it was superglue over e6000, so when I did pull the pieces apart, I was able to scrape away the e6000 that the superglue was dried on top of, and take apart my biceps nicely to cut and re-glue them with e6000. e6000 is great stuff, holds well, and comes apart when you want it to.
-
PGHtoolman AM armor build
maxsteele replied to PGHtoolman's topic in Build Threads Requireing Maintenance
Tim, you want to take the return edge out of the molded edge on the wrist side as well. -
AM 2.0 build (ANH Stunt) by Rystan
maxsteele replied to Rystan's topic in Build Threads Requireing Maintenance
When you're done, the shine will be completely gone. I used a can of regular acetone to remove it. Before: After: It took me about 45 minutes - hour of scrubbing to get all the polish off each boot. -
Need advice.
maxsteele replied to Christian R Torres's topic in Build Threads Requireing Maintenance
http://www.501st.com/maps/index.php -
TK-42430 requesting ANH Stunt EIB status [NE][402]
maxsteele replied to maxsteele's topic in Request Expert Infantry Status
Updated main post with proper left / right helmet photos showing painted screws and rank bars. -
cheap boot on zappos... paint it white?
maxsteele replied to TK5144's topic in Boots, Soft Parts, and other Accessories
My opinion, I think they look pretty good. Pretty close to the bass Amsterdams I bought and painted white. -
Need advice.
maxsteele replied to Christian R Torres's topic in Build Threads Requireing Maintenance
I think you're jumping the gun a little. You should really decide what type of armor you want, choose a vendor, and get a set delivered. During that time, you can look at other people's builds who also are building your particular set to get an idea of how it all goes together. Then once you get your set, make a build thread and questions like what to build first will be right at home there. -
TK-42430 requesting ANH Stunt EIB status [NE][402]
maxsteele replied to maxsteele's topic in Request Expert Infantry Status
Yep, sorry for that confusion. I was trying to get everything consistent on my EIB pics. The full body shots I took before I painted the rivets on the ab/kidney and thigh. Hence the close ups out of armor showing those painted. I was hoping that would be ok for submission photos. The helmet I can easily re-take photos with the painted screws and rank bar, but doing a complete suit up again just to show that I have rivets painted was a little too much at the moment. -
New to building.
maxsteele replied to Christian R Torres's topic in Build Threads Requireing Maintenance
I think I found it! They have it in their gallery under the label "Spacetrooper". ---------- -
New to building.
maxsteele replied to Christian R Torres's topic in Build Threads Requireing Maintenance
I was looking at Far Away Creations' web site, and I don't see anything listed where they make any type of TK armor. Have you received any photos showing what their TK armor looks like, or what it's made out of? -
AM 2.0 build (ANH Stunt) by Rystan
maxsteele replied to Rystan's topic in Build Threads Requireing Maintenance
Those are the rivet covers for the belt. You cut them to fit. Funny enough, you can see them in both of the pics you posted for the button plate examples. -
TK-42430 requesting ANH Stunt EIB status [NE][402]
maxsteele replied to maxsteele's topic in Request Expert Infantry Status
Thanks Steve! You just pointed out that those pics of my helmet were from before I painted the screws white and put the rank bars on my helmet! It was late when I posted these and I missed that. I'll take new pics of my helmet tonight and replace those. -
You will end up with 8 holes total. 4 for the left side of the frown, and 4 for the right side
-
Name: Ron Lenzi TK ID: 42430 FISD Forum Name: Maxsteele Garrison: Cloud City Garrison Armor = NE Helmet= ATA Blaster= THG Props Height = 5' 10" Weight = 170 Boots = Bass Amsterdams painted white Canvas belt = TKittel Hand Plates = NE (ABS) Electronics= N/A Neck Seal = Darman Holster = Mosi (Marc from Cloud City Garrison) Front Left side Left side arms up Back RIght side RIght side arms up Action Bucket Off Left side detail Right side detail Ab Detail Cod - Butt plate attachment Interior Strapping Belt Holster Attachment Sniper Left Side Sniper Right Side Thigh Battery Pack Left Side Thigh Battery Pack Right Side Thermal Detonator Back e11 Left Side e11 Right Side e11 D-Ring Neck Seal Helmet Front Helmet Left Helmet Back Helmet Right Helmet Hovi Detail Helmet Green TInt Lens Thank you for your time and consideration!
-
You want 4 teeth per side.
-
Ryan's AM Build!
maxsteele replied to Shank_O_Potomus's topic in Build Threads Requireing Maintenance
11 bumps is the left forearm, 12 bumps is the right. Curve at the elbow end is the left arm, straighter at the elbow end is the right arm. You have the curvy pieces identified correctly, but need to swap the molded indent pieces. Line the pieces up at the elbow end and cut off excess on the wrist end. Don't cut the molded indent piece, cut the other piece. I'd also be curious to see what AM pieces look like when they're put together before cutting them to fit to see where the extra lies on each side. I would suggest getting one more opinion on this, as I'm basing this on my own research and the NE armor kit I had. -
Any fitting of pieces is pretty simple to do once you understand the technique. The forearms and biceps take a 15mm cover strip for the front-facing cover strips, which means you will always cut them to be 7.5mm on one side and 7.5mm on the other. Once that is complete, you can tape the two pieces together, then wrap it around your forearm / bicep until it fits the way you want it to. Find the mid-point across from the cut in the front, mark the top and bottom, then cut the extra of each piece off. Now you have a place to put the other cover strip and the pieces fit to your arms. The shins and thighs should be 20mm for the front cover strip (10mm on each side). Then the same as the biceps / forearms - wrap them around your legs, get them to a comfortable fit, make sure the thighs and shins follow the conical shape of your legs so the bottoms are brought in more than the tops, then find your back lines, mark, cut, and put in the cover strips. I used 15mm for the back cover strips on the forearms and biceps, and 25mm cover strips for the backs of the shins and thighs. I completely closed my thighs, and used industrial velcro for the shin closures, open side facing inward.
-
Through research, the majority of people use 2" white elastic. I have seen mention of using 1 1/2", but I do not know the differences you may encounter between using 1 1/2" and 2". I used 2" and installed 2 snaps on each strap. Using 1 1/2" you may be limited to one snap if you wanted to do two.
-
I'm on the west coast, only 10:55pm here. One of the reasons it took as long as it did for me to build my kit - I only really was able to work on it after 10pm.
-
For the correct direction of the kidney, see if your armor kit follows this identification:
-
This should be interesting - First Build
maxsteele replied to nerdbaitplus3's topic in Build Threads Requireing Maintenance
Oh those ears.... I rough cut them with my scissors first. Then I broke out my dremel with a sanding barrel. I started shaping the ear, a little at a time, then I put it up to the helmet and saw how it fit. If there was a piece on the ear keeping other areas from touching the helmet, that's where I would sand down some more. I did this over and over and over until I got the fit I was happy with.
