JLight
-
Posts
253 -
Joined
-
Last visited
Content Type
Profiles
Forums
Gallery
Articles
Everything posted by JLight
-
Thigh piece a little 'pinchy' on the inner part?
JLight replied to maxsteele's topic in Assembly, Mods, and Painting
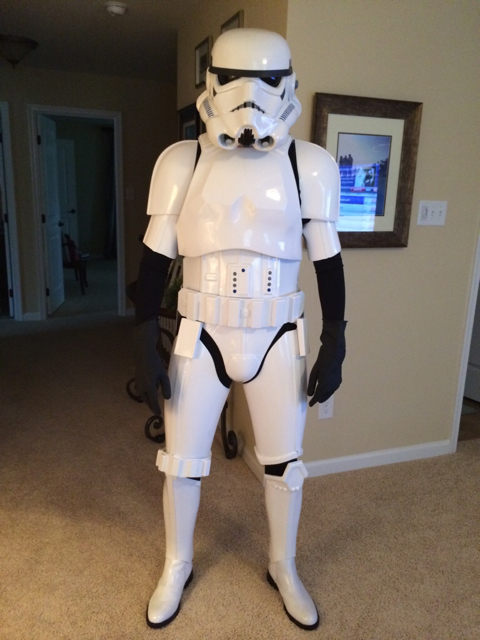
Yeah I am doing NE armor too and didn't know it was recast. I researched a lot and it was never brought up. Either way, I have to sleep in the bed I've made. Here's what mine looks like without the gloves, forearms, holster, blaster. Sent from my iPhone using Tapatalk
-
Diana's RS Props Build- ANH Stunt
JLight replied to AsBlondeAsLuke's topic in Build Threads Requireing Maintenance
Congrats! Been following along. Very informative and inspirational. Sent from my iPhone using Tapatalk -
Rezablad3's TM Luke Replica Suit
JLight replied to Rezablad3's topic in Build Threads Requireing Maintenance
That is awesome! Are you going to do the grappling hook and comlink to complete it? Sent from my iPhone using Tapatalk -
Rezablad3's TM Luke Replica Suit
JLight replied to Rezablad3's topic in Build Threads Requireing Maintenance
That is awesome! Are you going to do the grappling hook and comlink to complete it? Sent from my iPhone using Tapatalk -
If you have the green acetate lens, you can cut out eye shaped pieces, heat them in boiling water and push them into the eye sockets on your bucket to form bubble lenses. And then glue them. Sent from my iPad using Tapatalk
-
This has been very informative as I too am about done with armor and moving on to holster next. I have been reviewing posts about holster placement/attachment and read about the use of snaps but I didn't fully understand until now. Thanks! Sent from my iPhone using Tapatalk
-
Might be a stupid question, but are the mic tips supposed to be flat paint or glossy? I painted them glossy and have seen them flat. I have also heard a mixture between the both. Thoughts?? As far as the teeth, I haven't decided whether to use hot iron or ABS paste. But moving is taking over my time for now. Paul, anything in particular you would like to see more of?
-
Hey all, I wanted to post some pics of my helmet build. I would love feedback either good or bad. Whatcha think? Here it is right out of the box... Painting... Right after trimming out eyes and teeth. Still need to mod it for Hero Build. Disregard the vocoder. It has since been finished. I used Plasti-Dip to coat the inside... My attempt at making Hero Bubble Lenses I cut them out, used boiling water to soften them... Then placed them into helmet and pressed down with a towel This is the end result I used black modeling clay around the lenses and screwed the lenses in to them. Unfortunately, I didn't take photos of this part, but I could post the result later. I used Trooperbay stencils for the tube stripes and to paint vents on tears and traps. Still need to trim the screws on the inside, paint the ear screws white, mod the teeth and get a liner and fan. Next up...NE armor!!
-
Hilarious! And great build! Wish I could have gotten my ears as good as yours.
-
Compare TM, RS, and ATA armor?
JLight replied to Hermanator's topic in Hard Armor (General Discussion)
NE stands for Nostalgic Empire per Tupperware TK. That is about the only piece of info I do know since I am so new! This is great info guys!! -
Hey man it's looking really good. Don't get down. Your thread has been good to watch. I haven't ordered my armor yet, but I always learn something with each thread I read. Keep the photos coming.
-
No man it is actually looking good. I agree that you should try to straighten up the eyes according to the front traps. But even if you can't, don't sweat it. All helmets are wonky. Start on the ears. Go slow and trim in small amounts. The ears should cover everything up. I am like 95% done with my ATA hero lid. Although not an expert like these other guys/gals are! Great job!
-
For what it's worth, I think your progress is looking awesome! I am about finished with my ATA lid and am saving for ATA armor. But to be honest, after reading your threads, I am wondering if I can save headaches by spending more money. I too, am a perfectionist. Either way, no screen-used TK was "perfect" or "symmetrical". So I have to keep that in mind. But I will probably reach out to you when I start my build. Keep the pics coming!
-
Did ATA change the buck for his belts?
JLight replied to bigtrev503's topic in Hard Armor (General Discussion)
Yeah I can't imagine it being too noticeable. Thanks for posting though. I am about to order my ata armor. Still working on the lid. -
HOW to: assembling ATA ABS helmet #1
JLight replied to pandatrooper's topic in Tutorials, Tips and HOWTOs
I have one more ear to do and then paint before my ATA helmet is done. But I have to put it on sideways as well to get my head to fit. However, this thread has been critical for my cutting. Has helped alot!