

8BitBry
-
Posts
145 -
Joined
-
Last visited
Content Type
Profiles
Forums
Gallery
Articles
Everything posted by 8BitBry
-
Contact: [email protected] for AP armor.
-
Sign me up!
-
Ps. No Zelda "Link" jokes pls
-
So I've looked and looked - I've also trudged - and can't seem to find a decent source for TD clips on FISD. I want to avoid making my own (no resources). I saw Jesse retired. Can anyone hook me up with a link? Thanks!
-

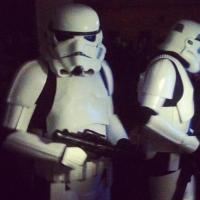
8BitBry's First Ever Build - ANH Stunt [*AP]
8BitBry replied to 8BitBry's topic in Build Threads Requireing Maintenance
Ahhh just got shipment info... stoked! Hopefully will be here before next weekend then the fitting begins! -
Any current or former MMO players out there?
8BitBry replied to Plastic Soldier's topic in Off Topic
Did WoW for 5 years. *shudders* -
Just ordered the icomm, aker 1506 and Memorex wireless. Thanks for shipping out same day, Jim!
-
Horrendous T/MC builds...
8BitBry replied to Horrendous's topic in Build Threads Requireing Maintenance
On a comedic note, the feedback timing in that clip was hilarious. -
8BitBry's First Ever Build - ANH Stunt [*AP]
8BitBry replied to 8BitBry's topic in Build Threads Requireing Maintenance
Thanks Glen, love your blaster build for centurion. Curious, what type/brand paint did you use for the black coat? -
8BitBry's First Ever Build - ANH Stunt [*AP]
8BitBry replied to 8BitBry's topic in Build Threads Requireing Maintenance
Thanks Reza and Troy! Here's the lens fitted with a light coat of E6000 on the outer rim laying on top one of the TrooperBay decals. Front end of the scope. I like that it adds just a hint of realism close up for an otherwise prop-ish looking gun. -
8BitBry's First Ever Build - ANH Stunt [*AP]
8BitBry replied to 8BitBry's topic in Build Threads Requireing Maintenance
I read that he stopped making them, anyone have another source? Maybe if I send Jesse cookies it will sweeten the deal? -
Dude that is awesome. My first outing will be pushing my daughter in her stroller around the neighborhood for test bites in the armor.
-
Awesome idea! Where'd you get your TD clips? I was going to ask Jesse but it looks like he's retired.
-
8BitBry's First Ever Build - ANH Stunt [*AP]
8BitBry replied to 8BitBry's topic in Build Threads Requireing Maintenance
Thanks, Glen! My first cutting for parts, I love taking stuff apart. I wanted a decent looking scope that looks somewhat realistic - which is ironic since I realize the detail of the hyperfirm is like "hey dude there's a seam, that's not real" but this was fun. Hyperfirm Scope Modification I used a Bushnell Powerview 8x21 Binocular for the lenses. Cracked it open (seemingly more easy than expected) and got both ends of lenses. The larger lens fits perfectly but I had to shave down the diameter of the smaller lens to fit it at the front end of the scope. Here's the after / before comparison of how much I needed to shave. Unlike the D-ring, I used double-sided padding tape on the teeth of the pliers to grip the lens to avoid cracking or scratching while working a 180° angle with the dremel on each side. Wear safety gloves and glasses for this - maybe a mask or something too if you want to be certain not to inhale dust particles or fumes from the cut. Took me a few passes and about 10 min to cut and size correctly. I cut into the scope fairly deep (about 2mm) with a dremel drill bit and smoothed the area with a sanding bit. Smoothed and painted the lens rim black to hide the areas where I nicked it with the drill. Same thing with the front scope. I wanted at least .3 - .5mm of recess for each lens. -
8BitBry's First Ever Build - ANH Stunt [*AP]
8BitBry replied to 8BitBry's topic in Build Threads Requireing Maintenance
Since I'm waiting on my armor I thought I'd start out small and dig into the E-11 Hyperfirm. These are small and simple updates to start off but I'm hoping it might be useful for other noobs out there like me. D-Ring I started out with the D-ring and cut it in half. Ahhh first drill! Drilled a hole using the dremel and tried fitting it through. Realized I needed to cut a few more mm off the ring to get it to fit inside. Worked it in there, bent it back with 2 pairs of needle-nose pliers and done. Later smoothed out the grip marks with a dremel. (I recommend padding the plier grips with something like a low profile double-sided padding tape to avoid biting the metal - unless you want more of a "worn" or weathered look.) Painted it black with the Humbrol black gloss paint I had available. Was worried about the glossy factor but I don't think it came out too bad. -
I ordered a ready-to-wear/modify kit from AuthenticProps. It's had it's challenges, far more than I could have imagined. Feel free to learn or This shopping list to start is mainly for me at the moment. If you have sources or comments on the list, please let me know! I'll be updating this thread with photos and progress. --------------------------- ACQUIRED: Gear / Hardware Completed: Hyperfirm E-11 (TK-6768 Lewis) Completed: TK boots (TKboots.com - can't say enough good things about the transaction, price and comfortableness of the boots) Completed: Undersuit compression gear (EastBay.com) Completed: Dave M decals (TrooperBay.com) Completed: E-11 Blaster D-Ring (TrooperBay.com) Completed: Bushnell Powerview 8x21 Binocular (Amazon.com - E-11 scope mod) Completed: Neckseal (TK-9356 Bobby) Completed: Frown screen (Trooperbay) Completed: Drop box backs (TK-0812 Kevin) Completed: Canvas belt (TrooperBay.com) Completed: ANH Holster (TK-9356 Bobby) Completed: Rubber screen accurate gloves (TrooperBay.com) Completed: Rubber hand guards - white (Trooperbay.com) Completed: Sport Elastic, 1-1/4″ x 1 yd, White (TrooperBay.com - for drop boxes) Completed: Helmet fans X2 with battery holders/wiring (AllElectronics.com) Completed: Accurate brackets for torso (Mr. No Stripes - Darren) Completed: Heavy Waistband Elastic, 1-1/2" x 1-1/4 yds, Black (TrooperBay.com - biceps to forearms, kidney to butt snaps) Completed: Thigh garter (TK-1576 VaderDave) Completed: 1" clips for TD (TK-2392 Vern) Completed: Cap/Split rivets (TK-8079 Sean) - Amico D94-S Counter (Amazon.com - E-11 counter mod, after 501st approval w/TK#) - Aker 1506 (TK-6294 Jim) - iComm from (TK-6294 Jim) Tested, not using: Rubber screen accurate gloves (AuthenticProps) Tested, not using: Holster (AuthenticProps.com w/modification hardware/strips from TK-2392 Vern) Tested, not using: Ab buttons (TK-1576 VaderDave) Tested, not using: Memorex wireless mic setup (TK-6294 Jim) Tools / Misc - 40 Heavy Duty Snaps with Tool (TrooperBay.com) - N52 Rare Earth Magnets (TrooperBay.com - destroyed 4 so far) - 4 Armor clamps (TrooperBay.com - destroyed 1 so far) - 20 Heavy duty muslin clamps (Amazon.com) - E6000 (Amazon.com) - Tamiya 74005 Curved Scissors 5-1/2 (Amazon.com) - Humbrol Gloss Black Paint #21 (Amazon.com) - Humbrol Gloss White Paint #22 (Amazon.com) - Dremel - 3M masking tape - Sand paper - Detail brushes - Exacto knife - 18" Steel straight edge (Amazon.com) - Novus polish (Amazon.com) - Zap-A-Gap / Zip Kicker (TrooperBay.com) - 15' 2" Industrial Strength White Velcro (Amazon.com) - Accurate nickel split rivets and washers (TrooperBay.com) - 105 piece hand riveter set (TrooperBay.com) - Soft Stretch Elastic, 1/4″ x 3 yds, White (TrooperBay.com - shoulder strap band) - Heat gun (Amazon.com) - Heat iron (Amazon.com) --------------------------- ORDERED / WAITING FOR: Gear / Hardware - Stanley 37" Mobile Job Box
-
Also interested. Put me down on the list, sending PM Curious, is this for the full set of wireless amp, sound pickups, fan, padding... like what's in the video? I'm not sure I caught the list of items you're offering. Maybe someone can help shove my face in the right post?
-
I think his biceps are good. Maybe he can attach the forearms to the biceps to move them up a little so they gap the black better and not so close to the hands. There's a tutorial out there for this, I can't find it right now but I've seen someone post it.
-
Great info. Thanks, Keith for this thread. Just ordered the L set for $30.
-
Geaux Saints' ANH stunt build (TM)
8BitBry replied to Geaux Saints's topic in Build Threads Requireing Maintenance
Nice job, is that AP armor?