Idaho Jones
-
Posts
99 -
Joined
-
Last visited
Content Type
Profiles
Forums
Gallery
Articles
Everything posted by Idaho Jones
-

TK-6682 Requesting ANH Stunt Centurion Status [RS*] [98]
Idaho Jones replied to TK6682's topic in Request Centurion Status
centurion needs a real sterling? -
Like I said I wasn't planning on tearing it apart until after the Star Wars Read event's. At the event I got some good suggestions and encouragement from my GXO. I have a plan and will get after it this week.
-
Thanks for the suggestions I'll try implementing them. I was feeling very defeated, not much support for the fx conversion. I had to defer an application myself this week as GML so I understand keeping to the standards. I'll try and implement what I can this week but I need to keep the kit together for Star Wars reads events next weekend. So I may not take it apart until after that event.
-
I thought that was what you wanted to see, sorry. I give up on the bells ... they are resting against the biceps, which are against my sides. I can't see how to get them any closer to the chest. Unless I trim the biceps down but I may not be able to flex my arm. We'll I guess EIB is not for me.....
-
Mod's completed: Handplates adjusted Shoulders bells additional snaps to hold in place Black bell straps visible and tightend to hold bells in place Blue ab buttons repainted (Humbrol 14) Drop boxes adjusted Scope rail added Boot photos provided Updated front view straight forward photo provided
-
Well that's unfortunate as the ab button's are the Vader Dave replacement kit specifically mentioned in this tutorial http://www.whitearmor.net/forum/topic/12478-howto-easily-make-your-fx-armor-eib-acceptable/ as a no paint replacement situation. After a little research I apparently I purchased my set before he started selling them with the correct colors, can you have the tutorial updated, to point out his old sets will need to be repainted, thanks. If there the same color as the helmet tube stripes, I have left over paint from painting the helmet I can make that change easy enough. I still have to address the handplates, I think they have slipped forward on the velcro attaching them to the glove. Or am I at a buy a new set situation? What part of the boots do you need to see specifically? I thought Caboot were acceptable for EIB level.
-
Rubber boot's or wellingtons were used on the original. I used rubber boots from the farm store and used E6000 to attach the wraps, works great slips on and off easy and better than messing around with wrapping your feet every time you dress up. Come on over to the Krayt Clan
-
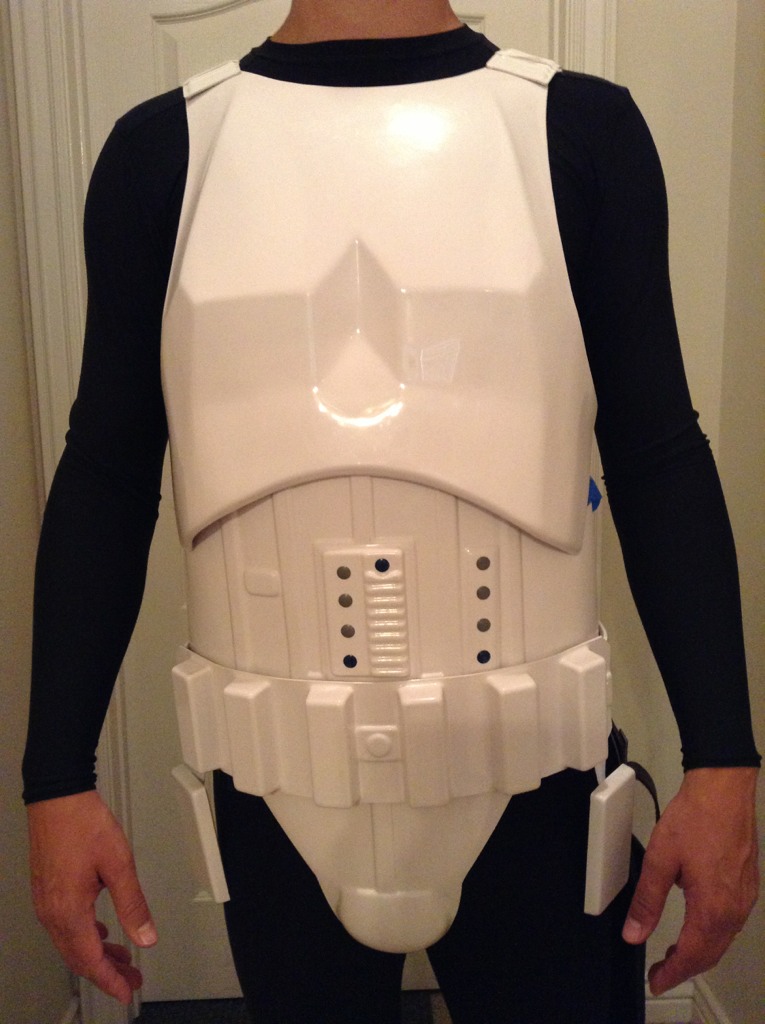
We'll I know why Bill noticed the score rail, I found and used your tutorial and knocked that out. I added snaps to hold the shoulders square. Excuse the hasbro blaster stand in, my regular one was at home drying. Shortened drop boxes Not sure on the buttons, Do they look better in this photo?
-
The buttons were created by cutting a circle from scrap belt material and glued on to cover the hole left over from the old bolt holding the old plastic belt on. The color difference must be from the scrap material being in a box vs the belt having uv exposure. If the color difference is to much I still have the old belt material that was on the suit I could cut button covers from that? There is a black strap on the bells, I'll make the adjustments.
-
Expert Infantry Application Mandatory Information Armor = FX Helmet= ATA (Hand Painted) Blaster= (Resin) Garrison= Timberline Optional Height = 6’0†Weight = 205 lbs Boots = Caboots Canvas belt = TKittell Ab Buttons = Vader Dave Side Shims = Scrap FX belt material Hand Plates = FX​ Armor Photos Full Body Front Full Body Back Full Right Full Left Right Side Detail Left Side Detail Helmet Detail Front Helmet Detail Side Helmet Detail Back Hovi Tip Detail Lens Color Detail Blaster Left Blaster Right Action Shot Neck Seal Therma Detonator Knee Pack Abdomen Detail Interior Strapping Interior Strapping
-
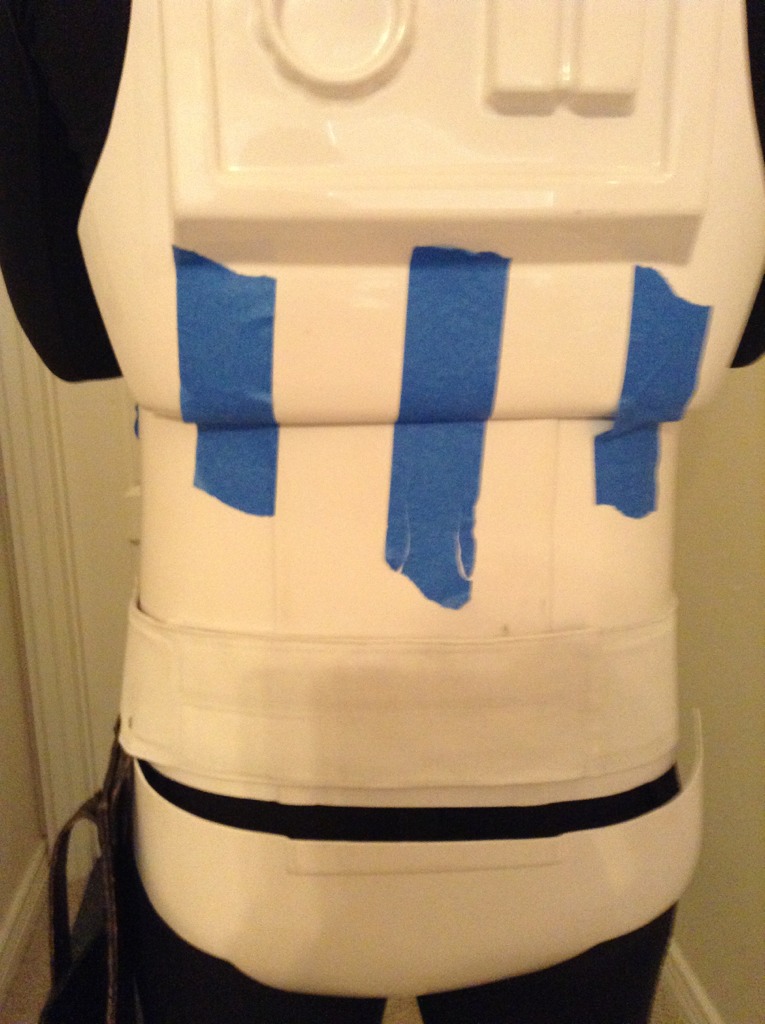
Well how's this looking?


-
I'm trying to get rid of velcro, Shouldn't there be a small gap between the back and kidney plate as mentioned in the CRL's?
-
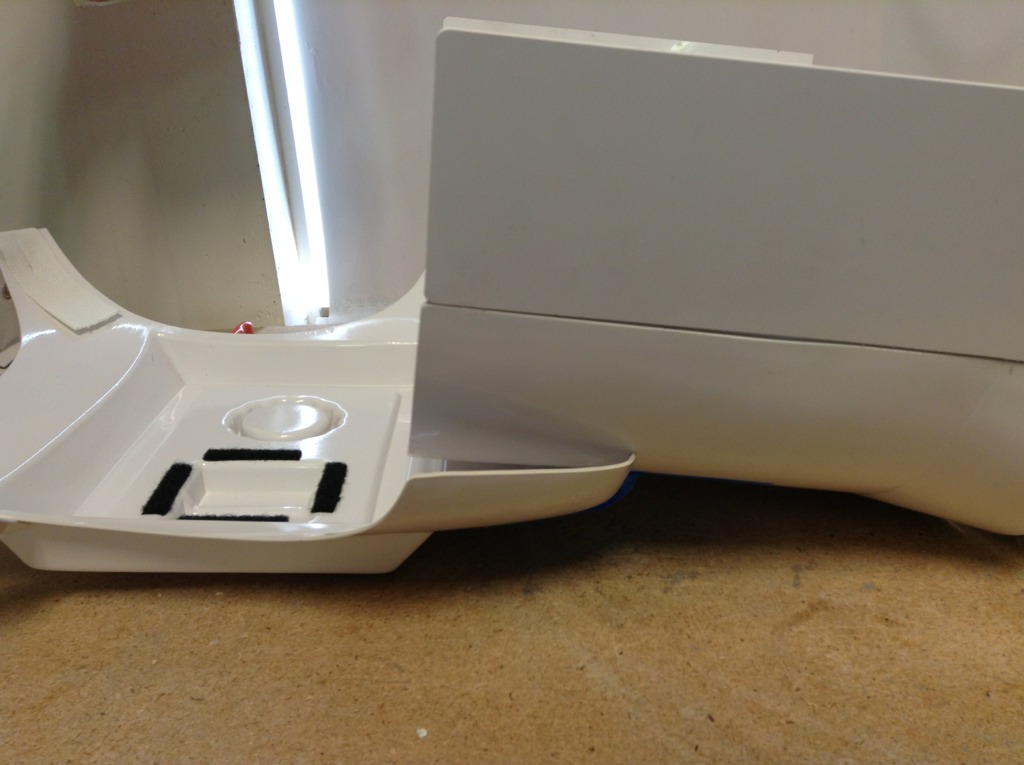
I cut my butt plate from the kidney and am upgrading to snaps from a full velcro rig that used suspenders. After test fitting, my back plate and kidney plate joint look's like this. Should I trim the bottom of the kidney plate so the back plate, kidney plate and butt plate don't overlap? I know the FX kit has short comings, I could use some advice before I proceed, thanks. You can also see the side gap filler I made from extra belt material.


-
Helmet Repair / Armour Upgrade
Idaho Jones replied to Idaho Jones's topic in Hard Armor (General Discussion)
Guess not -
Helmet Repair / Armour Upgrade
Idaho Jones replied to Idaho Jones's topic in Hard Armor (General Discussion)
Guess not... -
TK-11076 Requesting ANH Stunt EIB Status [FX][320]
Idaho Jones replied to TILLI02's topic in Request Expert Infantry Status
congrats! Nice to see somebody else upgrading an FX -
Helmet Repair / Armour Upgrade
Idaho Jones replied to Idaho Jones's topic in Hard Armor (General Discussion)
Guess not -
TK-11076 Requesting ANH Stunt EIB Status [FX][320]
Idaho Jones replied to TILLI02's topic in Request Expert Infantry Status
Keep going, I'm working on my FX upgrade also. On your biceps to forearms connection, look at adding an elastic strap to keep them at the correct spacing. -
Helmet Repair / Armour Upgrade
Idaho Jones replied to Idaho Jones's topic in Hard Armor (General Discussion)
Guess not -
Well I guess is should post a WIP on my EIB status. The only thing i think i have left is cutting the butt plate. Great job on the newsletter as always look forward to reading it.
-
My goal is to get EIB status. My to do list: Shim the sides, cut the butt plate and rivet on the holster.
-
The Road to 300 (FISD EIB, that is) Stormtroopers - Achieved!
Idaho Jones replied to Daetrin's topic in Off Topic
Will finish up my EIB after the holidays. Made a few of the changes before I applied for TK approval. Just have to cut the kidney plate and shim the side gap on my FX -
Welcome to the dirty side. I started with a DZ and just got my TK. I'm planning on wearing my Tusken to our next troop, an outdoor bell ringing because its warmer..
-
Requesting update to TK status, thanks. http://www.501st.com/members/displaymember.php?userID=13807&costumeID=124