


Nicky
-
Posts
444 -
Joined
-
Last visited
-
Days Won
1
Content Type
Profiles
Forums
Gallery
Articles
Everything posted by Nicky
-
Good thing I got that part right when making my build But I have no hips, so I had to use suspenders lol. Oh there we found a use for suspenders. For people with no hips. The trunk plates hang under eachother and the back and front join at your shoulders with 2 white elastic or webbing straps hidden by the shoulder bridges, then your ab and kidney plates hold on to eachother on one side or two with 2-3 elastic straps. No need for suspenders, if it fits nicely to your body it won't dangle.
-
You have to work a bit to hide the suspenders under the armor plates, but it's pretty reliable to hold your hidden belt on which you attach the thigh garters. I don't know what else suspenders are used for under a TK... and if not using any then we're talking about attaching the garter to the ab plate and all I know is that I wanted to avoid adding too much weight on the front plates.
-
Yep!
-
Could someone like superrush my TK ID delivery so I can participate in some exciting democracy?!
-

What kind of things damage armour?
Nicky replied to Owen91's topic in Hard Armor (General Discussion)
I think some ABS have UV filters and stuff that keeps the plastic color from going yello. Don't know about T/MC though, which is the kit I bought. -
Can you assemble armor using only velcro?
Nicky replied to terry's topic in Assembly, Mods, and Painting
If it didn't you're still in good hands using the forum and the whitearmor.net tutorials. If there are instructions that come with a kit, they are only suggestions. They show one way to do it, with the builder's favorite tools. But you can do everything with a knife, sandpaper, 1½ tubes of E6000, webbing straps, snaps, a snap presser, various velcro bands, paint, paintbrushes and Google custom search applet I made for whitearmor.net/forum because I think the built-in search engine of the board hates me. EDIT: http://www.google.com/cse/ That helped me hundreds of times If you like it better than the built-in board search, then make an applet and save an .html on your desktop to use as your homepage from now on. -
Ok, I'm confused about the language switches of this thread Je vais essayer de répondre en rapport aux difficultés que j'avais moi pour les strips. C'etait la mesure. Mesure des strips: Tu as deux mesures à faire, les strips qui vont sur les biceps et avant-bras, toutes à une même largeur, et celles qui vont sur les jambes, toutes à une même largeur mais superieure à celle des strips des bras. Les strips se collent couramment sur la bosse ou le "troittoir" là où les deux parties des tubes se joignent, et la recouvrent. Chez moi j'ai fait: Biceps, avant-bras: 8 strips. 2 par pièce. Jambes: 6 strips ou 8 strips (cuisses: 4 strips, Tibias: 2 strips). Tu dois essayer les tubes avant de couper leur points de jonction pour reussir à choisir la bonne largeur des strips sur les bras: on arrive souvant à 15-19mm et les jambes: 20-25mm voire plus si t'as un grand gabarit. Et la largeur depend de combien tu dois decouper pour que les tubes passent à tes dimensions du corps. Moi par exemple je me suis retrouvé à couper mes biceps de telle sorte à ce qu'il reste une "bosse"/trottoir de 8mm de largeur sur chaque moitié, donc j'ai découpé des strips de 16-17 mm pour recouvrir le dessus de cette bosse une fois le tube assemblé. Bizarrement en faisant aussi 8mm de bosse sur les avant-bras me donnait un diamètre parfait. Pour l'avant bras on utilise des strips de la même largeur. Si tu as du bol les avant bras te vont bien avec cette mesure, voire plus large ce qui est commun pusque tu compenses par rembourrer avec de la mousse ou attacher avec une bande elastique aux poignées ou vers les coudes sous le tube. Pour être sur, vérifie avant de couper si c'est tes avant bras ou tes biceps qui vont determiner la coupe. Sur cette photo ci-dessus on voit de quoi je parle avec la bosse, et les 8mm que je laisse pour mes strips de 17mm. J'ajoute 1mm à cause du fait que je coupe pas très droit ce qui ajoute un écart d'environ 0,5-1mm entre les deux pièces qui font un joint imparfait. J'ai utilisé un pistolet à air chaud pour accentuer la courbe et faciliter le joignage. Pareil pour les jambes, sauf que tu fais ta mesure sur la bosse à l'avant et tu as un peu de liberté de choisir ce que tu veux. Pour les jambes tu t'en fous un peu de la bosse à l'arriere, j'ai fini par choisir arbitrairement 22mm pour l'avant des cuisses et tibias et coupé autant qu'il faut à l'arrière. Ci-dessus la cuisse de mon kit (T/MC) avant la coupe, suggérait une bosse de 42mm sur laquelle j'en enlevé la moitié pour faire 22mm. Coupage des strips: Quand tu decoupe les strips tu utilise une regle metallique pour dessiner un rectangle parfait aux dimensions qu'il faut, et le long de la règle, sur le côté brilliant du plastique, tu traces légèrement avec ton objet coupant (cutter ou xacto) la ligne decoupage, juste pour tracer une ligne fine et droite. Ensuite tu verifie si c'est bien droit, et tu retrace encore une fois, plusieurs fois, avec une pression progressivement plus forte, à un certain point la lame suit la ligne et tu arrête d'utiliser la règle. Si tu appuie trop fort sur la lame le premier passage tu risque de faire bouger la règle ou derapper la lame, et le tracé sera si profond que tu n'arrivera pas à rectifier, et ca va se voir. Quand tu as fait une strip aux dimensions parfaites tu peux l'utiliser comme patron et règle pour tracer et couper les 3 autres, sans l'abimer. La raison pour laquelle on trace sur le coté brilliant est que le rendu après le "cassage" devient plus propre sur ce côté. Après le tracage au xacto/cutter tu essaye de plier avec les mains le plastique vers l'arrière jusqu'a ce que ca se casse parfaitement selon la ligne. Tu peux te servir du rebord d'une table. Des pinces pourraient laisser des traces et pourraient courber le plastique sauf si tu as de la marge autour à foutre à la poubelle, mais si comme moi tu dessines 2 strips l'une à côté de l'autre et tu veux les séparer il vaut mieux utiliser le rebord d'une table. Si ca ne se casse pas, repasse au cutter sans la règle, prend ton temps. Avant de coller on coupe les coins des strips pour l'apparence selon les photos que tu trouveras sur les tutoriels. Collage des strips: Tu passe du papier de verre sur les bosses et derrières tes strips pour créer des reliefs qui vont aider la colle à tenir. Ensuite tu essuie avec un alcool non corrosif pour le plastique, moi j'utilise du desinfectant pour les mains, histoire de nettoyer juste avant le collage avec l'E6000. Quand tu colle tu as besoin de deux pinces ou plus sur les bords, et des aimants sur la longueur. "Rare earth magnets", "Neodymium", quelque chose comme pour que ca tienne pendant les 8/12h durant lesquelles tu vas laisser la colle prendre plat. N'hésite pas à utiliser de l'adhesif à l'interieur et l'exterieur pour stabiliser le tout, il ne faut pas que ca bougeotte. La pression des pinces et aimants va faire deborder la colle sur les cotés, passe un cure-dent ou un chiffon sur le bord sans bouger le tout. Tu n'as pas besoin de nettoyer à ce stade, juste "couper" l'exces de colle pour pouvoir facilement enlever avec les doigts quand la colle sera seche. La colle E6000 s'enlève sans laisser de trace en frottant avec les doigts pendant quelques minutes. Si la courbe des deux pièces d'un tube pose des problèmes pour le collage, tu as 3 options: 1) Tu utilise du scotch assez fort et large de manière à faire tenir les deux pieces ensemble, en placant le ruban à l'interieur, mais aussi de manière à forcer la courbe durant le collage. 2) en faisant très attention tu utilise un pistolet à air chaud pour donner plus de plis au plastique et donne une courbe plus symetrique. 3) tu utilise des grosses pinces comme sur l'image ci-dessous. Par contre, ca c'est ce que j'ai fait mais c'est pour coller des strips à l'interieur des tubes en premier, et à l'exterieur à la fin. Je préfère faire cette étape inutile parce que je veux que mes strips à l'exterieur se collent sans problème quand la courbe des tube est déjà solide et en place. Ne suit pas tout à la lettre, il y a beaucoup de costumiers qui font les choses différemment et moi j'admets avoir pris quelques étapes inutiles. Désolé d'avoir remarqué ta question si tard! Je ne savais pas qu'on avait une section francaise J'ai répondu de manière large et peu détaillée, si tu as une question sur un point précis, n'hesite pas à la poser je pourrais te sortir des tutoriels sympa.
-
How do you travel with your armor?
Nicky replied to Dracos's topic in Hard Armor (General Discussion)
For a hundred bucks or two the stanley bin is a great deal and should be acquired sooner or later. The adequate size bin for a TK is narrower than a hard suitcase for the same purpose so you can fit two in a car luggage area or back seat, side by side without stacking. But when traveling by plane I don't like the attention you get from being the only passenger out of thousands who brings a sort of toolbox full of probable demolition gear lol My sis took her bin on a plane 3 times (international flights) and got her bin checked once, so the padlocks were busted and luckily the content wasn't thoroughly browsed in a way that would ultimately result in contents missing (if they take everything out and they don't have the time to fit everything back in, it's the insurance department's problem and yours). 1 incident out of 3 opportunities and more people complaining on Facebook after CVI (but that is most likely due to the cheap airline, not the bin) got me thinking. So I'll keep using the largest Samsonite hard suitcase I could find, helmet is carried as accessory. And "blend in". One 3-digits code lock and two key-locks on sides for which I lost the keys. Russian doll style Other accessories I can fit in there: 3 pairs of trousers, sweaters and t-shirts, multi-tool, yards of velcro of all types, webbing straps, e6k, 2pt epoxy, snaps, duct tape, hygiene stuff, socks, spare underarmors, women leggings for summer troops, bandaids, favorite jacket, costume electronics. Total weight: 22kg (48.5lbs). Below the passenger limit for most international airlines. -
Also I think it's like when you drive a car at night and keep it darker inside so you can both see through the windshield without reflection and your eyes have the time to adapt themselves to the darkness. I have very dark lenses so I painted mostly because of that.
-
A heart? I'll have a heart. But the cleanability is important yes, we're rubbing sweaty hair, scalp, gel and conditioner stuff on that thing!
-
Maybe you drilled enough with the small one, switch to a larger gauge to start pushing it further and it might cut enough on the sides. But be careful, until some point then you should start acting like an animal on the rivet using pliers or something to pull it out.
-
Is it mandatory to have it shaped like a weed leaf? :/
-
I haven't tried this, I tried MICH helmet pads off e-bay that looked like these: http://www.ebay.com/sch/i.html?_nkw=mich+helmet+pads&_sacat=0&_odkw=mich+pads&_osacat=0&_from=R40 If you go for that, try to find a seller who includes the velcro disks. The pads don't need loop patches as the pads alone stick to hook velcro pretty hard. I might misinterpret the photo at your link and believe that the foam in the top pad is a pocket and can be customized? Or is it just to demo the 3 layers of shock absorbing foam? Because being able to choose the thickness of the top pad would be great for our variable distance from eyes to top of the head, I can't customize my top pad and if I use it at all my eyes aren't in good line of sight, I only see upwards. So I had to remove that pad altogether. I don't know if I helped at all
-
Super cool! The photographic lighting makes everything look so clean I want to caress the plastic
-
Well I think it's the flapping issue Since I'm 2012 I have to follow the CRL I have two holsters, a dummy one I made out of light leather imitation (can't feel it's there but it looks accurate enough), and a heavier functional leather one.
-
Help with sniper plate for Centurion
Nicky replied to bigironvault's topic in Assembly, Mods, and Painting
Yeah indeed, it actually gives more work to FX/AM owners. I don't think that using E6000 to hold onto two 1/2 inch points of contact on the AP sniper plate is more work, just something to worry about, when however my T/MC sniper plate didn't touch the shin on both edges at all it wasn't the kit, it was my smaller shins. So we can also say the way you assemble your shin determines how stubborn the AP sniper plate is, you'd have to prefer fitting the shin by trimming its back and leave the front a preferred width and angle. Unfortunately attaching the sniper plate, like the thigh pack, tends to be done last due to its accessory appearance. If both the fitting and kit specs share the responsibility for not lego'ing nicely, it seems like an opportunistic overreaction to drill a hole in there and say that some kits don't work with glue. Heatgun and dremel. -
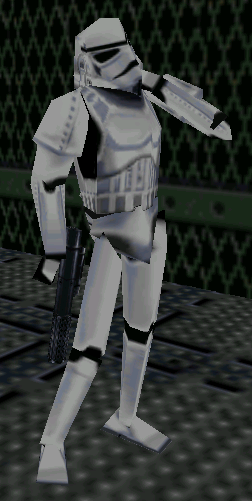
You're right. In a real time animation aspect you want that thigh pack higher so that it doesn't magically merge with the top of the shin when the leg is angled a certain way and it would be highly unimmersive, since in TFU they had real time ragdoll physics it is bound to happen, so they had other things to focus on than accuracy in their models. If you look however at the Star Tours Skytrooper, they've put the thigh pack low because it wasn't real time rendering and they had more time to animate, they can make the pack overlap nicely how it's supposed to. I'm sure that if the Lucasarts developers weren't starving for time they would have spent an extra hour on that model.. It looks high here: --------- But when making the 12 inch figure they have it low and upside down: There's always something wrong. Remember that if the dinosaurs had sweaters we would have TKC's looking like this, oops no thigh pack!
-
Help with sniper plate for Centurion
Nicky replied to bigironvault's topic in Assembly, Mods, and Painting
Yeah, we're not buying finished products. We're a club of costumers, not consumers! -
Want to see in person a ESB MKII helmet?
Nicky replied to Verne's topic in Build Threads Requireing Maintenance
It looks even better in reality, could almost smell it, hmmm aged armor yumyumslurpslurp. Curse! I checked my SD card from Identities, and I took pics of everything but the TK's!!! I was too busy staring close I forgot to take photos -
Well now I know what I want for xmas. Extra audio stuff Thanks for the inputs!
-
Help with sniper plate for Centurion
Nicky replied to bigironvault's topic in Assembly, Mods, and Painting
Agreed! This isn't Lego lol If it doesn't fit, dremel and heat gun is your friend to whom you can't say "No". Because fitting to the wearer's body is a requirement even at 501st standard approval level, am I correct? The sniper plate also has to be fit to the width of the assembled shin, not only for the glue to take but because the sniper plate wants to be bent, it's begging to be heated and bent nicely to shape. If it's already going nicely out of the box, then you'll probably want to heat it anyway Example of how absurd it is to take things out of the CRL because kits don't all go nicely: I ate lots of celebration pancakes because my hotel was next to Ihop and so I busted my 1/2 inch gap limit on the side by about 2 inches even when I suck in, making me not acceptable for EIB. I'm not asking to change the CRL, and I can't stop eating pancakes now, I just don't go for EIB unless I add matching ABS tab to fill the gap. Many don't have to do that extra work on their kit but I'm ok with it -
Help with sniper plate for Centurion
Nicky replied to bigironvault's topic in Assembly, Mods, and Painting
Wait, my kit isn't AP? Kidding, but what do you mean with "stubborn"? That it won't bend on its own or fit where it's intended to be? -
Thanks man! The ones I used suck, they are called that thing that doesn't suck but in practice they suck. Had to pile them up haha... Thanks!
-
I'm afraid it could also be like driving the same road twice, first time you check your mirrors, blink, yield at every turn... but second time you impale a guy on a segway with the bicycle of some other guy you ran over. In fact I had to literally clean blood off of my armor before CVI haha
-
Help with sniper plate for Centurion
Nicky replied to bigironvault's topic in Assembly, Mods, and Painting
My opinion is that rivets show, there's no logical place to put them esthetically on the sniper plate so I didn't approve it for "out of the house"-status But it's right that the sniper plate will never perfect-fit the shin after it was trimmed and assembled to our prefs. So instead of photoshopping every frame of my blu-rays I put on the Bananarama CD, grabbed the heat gun, and bent the shape until it fits without any effort AND IT's... not that a big deal. It just hurts to do without gloves. Oh, and you can also use a dremel to make tracks for the ridges underneath. My shins are quite slim so you can see the slight bending squeeze on the sniper plate at places, but I don't think they really bother.