

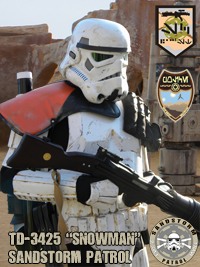
TD-3425
-
Posts
166 -
Joined
-
Last visited
Content Type
Profiles
Forums
Gallery
Articles
Everything posted by TD-3425
-
Contacting Doopy doos and blaster springs
TD-3425 replied to Sharkdiver289's topic in General Weapons Discussion
Feel free to defend Doopy Doos all ya want. Thats your choice. But I've now been waiting for a refund for nearly two weeks. Sorry, lousy customer service. Which has nothing to do with customs. I emailed SciFire, had an email back in 10 minutes and a blaster a week later. That was the better decision here. -
I'm 6'4" and 210. I bought an AM kit and had to trim a lot off it. Thinking of getting an ATA kit given my height, I think AM was maybe too big for my particular build.
-
I had this exact same issue. I ended up sewing hook velcro to my butt and the bottom of the loop side (that connects my butt to my kidney) locks into it, bringing my butt plate right up against me.
-
Contacting Doopy doos and blaster springs
TD-3425 replied to Sharkdiver289's topic in General Weapons Discussion
[email protected] is the only address they have. I ordered my doopy doos kit Sept 27th and it never came. Then two days ago (11/21) they said it was returned to them, couldn't read the stamp why it was returned, and said I could repay for shipping to reship it. Why would I do that? To be out more money in the event that it gets returned, again, after waiting another 2 months? I asked them to ship UPS or FedEx. They said there is no UPS or FedEx in the UK. What? lol, ok whatever. So I send them the link to FedEx UK. At that point, they say they only mail things with the UK royal mail. (US version is the lame post office). I said no thanks, send me a refund. So then I contact the guys at sic-fire.com. They get back to me in 10 minutes, and I placed my order. Then I find out, the guy who is making my blaster is not only in my garrison, I trooped with him a month ago lol and he's only a 45 minute drive from me. Super nice guy (Lewis) and if you really want a good blaster, I recommend them. (www.sci-fire.com) ----------- -
501st Requirements For Attaching Thermal Detonator
TD-3425 replied to senna1rossi's topic in Hard Armor (General Discussion)
I just did this same thing. Went to AutoZone, found $3.50 cent mirror that had two small metal clips on it. ----------- Bolted them on. Note these are not 1" wide, they are maybe 1/2 inch wide. If EIB requires 1" wide clips, well in my case they will be wider then the actual back of the flat areas on the TD. -
If you've spent the money on armor, parts, boots etc then why use a crud amp etc. I started off with a Radio Shack amp that was "recommended" with my TrikToys static burst module. What a waste! The RS amp was feedback central and while the triktoys module does "work"... the static burst volume was very low and you could barely hear it. So I bought an iComm and Aker amp from Jim, TK-6294. It works, it works VERY well, and it sounds GREAT! Simple, effective, and cheap. Around $150 for the Aker amp and iComm ---------
-
TK-3425 Requesting Access Update! Here is my 501st profile http://www.501st.com/members/displaymemberdetails.php?userID=13678 Thank you! Matt
-
Dang 1,329.00. Way too much! Someone got ripped, even with accessories. But, if you have no time, then you have money.
-
Thanks Mark for the link on the power pack. I didn't realize it sat so low. It looks goofy but indeed it (the power pack) is connected to the thigh at the top and not the bottom. Wow, screenshots ftw.
-
Same here. Out of the box AM thighs were huge. Didn't realize till after I glued them. Cut down the outline in the front, trimmed 1-2 inches from the TOP.... using velcro in the front to be able to put them on after shins.
-
Just got my new boots... now what?
TD-3425 replied to Duff Trooper's topic in Boots, Soft Parts, and other Accessories
Here's what I did --------- -
Opinions on these boots?
TD-3425 replied to ZeroRoom's topic in Boots, Soft Parts, and other Accessories
Looks like my ---------- -
Trik Toys Voice Amp vs Rom/Fx
TD-3425 replied to jimmylee7706's topic in Electronics for Helmets / Blasters
I have the same amp (from radio shack, but not bought from TrikToys) as well as the TrikToys static burst module. Here's a little video on my blog. -
The kiss on the cod piece says it all... (thats not me....)
-
I placed my order for one last week and Dawn said it would go out this week if I recall correctly
-
HOW TO: Turn an M-38 scope into an M-19
TD-3425 replied to ZeroRoom's topic in Build Threads Requireing Maintenance
Very nice! On my hasbro conversion I re-created the target reticle and printed to transparency. You can download the file from my blog. -
If the battery is getting hot really fast, it means you have a short somewhere. (IE, there is a connection happening between the negative and positive terminals before it runs it's (circuit) path through the fan wires. You don't need an enclosure unless you want one, or suspect metal would get into the battery (again causing a short) in which case, you can do it. But first, lets find the short circuit. How are you connecting the fans to the battery?
-
Hey speaking of the Doopydoos kit, mine is on it's way this week. Whats the best way to adhere the pieces to the plastic hasbro gun, ABS / plastic weld?
-
I hot glued in two layers of patio door screen. (Soft/grey) -
-
Looks really good!
-
If anyone is in the Los Angeles area, I found a store in Burbank that can order the paint/finisher next day: Victor's Shoe Repair 3810 West Verdugo Avenue Burbank, CA 91505 (818) 845-4213 I ordered mine yesterday and he said should be there by Thursday. So hopefully by Thursday night I'll have my first coat on the boots. My plan is to follow the above setup. Mask off boots, use 5 coats of white with a drying time of 24 hours between each coat. 2 coats of satin finisher (same with 24 hours in between) and then after unmasking, touch up any spots that may come/peel off.
-
Funny enough I had though about this but wasn't sure if doing so would cause any issues with armor approval. This is AM armor and it came that way So... do you recommend I dremel out the return edge all the way around the inside of the greaves? (Or just in the front?) Obviously, doing so (as you said) removes the possibility of a crack occurring in the future. (And on the right greave as well) And I can't really think of any other option.
-
Ok need some recommendations here! Got my boots today, and will paint them when I'm done with greaves armor. So I glued the front of the greaves and before I put on the ABS strips in the front to make it more ANH accurate, I put the left one on tonight so I could mark out where to place velcro in the back. Got the bottom section around the boot fine, and closed it up. Grabbed the pencil and then noticed the top front of the greave cracked! I guess this happened from opening the back up so I could fit it around my leg and the boot. It is definitely a stress point and I'm not sure what to do about it. For now, I used some white ABS and put it on top and in the crack. Then I cut out a small piece of ABS and glued that under the return edge. (See attached screenshot) I'll sand and paint this weekend. So "being careful" is of course something I will keep in mind but, what can I do to help stress relief in this area? Or, should my extra ABS on the under side be enough? Definitely worried about this one. What do you all do? You can clearly see where the crack is on the top front of the greave. Thanks for your input.