

ZacMuleer
-
Posts
196 -
Joined
-
Last visited
Content Type
Profiles
Forums
Gallery
Articles
Everything posted by ZacMuleer
-
Belt Question - Likely Dumb
ZacMuleer replied to James's topic in Boots, Soft Parts, and other Accessories
Thanks for posting this - it's very helpful.... my belt is about the same length. So how much of the holster's straps (the exposed brown part) should be shown? An inch? -
Congrats, Martin! Well deserved! And thanks, TM - I'll be working on that this weekend.
-
Hey TM - what do you mean, mount the snaps to the middle of your belt and not off-center? What if they are a little off from the placement of the male snaps on the ab plate? I haven't started this step yet... but would love some pictures of what you mean. Thanks!
-
I got the extreme racing suit and, like everyone above, the arms are a little loose. But have hope! While I will likely be purchasing a new one in the future, I made this one work for the time being. While the arms may not compress like they should, I sewed to pieces of elastic on the arms that act like thumb-stirrups. They are at least keeping the sleeve taut. And, I don't have to worry about exposing a wrist! (So risque!)
-
Hedji's AM Build! I'm Gonna Need A Bigger Boat!
ZacMuleer replied to Hedjii72's topic in Build Threads Requireing Maintenance
Looks great, Andy! Your thread certainly helped me as I follow closely behind you! Cheers! -
Congrats, Jenny!! Great work!
-
ZacMuleer's ANH Stunt TK build [*AM]
ZacMuleer replied to ZacMuleer's topic in Build Threads Requireing Maintenance
Happy Halloween, everyone! I'm so close to being done, but likely have a good two weeks left to go - the first to finish the belt, the second to adjust all the things that I need to make trooping bearable. But I want to thank everyone on here who've posted and have helped me along the way. Cheers, troopers! -
Looks pretty close to the one I got from MightyTank! Except, you know, without the lace. He was charging extra for that! Build is looking great, Jenny!
-
TK5741 Requesting EIB ANH Stunt[186] [TM]
ZacMuleer replied to TKmAx's topic in Request Expert Infantry Status
I've been blinded by the glare! Gorgeous polish on that! -
ZacMuleer's ANH Stunt TK build [*AM]
ZacMuleer replied to ZacMuleer's topic in Build Threads Requireing Maintenance
When the pieces are all together, I went along all the return edges and either removed them (at the wrists, and at the ankles) or sanded them down to minimize the wonderful world of armor bite. As I mentioned, I'm building an AM kit, and the AM pull has a little quirk. The shins are backwards (according to how the shins close in the back). With many garrisons, this will have to be remedied to where the raised edge of the back of the shin (the correct inner shin) will have to go under the flat back of the correct outer shin. It will go a long way in making walking comfortable if you do this correctly. But remember, they can't just be glued shut. In order to get the shin armor on over the boots, the backs need to be able to open and shut. So, use INDUSTRIAL strength velcro along the back seam. I designed the back of the shins to look like the rest of the armor - in that there would be an inner shim and outer cover strip, with the armor butt-joining. To do this, I glued the inner shim under the raised edge - which was supposed to go on top if the pieces overlapped. On the exposed section of this inner shim (facing away), I put a strip of the hook (rough) industrial velcro. Along the edge of the armor that is to be butt-joined, I put the loop (soft) velcro. Now, this velcro is thick, so it doesn't exactly line up flush, but it's close enough for it being the back of the costume. Opposite the soft velcro, I placed the cover strip, large enough to *look* like it covers the raised edge of the armor beneath it. (ALWAYS the soft side of the velcro should FACE you, or you should expect the velcro to tear the hell out of your bodysuit.) Better pic here - sorry about the flash. Voila - the shin. At this point, I planned out the strapping harness. How was I going to get the suit on and off with relative ease? I decided to take a page out of pandatrooper's book, as he has yet to steer me wrong. I would attach the harness to the back of the armor, with buckles in the front that attached to the ab plate. The ab plate would clamshell closed around me once I lifted the armor on and buckled the top. Then I could attach the separate chest piece to the ensemble. Easy. (Well, in theory.) I found some nice clips that fit on the 2" webbing and elastic that I think would work well for the harness. I sewed two cross straps for support, and will be attaching the webbing harness to the kidney plate and back shoulders, while the elastic will attach to the ab plate. Obviously, I used pandatrooper's build as a model for this. While I was doing this sewing I went ahead and put stirrups on the bodysuit - in the feet and the hands. Nothing would be worse that having your sleeve or pant ride up while in full armor, where the only options would be to either have someone stuff it back into your shoe/glove, or to completely unsuit and resuit again. No thanks. While the limbs gave me confidence to work, the thing I needed the most help on was the torso. It is very hard to accurately fit around yourself AND take measurements AND make sure it's sitting correctly AND mark where the items need to be trimmed WHILE standing in some sort of normal fashion. You definitely need another person who knows their armor to help you out at this point. I enlisted the help of the aforementioned expert trooper in Garrison Tyranus (thanks again, Brian!) to tape up the torso and mark all the places that needed to be cut at a local armor party. I had some homework, some things to fix, but most importantly, everything was marked and I could cut with reckless (not really) abandon. About halfway through the build, I did my first full-suit fitting, putting on everything I could at once. (Usually I try on a bit at a time.) But even without a back, I held the chest and ab plate up with my hand and unpainted Doopydoos E11. It felt very good to get into the full suit, even incomplete. I felt like I was making progress. Mark everywhere you want the armor to connect and make snap/webbing or elastic plates to hold it all together. This is a long tedious process (unless you have enough clamps and magnets, then it only takes a day!). I prefer using elastic because it allows a little bit freer movement. However, it also allows a little more shifting to take place and the armor might not be lined up as perfectly for pictures later on. So it's a balance. Comfort and troopability vs screen accuracy and impeccable lines. Your choice. I did get to add some accuracy pieces that don't have a function (in my suit), but will go a long way to making the armor screen accurate. I placed all of the flat-top rivets into the left side and the crotch tab, as well as the knee power plates. It took two additional pieces of ABS plastic to rivet behind the armor to accomodate the long rivet pin. (Without it, on test pieces, the rivet was falling over and getting smashed, exposing the hole beneath it. But with a thickness of 3 abs pieces, the rivet looks amazing and is in solid.) (Picture taken during an early harness fitting - the lines will be cleaner when I get a belt on and fix some of the internal strapping.) I was worried about the hold on the knee plate, so I reinforced the backing with some E6000. A rivet already popped off once - I'd rather not deal with it again. But I'm worried I might have to... ADVICE NEEDED, FISD BROTHERS AND SISTERS: I'm worried I misplaced the thigh/knee power pack. It looks twisted outward a little too much. I tried basing it off of pictures, but found it settled into the position it is in now (based on the contour of the knee's edging). I'm hoping it will pass muster, but I have a feeling in the pit of my gut that I'll need to drill out the rivets and rotate the power pack about an inch inward for my own preference. Sucks, especially since I'll have an exposed hole on the outside of the thigh. Going to have to figure out a patch for that. Any advice from you troopers would be most appreciated. Do I leave it? Or if I have to move it, what's the best way to plug the hole? In some angles it looks fine! But in others, it looks twisted, like a rotated sock. Sorry about the picture quality. Old iPhone AND in a mirror. Not a good combination. So, 0.90 ABS plastic is nice sturdy stuff, but sometimes, the pieces just don't like to bend and fit. Maybe I'm just being too gentle. Next - details and fittings! -
ZacMuleer's ANH Stunt TK build [*AM]
ZacMuleer replied to ZacMuleer's topic in Build Threads Requireing Maintenance
The helmet, as promised. Still a bit more to do, but it at least looks all right. One of my prouder achievements. -
ZacMuleer's ANH Stunt TK build [*AM]
ZacMuleer replied to ZacMuleer's topic in Build Threads Requireing Maintenance
Thanks! I'm actually a lot farther along than this - I just need to get the write-up up-to-date and the pictures linked in. I went with an ATA helmet and I think it looks pretty good so far. Just have one more coat of paint to go on the ears, and some touch ups here and there. Still need to apply the decals and pop on the trim and lenses, then fill it with electronics. I'll post a pic when I get home this evening. -
Hey Mike (or anyone) - quick question. Does the water/soap affect already painted areas in any way (assuming the paints are 100% dry)? I was planning on doing my decals after painting, but now I'm wondering if I made the wrong choice... The paints are the humbrol enamels.
-
I think it depends on if you'd prefer "screen accurate" vs "Imperial issue". I'm a fan of the hidden snap system, but if you want the super-accurate wire system, it's certainly been done before. You raise a good point, though - I'm not sure how much trooping it would withstand.
-
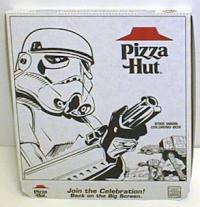
Hi all! So I've been working on my armor for the better part of a few months now and still have a little ways to go, but I thought it was high time I started a build thread. I've had a great time putting the armor together so far and can't wait to submit to be a part of the 501st. For 501st and FISD members, I apologize if I sound like I am dumbing down the conversation - I'm writing as though any general outsider can read this thread. Though some rudimentary knowledge of acronyms and trooper terminology is certainly required to follow. Building a kit of stormtrooper armor is a massive undertaking. It required me to learn a whole new set of skills, and fill my work area with a whole new set of tools. Many of the more specialty work can be done by the experts for a much cheaper price, so I sent out for a lot of things. Below are a list of the tools I both regularly use, or may have had to use only once or twice. TOOLS AND MATERIALS: Metal ruler Exacto knife (with many replacement blades) lexan scissors (both curved and straight) Sandpaper (150 and 600 grit) files needle files line 24 snaps snap setter and anvil rapid rivets rivet setter DREMEL clamps (pack of 18) rare earth magnets (30 or so) E6000 glue (like 7 or 8 tubes) cutting mat protective eyewear tongue depressor/craft sticks paint stirrers from home depot or lowes Painters tape. Lots of it. black nylon webbing (2") - about 4 yards black elastic (2") - about 2 feet Industrial strength velcro (black and white both) pencils reference photos From FISD members and in various places around the web, I purchased: The AM armor kit ExtremeRacing black undersuit nomex/leather black gloves TK Boots kneepad replacements ATA helmet kit Trooperbay decals, paints, mesh Helmet electronics (Icomm static burst system, Aker amp, wireless mic) canvass belt inner drop boxes thermal detonator clips (and tube) Doopydoos resin hasbro conversion kit doopydoos full resin e11 build Neckseal from Lady SewForUs Holster for E11 Man, when it's all listed out like that, it seems like a lot.... The obligatory big brown box! I was so excited when it arrived! I laid everything out the best I could. Clint (MightyTank) was wonderful to work with and I highly recommend him if you are looking into getting an AM kit. I decided to go with an AM kit. First, I'm an amateur at this, so I need it to be as easy as possible. Second, I'm a larger trooper. 5'9", and close to 200 lbs. So I wanted to get something that would fit a little better. I did decide to forego the GIANT and terribly inaccurate FX helmet for a screen-derived ATA helmet. The helmet will be discussed in another post. I did get some time to hang out with tkrestonva (Brian), one of the premier experts on TK armor in the country/world/galaxy, and he lives only 20 minutes away! He showed me his armor and some helmets and his suit which gave me the confidence and knowledge I needed to go forth and begin this epic project. I read almost every single build thread on the FISD forums (for ANH troopers, primarily, but also some of the other types, too. They all start out similar). My plan is to go in directly for the high-accuracy EIB/Centurion builds. It's not that they are more difficult, they require a little more time, and a lot more attention to detail. But it's easier to go in knowing how you will build the armor to certain standards than to undo your work and remake it according to a higher standard later. Special shoutouts go to Pandatrooper, tkrestonva, kaptinkaos, Hedji, and the many others that have posted their builds. Your builds were tremendous helps. In fact, some of their pictures look so similar to what I did, I didn't bother taking pictures, because I did the same thing. So, I started on the biceps. Pandatrooper did, most folks do, and if you mess up, it's one of the least visible pieces, covered by the shoulder bells. That first cut is one of the most liberating experiences. Prior, I was terrified of messing up this pristine white armor. But after repeating to myself ten thousand times "I can always buy a replacement if I screw up bad enough" then a peace settles over you and you can finally begin cutting. Fitting by oneself is difficult, blue painters tape becomes your friend. I use it for almost everything and it comes off really cleanly. Measure twice, cut once, but only cut off what you are sure you don't need. It's easy to take more off - but putting it back is a pain in the butt. I decided to butt-join the armor, rather than use the traditional AM-overlapping method. So, knowing how far apart the raised areas needed to be from the seam, I used a guide to mark and trim down to the seams, and I used the pieces I cut off as the inner shims. The width of the inner shims matters little, and I would argue they should be wider than the front cover strips, so there's more material for the armor piece to grab onto. While a lot of members use the score-and-snap method, I preferred the cut-with-lexan-scissors-along-a-straight-line method. To each their own. I would mark the distance to the seam, mark the armor, and lay a piece of painters tape down along where I needed to cut. Tape does a good job of staying flat, moving with the material, and if laid down without any wrinkles, the edge stays a straight line. I found it easiest to cut along this line with the lexan scissors, going slowly, and then sanding down any shards or pieces that stick out. KEY thing to remember: Always score the areas you are going to glue. E6000 is the King of all glues, but it comes up from ABS easy enough (if intended). Scoring the material helps keep the E6000 keep its grip. (You can barely make out the "X's" I scored into the inner shim below.) I would cut the front seam for each armor piece, then tape it up as if it were together and start test fitting the back. This is difficult as you need to measure, tape, and mark all at the same time - and usually with one hand. It's ideal to have someone help you, but if you don't, go slowly, and take a little bit off at a time. The best thing to do is to cut the places with the raised edge first - you know how much needs to be taken from the raised edge, and then you can tape those two edges together, and measure/mark the backside before cutting. Then it comes down to gluing the inner shim into each armor piece. E6000 take 24 hours to fully cure, so don't expect this to be quick. First, score both of the sides to be joined. Then, apply a good line of E6000 to both surfaces. Don't be shy now, you want a good bead all the way down the shim (well, the half you are gluing anyway). I take a piece of scrap plastic and spread it over the surface to be glued on both sides. (Make sure you put the cap back on the E6000 - it'll dribble out, plus it gives you the time the glue needs to tack up.) One of the great things about E6000 is it's long cure time - because you can correct any errors you find before they become mistakes. And even if you make mistakes, E6000 is not damaging to the plastic if you pull it up carefully enough. Case in point, I had completely glued my bracers together when I was advised to make the hole at the wrist smaller. I had to take them appart, clean out the old E6000, recut the bracers, and reglue. And it worked! And they look great. So, take your inner shim and your armor piece and press them together. I wait about 30 seconds to let the glue tack up before pressing them together. Some troopers wait 1 to 2 minutes before pressing the pieces together. Take your clamps and your magnets and set them all along the shim - you want pressure along the full length of the pieces being glued. Then you leave it for a full 24 hours. (I tried to do as many pieces as I could right when i got home from work, so I could do the same thing when i got home from work the next day.) Notice how I was generic on what armor pieces I was working on above? It's the same for most of the pieces: the biceps, the bracers, the thighs, and the FRONT of the shins. The back of the shins will be a little different, because they need velcro to get on and off. More to come.
-
Photographer was recently interviewed by the Daily Mail on her work. More pictures here: http://www.dailymail.co.uk/news/article-2052456/Evil-Star-Wars-Stormtrooper-photographed-loving-scenes-young-son.html?ito=feeds-newsxml
-
Yeah, the more I look at folks' builds, I think the power cell placement is good. Doesn't look like they tend to be perfectly centered. I'm still curious about the shoulder bridge placement, though. I'm looking at putting it down 4 or5 notches on the front, but that's where the crease in the chestplate is, causing the gap. I noticed that on some previous AM builds (Hedji and Kaptinkaos) they mentioned using a heat gun. Is that the only/best solution? I don't have a heat gun - so I was hoping there was an easier solution.
-
Howdy all - Substantial progress made on the build today. Haven't started a build thread, even though I know I should. I've been following most of the advice on here and am very appreciative of all those who have gone before. I have two short questions that I'm hoping y'all can help me with. I'm building an AM kit, in the style of ANH Stunt. 1) The knee power cell attachment I couldn't get mine centered without the edges looking a little weird. It's an awkward fit, and I think it feels that way and would be different for everyone based on how tapered the thigh piece is at the knee. I wanted to see how everyone thought of this, since the next step is riveting, and I really, really, really don't want to have to do this more than once. The boxes adjust slightly to the outside of the leg, which I think would help with walking - but I wanted to check with the FISD to make sure I was assuming something imaginary. The AM kit (and I assume others) around the knee are not perfectly round, but have corners around the knee. I was able to line the power packs up to the top of the lip on either side, as far back to each corner. (But that's when it makes it off center. Look good? Rivet away? Second question: I'm looking to attach the shoulder bridges to the chest piece, but the creases in the chest prevent the bridge from laying flat. Am I placing the bridge on in the wrong place/wrong angle, or is there some massive heat warping that needs to take place here (something I'd like to avoid...)? Or is the shoulder bridge supposed to go on like this - on the far side of the crease in the chestpiece? If it's over on the far side of the crease, it's angled in a strange way that I can't see how it would lay flat on the backpiece (floating, but still off from where it would meet the backplate. Plus there's an unslightly gap between the shoulder and chestpiece on the neckside if I close the gap on the shoulder side). Any recommendations on how to fix this? I'm looking for this build to be EIB/Cent qualified, so any solutions that don't keep that from happening (i.e. riveting the shoulder bridge) would be most appreciated! Thanks, brothers and sisters in white! Dan
-
LOL - If there's anything I've learned on this site... there's no such thing as a "final" purchase! Congrats, and great job!
-
A dremel with a grinding stone works well - but you have to be real careful - it cuts through the resin like a hot knife through butter.
-
Darth Aloha's RT-MOD ANH Stunt Build[*RT]
ZacMuleer replied to Darth Aloha's topic in Build Threads Requireing Maintenance
Absolutely brilliant! Fantastic! This made it really easy (also the fact that I received my anvil and setter from Tandy leather yesterday) but I've already cranked out 30+ snap-webs. Thanks for the tip!! As for punching - I just folded the webbing over twice so I could cut the middle (exposed as a corner) of the web-plates. As you mentioned, kev, the snaps clamp down all around and hold the webbing well outside of the hole. -
I saw this recommended and got a bunch of it - way more than I needed. LOL. Guess I'll have some for other helmets I make. - Cheap stuff, too.
-
YAHB (Yet Another Hasbro Build)
ZacMuleer replied to Darth Aloha's topic in Build Threads Requireing Maintenance
Hey Bennett - I asked the same thing over on this thread. Check here. http://forum.whitearmor.net/index.php?showtopic=12522&st=0 -
Anyone have any luck either finding one, or have any ideas/suggestions on how one can be put together?
-
Darth Aloha's RT-MOD ANH Stunt Build[*RT]
ZacMuleer replied to Darth Aloha's topic in Build Threads Requireing Maintenance
Do you have any strapping problems using nylon snap "plates"? It seems like a good alternative to plastic... I would just be worried about either the material fraying from the pulling going on or the snap pulling through the elastic. Is it just a personal preference or is one actually better?