
Leaderboard


Popular Content
Showing content with the highest reputation on 03/31/2026 in all areas
-
Thanks for finding that scan Glen, though it was bothering me today so I hunted around all of the places it could be and eventually found it in a folder on the shelf. Having seen that scan of the Anovos one, I'll scan this so if anything goes wrong applying I can reproduce bits.1 point
-
The following may be of help Also Attached a scan of the Anovos decals TFA Decals.PDF Trooperbay's ANOVOS-the-force-awakens-TFA decal-set.pdf1 point
-
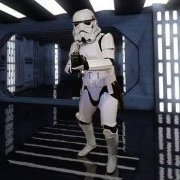
Two weekends in a row? outrageous. Started by addressing last weeks mistake. I filed out the holes as I described, which worked well on one but the other side drifted slightly so fitting the bar was impossible. I ended up making some little 3D printed donuts I taped in place and then used a step bit and went to 5mm. This is a little sloppy but allows me to align how I need to. A dab of slow setting glue when I apply will stop them moving with time. Next up, there was a fun delivery this week. The full works from @R2Dan After a quick test fit of my SC-44C, which was perfect spacing but needs shorter screws I moved on to fitting the holster to the leg. Having learnt to be more carful on the Kit Kats the 1st job was to prep the template. The mount from R2Dan wasn't a perfect fit so I positioned it where it looked central and marked the holes. I then marked the hole centres. Once the template was taped on I very very carefully aligned the part to where it will go and after a couple of adjustments was happy so centre marked the holes and drilled with a brad point. Used the nicer ones this time which where through very cleanly. Much happier with this. I will probably also reinforce the leg slightly at the hole point, which means slightly longer screws. Will Need to see what the leg room is like. This means the legs are all now ready for gluing up the 1st seams. I need to check I have all the clamps and magnets to hand and I can get going. (legs swapped side to side so the fall into each other not over, I didn't drill the holster in the middle) Next up I got on with removing the remaining excess from the forearm parts, again going for a minimal return for comfort, room, and flexibility. The wrists I have tried to remove as much return as possible. My hands BARELY fit so I need to tape them up and see if I need to do something clever to help here. Biceps got the same treatment as everything else. Also probably now ready for the main seam to be glued up. The overlap will wait for sizing later down the line. Shoulder bell lips also all ready for glue now, removed the lip for a clean edge. The foam draft trim came so I also fitted that to the spats per Ardeshirs video. I also couldn't resist adding the velcro to have something that sort of looks done. The glued clip end I'll wait for once I have the shins and boots assembled to be able to check positioning. The foam trim works great and really does help kit it all lined up well. Finally I did a trimming pass on the chest plate. I've left more return here as it's not really going to need to flex much, but I know some reshaping will probably be needed. As you can see I also removed the pill backing to allow for some fabric. I've left a small lip on the rear to give a nice clean definition, but could go a little further if needed. I need to order some fabric for the backing. I understand this should be an aeromesh? I can't find any good reference or documentation on this only a few photos from submissions. I was sure if I should go for this https://www.ebay.co.uk/itm/122155896996?var=424700660017 which is a basic mesh, or this https://www.ebay.co.uk/itm/323052345596?var=515553086677 which is a "spacer" which has a thin foam and backing which might be a bit more opaque. I am also considering the basic mesh with a plan cotton/canvas 2nd later to make it opaque. I also can't seem to find the sticker sheet for the armour, which is a little worrying as if so I am going to have to remake them all. And while I have a circuit, that's not really what I was hoping to have to do.1 point
-
Ahhhhh. Bernie meme.1 point
