Leaderboard


Popular Content
Showing content with the highest reputation on 02/04/2025 in Posts
-
Costume = Stormtrooper, Rogue One Costume CRL Link = https://databank.501st.com/databank/Costuming:TK_rogue_one Name = Mike Foglia TKID = 26300 Forum Name = MikeRadness Legion Profile = https://www.501st.com/members/displaymemberdetails.php?userID=36176 EIB Approval = TK-26300 requesting Rogue One Stormtrooper EIB status [Jimmiroquai/Mr Paul] (1082) - Request Expert Infantry Status - 1st Imperial Stormtrooper Detachment Garrison/Squad = Central California Garrison Armor = Hybrid: Jimmiroquai: Chest, Back, Thighs, Cod, Butt and TD (Fiberglass). Mr. Paul: Shoulders, Biceps, Forearms, Abdomen, Hand plates and Shins (3D Printed in PETG). Jason Carter (BigJasoni): Shoulder straps and Belt Boxes. Front Hard Belt: Made by Me out of HIPS Helmet = Nico Henderson (DesertFareCosplay) Helmet with Mr Paul’s lenses (3D Printed in PETG). Optional Information Height = 5ft 8in, or 173cm Weight = 155lbs, or 70kg Boots = Keep Trooping, Trooper Gloves = Endor Finders, Rogue One Trooper Gloves Undersuit & Neck Seal =Keep Trooping: New Era Undersuit Blaster = E-11 - (3D Printed S&T STERLING L2A1 AEG AND ROGUE ONE E-11 CONVERSION by TK14082 - Thingiverse) Armor Photos Full Body Front Full Body Back (With updated back plate/belt adjustment to correct based off Armor Fit recommendations from EIB Submission) Full Right Full Left Front w\Pauldron Action Shot Helmet Front Back Left Right Lenses Rank Bar Gasket Brow Trim Hovi Mics Tube Stripes Voice Coder Tear Frown Rear Trap Side Trap Eye Bump Neck Seal Under Suit Shoulder Straps Shoulder Armor Upper Arm Armor Forearm Armor Hand Plates Gloves Chest and Back Armor Abdomen Armor Cod Kidney Back/BackBelt/TD/Posterior/Backplate (these are assembled as once piece but can be separated if needed. *Pics for submission taken assembled) Belt Thermal Detonator Thigh Armor Lower Leg Armor Boots Blaster E-11 (Maybe a black blaster on a black background wasn't the best choice... haha) D-Ring Scope Counter/Hengstler Power Cylinders Bayonet Lug Flashlight Optional Accessories Pauldron Bucket Off! Thank you all for the consideration. As well as your previous input. Hope this meets all Centurion standards. I look forward to representing the FISD through Centurion Deployment! Mike (TK-26300)4 points
-
As Chris ran uncontested for the 2025 election cycle, he will remain as our Detachment leader for another term. Congratulations, Chris, we look forward to seeing what you have planned for the Det in 2025. As always, you have my full support, and that of a great team of staff ready to continue driving FISD on to new heights. Congratulations once again.1 point
-
Nice clean build, good luck with approval1 point
-
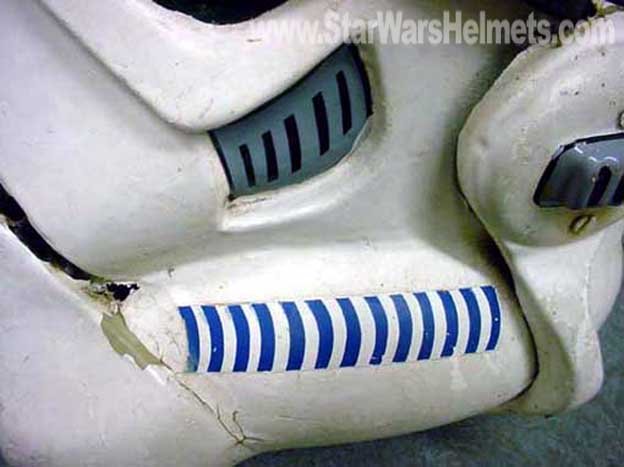
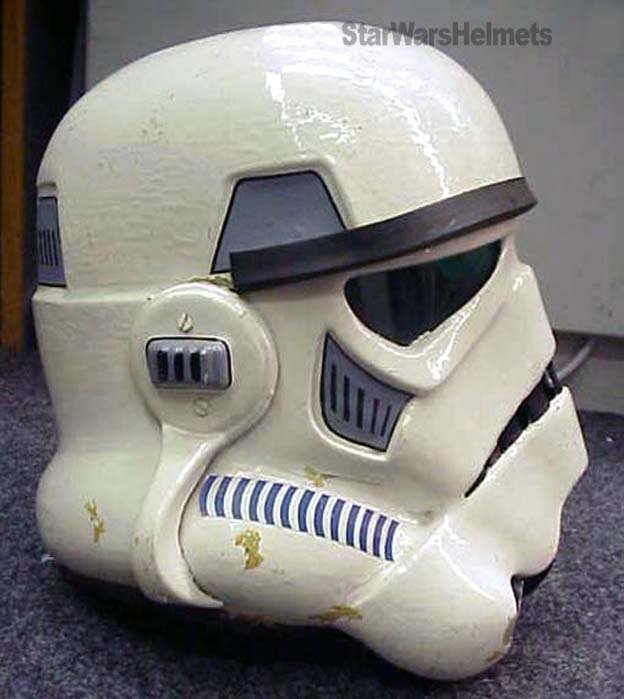
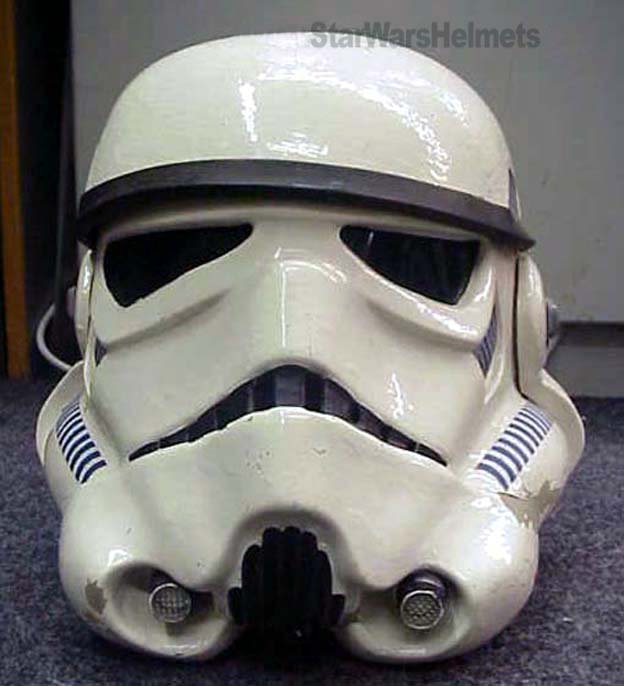
Just like ANH should be fine, pencil width from the cheek (although some helmets have a wider gap) Ideally, the tube stripes are positioned approximately a pencil width from the side of the cheek. Wider gap Application you can add them dry (as long as your alignment is good) OR wet (soapy detergent in a water spray) BUT that is a slow process to wipe all the water out and get them to dry, but you are able to get rid of air bubbles. More references here http://starwarshelmets.com/original-ESB-stormtrooper-armor-helmets.htm
 1 point
 -
This is beautiful. Best of luck Mike!!!1 point
-
Thanks for the tip! I've had a lot of live and learn moments on this build so I wasn't daunted by the redo. Good to know for future work. Before moving on to painting the gloss white, a was looking at all the final things I need to do. I noticed that the edge for the black trim around the neck opening had two places that were going to be difficult fitting the trim smoothly. I had purchased rubber edge trim for the neck opening and fitted it on to see where I needed to make adjustments. I trimmed one side of where the two helmet sides met which made the trim go on smoothly. I then re-primed the surfaces I needed to sand.1 point
-
Indeed, you can never have enough, well almost1 point
-
Thank you every one. Another year of service.1 point
-
Thanks! As much as I'd like to say yes, honestly they're really annoying to make haha. The polyurethane ultimately hardens to shore 90a, but for the first few days it's uncured and really soft, so each casting needs to be left in the mold for up to a week to fully harden up. That's not really great for doing runs, I don't want to make people wait like that. I've also run into a few little snags on that front that I've got to sort out before I can continue. I'll be more specific in my next update post.1 point
-
Alright, here are some shots from my Captain! I fixed all the previously mentioned points and in my eyes its pretty done! I'd like to hear your opinion if we can move on to get this as a CRL model and the CRL finally done!1 point
-
Haven't you finished yet0 points