Leaderboard


Popular Content
Showing content with the highest reputation on 11/21/2024 in Posts
-
I find it a bit too light, when I tried it would smudge more than remove the paint, but it depends on the paint and how long it's been applied, could be worth a try though2 points
-
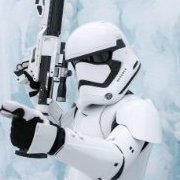
Hey FISD! Like many folks I was among the crowd that ordered a FOTK kit from Anovos back in 2016 and never received it. After emailing Denuo Novo last month however, they said they'd honor the purchase and ship it to me. Eight years after I bought it. I was appropriately skeptical. Imagine my surprise and delight when a gigantic box showed up at my door! Finally, I can get started! This is my first stormtrooper build, but not my first build. I'm a fairly experienced maker already, but this is a new one for me. Here we go. Most of the armor, helmet, neck seal - Denuo Novos Various pieces of the armor - DIY Boots - Keep Trooping Gloves - Endor Finders Gaskets - DIY, but I'd love to pick up some extra real rubber gaskets from Thorsson if he's still making them. Still waiting for a response. If you know of anybody that's still making legit rubber gaskets please tell me! F11D Blaster - DIY Since this is my first stormtrooper build, I'm shooting for centurion, but I'll cross that bridge when I get there. Since a lot of this build so far has been doing A while waiting for B, the progress is probably going to be fairly disorganized for now. There are a lot of parts of this I haven't documented because I've been so busy working on it, so I'm actually farther along in some areas than is shown here. Firstly, cutting the armor out of the vacuum pulls. You're all familiar enough with the way Denuo Novo/Anovos' kits look and how this process goes. Days of checking, measuring, double checking, cutting, thumbs hurting from the little scissors, you know the drill. Started by using one of my inking microns, then moved on to trimming, praying I wasn't going to cut off something essential and have to patch it later. What a mess. I'm eventually going to put some electronics in the bucket to facilitate hearing and speaking, so I soldered together a little proof of concept circuit with an electret microphone. Fortunately, I'm no stranger to creating my own circuitry. Worked like a charm! I'll get back to the helmet in a little bit. For now, the rest of the armor is more important since it's occupying valuable real estate on my living room floor. Starting to glue up the armor pieces with E6000. Those are rare earth magnets I'm using for clamps. The rags zip tied around them are to keep them from exploding and shooting metal shards into my eyeballs if they break. So far it's been really effective, my eyeballs are still metal free. Unfortunately since I have a very limited supply of clamps and magnets, and e6000 has a very long set time, this process is one of the parts of this build that is taking the longest. Well, more of A while waiting for B. Considering the fragility of abs sheets, my goal with the strapping is this: If a piece is hard, it has to mount to something soft. That way if a component comes under torque or stress from my body moving, the soft component will flex, not the hard one. I had a high quality spare belt laying around already, so I picked up a very basic cheap harness for internal strapping. The original harness, pre modifications: https://www.amazon.com/gp/product/B09VPMLC26/ref=ppx_yo_dt_b_search_asin_title?ie=UTF8&th=1 Started by sewing together some straps and buckles for the midsection. These have velcro sewn in so they're very adjustable, and will remain 100% stable after the suit's been sized. Starting with the snaps. These are belt mounts for the thigh straps. Also started on ye olde abs slurry mod. Against my better judgement, I went too heavy with that first application of abs, and as the acetone evaporated, it left a few little bubbles that were revealed as I started sanding. I filled them with my second and third applications. Currently waiting for the third application to dry, then I'll probably be able to wrap it up with the 3000 grit. As of right now, it looks almost good! Getting the greeblies and boxes all painted. Also printed out a bunch of F11D parts and got them all sanded and painted up. Half of the gun is assembled at this point, only a couple more touches and I'll have that part wrapped up. I prefer the version of the F11D with the stock, but I'm not going to be dressed as a heavy trooper. Is there a regulation somewhere that says I'll need a rifle without a stock if I'm your normal, run-of-the-mill FOTK? Getting the midsection strapped. I opted for Ardeshir Radpour's technique of building a separate fabric piece with a zipper for the midsection back. The fabric piece connects via velcro, meaning that the midsection sizing can be adjusted if I get fatter. Thanks Ardeshir, that was a fantastic idea! I also added a zipper pull using a shoelace and some shrink tubing. I've tested it, and can undo the zipper quite easily, even while I'm in the suit. Also shout out to YKK zippers, they're the best. Never gets stuck. Thermal detonator and backplate. Painting this thing was fiddly, particularly that white stripe around the cap. I've got the TFA TD version that's all one solid resin piece. Now that it's all assembled, I can see why TLJ and TROS versions were hollowed out, this thing is quite heavy. Is there an allowance for a TFA trooper to swap the solid resin one out for the hollowed two piece construction? Or would that negate any shot at higher approval levels cause it's not "screen accurate?" In this instance, one could make an argument that the two part construction is more universe accurate, even for a TFA trooper, and to me, that's more important than screen accuracy. Anyway, the Denuo Novo manual claimed that the backplate is supposed to be velcroed on (no), while other builders here tend to use an abs clip. The clip seemed more secure to me, especially considering the weight of the full resin TD, but I was kind of stumped on how to attach it. I started by epoxying in some eva foam backing to fill out the piece a little more, then I made an abs clip out of some scrap by heating to 250 in my oven. I discovered with my first attempt that the abs sheeting likes to curl up like an arthropod when its heated like this, and once it cools it's rock hard and impossible to uncurl. It also cools very very quickly, so once you take it out of the oven you've got about 15 seconds to shape it. I pre creased a couple sheets of scrap cardboard so that I could quickly bend them into a U shape, then laid a piece of abs sheeting between them. To keep the piece from curling up while it was baking, I placed a 2.5 lb weight on top. Since the weight was pure metal, it kept sucking the heat out of the abs, so I had to leave it in the oven for a good 30 minutes for the abs to get pliable. The cardboard jig worked well, and gave me a rock hard abs clip. I opted to use epoxy putty to hold the clip in place, but I was concerned that it wouldn't hold without some kind of mechanical connection. It needs to support quite a lot of weight while I'm walking after all. I added a couple m3 screws to be encased in the epoxy to give it a bit more strength, then lined the clip with canvas fabric to make sure the clip slides on well and doesn't scratch up the back of midsection. Feels solid as a rock now. You're all probably aware how stupid Denuo Novo/Anovos' long belt pouch is. It's a full inch shorter than the plate that's supposed to attach to the front! What the hell were they thinking? Anyway, this pouch sucked, so I made my own. Eventually I'm going to print out some rigid resin boxes to slip inside of these fabric pouches to keep them crisp and square, but I haven't had the time yet. Now on to the fun stuff. With a few of the suit parts, I've found that parts I manufacture myself are better than the provided suit parts, so I ended up replicating and replacing them entirely. Fortunately, I work as a lead 3d tech artist at a game studio for my day job, so replicating these pieces digitally was pretty straightforward for me. Basically just a few extended work days. I remade the hand plates in 3d from scratch, and printed them in resin. The sharper ones are the ones I made. I modeled in a pocket behind the pill shape so that I could mount mesh behind it. The abs copies were ok, but I figured since my endor finder gloves look so nice and I'd likely be touching my hands a fair bit, why not make the hand plates really premium? These turned out really nice; they look great in person. I remade the forearm boxes from scratch too. I placed grooves on the underside. I found some long rare earth magnets and will be epoxying them into place here. I'll put magnets on the inside of the forearm under the box to keep things in place rather than velcro. Here are the forearm prints, fresh out of the alcohol. Crisp as hell! Here's the print next to the Denuo Novos abs version. Once mine gets painted, it'll look much nicer. I also made a mold for the arm rail greeblie. In order to hit centurion I'll need to cast the arm rails in flexible material so the forearm box can move. I've noticed that a lot of people complain about certain pieces of their FOTK armor cracking and breaking when they try to get in it. Most notably the back/yolk piece around the shoulders, and the calf pieces. The reason for this is clear: many components of the suits used in the movie were made from a flexible polyurethane, and the armor was designed around this fact. The calf for instance, is designed to be pried open to get your leg inside. The problem is the shells that Denuo Novo produces are vacuum pulls made out of thin, rigid abs, which is not supposed to bend like that. I tried gluing up one of the abs calves I've got, and ripped half the epoxy off when I tried to get in it. Not great. That got me thinking. I'm scrappy, I'm a maker, I can do better. I wanted to replicate these pieces as accurately as I could, and unlike the pieces above they're difficult to measure with calipers, so first I wrapped my back/yolk and one of my calf pieces in painters tape to prep for a photogrammetry scan. I ended up drawing a rough topology mesh over the back/yolk piece to provide more accurate registry points. Photogrammetry doesn't do well with featureless shiny objects, thus the tape. I should have taped the leg up more thoroughly, but it worked out ok in the end. After a boatload of processing, this is what I got out. It may look like a hot mess, but it was pretty much exactly what I was expecting. Unusable as-is, but a lot of the waypoints were there. I remodeled them from scratch based on the measurements I got from the scans. These are about as accurate as you can get. I modeled the clip greeblie into the leg because I wanted it to flex with the rest of the calf, rather than being glued onto the outside and have the potential to pop off. After I modeled these, I inverted them and engineered some slush cast molds. This part was tricky, particularly with the leg, because I wanted the leg to only have one opening on the inside, and be seamless on the outside. That meant that I needed to design a roto cast mold with overlapping walls on one side; essentially a spiral. Then I had to puzzle out how to get the cast out of the mold, not an easy task considering I had to model in return edges. Eventually I landed on a mold design that can be disassembled into a few pieces after casting. I also had to split everything up into sections that would fit on my build plate, then epoxy them together and sand everything smooth after the fact. An annoying step, but necessary. The chunky bits on the outside of the mold are screw mount points that hold the assembly together. I've done a little bit of slush casting and fiberglass mold making, but that was a very long time ago. Naturally, I bricked this first cast because I used the wrong mold release for polyurethane. Whoops! Lessons for next time! I did another test today using only a single piece of the calf pre-epoxy to prevent any further tragedies. I've still got a lot of mold pieces to print and assemble. Don't spill it don't spill it don't spill it don't spill it don't spill it don't spill it don't spill it don't spill it don't spill it don't spill it I added some white. It came out ok! That greeblie turned out really nice. The rubber is still a little too floppy for my taste, but I think that's either poor mixing (I was trying to pour only 25ml out of two gallon buckets--I would not be surprised at all if I screwed up the ratios), the layer is too thin due to it only being a test, or maybe it's too bendy because it hasn't cured fully. Apparently it takes 7 days for this stuff to fully set up right. Or it's probably all of the above. With a full proper cast I'll get it right. EDIT: I just went and picked up the test piece, and it has hardened up quite a lot. Still flexible, but not floppy at all anymore. Perfect! Here's the polyurethane version next to a sheet of Denuo Novo abs. Pretty close! Hit it with some paint and I'll be good to go on the color. I'm excited to cast the full leg!1 point
-
Congratulations Chris!1 point
-
No problem man.1 point
-
Congratulations Chris, and welcome to EI rank!1 point
-
There is no actual size listed, I went to the local hardware and eyeballed against screen reference, was 13 years ago so I can't recall the size sorry.1 point
-
Hey congrats! Super excited to help welcome you to EIB!1 point
-
Yes! Looking so good trooper! More than happy to see you make it here 10 days after your EIB submission! Wow!1 point
-
You may want to check this thread and compare.1 point
-
Hi Brandon, For basic approval, the weapon is not required.1 point
-
I would love to meet you at Celebration Japan. I've followed you on Instagram.1 point
-
If any emails or contact info doesn't work we need to be notified, all contact info is correct when they are added to the sellers list. They are "vetted sellers" as we know they supply (and at a reasonable time) quality costumes and people have had no issues with them. What you buy is entirely up to you BUT there is no guarantee you will recieve what you order or could even become legion approved with a lesser quality product, entirely up to your GML (garrison membership liaison). Unfortunately price is a part of this hobby especially for costumes which are close if not better than screen accurate.1 point
-
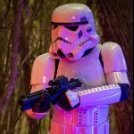
Sanding, priming, sanding, painting, more sanding.... I'm nearing the end! I tried out one of those plastic staplers, it was pretty nifty. I'm planning to cover the staples with some epoxy resin to lock 'em all in there. Here's some FO armor partying! More painting work Aaand I finally sewed an arm gasket! Got the sizing all right the first time! Got velcro sewn onto the gloves at last Here is a painting update, which has been updated since taking this. Chest, TD, and the rest of the leg parts are painted as well Some greeb printing work, done by a friend and garrisonmate I believe I have everything ordered to finish this up, short of getting some velcro/clips/elastic for assembly and such. The helmet is in progress, soon!!1 point
-
Thank you SO much - that was awesome news to wake up to! I will definitely get to work on those final issues before hopefully pushing for Centurion. I have been studying previous L3 applications (and common feedback) and learning about some subtle things I needed to change, so have been chipping away at them in the background in anticipation of that feedback. I'd forgotten to mention I have a long neck and a relatively large head - there's no padding in the helmet in those pics, so way to make me feel self conscious! I can't do a whole lot about that one, unfortunately. I'll just shrug my shoulders a touch I hadn't realised the silicone hand guards were required for L2 when I lodged my application. I've had a set made and am picking them up next week, so that one is an easy fix. There's a pic of them included, but I didn't have them when I took my original photos. My T.D was originally too long when I lodged the application. I've since cut it down and repainted it during the application process and it looks a LOT better now. I'll give the elastic on the ammo boxes a bit of a tug to put a mm or two gap from the belt. Since removing all the return edge on my forearms, I did notice they are now a bit loose. I'll definitely cut and shut them to make them look better. Ab plates: painting and shaving - will do Easy! E-11 touch ups - piece of cake. Will do. I think the lighting was messing with the angles of the tube stripe photos. It's pretty much exactly a pencil width, but the curve in some lights makes it look a fair way off. I was shocked when I saw that, then double checked as I was sure I used a pencil as a guide when I placed them. Now - my BIG challenge. The dad bod! I'm torn - do I add in a 15mm shim on each side to allow me to close the ab plate to the kidney armour, OR do I stop eating so much chocolate and do some sit ups? I know what's easier, but I do REALLY like chocolate (and beer). I think for overall health, I'll just try to drop 2-3kgs and it should close for me. I really want to thank you all so much for your guidance and patience. This is my first ever attempt at any sort of costume and the whole community has been awesome and encouraging. I love being a part of it! Cheers - Chris1 point
-
Hi Chris, and thank you for your EIB application! CRL and EIB Application Requirements: All required photos have been submitted, and on behalf of the entire D.O. staff we are pleased to welcome you to the rank of Expert Infantry. Congratulations! Other-Armor Fit/Assembly; In this area we review observations made by your fellow troopers and the DO team. Some observations may lead to suggestions to improve the overall look of your armor, and please keep in mind that we consider both text (CRL) and pictures (screen caps/reference images) when reviewing submissions. Great job with the required fixes brother. Next we have some suggestions for you to check. Let's start from top. The helmet looks like you're wearing a bit too high. If possible, we recommend that you remove some of the inner padding of the helmet (upper area) so that it sits a little lower Reference Images Centurion Requirements: In this section we prepare you for our highest tier of approval. Because Centurion photos must show more detail than EIB, items pertaining to Level 3 might be seen there and not here and additional photos may be required. We try to point out all that we can from what we are able to clearly see, but the final accuracy is the responsibility of the trooper. CRL L2: Ideally, the tube stripes are positioned approximately a pencil width from the side of the cheek. This is a requirement for Level 2, but since yours are somewhat close( the right side is perfect) we are allowing this for Level 2 and moving it to Centurion. Reference Images CRL special note: Armor is scaled proportionately to the wearer. Looking at your forearms, they seem too wide. I've made this modification for Garrison's buddies by removing the cover strips (sometimes just the rear one), trimming the forearm a little, and re-gluing the cover strip. Reference Images CRL L3: Ab button paint shall not extend beyond the bottom of the actual raised button. This one is an easy fix, just a painting session to add a little more paint to the edges to cover the raised section. Reference Images For accuracy , you may want to trim the return edge on your small ab buttons plate to get it flat. Reference images CRL L3: The top of the ABS ammo belt should sit at or just above the bottom of the central and vertical abdomen button panels. In looking at the reference images below, we are asking that you raise it a little to at least cover more of the bottom of the ab-button plate(s). Ideally it should touch (or even overlap a bit) the bottom button(s). Reference Images CRL for BASIC : The total length is approximately 7.50" (190.5mm). End caps are approximately .78" (20mm)in width. Looking at your Thermal Detonator and comparing it to the reference image, you will nee to reduce the endcaps width and the pipe size to get a more accurate look sir. You may want to check the above CRL reference dimensions. Reference Images CRL L3: Ideally there no gap between the abdomen and kidney armor Perhaps , Just a little strapping adjustment could do the job here. Reference Images CRL L3: Drop boxes are vertically aligned with the end of the ammo belt with minimal gap between belt and box. As you can se bellow, the drop boxes are overlapping a little the ABS belt. It looks like you need to lower down the elastic strap. Reference Images CRL L3: Hand guards shall be latex or latex-like, solid white or painted white, and affixed to rubber gloves with no visible strapping or stitching. You may want to replace the plastic hand plates for the more accurate ones requested by the crl. Reference Images CRL L3: The blaster may have minor weathering or base metal exposure however, T-tracks and grips shall be of a black plastic appearance with no silver/metallic weathering allowed. Just take in account to give a black paint coat to the T-tracks as per the CRL requirement. Reference Images And that's all trooper. Congratulations for your EIB badge!!! We are confident that you'll go above a beyond with the fixes to reach the next level. Remember to request your EIB certificate HERE .1 point
-
Good luck! Excited to see all the pictures as you build it. Maybe I'll see you at Celebration Japan!1 point
-
Welcome aboard Hiroyuki, we are here to help. Good luck with your new build. Sent from my iPhone using Tapatalk1 point
-
Welcome to the FISD Hiroyuki! Good luck with your build.1 point
-
And it's near the very top of our LIST OF VENDORS TO AVOID. Our advice would be to stay clear.1 point