Leaderboard


Popular Content
Showing content with the highest reputation on 07/19/2024 in Posts
-
Some pictures from a photographer from last weeks event3 points
-
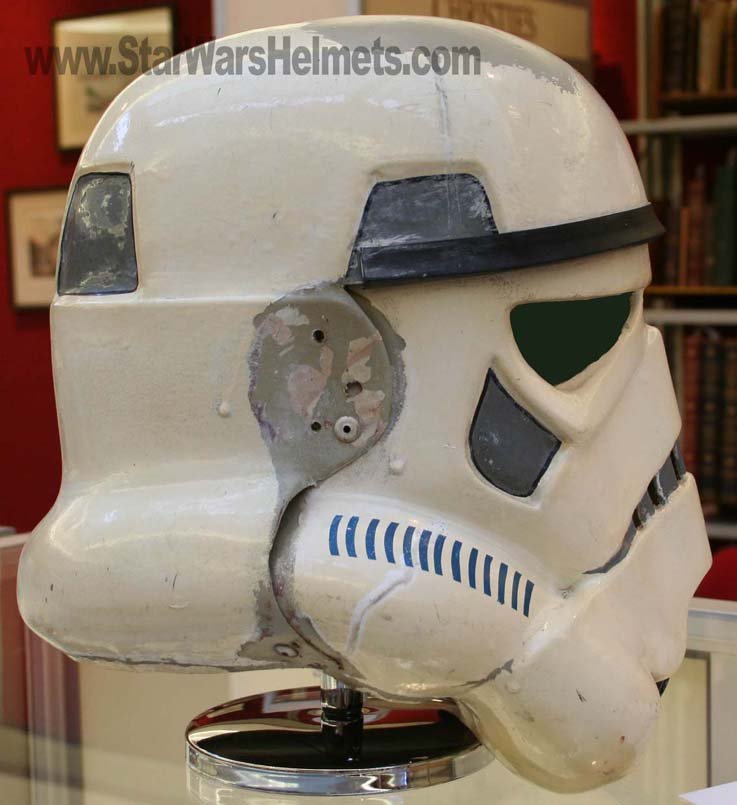
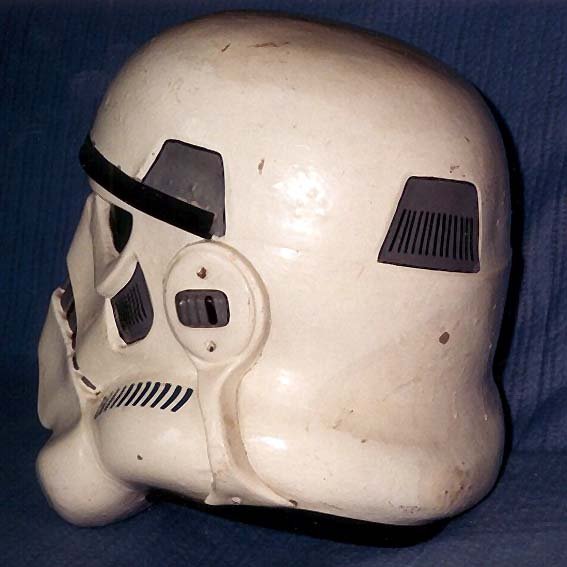
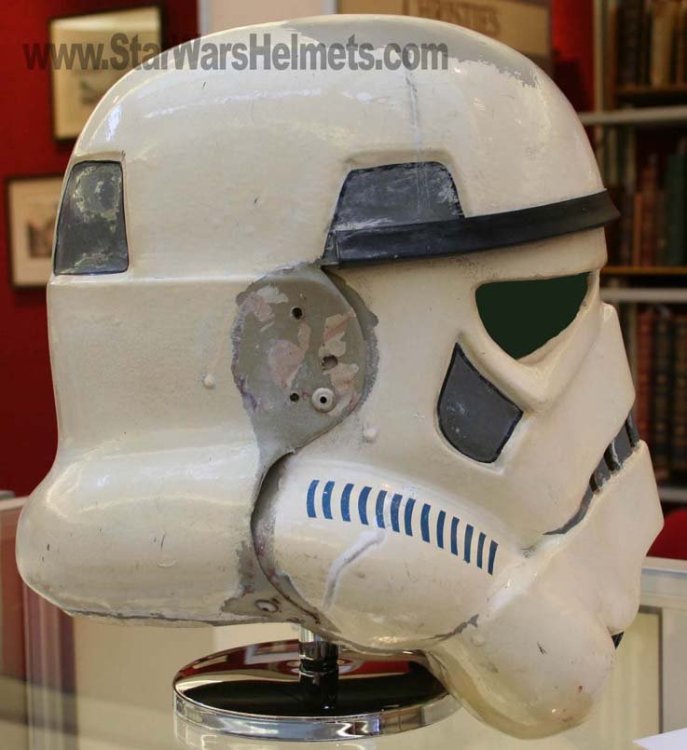
You can trim a little more in the corners of the teeth Although I would trim a little more into the corner some screen helmets stopped short so you may have gotten away with it. You can also notch the ear which will allow the ear to sit closer on the faceplate. More info in this thread If possible try to align the ear angle to the traps, not all helmet makes can achieve this though The "ideal" ear placement is as seen below, where the screws line up with the rear angle of the trap right above it. Because some armorers design their helmets differently or send them pre-assembled this is not always possible to achieve, but it is suggested that you try to get as close as you can. Note: Top ear screws should ideally be located directly below the rear of the trap.

 2 points
 -
This is a really informative thread on fitting the ears1 point
-
I see I see Unfortunately I don't think I can save this, especially with the helmet ears- I tried closing the gap as best as I could not too long ago. I might just have to throw in the towel on the bucket at least, and maybe just buy one. Thanks for all the great helmet closeups1 point
-
Looking good!! However, I believe the kama is still too bright and too red. I've worked on some reference photos. The night sisters gowns are the same red as the night trooper's ribbons. Enoch's kama is a LOT darker. This image is brightened from the original screen cap. The material is a very dark brown and the edging is just barely a brighter red. I tried to darken your image to match a bit better. Notice that your edging is much closer to the night sister gown than to Enoch's. Here's an image with the light source hitting the kama. I also brightened this image from the screen cap. Note how the kama material barely reflects the light. It is very very matte finish. It also appears to be a rather similar color to Morgan's top. The red ribbons on the trooper behind are also quite a lot brighter than Enoch's edges. And one more comparison. I got a lot closer in the color correction on your photo this time. I also added a screen cap from Morgan's fight with Ahsoka when she was outside and better lit. Do you think that darkening your kama and dulling the finish would be possible? I think the coloring on that one piece is the only big difference between the screen used armor and yours.1 point
-
Got it, thank you! Lots of work ahead of me!1 point
-
I continued with the chin extension work. I first filled the thin gap with Bondo putty. I filled a cleaned out icing tube so I could use the narrow end to get the Bondo into the crack. I've since sanded and reapplied the putty about four times. I found that smoothing the Bondo with a (gloved) finger caused less air gaps and made it easier to get a smoother sanded finish. Still needs a final sanding or two. I also dry fitted the black neck seal (car door edge trim). The chin extension met the original helmet at 90 degrees and the trim was going to have a hard time staying in place. I added a backing piece and then a curved piece of scrap to round the edge a bit and hopefully help the edging adhere to the curve better. That will get the same Bondo treatment as the rest. I also removed the aerators/hovi mix tips earlier in the process. They wouldn't snap out so I cut one of the tabs from the inside of the helmet. They both came out easily after that.1 point
-
I got new rubber gloves. Will these be ok?1 point
-
Congratulations trooper, an easy walk in the park1 point
-
Hi Dan and thank you for your Centurion application! Centurion Application Requirements: All required photos have been submitted, and on behalf of the entire D.O. staff we are pleased to welcome you to the rank of Centurion. Congratulations! Other-Armor Fit/Assembly; In this area we review observations made by your fellow troopers and the DO team. Some observations may lead to suggestions to improve the overall look of your armor, and please keep in mind that we consider both text (CRL) and pictures (screen caps/reference images) when reviewing submissions. You have done a great job on this costume and can wear it with pride. Congratulations again.1 point
-
Minor update to the General Construction Notes section to account for the recent changes to the CRL header.1 point
-
Thanks again to everyone for catching this issue and providing me tremendously helpful feedback! Drilling out the pop-riveted snaps was a simple matter with a drill press. I did some measuring, and about 12mm higher seemed good. Also, to get some slack on the belt so it would sit in front of the button plates, I eyeballed that I needed about 6-7mm on each side. Then I remeasured and punched: Now, it looks like I’m at a better height, but there is some sag in front, as you can see by my thumb needing to hold everything up in this photo: The back has the belt only on the kidney plate now: Hoping this is OK now, perhaps with some more Velcro in strategic positions.1 point
-
Finished my new Enoch helmet last night And here are both in comparison, new left, old right1 point
-
So, the armor now has gold leaf. Last time clearcoat, then done. Helmet is also in printing, will be gold leafed too.1 point