Leaderboard


(1)(1)(1).thumb.jpg.9e12048d59bf74ca778a7d26edbed7c9.jpg)
Popular Content
Showing content with the highest reputation on 11/06/2023 in all areas
-
Very honored and excited to be a part of the EIB! I appreciate all the help and suggestions to make my approval possible. In addition, I'm thankful for all suggestions to address in preparation for the L3 process. With gratitude, Mike3 points
-
Hello all, I am freshly minted TK-74759, and I have a separate 50 gallon bin for Kylo, so I wanted to make this bin my TK/Trooper bin. First thing I did was strip the stickers, painted it white (masked handle/wheels/tires). I have TK Name Plates and 501st Decals on the way. I also would like to add some lights/switches and OLED type displays on this thing. I also want to 3D Print a rod to hold up the removeable drawer on the extended handle, and I'll show that design here eventually. I added Imperial cog wheel covers, and I have a black handle I'll be adding opposite the extending handle to aid in lifting the box into my truck. I want my TK box to be unique. Right now its pretty plain, but I'll try and keep up this thread with my progress. To Do: 1. Add custom etched plates TKID/501st Legion Decal/Carolina Garrison Decals 2. Add Black Handle Opposite extending handle. 3. Add lights/blinkies/OLED? 4. Design/3D Print a bracket to go across extended handles that will hold the removeable drawer...which contains my ICOMM 5. I'll take any other suggestions! Beginning state! Paint and Wheels side! paint and wheels top2 points
-
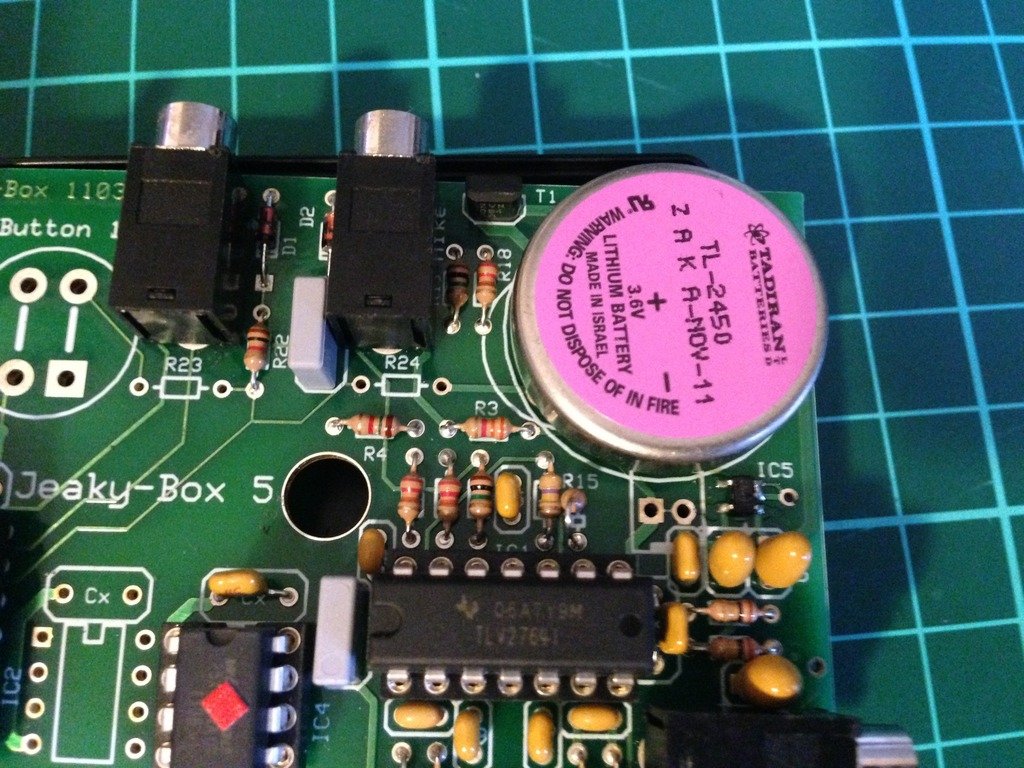
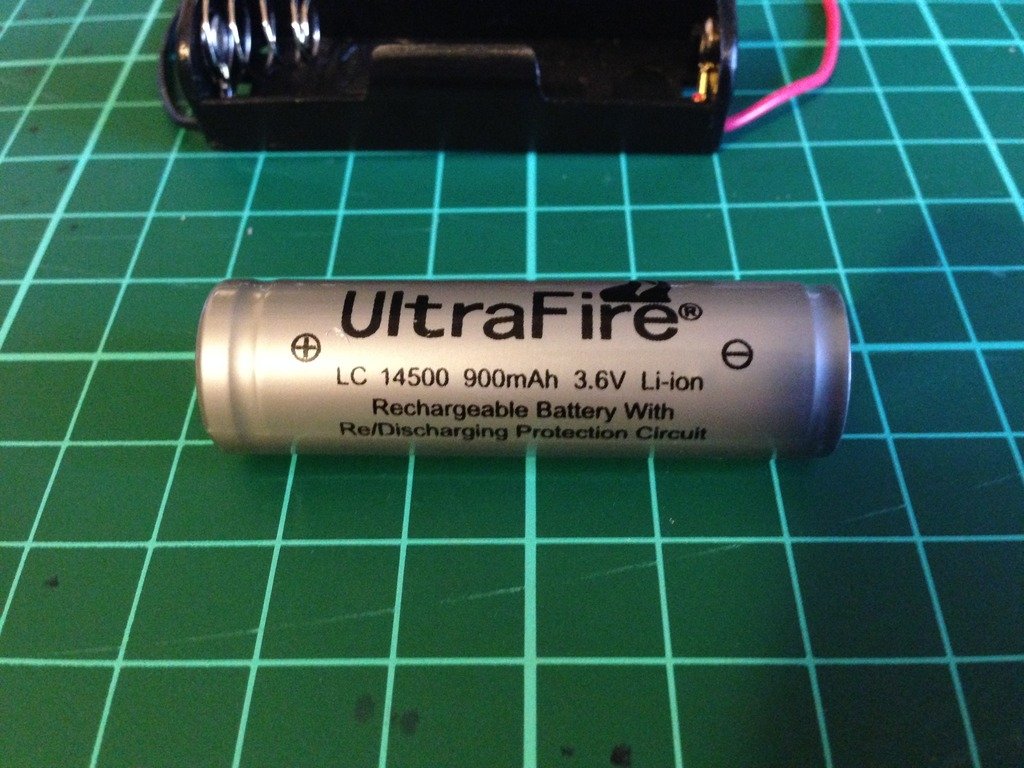
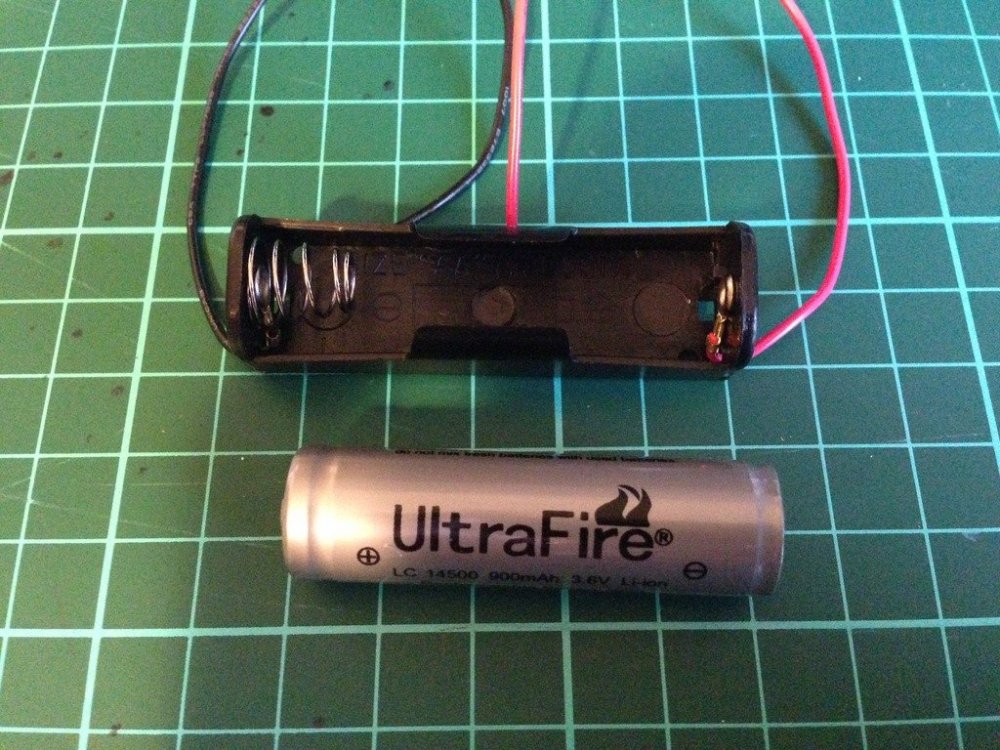
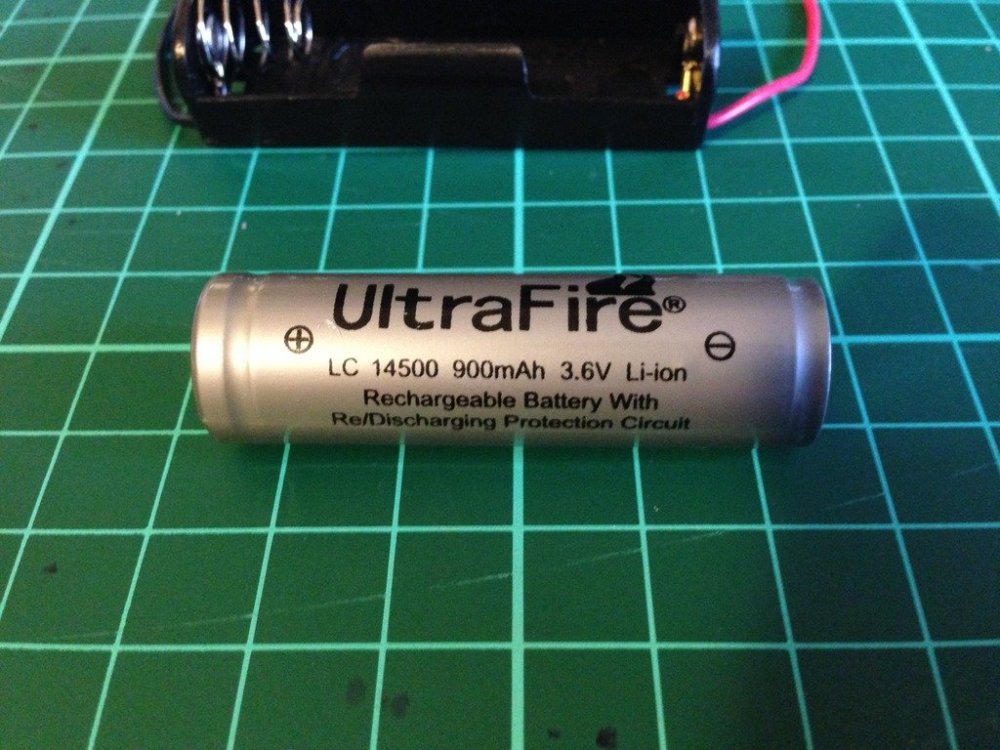
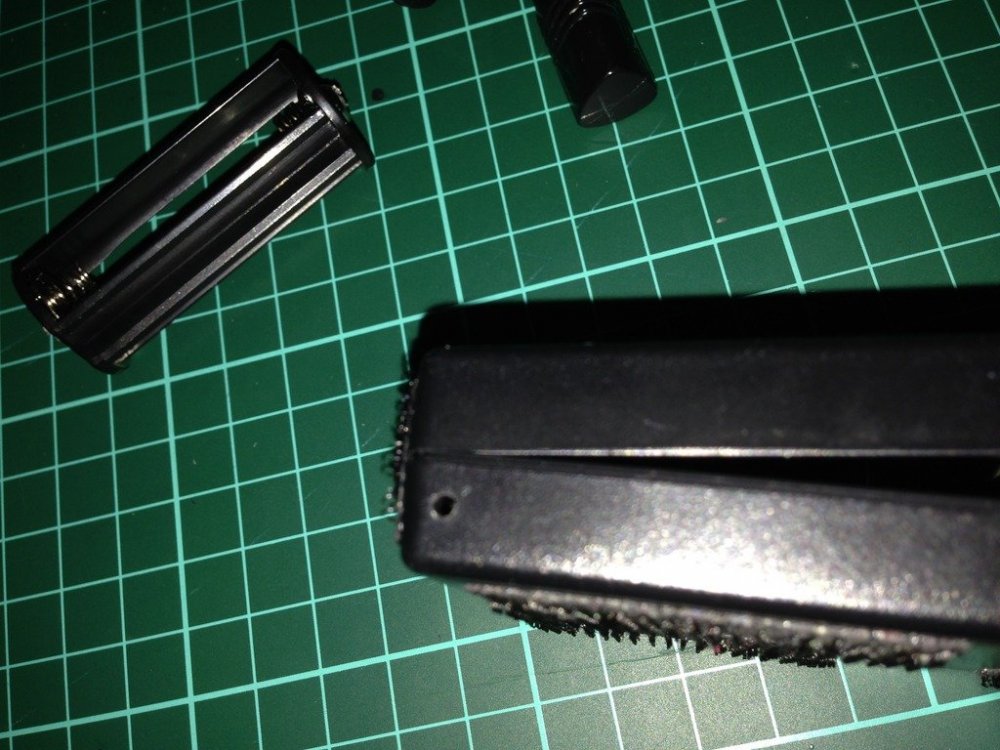
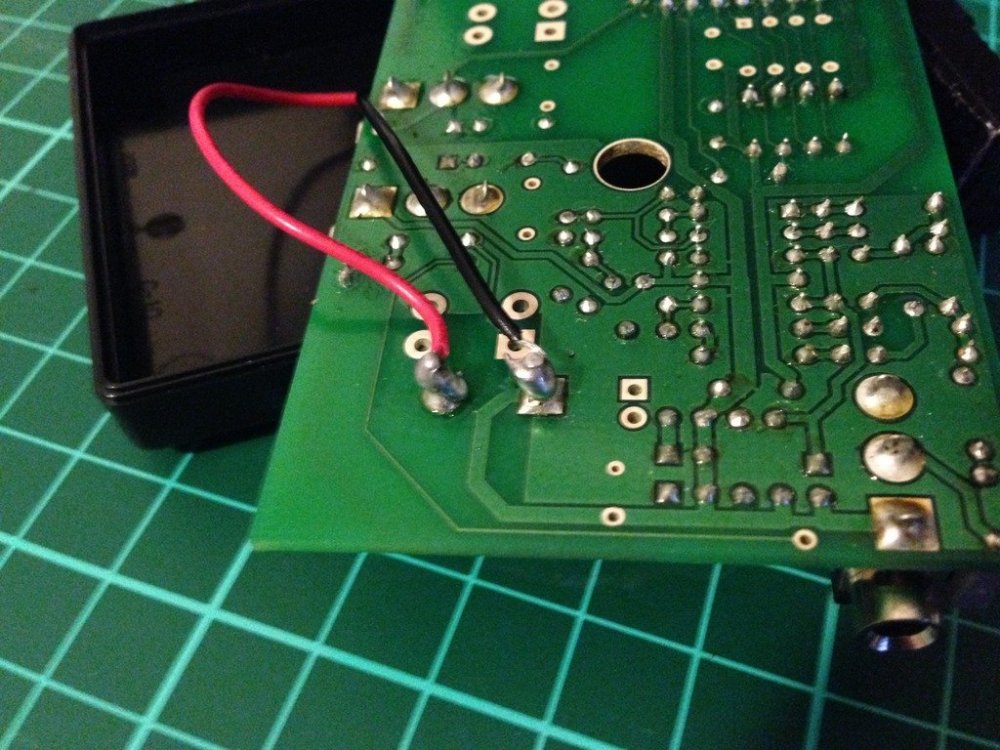
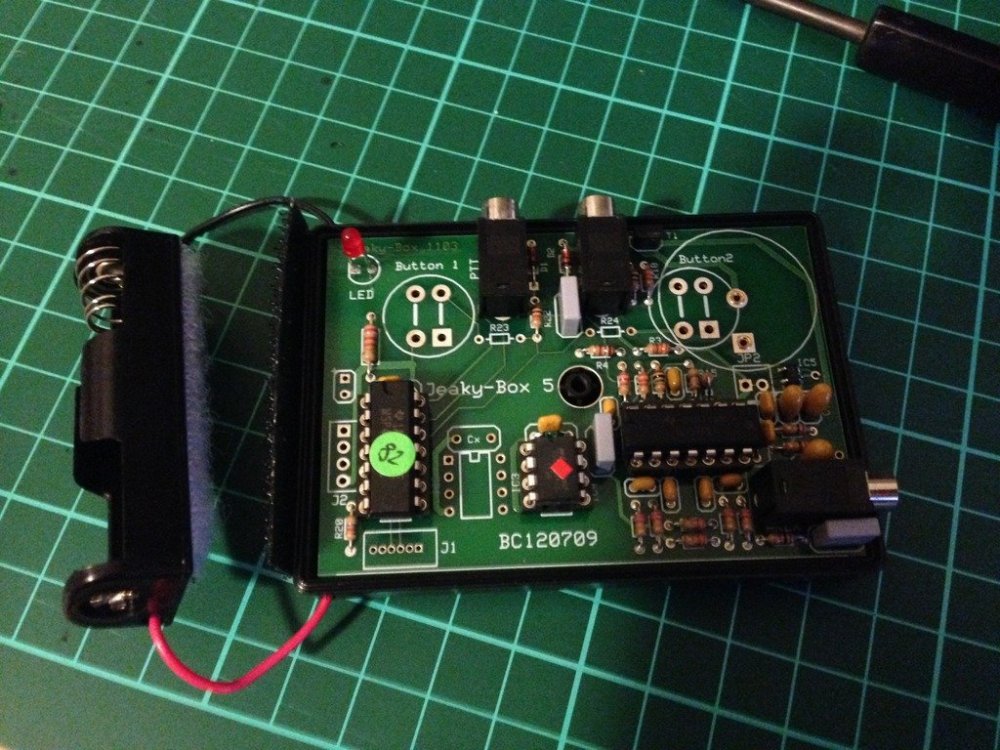
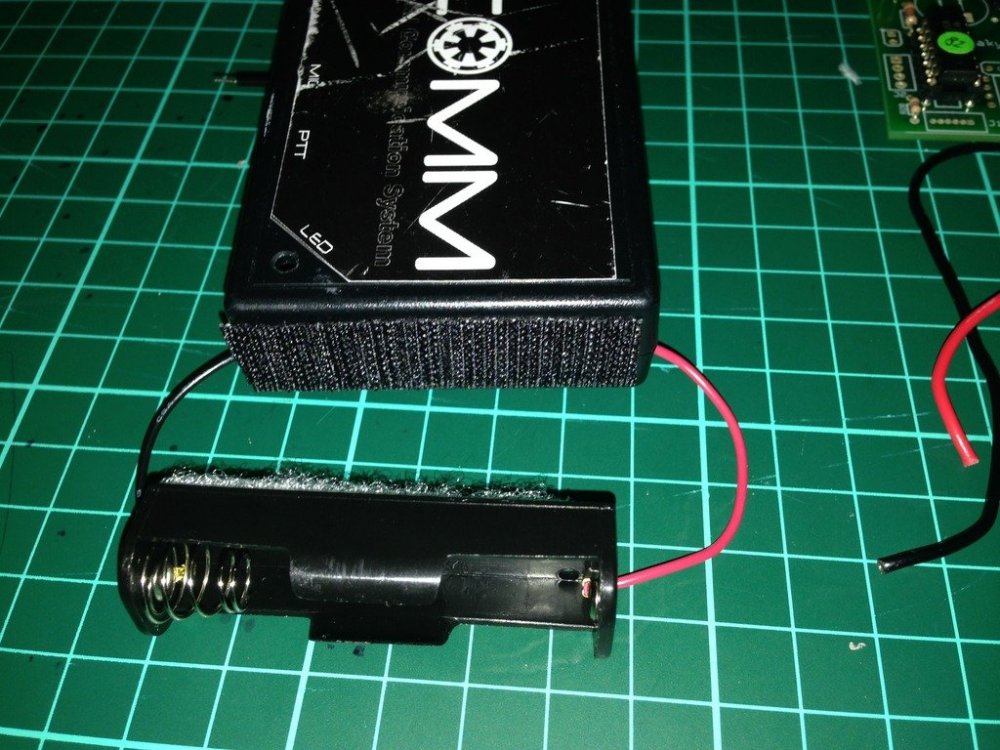
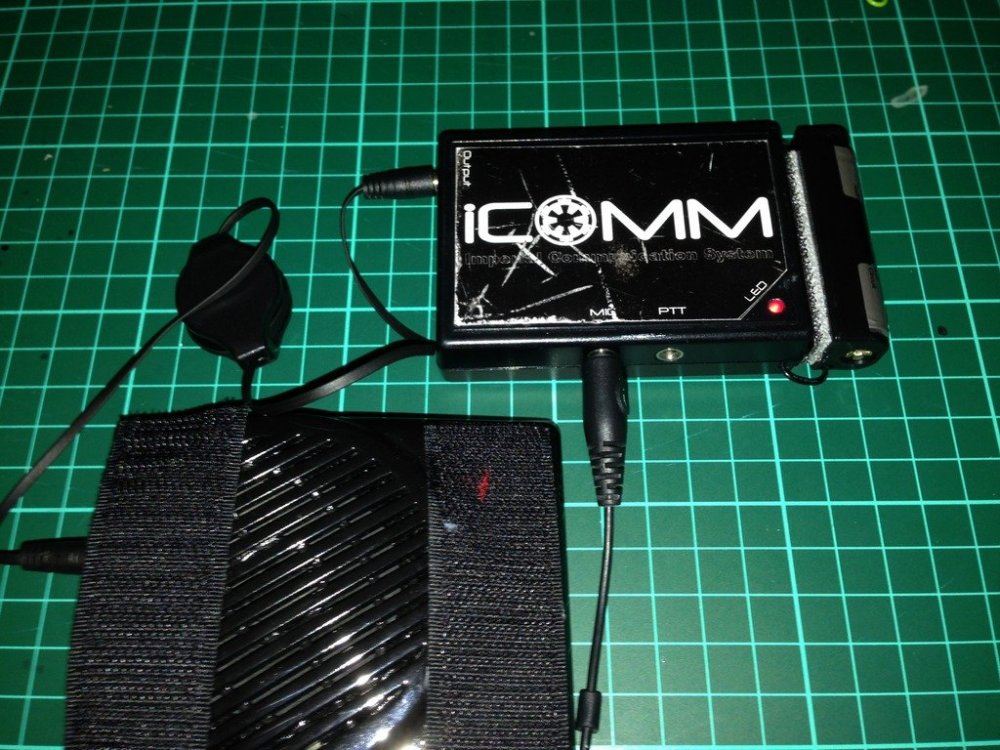
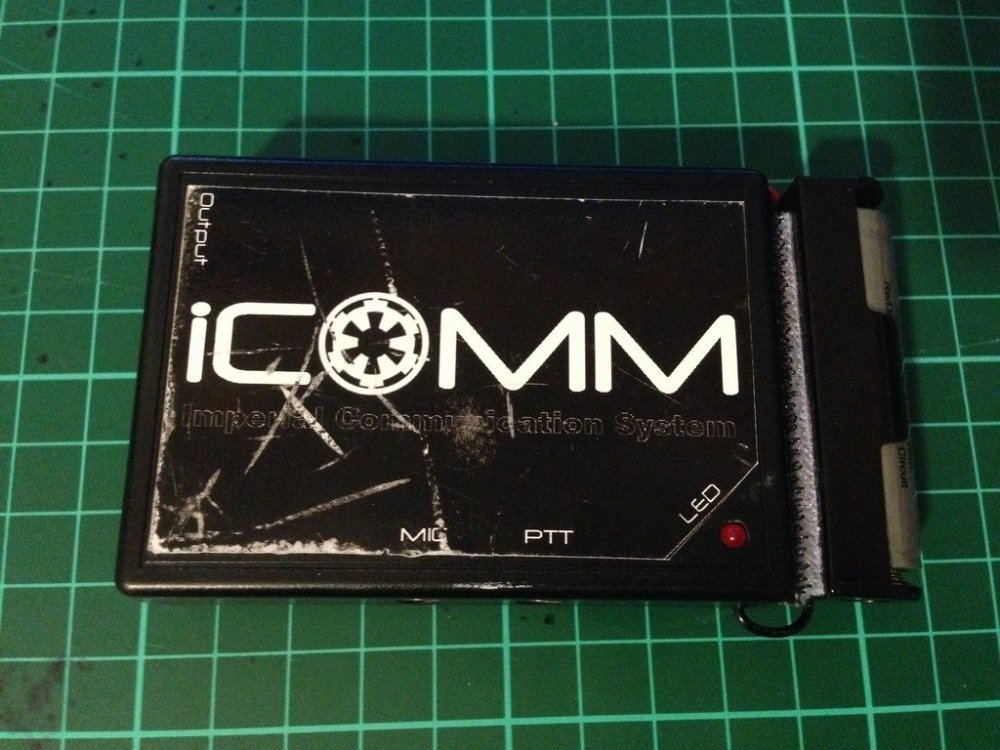
The humble iCOMM, works well while the internal battery is good, but after a year or so..........they stop working. How to tell, its the iCOMM battery. If the little red light no longer comes on and the static burst is not sounding, there is a good chance it is just a flat battery. Image has been scaled down 42% (600x450). Click this bar to view original image (1024x768). Click image to open in new window. Internal iCOMM battery Image has been scaled down 42% (600x450). Click this bar to view original image (1024x768). Click image to open in new window. Freight is expensive to get the very specific battery that is inside. Genuine replacement batt $5 US, freight, $25 US. Whattt!!! $30 US.... for a battery.....at least that's what I said. (approx $38.40 AUS) So I decided to do a little research, and come up with a reasonably simple and inexpensive mod, approx $12-$15 Aus. A simple AA battery holder and a rechargeable Lithium ion battery. Image has been scaled down 42% (600x450). Click this bar to view original image (1024x768). Click image to open in new window. Not just any kind of rechargeable battery can be used. The iCOMM is sensitive to voltage, so a 3.6 volt battery is required. The milliamp hour rating, or how much draw per hour on the battery, is only 560mAh, not bad for its small size, but I have replaced it with a 900mAh, so almost twice the capacity, and rechargeable. Approximate lifespan......Years and years. I chose to go with a battery with an internal protection circuit, as Li-ion batteries are finicky with charging. (have been known to EXPLODE). A digital battery charger, designed to suit 3.6-3.7 volts is perfect. Available on evilbay for as cheap as $5 shipped from China Image has been scaled down 42% (600x450). Click this bar to view original image (1024x768). Click image to open in new window. As I discovered during the research phase, the internal battery is easily removed. Image has been scaled down 42% (600x800). Click this bar to view original image (1024x1365). Click image to open in new window. First I added some adhesive Velcro to the back of the battery holder. Image has been scaled down 42% (600x450). Click this bar to view original image (1024x768). Click image to open in new window. Then I drilled a couple of small holes, one in either side of the bottom half of the iCOMM casing. Image has been scaled down 42% (600x450). Click this bar to view original image (1024x768). Click image to open in new window. Thread the red +, and black - ,wires through the holes of the casing.(From outside through to inside) When you flip the circuit board of the iCOMM over you can solder the wires to the corresponding posts. The outer most post is the positive (+) and the inner post the negative(-). Image has been scaled down 42% (600x450). Click this bar to view original image (1024x768). Click image to open in new window. Flip the circuit board back over and fit back into the case. Please note, you will actually have to fit the circuit board back into the top part of the case as it is the half that has all the plug holes and LED hole. Image has been scaled down 42% (600x450). Click this bar to view original image (1024x768). Click image to open in new window. Place the two halves together, put the screw back in, and add the opposite half of the adhesive Velcro to the end of the iCOMM. Feed the wires in through the holes to keep the excess out of the way. Image has been scaled down 42% (600x450). Click this bar to view original image (1024x768). Click image to open in new window. Tested for success, my iCOMM is again fully operational. Image has been scaled down 42% (600x450). Click this bar to view original image (1024x768). Click image to open in new window. As you can see, the overall size hasn't changed too much. iCOMM 8cm long, iCOMM with external battery adaption, 10cm long. The weight has increased by only 20 grams. Image has been scaled down 42% (600x450). Click this bar to view original image (1024x768). Click image to open in new window. Parts List and cost Battery Holder AA size $1.00 UltraFire Li-ion battery $6.00 (Protected circuit) Digital battery charger $5.00 miscellaneous bits $3.00 Battery holder from Jaycar, all other parts from ebay. Please note: These prices were in Australian $, so would be cheaper again in US$


 1 point
 -
Michael Trunko 12331 EIB Letter Chemi Here you go, Michael, Congrats!! https://www.whitearmor.net/eib/certificates/12331-eib.png1 point
-
Thanks a lot. Glad you like it. Your blaster project is very cool as well. I'm thinking of doing a similar E-11 thing with totally different hardware for another trooper friend. For sure you could use Proffieboard since you're familiar with it. It's way overkill really but would definitely get the job done. The Nano boards are just 8 bit atmega328s. Sent from my SM-A546U using Tapatalk1 point
-
goodness gracious Josh, that bin is a work of insanity! I love it. I could tinker on this thing forever for sure. I also own Megtooth Sith Sabers, so I am familiar with neopixel animations, and open source soundboards to control them, and an OLED. I think you have inspired me to incorporate a proffieboard into my rolling bin! That will be insane!!!!!! PS, check out my Proffie blaster thread here: Proffieboard E-11 Build
 1 point
 -
Good start. Sounds like you're going for something like mine... https://www.whitearmor.net/forum/topic/53853-my-trooper-armor-transport-crate/ Sent from my SM-A546U using Tapatalk1 point
-
Looking forward to seeing the progress1 point
-
Finally, the last photo Action photo: I hope all photos needed are correctly presented and have nothing left but waiting for your answer.1 point
-
I've posted this elsewhere but I figured I'd also drop it here for anyone following this one. I was granted approved for FOTK at Basic level on Nov. 1. Thanks everyone who commented and reacted. I appreciate the support of this great community & forum. It helps a lot! Stay on target. For the First Order!1 point
-
Yes, they were annoying me. Is there a recommended way? My OTTK has an elastic connecting to bicep but it seems like that might not work given the texture of the gasket material. I suppose I could velcro them up like the shins? Thank you! Yeah, my family can't wait to see me again. (I think.)1 point