Leaderboard


Popular Content
Showing content with the highest reputation on 06/25/2023 in Posts
-
Moin and hello, my name is Christian Langen and I am a new approved Stormtrooper ANH Stunt since May the 30th 2023 from Northern Germany, Harsefeld. My Squad is Coastal Hammer (NSQ) German Garrison. Ready for Duty! So excited to meet and greet you all :-) Imperial Greetings Christian
 3 points
 -
A sneak peek at how the CRL will look, Only helmet section complete ATM, but once all taxt is adjusted I'll share that for in house review.3 points
-
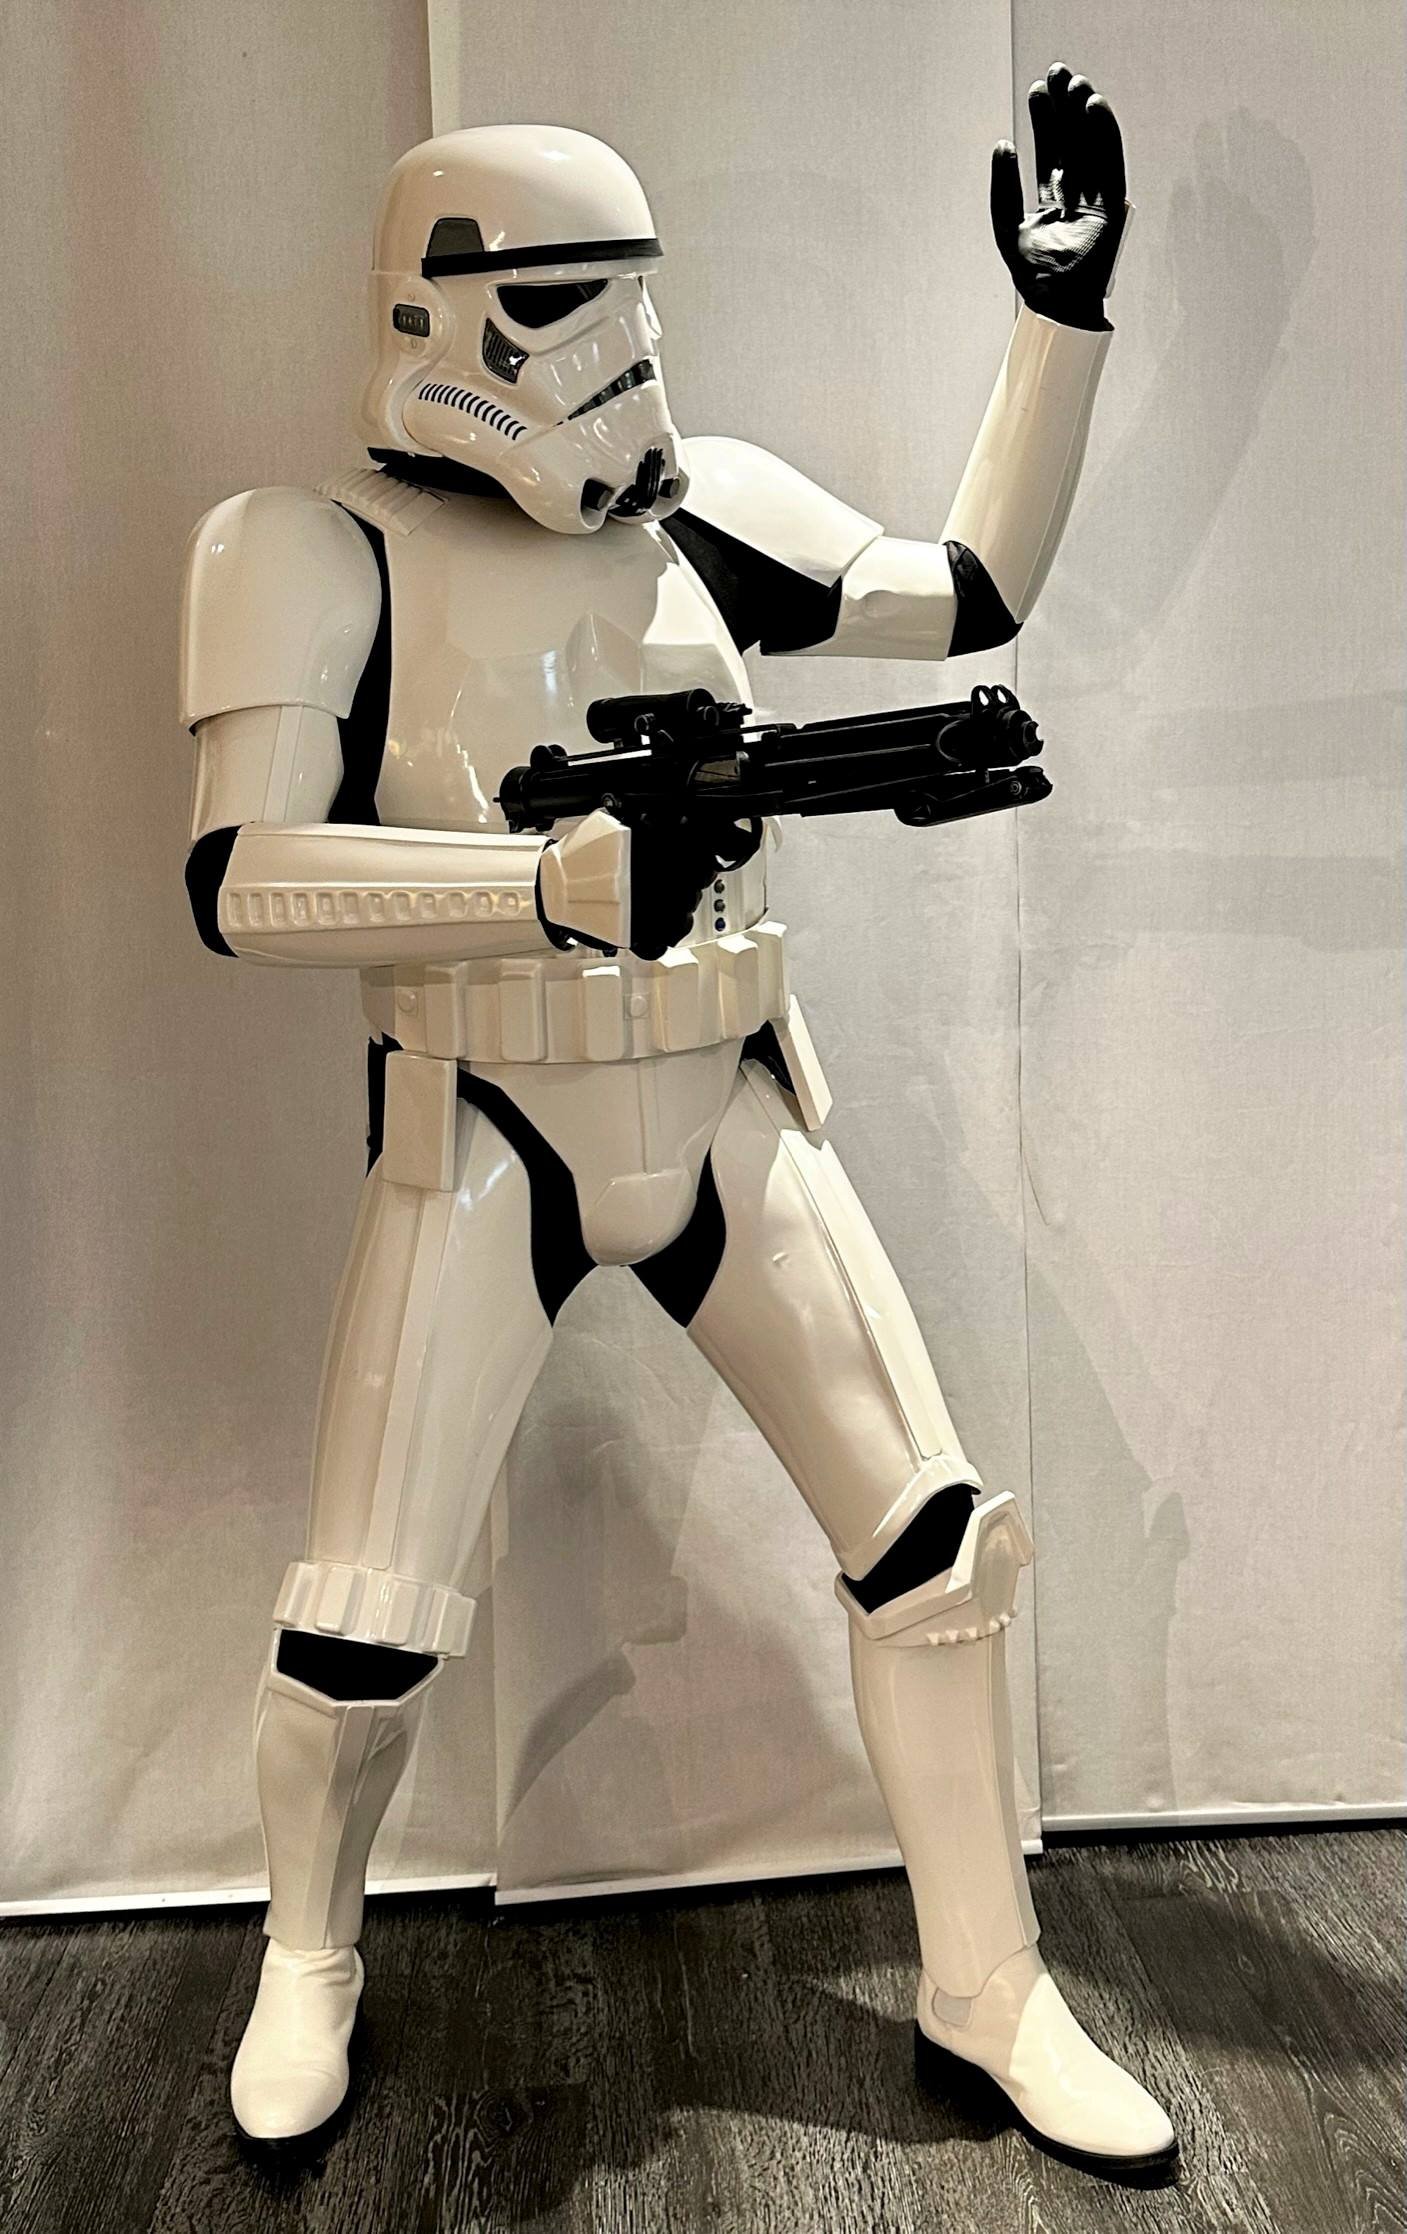
Legion Profile: https://www.501st.com/members/displaymember.php?userID=707&costumeID=126 Trooper Information Name: Justin Philpott FISD Forum Name: evnltr Legion ID: 9921 Garrison: Midwest Garrison Height: 5'9" Weight: 175lb Costume Information Armor Maker: RS Props (ABS) Helmet Maker: RS Props (ABS) Gloves and ESB Hand Guards: RS Props Neck Seal: ImperialSeamstress Soft Belt: RS Props Boots: Imperial Boots Holster: RS Props Electronics: Aker amp / Helmet Fan Kit Blaster: Blaster Factory Armor Photos Thank you for your consideration! Please let me know if you have any questions or need to see any additional details that I haven't provided.2 points
-
Legion Profile: https://www.501st.com/members/displaymember.php?userID=36570&costumeID=124 Trooper Information Name: Alex Miller FISD Forum Name: Alikh Legion ID: 31701 Garrison: Old Line Garrison Height: 5'5" Weight: 165lb Costume Information Armor Maker: AP Helmet Maker: AP Gloves and ESB Hand Guards: AP Neck Seal: Darman Soft Belt: AP Boots: Imperial Boots Holster: AP Electronics: Aker amp / iComm Blaster: kmwilson343 / Wilson Precision 360 Armor Photos2 points
-
@Deployment Officer Team On it! Thanks!!2 points
-
Hi folks. This is Mike from 850 armor works. For the past month or so, we have been working on bringing the new super commando to life. We're at the cusp of full launch now. The few parts that will be vacuum formed, the final molds are in progress now and will be 100% ready within a week. The majority of the suit is being resin printed for maximum detail and ease of finishing. I've been through all the prototype printing and ran all the parts for the first round of production printing. This project started with the helmet. Six different helmet models were purchased and only two made the cut to bother printing. The first was nxt3d then Big Fred's customs. Initially, the nxt3d was great. It was missing a few things to turn it into THE helmet. Big Fred's was next. The initial print was great. Perfect set up. It does seem a bit small. For my production version, I increased the overall scale a small amount then widened it slightly. Either one is probably fine. Pictures of it later. If you want to print all your own, big Fred's customs is the set to use. It's excellent. This initial post is from my phone and a bit of a pain to do. I'd rather do it from a computer. We were able to finish the chest molds late this afternoon and did a quick test assembly. This is with the standard big Fred's helmet. Collecting and organizing parts for the first test run Jetpack...love this thing Helmet comparison. Dark gray modified, light gray standard big Fred's. More pictures later Hopefully this link works for all the pictures uploaded so far. I'll post more when I have time at a computer and as the final build progresses. https://mglover54.imgbb.com/?list=images&sort=date_desc&page=2¶ms_hidden[userid]=1sR95M¶ms_hidden[from]=user&seek=MnqvJ5f1 point
-
Hi Bryan. Considering the size of your armor's kidney plate, we think the best solution is what @TheSwede says well. Keep up the good work!1 point
-
I was able to make some progress yesterday! I had a friend come over to help me with measuring the chest, back, and torso pieces. After trying the pieces and measuring, I went ahead and cut the remaining excess from those pieces. The photo shows the chest piece after the remaining excess has been removed, and you can also see the cut line on the front torso piece. As I anticipated, I am just a bit bigger than the front and back torso pieces allow, so they do not butt up with each other. As such, I cut off as little as I could from those pieces (just cutting off the curve edge from the manufacturing process). I am toying with the idea of creating a spacer to fill the gap to give the appearance of the white armor fully wrapping around my body on each side. I was not surprised by this as this is a crossplay, so I knew some modification may be needed to get the armor to fit my body. However, aside from the modification using the spacers, I am wanting to follow the guidelines for building stormtrooper armor as close as I can, due to how well-tested those guidelines are. I still need to do the sanding and finishing, but I think I will work on the strapping for these pieces before moving on to anything else. At least for the chest, back, and troso, I am going to go with snaps to attach the elastic. Not sure about the rest of the armor yet.1 point
-
Nice trimming and good shape and taper of the thigh to the shin. Great wok Brendan, just remember the outer half of the shin is the side you will mount the rear cover strip to so it overlaps the inner half.1 point
-
In order to prepare for the belt, I first needed to get the abdomen details attached. I sanded and filed the 3D prints. I worked on the back armor cog and bars as well as the thermal detonator holder at the same time. Before sanding and filing them, I was researching ways to reduce print lines. I came across XTC-3D. In the end, I chose to use it not to reduce the print lines (because unless you are painting the print, the lines are still visible through the clear finish), but rather to give the pieces a glossier finish. The original print was a flat white and it stood out against the armor. In the end , the finish is a little glossier than the armor, but I still think it's better than the flat white. A couple of the pieces need a light, second coat to get the finishes consistent. I also painted the blue, gray, and black on the ab details. Once those are dry, I'll attach them to the abdomen.1 point
-
No worries Glen, I hope you get well soon, I was hoping to make it to supanova this time around so I could meet some of the people from the garrison but one of my colleagues put a stop to this by coming into work with a nasty cold, knocked out half my team and me but I am slowly on the mend. Ill hopefully get some pictures in the pre approval section soon, I really want to get this sorted now. Ordered a blaster from sheartech last week and sorted the import and customs paperwork with WA Police, not as hard as I was expecting thankfully.1 point
-
Looks great, Bryan! Since you are headed for Centurion () keep in mind when it comes time to paint the buttons that it should not extend all the way to the bottom of the raised part (note the gaps in the screen used reference).1 point
-
Buttons attached!1 point
-
Wiki Document is created for this CRL, next we need to get the descriptive text down. It is based off the Rogue One CRL so each section doesn't need a full rewrite just modification so we have the colours, shape of markings and weathering to work through. I also have some of the images from Honey Mustard and have started cutting them from the backgrounds. This is time consuming so if anyone is happy to do a draft of the descriptive wording for this, that will be of great assistance and we can get this CRL to the LMO team in a shorter time frame.1 point
-
We already have everything we need, and will be looking at this again in due course. Currently I am building platforms for 4 new to legion costumes, so CRL work is where I am spending my time over the next few months.1 point