Leaderboard


Popular Content
Showing content with the highest reputation on 07/09/2017 in all areas
-
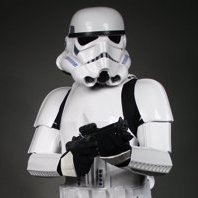
Greetings everybody! Probably it is my first topic on FISD, despite that I approve my stormtrooper in 2013 +)) But after conversation with Daniel during our trooping in Moscow. He asked to give a look on 3D model of stormtrooper armor that I currently work under in my workshop. So there is our current progress with 3d modeling of helmet and armor. After "approved" parts I will do first 3d prints of it and then will think cast of vac forming it. So there is a links on: Helmet ------------------- Armor ------------------ Armor in piece------------------ We use my photos from celebration London, photos from Visual Guide, Hot Toys figure & Anovos manual for @part sepereation@ to create this pieces. Probably we miss something or don't see. And I know that many people don't like look of new armor, but for me it is really like HD version of OT armor. But I will be very grateful for help, view and critique notes Best regards, Andrew TK-250071 point
-
And so it begins.... Received my kit from MTK and it's time to get started!1 point
-
Right click the image in your local Dropbox folder and choose "Copy Dropbox link" and change ?dl=0 to ?raw=1 at the end of the URL. Now it'll embed. Now, how do you replace 100 pictures in a thread quickly on THIS forum? - Click on edit post - Right click image placeholder and choose "Open image in new tab" (This is in Chrome. IE or Firefox may differ) - Go to new tab (this will be Photobucket) and save image from new tab into the local Dropbox folder you want to use - Keep the Dropbox folder open (I recommend viewing files in detail view and ordering by "date created" so the current image is always at the top) - Right click saved image and choose "Copy Dropbox link" - Return to forum post and backspace to delete image in forum post - Click "Insert other media (bottom right) and choose "Insert image from URL" - Paste URL and change ?dl=0 to ?raw=1 at the end of the URL - Repeat This may sound difficult, but once you get into a groove it takes about 10 seconds an image. This saves you from having to download your whole Photobucket en masse, an trying to figure out what images were where. It is also way easier than uploading to a new image hosting service and running through the process of getting the new image URL for each. Feel free to copy and paste this to any forum anywhere . . . I don't mind. Vaya con Dark Side. Danny Steinberg TK 66668 Canadian Garrison1 point
-
I am not the DO, but I'm going to say no. Absolutely not. That's crazy talk.1 point
-
Have you tried using a regular computer, e.g. a desktop or laptop? I know it sounds heretical to you young folk, but it is far easier to work with a full size keyboard/mouse driving double 22" monitors on an actual computer than a phone. Just saying...1 point
-
I've had success using images on my OneDrive too. OneDrive & Dropbox are both excellent.1 point
-
My Hyperfirm is 50 inches (127 cm) long.1 point
-
Shoulder bells adjusted1 point
-
It always feels more like 'armor' when you don't have tape all over it. Good job!1 point
-
Well today I've sort of tidied up the magnetic greave closures, these are the pieces that will go on the inside of each greave, I still have the outside closures to do Anyway glue dried Trimmed the excess glue from the edges and around the magnets Got all the excess glue off and sanded the edges This is how they will be fitted to the greaves, the parts where the magnets are covered by the greave will be dremeled out Cut and sanded the inner cover strips to both greaves Sanded the inside of the greaves 20mm inner cover strips glued and fitted They will be treated to a hot water bath on Monday to get the rear to align properly .... I'm well chuffed with today's progress1 point
-
Ordered some 1x5 flat pieces for the T-Tracks. I think we'll call this done now Thanks for stopping by everyone!1 point
-
Hey Jeff! Congrats on beginning your build! I might have missed it, but who made your armor? Also, I can't see any of your pics. Is it just me? Would love to see them! There are many vertically challenged troopers out there (myself included at 5'4" and 110lbs!), and we can all tell you that sizing down a kit to fit well is possible! Nice thing is that we end up with lots of extra material for ABS paste (always good to have on hand, ask me how I know...). Others are correct about how the armor should feel when it's on. Not too loose, not too tight. If you're smaller in the middle, you can add foam to bulk things up (along the back and kidney are common). You'll see as you fit your armor what looks proportional to your body. Study the screen grabs of troopers to get an idea of how it's all supposed to look. This one is one of my favorites: My thighs were the most challenging to fit because they were so large to begin with. I have about 1/2" of room all around on them, and they don't wobble or rattle too much. As always, be sure to wear your undersuit when sizing your armor! Everything fits much differently with the undersuit on. Looking forward to seeing your build!1 point
-
Looking good Jay. I see there is a bit gap between the the shoulder bells and the shoulder straps. Might wanna tighten those a bit. Good luck.1 point