Mynock Posted September 4, 2012 Report Share Posted September 4, 2012 (edited) With all the projects I have on the go, I decided it's time to do another lol. I decided to sculpt a TK lid. Working on all my molds at the same time to conserve materials such as bondo. Im using photos from starwarshelmets.com for reference, as well as my efx and AP helmets for size reference. Sculpting it from scratch out of plasticine to start, over an old cut up Fett Don Post dome. I will then harden it with bondo or fiberglass and go from there. ----------- Half way through sculpting, I replaced the Don Post dome with a much smaller kitchen dish, to still give it some form, while decreasing the profile of the buck, as later hardening will thicken the mold again. Don't want to end up with an FX sized monster lid --------- Here is the rough plasticine sculpt. ----------- Edited April 11, 2022 by gmrhodes13 link removed no longer working Quote Link to comment Share on other sites More sharing options...
gmrhodes13[Staff] Posted September 4, 2012 Report Share Posted September 4, 2012 Looking good, you could also have started with wire mesh and paper mache for the base form. Good luck with the build Quote Link to comment Share on other sites More sharing options...
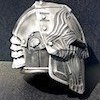
Pickles[TK] Posted September 4, 2012 Report Share Posted September 4, 2012 Very cool Quote Link to comment Share on other sites More sharing options...
Mynock Posted September 4, 2012 Author Report Share Posted September 4, 2012 (edited) First application of bondo And comparative shot of all the molds I'm working on Edited September 4, 2012 by Mynock Quote Link to comment Share on other sites More sharing options...
TK5492[TK] Posted September 4, 2012 Report Share Posted September 4, 2012 Are you an artist???? Quote Link to comment Share on other sites More sharing options...
Mynock Posted September 4, 2012 Author Report Share Posted September 4, 2012 (edited) Are you an artist???? By interest only. Not by trade Edited November 10, 2012 by Mynock Quote Link to comment Share on other sites More sharing options...
Locitus[Admin] Posted September 4, 2012 Report Share Posted September 4, 2012 Don't look too closely at the eFX for anything. There's nothing that is accurate about it. Wishing you the best of luck! Quote Link to comment Share on other sites More sharing options...
Griffin-X[TK] Posted September 4, 2012 Report Share Posted September 4, 2012 Looks really good so far, nice work! Quote Link to comment Share on other sites More sharing options...
Locitus[Admin] Posted September 4, 2012 Report Share Posted September 4, 2012 Also keep in mind that the vocoder is not supposed to be a separate part, so make sure that is in place before you form anything. Quote Link to comment Share on other sites More sharing options...
Mynock Posted September 4, 2012 Author Report Share Posted September 4, 2012 (edited) Also keep in mind that the vocoder is not supposed to be a separate part, so make sure that is in place before you form anything. I've done a pile of research on this over the years, so it will all be accurate I like the idea of idealization such as the eFX lid offers; let's face it, a civilization that built the hyperdrive, lightsaber, and the death star wouldn't build a lopsided, asymmetrical helmet. The troopers in the movie are a cinematic representation of a vision limited only by the production technology, and budget at the time. HOWEVER! I also very much appreciate the craftsmanship and originality of hand made props. Not to mention the satisfaction of sticking true to the original and following in its footsteps. My sculpt will be hand formed and as close to the "imperfect" original as I can make it. In other words, as close to being perfect as I can make it Edited September 4, 2012 by Mynock Quote Link to comment Share on other sites More sharing options...
Locitus[Admin] Posted September 4, 2012 Report Share Posted September 4, 2012 Sounds good. Quote Link to comment Share on other sites More sharing options...
gmrhodes13[Staff] Posted September 4, 2012 Report Share Posted September 4, 2012 (edited) they are looking great, I hate rubbing bondo, used it a lot on cars, you must have no skin left on the tips of your fingers Edited September 4, 2012 by gmrhodes13 Quote Link to comment Share on other sites More sharing options...
Mynock Posted September 5, 2012 Author Report Share Posted September 5, 2012 they are looking great, I hate rubbing bondo, used it a lot on cars, you must have no skin left on the tips of your fingers In truth, I have more bondo on my fingers than skin (or fingernails) at any give time! I tried using spreaders and brushes of all kinds to apply it, but in the end nothing works better than fingers. I sometimes use a bit of acetone to thin out Bondo which makes it easier to apply with a brush, but too much acetone makes it too brittle once it cures, and too little acetone does not really thin it out enough to apply with a brush. So I always just say screw it, and use my hands. The sanding sucks just as hard as applying the wet stuff. I have 3 types of electric sanders and without them I'd be completely lost lol. I love Bondo. I hate Bondo. Quote Link to comment Share on other sites More sharing options...
gmrhodes13[Staff] Posted September 5, 2012 Report Share Posted September 5, 2012 Last time I used rubber gloves, dont get the messy fingers then, even those thin food prep gloves may be useful. I find you can rough sand the bondo just before it goes completely hard, clogs up the sandpaper but I use a wire brush to get it off. Dont know if it's any help to you Quote Link to comment Share on other sites More sharing options...
Dizzydevil105 Posted September 5, 2012 Report Share Posted September 5, 2012 (edited) You are very talented I want to try stuff like this i just don't have time but good job great idea using a bowl Edited September 5, 2012 by Dizzydevil105 Quote Link to comment Share on other sites More sharing options...
Mynock Posted September 6, 2012 Author Report Share Posted September 6, 2012 (edited) Thanks for the kind words! I never thought I'd get into this kind of stuff until one day I was looking at my TK armor and thought "I can totally do this." So I researched what to do and how to start, and here I am, learning as I go! Next steps: Took the plasticine out, and ended up with a rough female mold. Some of the plasticine was hard to remove (in the nooks and crannies) so I used a heat gun to melt it, and then wipe it out with a towel. Next, I mixed 3 milk jug sized containers of plaster of Paris with appropriate amounts of water and poured it inside. This created a positive mold. Allowed about 30 mins for the plaster to sufficiently harden, and peeled off the bondo shell. I decided to do the master positive mold out of plaster instead of bondo because plaster is A LOT easier to shape and significantly cheaper. Bondo sucks to carve and sand, and is also a lot messier. Plaster dries just as quick, sands a lot easier and cleans up with cold water. The plaster mold will remain soft enough to shape by carving with a knife for a day or so; beyond that, it will be too brittle to cut, and require sanding to shape. Once I carve it to the point where it can't be carved further (becomes too dry), I'm going to stick it in the oven on low temp to drive the rest of moisture out so that it does not clog sandpaper. As long as the top inch or two are hard, the inside can take its time drying. Throughout this entire process more plaster can be applied to fix any damage that may arise from shaping, and as long as the damaged areas are small, and the mold is left in the sun, the plaster will dry and fully cure within minutes. Edited September 6, 2012 by Mynock Quote Link to comment Share on other sites More sharing options...
Pickles[TK] Posted September 16, 2012 Report Share Posted September 16, 2012 Love the progress pics Thanks for sharing! Quote Link to comment Share on other sites More sharing options...
Dday[501st] Posted September 16, 2012 Report Share Posted September 16, 2012 Hey, there is a fly on your form! Get him before he lays some eggs and you have a Halloween 3 mask on your hands busting with eggs. Quote Link to comment Share on other sites More sharing options...
Dday[501st] Posted September 16, 2012 Report Share Posted September 16, 2012 But, great progress! Will you be making a mold without a chin, and make the chin as a separate item, or going to add it in later? Quote Link to comment Share on other sites More sharing options...
Mynock Posted September 16, 2012 Author Report Share Posted September 16, 2012 (edited) Man, I put up 4 sticky tape-fly-catcher-murdering-device-things in my garage, and within a few hours, all were black, buzzing with catch. Can't leave the garage door open for more than 3 minutes without getting assaulted by flies and wasps. Soon.... though. Very soon.... it will be -30c, and I will be complaining the other way. No. I'm doing the vocoder way it's supposed to be - all one piece. I'm just going to add to the mold afterwards, probably using different materials. We shall see. Edited September 16, 2012 by Mynock Quote Link to comment Share on other sites More sharing options...
DizzyStormtrooper[501st] Posted September 27, 2012 Report Share Posted September 27, 2012 Man, I put up 4 sticky tape-fly-catcher-murdering-device-things in my garage, and within a few hours, all were black, buzzing with catch. Can't leave the garage door open for more than 3 minutes without getting assaulted by flies and wasps i lol'd! i have that problem with mosquitos. for that i recommend: http://www.harborfreight.com/double-garage-door-screen-68310.html Quote Link to comment Share on other sites More sharing options...

Recommended Posts
Join the conversation
You can post now and register later. If you have an account, sign in now to post with your account.