Mcott65[TK] Posted June 14, 2015 Report Share Posted June 14, 2015 This will be a slow build i am afraid with only getting to do a few hrs now and again wife,work and my two year old permitting. BOX TIME Ok now for a peek inside. Thanks Paul aka Troopermaster looks amazing. Inside of the helmet was masked off and painted black satin auto spray paint then trimmed, that way i did`nt have to worry about overspray through eyes or frown holes. I have only put one coat of paint on vocoda and frown just so i could see how it looked. Any coments or observations please. 2 Quote Link to comment Share on other sites More sharing options...
gazmosis[501st] Posted June 14, 2015 Report Share Posted June 14, 2015 Get ready for pleasure. What a great suit this is to build! 1 Quote Link to comment Share on other sites More sharing options...
johnnyshotfirst Posted June 14, 2015 Report Share Posted June 14, 2015 Can't wait til I reach this day! Anxiously following your build Sent from my KFTHWI using Tapatalk Quote Link to comment Share on other sites More sharing options...
Mcott65[TK] Posted June 30, 2015 Author Report Share Posted June 30, 2015 Managed to get some more work done on my lid. Fitting the ears , first i measured inside the round part 10mm up and marked this off every 20mm or so . Then using a snap blade (stanly knife) trimmed this round to the pencil marks i made. Then started marking off the curved area and trimming still using the knife. Trim, fit, mark, repeat front and back. Once i got to this point the knife was put away and out came the sanding sticks and small metal files to finetune the edge. Inside the ear where the screw goes through to give more suport to the plastic i added a washer held tight to the screwhead with a nut. Quite pleased with how they turned out. Quote Link to comment Share on other sites More sharing options...
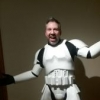
Mcott65[TK] Posted September 9, 2015 Author Report Share Posted September 9, 2015 OK so its been quite a while scince my last up date and i have made quite a bit of progress so first up my lid still not put the tube stripes on yet or the mic tops in but here are some pics of where i am up to. All the grey and black detail added Seven lines in the tears and thirteen in the traps. I found the best way to freehand them was to add the two outside lines first then the center line and fill the others in by adding a dot top and bottom of where i wanted the lines and once happy with how they looked spaceing wise painted down from the top dot to the bottom one . Ok so before i painted, the area was roughed up with a sanding stick i use for modeling think it is 1000 grit. I caught the helmet in a couple of places so wanted to remove the scratches here is what i did. Sorry about the advertising other files are available . This is a polishing stick or they are sometimes called polishing sponges. Used for model aircraft canopy cleanup. First using the rougher side sand the scratches out you are left with a slightly dull area. Then polish up the area and like new. So that is where my lid is up to at the moment. Thermal detonator parts . The inside edge marked up at 18mm this made the outside measurement 20mm. Using the markes on the cutting board to get a level to cut the sides of the control panel to. Yes that looks ok carry on. Grey tube cut to size just under 190mm. Tube marked at both ends just under 18mm then this area was sanded down to take the end caps. Holes marked on the two brackets for the TD. Brackets being bent into shape. Once they were bolted into position i measured 3inces down from the end and using a piece of brass i found in my stash bent them over. Then added a second bend about 1inch from the end. So it ended up like this . Not happy with that i added a second bend. Better. My belt two lengths of 3inch white elastic sewn together at the edges . White canvas folded over and sewn at just over 3inches to form a tube. Canvas turned out and the elastic thredded through. The seem is just off center at the back of the belt so that poppers etc don`t go through it. Finnished off with stiching to the edges. The ends i have left open at the moment untill final fitting. One or two snap plates set up. Rough pencil marks for trimming. First fitting of the arms tight round my hand loose in the wrist. This has been corected some what now by sanding the return edge away compleatly and smoothing the end so minimal skin removal. The elbow end of the forearm thes are just a first trimm so i can finetune when fitting. These are the tools i have used to mark out and trim the main bulk of my return edges. Test fitting parts on my body double. Washing my butt in the kitchen sink All the parts once trimmed and sanded got a rinse in the sink. Ab buttons glued on. Split rivet placement my own measurement looked about right. Han snap placement again this measurement is to match the snap plate on the kidney so may be different to others. Butt snaps first one is 15mm center from the edge. Trimmed up body parts.(Saw ) Holes in the kidney plate matched to the ab plate holes.For split rivets. Should have marked my second snap from the inside not the outside. OOps Han snap. Ok so now first test fit my wife helped she said "yes looks great " DON`T trust her. People with heart conditions or week stomachs please consult your doctor befor viewing the followin images. You have been warned. How she could not see the side was not straight i will never know. That is all for now. Quote Link to comment Share on other sites More sharing options...
Mcott65[TK] Posted September 13, 2015 Author Report Share Posted September 13, 2015 Just for some confirmation do the shoulder straps sit with five bumps stuck to the chest part?<br> Thanks Quote Link to comment Share on other sites More sharing options...
troopermaster Posted September 13, 2015 Report Share Posted September 13, 2015 It's not the law but five is preferred 1 Quote Link to comment Share on other sites More sharing options...
Mcott65[TK] Posted September 13, 2015 Author Report Share Posted September 13, 2015 Thanks Paul hope I am doing justice to your fantastic kit. Quote Link to comment Share on other sites More sharing options...
troopermaster Posted September 13, 2015 Report Share Posted September 13, 2015 You are doing a fantastic job! Keep up the great work 1 Quote Link to comment Share on other sites More sharing options...
Chills[TK] Posted September 18, 2015 Report Share Posted September 18, 2015 Looking good so far, Mark. For fitting, the chest should come up farther, almost to your throat. And the back piece shouldn't overlap the kidney. Quote Link to comment Share on other sites More sharing options...
Mcott65[TK] Posted September 25, 2015 Author Report Share Posted September 25, 2015 Don't worry Chris these pics were taken so i have a rough idea of what it's looking like. I have put the abs shoulder straps on now and that makes it sit right under my chins. Will be posting more photos soon. 1 Quote Link to comment Share on other sites More sharing options...
VulpX[TK] Posted September 25, 2015 Report Share Posted September 25, 2015 Wow, these pictures are really great! Lot's of useful info here! Thanks Mark! 1 Quote Link to comment Share on other sites More sharing options...

Recommended Posts
Join the conversation
You can post now and register later. If you have an account, sign in now to post with your account.