Arienh[501st] Posted June 11, 2015 Report Share Posted June 11, 2015 (edited) Hi all; I am about to embark on a new build. I'm staying on Tatooine, but I'm going from the Denizens (Jawa) to the Empire (TD). The exact build I am going to go for is Captain, Roadblock V2. This is all new to both myself and my husband DarkFather. It will be our first journey into the world of hard armour. I must admit, we are both quite apprehensive about getting started. DarkFather has enlisted some help from a fellow Redback Garrison Member, Baytrooper who will be helping us out this fortnight, when our days off sync up, with our first cuts and showing us his own TD armour, for us to get ideas and visuals of what we are up for. The armour kit we have is a MoldMan Kit which DarkFather purchased for himself, but as he is a, larger build , there is no way it will work for him. So I lucked out and now I get to do a costume I always thought was going to be out of my reach. I'm quite excited about this build. I have signed up here (obviously) and over at MEPD, and will be posting a build thread on both forums. Hopefully between here, other forums, and Baytrooper (and maybe others), we will be able to turn the kit into a Redbacks approvable TD. Things like the weapon and electronics (fans/etc) for the helmet will not be sourced anytime soon. It's all about the hard armour first. Softparts will be looked into at the appropriate time, and hopefully I will be able to make use of another Redbacks member's skills for those items. While I've been at work, DarkFather has sourced the building supplies we didn't previously have. We have bookmarked BIDS' build thread on the Redbacks Forums and plan on using that as a major reference point for the building of non-specific TD parts. Expect LOTS of questions and photo's. Due to my work schedule, DarkFather will be the one posting most of the updates with pics, videos. And we both give our appreciation and thanks for any future help from all of you. So it seems, or so DarkFather says, I should post the obligatory Big Brown Box photo, to 'officially' start my Build Thread, so here goes. Even though we have had the armour since the week before DreamWorld Australia Star Wars Weekend, it has remained in the box wrapped up for the main part. The kit also includes: Plus lengths of Velcro. Edited June 11, 2015 by Arienh Quote Link to comment Share on other sites More sharing options...
DarkFather Posted June 11, 2015 Report Share Posted June 11, 2015 Shopping spree over, for the moment... I went and hit up Bunnings and a couple of other places trying to find everything on the list here. I have purchased 2 tubes of E6000 via Paypal. I also got some Zapagap and accelerator. I checked out the one and only tannery I know of in Bundaberg to get some good quality nickel snaps, they carry the Mac Lace brand. I have 50x 15mm cap x 5mm pole. I looked at the 7mm pole, but it seemed too long. I already have 20x 20mmx3mm REM's ordered from Ebay. Hoping they will be here by the 25th June. I have gone out and bought a sewing machine. Got the one in the pic below from Spotlight for under $200. It'll do me for basic stuff. I also got a leather punch and snap tools, heavy duty needle for the sewing machine and thick thread for doing the snap brackets and straps (see BIDS' build thread). The only thing left that is going to be a problem is the bifurcated/split rivets and speed rivets. I'm sure I'll find them from somewhere eventually. Shopping Spree results: Items I struggled with and just could not get (or was unsure of)... 1) Rivets. 8mm Round Head bifurcated/split rivets. Bunnings had 1 size and brand of these, they were too big. Speed Rivets - No-one at Bunnings had any idea of what I was talking about (either did I to be honest). Do we know these as something different in Australia? Please help? I think that's all I am struggling with at the moment. Any help on the above items would be greatly appreciated. Quote Link to comment Share on other sites More sharing options...
Airborne Trooper[501st] Posted June 11, 2015 Report Share Posted June 11, 2015 Always nice to see more TD builds. Good luck with the build! Quote Link to comment Share on other sites More sharing options...
Khazid[TK] Posted June 11, 2015 Report Share Posted June 11, 2015 Shopping spree over, for the moment... I went and hit up Bunnings and a couple of other places trying to find everything on the list here. I have purchased 2 tubes of E6000 via Paypal. I also got some Zapagap and accelerator. I checked out the one and only tannery I know of in Bundaberg to get some good quality nickel snaps, they carry the Mac Lace brand. I have 50x 15mm cap x 5mm pole. I looked at the 7mm pole, but it seemed too long. I already have 20x 20mmx3mm REM's ordered from Ebay. Hoping they will be here by the 25th June. I have gone out and bought a sewing machine. Got the one in the pic below from Spotlight for under $200. It'll do me for basic stuff. I also got a leather punch and snap tools, heavy duty needle for the sewing machine and thick thread for doing the snap brackets and straps (see BIDS' build thread). The only thing left that is going to be a problem is the bifurcated/split rivets and speed rivets. I'm sure I'll find them from somewhere eventually. Shopping Spree results: Items I struggled with and just could not get (or was unsure of)... 1) Rivets. 8mm Round Head bifurcated/split rivets. Bunnings had 1 size and brand of these, they were too big. Speed Rivets - No-one at Bunnings had any idea of what I was talking about (either did I to be honest). Do we know these as something different in Australia? Please help? I think that's all I am struggling with at the moment. Any help on the above items would be greatly appreciated. Check out the PX here, Echo sells rivet kits that have all you need in a build. If he doesn't ship internationally, send me a PM. I have some extra rivets laying around waiting for my build to start. Good luck! Quote Link to comment Share on other sites More sharing options...
Sly11[Admin] Posted June 12, 2015 Report Share Posted June 12, 2015 I'm excited for you guys. I have your Lanyards and will be sending them up to Hervey Bay with Baytrooper this weekend, pity I didn't have them on Tuesday, cause i was in Bundaberg and could have hand delivered them. Good luck with your build. Quote Link to comment Share on other sites More sharing options...
DarkFather Posted June 12, 2015 Report Share Posted June 12, 2015 I'm excited for you guys. I have your Lanyards and will be sending them up to Hervey Bay with Baytrooper this weekend, pity I didn't have them on Tuesday, cause i was in Bundaberg and could have hand delivered them. Good luck with your build. Sly; Find either myself or Arienh on FB and send us through a request. It'd be great to meet you on one of your visits up this way. ACTUAL PROGRESS PICS AND UPDATE!!!! Not just a shopping list post. Today, Arienh and I played with our new sewing machine (read: replaced the first one - read about fault above, and then went through the instruction DVD). We also had to go out and buy velcro without the adhesive backing (Don't try sewing through this stuff with a cheap sewing machine). Tonight however, after real life stopped interrupting us, we got to work on trying to blatantly copy BIDS' snap plate design. I'm not going to reiterate everything from BIDS' thread here, suffice to say... WOW... What a build and a fountain of knowledge that thread is. I've created a monster by buying this sewing machine. I'm not allowed near it now : With the Nylon/Velcro 'plates' sewed we then punched holes into the 'plates' and used a soldering iron to melt the edges of the holes. Then I tried my hand at making the snaps (for the first time ever). The first one came apart, ROFLOL, but I learnt from that mistake, and started churning them out. Take a pic of the wife with the sewing machine, don't leave the phone laying around as she WILL get revenge: One more thing 'I' learnt while making these snap plates. Do not go overboard on the Zapagap. As you'll see in the next pic, it was a lesson I quickly learnt. The first 4 plates look like they've been snowed on, but the last 8 plates came out great. Hopefully I can get rid of the superglue fogging (artline marker?). I'll work something out, but at least I learnt from it, and if worse comes to worse, they won't be seen anyway once the armour is together. We have more 'plates' to make, a lot more, but we won't go crazy at this time. 12 will be enough to join the back/kidney/butt sections together. So for now, we'll stop. I have to admit though, just doing these plates tonight has been great fun. Quiet house, just Arienh and I working together. It really got the excitement going for this build. If I had even a modicum of bravery, I reckon I might have tried my luck with trimming the back/kidney/butt armour. But I'm still too scared that I will stuff something up. Slow and steady, and wait for Baytrooper to come up and give us guidance. Until the next update. Quote Link to comment Share on other sites More sharing options...
DarkFather Posted June 14, 2015 Report Share Posted June 14, 2015 OK. Here goes... I'm getting everything organised and ready. Time to do the first cuts. I am 99.9% sure I have researched all I can. CRL's have been checked and FISD and MEPD has been gone over 10,000 times (at least). I can't find anything online pertaining to MM armour in particular, so I'm going with what I have been able to research. One fear I do have is that i have two 'same side' forearm armours. I'm trusting that I'm wrong and it's just that I have no idea what I'm looking at. Even if I do, it's too late to do anything about it anyway. Time to cut... Forearms - Pre-trim: I just hope I'm right. Wrist end of forearms have no return edge. Elbow end (I believe) is the same. Quote Link to comment Share on other sites More sharing options...
Sly11[Admin] Posted June 14, 2015 Report Share Posted June 14, 2015 Yes the mould man kit has identical forearms, that is how the guy made them, they will be fine. Sent from my iPad using Tapatalk Quote Link to comment Share on other sites More sharing options...
DarkFather Posted June 15, 2015 Report Share Posted June 15, 2015 OK... we got brave. Not too brave though. First cuts are done. We haven't cut down the side sections yet, as Arienh had to go to work. And cleaning up and sanding still needs to be done. Tomorrow we will have pics of both forearms cut properly and fitted (albeit with painters tape for everyone's perusal, before any gluing is done). Quote Link to comment Share on other sites More sharing options...
Airborne Trooper[501st] Posted June 15, 2015 Report Share Posted June 15, 2015 Just remember try to stick to the original finishing strips in the front as much as possible. Not everyone has scrawny, British, stick arms so use larger in the rear where necessary. Quote Link to comment Share on other sites More sharing options...
DarkFather Posted June 16, 2015 Report Share Posted June 16, 2015 This is going to end up being an extremely pic-heavy thread. Sorry in advance. Looking for thoughts, comments, help... please. We have trimmed the 'shim' areas and painters taped the halves together. We are unsure about the trimming of the ends (size, shape, etc al.) so we thought we'd take some pics of the forearms on Arienh so we could get some feedback. BTW - we have cut the joins of each piece to 8mm as per the FISD tutorial. Also, we are hoping to see Baytrooper soon (week or so) and will probably move a lot slower from here on, until he gets to physically see what we've done. We might trim the biceps and shoulder bells. Anyway, here are the pics. How badly have we done? Have we done damage beyond repair? Wrists. Showing the spacing around Arienh's wrists: Right arm 'outer join': Left arm 'outer join': Right arm 'inner join': Left arm 'inner join': Quote Link to comment Share on other sites More sharing options...
Airborne Trooper[501st] Posted June 16, 2015 Report Share Posted June 16, 2015 Mine originally fit like that. I ended up having to use wider strips on the front and back. You might be able to get away with just wider on the rear but do what's comfortable and works for you. Quote Link to comment Share on other sites More sharing options...
DarkFather Posted June 18, 2015 Report Share Posted June 18, 2015 Hi all; It seems Arienh and I have gotten the trimming bug, big time. We've been having great fun researching, measuring, researching some more, and measuring again, then trimming bits. We've fought with mold lines (and lack there of) and for 99% of what we've done, I think we are doing ok atm. A semi-trimmed suit of armour: We have only trimmed to mold lines so far, working out where return edges should be and shouldn't be and trimming those sections. We ran into a problem with Mel's biceps and thighs, but we have contacted Baytrooper and have received awesome help from him. At this point, until Baytrooper's eyes fall on our work thus far, we are stopping short of cutting the 'butt-edges' and doing the cover strips. Again, fitting issues and we want to play it safe and wait until Baytrooper is here. There was unfortunately 2 errors made in trimming, both on the same Shin Greave - and not on the one that has the knee plate attached (which would hide one of the errors) unfortunately. One return edge has been accidently removed (I think I may be able to fabricate a replacement with a lot of work) and another error where a mold line was followed on one half of the Shin, but not on the other. 1/2 a return edge gone & half the rear 'V' section cut out: Questions: 1) Are we best off cutting out the other half of the 'V' section, or try and fabricate a replacement piece of ABS? Completing the 'V' would be by far the easiest option. 2) Balance the missing return edge on the front of the Shin-top by removing the return edge on the other side, or try to fabricate a return edge? I could fabricate a return edge, I believe, but I am unsure how strong it would be. Please any assistance would be greatly appreciated. Quote Link to comment Share on other sites More sharing options...
DarkFather Posted June 28, 2015 Report Share Posted June 28, 2015 (edited) mispost Edited June 28, 2015 by DarkFather Quote Link to comment Share on other sites More sharing options...
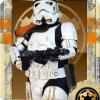
Arienh[501st] Posted June 28, 2015 Author Report Share Posted June 28, 2015 Luckily we received some much needed on site assistance, so we are back on track now. With both DarkFather and I out of commision this week with the flu, DarkFather still has it, we haven't managed to get much done, until today. Since DarkFather's magnets still haven't arrived we decided to get final trimming done to the arm sections, shoulder bells, and body armour sections. With that done, we figured we would have a try at the helmet. I did the line work around the eyes and teeth and DarkFather took control of the cutting out of those areas. After the primary cuts we sanded and filed the areas and basically cleaned them up. DF didn't want me to risk cutting myself: With the eyes and teeth done, we cut down the cap and back of the helmet (MM helmets are 3 parts). We put the brow rubber on and with the use of clamps and painters tape, we roughly built the helmet. Of course, I couldn't resist the urge to try on my new helmet, even without the ears: We have cut out the ears since the pics have been taken, but haven't attached them yet. DarkFather wants to put a nut'n'bolt in the rivet hole "just to hold the face and back together temporarily" so we can test-fit the ears etc. I prefer that we wait until the back and cap are glued together, just in case. Anyway, here is my 'painters tape trooper' where it currently stands: Tomorrow will be leg sections and working out shims for the ab/kidney and thighs Quote Link to comment Share on other sites More sharing options...
DarkFather Posted July 27, 2015 Report Share Posted July 27, 2015 Been a while since this was updated... Wow... What a day. Must've been the weather. It was like Arienh and I had a fire lit under us today. We got (we feel) quite a bit done today. Let's see. Firstly we got ALL cover strips on every piece of arm and leg armour (except the Right Thigh). Cover Strips EVERYWHERE!!!!: Following that all those armour parts had final trimming and sanding done to them, then thoroughly washed with Mineral Turpentine, then washed again with Sugar Soap to remove any possible residue of any sort. See, Arienh does do the work on her armour. Actually (as she should) she does most of it: The bane of the next photo... The Right Thigh. Waiting until tomorrow for yet another layer of filler to dry. Sanding tomorrow, and hopefully some paint, both outer cover strips, and the ammo pouches: We also worked on the bucket as well. Trimmed a little that needed trimming, gap filled where the back and the cap meet (3 part bucket), sanded and cleaned up the eyes and teeth. We also test fitted, and drilled out screw holes for the visor material that was so kindly donated by Cyclops. The look on Arienh's face when she got to test out the bucket with eyes. She was seeing green, and I was envious. I need to trim some more from the visor material tomorrow afternoon (when I get myself some snips) and buy some correct screws/bolts for the ears. Fit them, then trim them down and rebuild the bucket for the final time. After all our work today and tonight we laid the TD 'ghost' out on the table for a photo: Things still to do: Bucket: Paint, fit Visor and Teeth Mesh, fit 2x Fans. Right Thigh: Sand Filler, paint Shim, Outer Cover Strips, Ammo Pouches. Body Armour parts: Pretty much everything. Add buttons to Ab plate, Sand and clean edges on all parts, and add rivets and snaps. Canvas Belt: Add Ammo Pouches, snaps, rivets, cover said snaps. Basically the total kit: Strapping, then finally... Weather it all. We have basically given ourselves until the end of August to get it all done and approval pics posted in. We're hoping to both be trooping in our new costumes @ OzComicCon Sept 19. That's the plan anyways. So 4 more weeks (kinda) of build time. Quote Link to comment Share on other sites More sharing options...
DarkFather Posted July 30, 2015 Report Share Posted July 30, 2015 ARGH!! MY EYES!!!! WHAT HAS BEEN SEEN CANNOT BE UNSEEN!!! A CLEAN SANDY!!! Seriously though. Arienh and I have (we think) finished the trimming and building stages of all the armour pieces. With new (correct headed) bolts in the ears and the visor in place (thank you again to Cyclops for the material), Arienh couldn't help herself. She just had to play dress up. **Warning - no strapping has been done. Everything kind of held in place with hidden painters tape. But the individual parts are BUILT!** Things to do: Pad helmet. Attach vocoders (?) to helmet. Paint Helmet. Glue 'buttons' to front of canvas belt Ammo Packs. Strap and snap everything. Garter belt for thighs. 'stirrups' for Shins (to stop them from constantly turning and raising) Weathering!!!! Please, take a good look at the pics, in all seriousness, and if there is anything wrong (not strapping/fitting wise), please let us know. Thanks in advance 1 Quote Link to comment Share on other sites More sharing options...
Barcode Posted July 30, 2015 Report Share Posted July 30, 2015 Looks awesome! More ladies in TK's! Quote Link to comment Share on other sites More sharing options...
DarkFather Posted August 3, 2015 Report Share Posted August 3, 2015 IT'S A STRAP!!! Last day of Arienh's holiday today, so our building time will be drastically shortened heading in towards our self imposed End of August timeline. So I cracked the whip one more time and we got stuck into making Snap Plates and doing some strapping. Chained to the sewing machine. Knocking out snap plate after snap plate: We managed to get to this milestone, so I took 2 pics. Rear Armour Sections strapped! Internals: Rear Armour Sections strapped! Externals: After these pics were taken, we soldiered on and all we need to 'strap' and snap plate now is 1x Shoulder strap and the crotch/cod sections. Then I will need to go buy more snaps. Apparently 50 just wasn't enough. :banghead: That will then lead into doing the garter belt for the thighs (and required strapping and snaps) and then the arms strapping setup. Once that is all done, it's all about the bucket. THEN!?!?!?! Weathering. Quote Link to comment Share on other sites More sharing options...
DarkFather Posted August 11, 2015 Report Share Posted August 11, 2015 OK... Big post... with just a couple of quick questions at the end... Firstly, some pics I didn't post of our Strapping attempts... Happy to have armour on and fitted, finally!: And the obligatory other angle shot: Once the body armour parts were strapped and we were happy with them, we moved onto the arms. I have to use this chance to say thank you to BIDS. Anyone building anything with white armour really should follow his build thread, it is a phenomenal source of information. Arms and gloves with plates done: And now onto today... We have finished the strapping on all the armour today (well we though we had - see questions after pics). So we thought it a great time to take a couple of quick pics with Arienh wearing EVERYTHING she currently has. Yes, bucket still needs painting (this weeks job) and then the whole lot needs weathering. Oh and if anyone has a DLT-19 laying around that they would be interested in selling, please... let me know. cheers. Please... tear these pics apart. If something looks wrong, let us know (after checking questions at end of post). Usual front on pic with Bucket on, arms at side. If the thighs look low, it is because of 2 reasons. 1) They are up as high as they will physically go before they become a little 'too friendly' with Arienh. 2) The belt they are suspended from sagged (See questions): Arms up Pic: Side on pic: Arms up, side on: Back pic: Action-esque pose (Really need to get her a gun): **THESE ARE NOT APPROVAL PICS** Rather just pics to show our progress so far on Arienh's TD build. Questions/Advice: 1) Thighs. Arienh has deceptively short thighs. We have (since the pics) adjusted the belt that the thighs hang from. Should we add a 2nd thigh strap at the sides to help position the thighs better on her legs (or maybe even a rear/3rd strap)? 2) Thighs. The Thighs seem to angle 'in' at her knees (as if she were bow-legged). Would placement of sticky-backed foam in places aid with this problem, by forcing the armour to sit in the correct position? 3) Right thigh. Ammo pouches. Are they sitting too 'high' at the front of the thigh armour (see side on pics)? 4) Left Shin. Sniper Plate. Have we connected it too low? It seems to like popping under the bottom of the thigh armour. 5) We have padded the Bucket. But Arienh cannot look down once it is on. The bucket hits the chest armour. Is this just a case of 'too bad you have a small head and short neck"? 6) Chest armour. Arienh has 'parts'... that force the chest armour to not sit flat on the Ab section. If I push lightly right in the middle of the bottom of the chest armour, it all sits flat even horizontally. Would it be wrong to place a small bit of velcro between the chest and abs where they overlap to assist in having it all look 'right'? 7) Shins. They both twist on her legs. Even just 1 step causes it to happen which in turns causes problems with the sniper plate, etc. How best to fix this? Snaps on the boot 'tongue' area and inside the shin, or less evasive - Velcro on the front and rear of the boot and inside the shin at the same locations? We're considering doing the Velcro. I think that is all the questions I had about the above pics. I do have 1 question concerning the Bucket and painting. I have looked around and found (on FISD) a pic showing the Humbrol paints that I need for the bucket. The pic was posted back in 2012, and I just want to make sure I am getting the correct, up to date colours (in case anything has changed). The colours are... Humbrol #5 (Admirals Grey), #14 (French Blue), and #21 (Black). All are gloss. Is this correct? Sorry for the stupidly long post everyone, and the plethora of questions. We know this armour won't ever be SWAT/Centurion level... but it doesn't mean we don't want to do a good job with it. So all your help and answers will be greatly appreciated. Quote Link to comment Share on other sites More sharing options...
Kredal[TK] Posted August 11, 2015 Report Share Posted August 11, 2015 Questions/Advice: 1) Thighs. Arienh has deceptively short thighs. We have (since the pics) adjusted the belt that the thighs hang from. Should we add a 2nd thigh strap at the sides to help position the thighs better on her legs (or maybe even a rear/3rd strap)? If the thighs are getting too friendly with her in one area, but still low in the front, I would retrim the offending areas so they can be pulled up more in front. Do that, and the single strap in front should be enough. 2) Thighs. The Thighs seem to angle 'in' at her knees (as if she were bow-legged). Would placement of sticky-backed foam in places aid with this problem, by forcing the armour to sit in the correct position? Trimming and slimming down the knee-end (by taking off the back cover strips, and recutting the back at more of an angle) should solve that. But do the trimming from question 1 first. That may be all she needs. 3) Right thigh. Ammo pouches. Are they sitting too 'high' at the front of the thigh armour (see side on pics)? Ammo belt is fine. 4) Left Shin. Sniper Plate. Have we connected it too low? It seems to like popping under the bottom of the thigh armour. I'm not sure how the TD sniper plate is supposed to be connected, so can't answer for that. When I pulled my thighs up, it solved the problem with my knee plate. (: 5) We have padded the Bucket. But Arienh cannot look down once it is on. The bucket hits the chest armour. Is this just a case of 'too bad you have a small head and short neck"? I can't look down in my bucket either without bending at the waist. I look through the teeth holes to see if there are any small people in front of me. 6) Chest armour. Arienh has 'parts'... that force the chest armour to not sit flat on the Ab section. If I push lightly right in the middle of the bottom of the chest armour, it all sits flat even horizontally. Would it be wrong to place a small bit of velcro between the chest and abs where they overlap to assist in having it all look 'right'? It all looks fine to me. The chest armor is really good at hiding 'parts' Adding velcro to the ab-chest connection will just make the top come away from her neck more, and result in a big gap at the shoulders, most likely. 7) Shins. They both twist on her legs. Even just 1 step causes it to happen which in turns causes problems with the sniper plate, etc. How best to fix this? Snaps on the boot 'tongue' area and inside the shin, or less evasive - Velcro on the front and rear of the boot and inside the shin at the same locations? We're considering doing the Velcro. Velcro on the boot tabs and inside the shins seems to be the fix action for this. I think that is all the questions I had about the above pics. I do have 1 question concerning the Bucket and painting. I have looked around and found (on FISD) a pic showing the Humbrol paints that I need for the bucket. The pic was posted back in 2012, and I just want to make sure I am getting the correct, up to date colours (in case anything has changed). The colours are... Humbrol #5 (Admirals Grey), #14 (French Blue), and #21 (Black). All are gloss. Is this correct? 5, 14, and 21 are right. Sorry for the stupidly long post everyone, and the plethora of questions. We know this armour won't ever be SWAT/Centurion level... but it doesn't mean we don't want to do a good job with it. So all your help and answers will be greatly appreciated. It's looking really good already! Shame you'll be making it all dirty! (: Quote Link to comment Share on other sites More sharing options...
Airborne Trooper[501st] Posted August 11, 2015 Report Share Posted August 11, 2015 I am short at 5'5" so I had to trim the top of my thighs so they don't go inside the ab/cod area. She might benefit from trimming the swooping inner portion of the thighs which would allow her to pull it up a bit higher. Don't know how accurate you guys are aiming for but she also will need the ANH style notches on top of the thighs as well. Last thing is the gap of the kidney to ab plate. Won't hurt acceptance into the 501st I don't believe but for Police Officer deployment on MEPD it will. Look into the different shimming techniques. Had to shim my sides and my thighs with my kit. Quote Link to comment Share on other sites More sharing options...
DarkFather Posted August 14, 2015 Report Share Posted August 14, 2015 I am short at 5'5" so I had to trim the top of my thighs so they don't go inside the ab/cod area. She might benefit from trimming the swooping inner portion of the thighs which would allow her to pull it up a bit higher. Don't know how accurate you guys are aiming for but she also will need the ANH style notches on top of the thighs as well. Last thing is the gap of the kidney to ab plate. Won't hurt acceptance into the 501st I don't believe but for Police Officer deployment on MEPD it will. Look into the different shimming techniques. Had to shim my sides and my thighs with my kit. We have played around with padding inside the thighs and that seems to have helped immensely with the final placement/sitting of the armour parts. Arienh is aiming only for basic 501st approval as the armour is only a B-grade pull of a not very well known (older) armour. The physical abs/mold itself would not lend itself to anything more than basic approval anyway. If nothing else, this has been a great way for us to get introduced to 'armouring' for the 501st, as we can afford to make a few slight mistakes and get away with it with this poor quality pull. A somewhat scattered (more than usual) post this afternoon... Arienh is currently painting away on the bucket like a mad-person. It's fantastic to see. Slight rewind: Ab/Chest and Thigh problems all seem to be solved. Terrible pic to follow, but it shows all the buttons visible on the Ab plate, the gap between Cod and Thighs reduced, and the 'knock knees' look fixed as much as possible (surgery to fix Arienh's legs is out of the question) : Last nights efforts: Bucket had frown penciled in, which showed that a little more cleanup was needed on the teeth, but after expert feedback, we are happy with the pencil'ing in of the frown area: With the frown penciled in, masking was the order of the hour. Arienh got the bucket all masked up and then announced that since the bucket was important - she'd be painting it... (*sadface* - Put in my place...). Let the painting begin!!!! Tube Stripes first to be done: With the stripes done, the masking was removed. A bit of bleeding from what we used as a stencil, but we're hopeful it should clean up ok: This morning I awoke and was told the stripes had been cleaned up. I eagerly rushed to my office to have a look at the bucket before I headed off to get the required brush needed for all the grey areas. I took a Left and Right and Front pic to show the stripes (11 per side BTW): As it is at the time of posting this update - Arienh is currently painting all the grey areas. Then the Vocoder in black and the ear/rank marks in black. Once that is all done, there will (of course) be more pics. Then.... WEATHERING TIME!!!! Quote Link to comment Share on other sites More sharing options...
Airborne Trooper[501st] Posted August 14, 2015 Report Share Posted August 14, 2015 Super exciting stuff! Quote Link to comment Share on other sites More sharing options...
DarkFather Posted August 14, 2015 Report Share Posted August 14, 2015 Super exciting stuff! For Arienh and I (being n00bs) it most definitely is. Final update (for tonight). Arienh had finished painting the bucket, basically. Earlier this afternoon - Bucket painted pre-cleanup: Pics taken just moments ago... Bucket Painted Post-Cleanup but Pre-Outlining - Front: Bucket Painted Post-Cleanup but Pre-Outlining - Right: Bucket Painted Post-Cleanup but Pre-Outlining - Left: Bucket Painted Post-Cleanup but Pre-Outlining - Rear: Tomorrow morning will see the outlining. Then we will take a break for the rest of the weekend. Weathering will start sometime after Monday. 1 Quote Link to comment Share on other sites More sharing options...

Recommended Posts
Join the conversation
You can post now and register later. If you have an account, sign in now to post with your account.