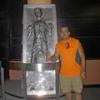
TK-7186[TK] Posted January 12, 2012 Report Posted January 12, 2012 I received my armor from RT-MOD today. Now the fun begins. I need to remember to be patient and to take my time. I will start making some snap plates this weekend. I have also printed out every armor setup I could find on the site so I have many references to refer to. -Gerrit Quote
darksideemt Posted January 12, 2012 Report Posted January 12, 2012 and post lots of pics along the way . Good luck! Quote
xaoslord Posted January 12, 2012 Report Posted January 12, 2012 Congrats! Mine is set to be formed when he returns from vacation. Like Travis said, lots and lots of pics! Quote
Darth Aloha[Admin] Posted January 12, 2012 Report Posted January 12, 2012 R Tizzle to the M-O-Dee! Yes. Lots of photos if you please. Let us know if you need help. Post here or PM me anytime. Aloha, -Eric Quote
TK-7186[TK] Posted January 14, 2012 Author Report Posted January 14, 2012 I shall post many pictures. It would seem I need assistance already. While I cut out the snap plates I thought I would glue the ribbed shoulder strap to the front of the armor. How many ribs should be on the armor? Also, should there be a gap? Should I add a piece of abs to the underneath of the strap to give it a bigger gluing surface to the armor? Quote
TK-7186[TK] Posted January 14, 2012 Author Report Posted January 14, 2012 After further review, yes I am eager for the NFL playoffs, I will be velcroing them instead of glue. I see for ROTJ they need to be affixed front and back. Plus it is easier to remove once I see some member suits up close. My wife got home and she held the back plate on and I held the front. When I place the ribbed shoulder plate, counting the big flat part, I get two on the back and two on the front. So I am no where near the 5 ribs that I read. Yes, I have a wide chest and broad shoulders. In another 30 years when I cannot lift the heavy weights I will be able to adjust towards five Quote
Darth Aloha[Admin] Posted January 14, 2012 Report Posted January 14, 2012 I might suggest leaving the shoulder bridge glueing until the end. That way you can adjust everything so it all lines up first. I glued mines on right away only to realize I put them too far down the chest and they barely reached the back plate. This is the price of being larger than the average trooper. Aloha, -Eric (null) Quote
TK-7186[TK] Posted January 21, 2012 Author Report Posted January 21, 2012 Does everyone break out in a sweat on their first build? I started gluing the snap plates in. Made sure not to use a lot of glue and smeared it on evenly. Figure I would start off slow with a couple of pieces. -Gerrit Quote
Spectre Posted January 22, 2012 Report Posted January 22, 2012 I didn't break out in a sweat, but I was pretty worried when I started! Just take it slow and ask if you're unsure, you'll be right. Quote
Darth Aloha[Admin] Posted January 22, 2012 Report Posted January 22, 2012 Yep. Even tho our RT kit comes trimmed it was an anxious and sweaty first couple days. I turned into a real woody Allen for a while. I see you bought the bag of plastic spring clamps from home depot. I wish I had. The metal spring clamps from work and my magnets were challenging to control. Does that sort of blue tape leave residue on your armor? I ended up going back and buying the cheaper regular blue tape... And nearly used the whole roll from fitting fun. I ask this of most other RT troopers.... I ended up trimming my forearms and biceps... did you? And who's photo is that under your bicep? I'm building a list of such things at the moment. Aloha, -Eric Quote
TK-7186[TK] Posted January 23, 2012 Author Report Posted January 23, 2012 So far the blue tape is working fine. No residue. I made one mistake of accidently overlapping the bicep piece on the blue tap. It is going to take me a little to clean that up. I have more pieces drying now. The picture is just a random one I found in a post. I copied all the build pictures I could fine on the site and put them in a word document to print as reference. -Gerrit Quote
TK-7186[TK] Posted January 26, 2012 Author Report Posted January 26, 2012 More snap plates have been added. Biceps and forearms are togther. I am now ready to start adding the straps to link the chest, back, shoulders and arm pieces together. So far the hardest thing to glue are the thighs. I finally got the front of one done last night. On a postive note my thighs are big enough that I do not need to trim them. -Gerrit Quote
LePaul Posted January 28, 2012 Report Posted January 28, 2012 How did you make your snap plates? I am curious how the back, that gets glued inside, looks. Quote
TK-7186[TK] Posted January 28, 2012 Author Report Posted January 28, 2012 This is my first build so other more experinced builders can chime in. With that said, I cut 1 inch by 1-1\2 inch plates, bigger for double snap plates, and put the snap in the center. I then glued another plate to the back of the other one to cover the back of the snap. I read soemwhere that a reaction could occur between the glue and the metal snap that could melt the armor. I then trim the snap for the area, spread on the glue evenly, put it on the armor and let it sit with a clamp over night. The magnets are the best thing ever and in my opinion essential. Quote
LePaul Posted January 28, 2012 Report Posted January 28, 2012 Using the E6000? Is E6000 all you need to glue everything together? Quote
TK-7186[TK] Posted January 29, 2012 Author Report Posted January 29, 2012 Yes. I am using the E6000 glue. Here are some pics with some strapping done. Quote
NastyNoah[TK] Posted February 5, 2012 Report Posted February 5, 2012 Can you post some more pics of your progress? Quote
TK-7186[TK] Posted February 5, 2012 Author Report Posted February 5, 2012 Sure can. This is where I am currently at. -Gerrit Quote
tkrestonva[TK] Posted February 5, 2012 Report Posted February 5, 2012 Interesting. Are you doing a ROTJ build? Quote
TK-7186[TK] Posted February 6, 2012 Author Report Posted February 6, 2012 Yes. I am attempting to build a ROTJ suit. For my first suit it will be close to ROTJ and I figure I will get more compliant as I go. I have an Ab on order with the correct button orientation and I still have to put the trim around the armor pieces. -Gerrit Quote
TK-7186[TK] Posted February 12, 2012 Author Report Posted February 12, 2012 Getting there. I need to work on the side straps for Ab and Kidney, belt, Ab buttons, trim around the armor and paint the soles of the boots white. Then I can play around with the setting up the sound system and fans inside the helmet. -Gerrit Quote
TK-7186[TK] Posted February 18, 2012 Author Report Posted February 18, 2012 No new pictures, but did my first complete test run with everything strapped in. I need to move the cod piece up higher, which means I need to add additional snap plates to the ab section. The thighs were to loose, you could easily fit a hand between the armor and the thigh. I was able to get the rear seam apart and will have to do the dreaded cutting then reglue the thigh. Quote
TK-7186[TK] Posted February 23, 2012 Author Report Posted February 23, 2012 (edited) Buttons from VaderDave have been installed. To do: I need to attach the legs to the Ab, add the holster to the belt, armor to the gloves, thermal det., and decals on helmet. Then walk around in the full suit and see if it holds together. Edited February 23, 2012 by gofarlow Quote
TK-7186[TK] Posted February 27, 2012 Author Report Posted February 27, 2012 I have a few little things to touch up, but decided to throw on the entire suit. I did not think I would be able to do it, but a few months later and I look like a Stormtrooper. Thank you everyone for the help along the way. I will touch up a few things, and take some better pictures for submission later this week. I am already planning future upgrades and will probably get a lot more ideas once I can start seeing everyone elses suits up close. -Gerrit Quote

Recommended Posts
Join the conversation
You can post now and register later. If you have an account, sign in now to post with your account.