tmcp51d Posted November 11, 2010 Report Posted November 11, 2010 Well it here!! the big brown box of white plastic!?!? This will be my first build but I do have a lot of experience with white plastic as I have many (80 or more) hours into re-building a rubies kit. Also many years with plastic models and R/C so building and painting should go well. I would like to start at the top (lid) but do have questions about the helmet...The mic tips are faucet aerates...is this normal? Should I change them? The helmet is a front, back and top and some of the accents don't seem to be accurate but I should be able to work around them. The frown has decals for it...I should cut it out and paint...Right? Thinking an ANH build for this one but would like to use the lid with the rubies (the armor will pass the test but not the lid) and wanted to keep both...Yes?..No? If anyone has done this kit please speak up as I can really use the help...oh btw it is from Troopersupplies.com TMC Quote
Quebectrooper Posted November 11, 2010 Report Posted November 11, 2010 Hi Tom. You can get accurate mic tips in the sales section. Can you post a photo of the helmet? Quote
Jorran Posted November 11, 2010 Report Posted November 11, 2010 If I may point you to a very excellent AM build thread: Pandatrooper's AM build thread Good luck! Quote
pandatrooper[TK] Posted November 11, 2010 Report Posted November 11, 2010 My suggestion: start with something small like the biceps before tackling the helmet. You'll find that your skills improve once you start with small parts up to the bigger ones. It's one thing to mess up a bicep slightly (no one notices) but if you cut your eye holes too big, it will be too late to fix them and people will notice that something looks wrong. Start small and work your way up! Quote
tmcp51d Posted November 11, 2010 Author Report Posted November 11, 2010 If I may point you to a very excellent AM build thread: Pandatrooper's AM build thread Good luck! I did go through it...great thread TMC Quote
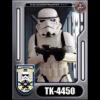
tmcp51d Posted November 11, 2010 Author Report Posted November 11, 2010 (edited) Hi Tom. You can get accurate mic tips in the sales section. Can you post a photo of the helmet? Not the best pic but here it is....sorry I cant seem to make it any larger TMC Edited November 12, 2010 by tmcp51d Quote
tmcp51d Posted November 11, 2010 Author Report Posted November 11, 2010 My suggestion: start with something small like the biceps before tackling the helmet. You'll find that your skills improve once you start with small parts up to the bigger ones. It's one thing to mess up a bicep slightly (no one notices) but if you cut your eye holes too big, it will be too late to fix them and people will notice that something looks wrong. Start small and work your way up! Cutting, sanding and gluing plastic is not to hard for me...with all the mods to the rubies suit I just about built from it from a kit....besides the eyes are already cut out.. Quote
BananoPower22[TK] Posted November 11, 2010 Report Posted November 11, 2010 I did not went through the process of building my armor (got help from a local trooper), but I was there and I saw it wasn't that hard. It's just putting the piece where it should go and cut You could always use the help of a local trooper Quote
pandatrooper[TK] Posted November 12, 2010 Report Posted November 12, 2010 Have you taken a look at these threads / tutorials? Perhaps they will help. http://forum.whitearmor.net/index.php?showtopic=1101 http://forum.whitearmor.net/index.php?showtopic=13069 BTW: that's an FX helmet with a new dome that you have, as AM does not have a "new" AM helmet yet. Quote
tmcp51d Posted November 12, 2010 Author Report Posted November 12, 2010 Have you taken a look at these threads / tutorials? Perhaps they will help. BTW: that's an FX helmet with a new dome that you have, as AM does not have a "new" AM helmet yet. Just found them....Just what I was looking for!!! Thanks So Much, TMC Quote
tmcp51d Posted November 12, 2010 Author Report Posted November 12, 2010 OK was ready to go and buy an assembled helmet but then it started to come together... And next to my Rubies...What a difference!! Quote
tmcp51d Posted November 13, 2010 Author Report Posted November 13, 2010 OK on to the details...Question on the brow piece, the on in the kit is a soft black foam strip that sticks to the helmet. Is this screen accurate or should I change it? How high should it be? The instructions say to have it cover the split between the front and back..is this OK? Thanks, TMC Quote
pandatrooper[TK] Posted November 13, 2010 Report Posted November 13, 2010 The screen accurate brow trim was a strip of rubber trim material in a thin U shape. You can buy some brow trim here: http://members.cox.net/appstronaut/supplies.html Quote
tmcp51d Posted November 16, 2010 Author Report Posted November 16, 2010 Here is the helmet so far, before I go on to the interior I need to order mic tips w/speakers in them as I want to have sound in the helmet... Well on to cutting and sanding the rest...going well so far TMC Quote
TK5707[501st] Posted November 16, 2010 Report Posted November 16, 2010 Looking great my friend! Quote
Hawkeye[501st] Posted November 17, 2010 Report Posted November 17, 2010 Good work mate. Looking good Quote
tmcp51d Posted November 18, 2010 Author Report Posted November 18, 2010 And moving to the shoulder bells and biceps: and the forearm: Love the magnets...Thanks 501st forums! TMC Quote
tmcp51d Posted November 19, 2010 Author Report Posted November 19, 2010 And the assembly of the shoulder bells and biceps: Snaps and elastic straps to hold them together, cloth for the tops...now on to the chest...BTW great info here many helpful assembly tips and as you can see Ive used them alot...thanks. TMC Quote
tmcp51d Posted November 24, 2010 Author Report Posted November 24, 2010 Seeing as things are going well I am moving this to "Armor Builds" And if someone can move the whole thread please do... Thanks TMC Quote
tmcp51d Posted November 24, 2010 Author Report Posted November 24, 2010 The start of the Chest and Back... Quote
pandatrooper[TK] Posted November 24, 2010 Report Posted November 24, 2010 I have merged your 2 threads and added your latest post here. Quote
tmcp51d Posted November 24, 2010 Author Report Posted November 24, 2010 I have merged your 2 threads and added your latest post here. Your the BEST!! Thanks Quote
pandatrooper[TK] Posted November 24, 2010 Report Posted November 24, 2010 And the assembly of the shoulder bells and biceps: Snaps and elastic straps to hold them together, cloth for the tops...now on to the chest...BTW great info here many helpful assembly tips and as you can see Ive used them alot...thanks. TMC BTW: you can use a heat gun to resize the shoulder bells if you want them a little more accurately sized. The AM ones are very wide. Just heat on either side of the outer seam, and squeeze the bell together. It helps quite a bit. Quote
tmcp51d Posted November 24, 2010 Author Report Posted November 24, 2010 The Shins and Thighs...E6000 and rare earth magnets. Seeing that I am a thin guy, 136lb wet it took alot of heat and trimming to fit me. TMC Quote
tmcp51d Posted November 24, 2010 Author Report Posted November 24, 2010 Here is how I attached the thighs. A back support belt with elastic straps snapped to the belt and velcroed to the armor TMC Quote

Recommended Posts
Join the conversation
You can post now and register later. If you have an account, sign in now to post with your account.