

kwdesigns
-
Posts
461 -
Joined
-
Last visited
Content Type
Profiles
Forums
Gallery
Articles
Everything posted by kwdesigns
-
Off White is a color. Meaning slightly havening a beige hue or tint. Like an egg from a chicken. All white colors have either a beige, yellow, blue or even pink hue or tint to it. The white styrene has a blue tint to it. So when you compare the outside of my painted armor to the inside you can see a slight difference. You need to understand something about me. I am VERY high detail orientated. Most people won't or don't notice the difference in color. so it not a big deal at all. If you use the same paint for all your parts and helmet you will be fine. It is the regular Krylon Gloss White spray paint can. Not the Kyrlon Fusion stuff.
-
I used Krylon white primer (not a lot of it) Just one thin coat. The white primer is not the best primer if you use too much of it. I used the Krylon glossy white to paint it. The Krylon gloss white is slightly off white. But I don't think the original armor was a bright white. After I spayed it, I let it sit in the sun for a few hours. Then I brought in all the parts into the garage to cool down for the night. The next day I took them all out in the hot sun. This is a great baking process to help the paint cure better. After it sits for a few days, I will buff it all out with Novis Polish. This will help it get a slight wax coating and make it shine. Kevin W.
-
OK so I got a lot of work done on this early this week then got sick yesterday. After all the basic parts were assembled, with snaps and straps attached, I used this tub to wet sand all the parts. I used a 320grit sanding sponge then 600 grit sand paper. Then I let all the parts sit out to dry in the sun. After the parts were dry and ready for paint I cut some strips of cardboad and placed under the elastic so to keep from getting white paint on them through the splits. And heres are the parts getting painted. All the straps are made and I thought I would be finished this weekend but I just found out a part I didn't have won't get here in time for an event this Saturday. So the rush to get it done is kind of over. But I will finish it as soon as the part comes in and when I get feeling a bit better. Kevin W.
-
I think I found the right Jean Rivets at Jo-Ann's. The tool and the box of 24 rivets runs about $8.00 each. These are the rivets that are used to attach the left side of the Ab and Kidney together using 3 on each side and one at the bottom of the Cod to hold the strap that connects to the butt with 2 different snaps. Here is a close up... I remember seeing this picture posted of the side rivets looking a little different. They did not have the smooth cap look. I think The cap came off and the brass flower texture side was all the was left holding the armor together. I also found these at Merritt's ACE Hardware for about $3.00 I am going to try to bend them to become the Brackets to hold the Thermal Detonator. Thanks Kevin W.
-
Thanks for pointing out the misspelled word. Fist = First. I corrected it on my first post for you. I noticed yours too... It would "bwe" nice to know if they fit the ATA drop boxes. I could really use these.... Anyways fun time is over and Yes I believe they will fit.
-
Most of my current armor build is a CAP and I am using some of ATA parts. These Drop boxes are from CAP. I did not get drop boxes from ATA because it will be a TD suit. I have a buddy that has a set of AP I will try to get with him to see if these inner drop boxes will fit or I I need to make for the AP kit also. Because I know my buddy will want a set too.
-
I have another Question... I will be using a canvas belt and I know the vac-form belt can be snapped to the canvas belt but... Is a snap used to hold the assembled belt to the Ab plate or something? What keeps it from falling down?
-
My ANH TK Stunt build WIP thread is HERE. That's great that other prop-makes are, or will be, including the inner drop boxes with their kits. They are a part of the armor. I wasn't planning on offering them but if someone needs them I can try to help out. Thanks Kevin W.
-
Thanks everyone for looking an giving me the worm welcome. I am multi tasking big time right now. I just finished vac-forming the first summer run of my Animated Clone armor yesterday. I have a few small parts to cast but while I was doing that I also got some more work done on this TK build. I am not that familiar with the 7 minute epoxy stuff but I have heard good things about it. So I am giving this a try. I normally use CA Zap-A-Gap with my Clone builds. I have also heard good things about E6000. I think I am going to use that in other areas. I taped off the inside seam to keep the glue from running in. I used a 1inch foam brush to apply to the outside with blue painters tape to try to keep the edges clean from execs glue. I taped the strips down while waiting for the glue to cure. After the outside glue with the attached strip cured, I also coated the inside of the seams with the 7 minute epoxy to add strength the the seam. I did this to all the parts. But while I was adding the glue I switched to a disposable brush and cut the length of the bristles off with scissors. And that made it much easier to apply the glue. I had a little bit of the glue come out the sides and I used a dremel to grind the glue away then sanded it a bit. I also glued the Ab button box and button strips to the Ab section. I hope it looks right. I'll work on this more next week. I need to finish the small clone parts first. Question... What type of rivets are used to attach the left side of the Ab and Kidney? I know there are 3 on the one side but the look sort of dome shape on the outside. They don't have a rivet hole. Also the appears to be another type of button on the right side near the top. What type is that? Thanks Kevin W.
-
To early to tell. This is my first time working with Styrene. It trims fine, sands fine and seams to go together well. I'll know more when I try it all on.
-
Honestly... I am only working on this TK build while I am Vac-forming or casting the Clone parts. After I pull a sheet and trim out the parts, I get about a 3-4 minute window to work on this TK. So that allows me to either sand something or trim an edge or primer a part.
-
Well Like the topic says... What are the correct colors for the aerators for the different helmets? Inside color? Outside color? and color or Screen? ANH Hero?... I have seen all black inside and out. I think they were on a Hero helmet. If this is correct, was it a flat black or gloss? ANH Stunt?... I have seen what looks like silver on the inside of the aerator (behind the screen) and the outside black. Again is that correct and is the outside a flat black or a gloss. I have also seen white on the inside and black on the outside. Can someone who knows this set the records straight for everyone? Pictures would be helpful too. Thanks Kevin W.
-
Well it been about 6 years sense I built a TK and that was an FX. I've had a set of CAP that has been in a box for over a year now. I just also ordered a set of ATA as a back up or future TD. My plan is to build a EIB quality TK Stunt suit in about 3 weeks. I willing to work long hours to get this done. (in-between all the other stuff I am also doing) LOL Well I started about 3 days ago... and I have been on this forum giving myself a crash course on what to do and how to do it. This place is awesome! Here is what it looked like 3 days ago... Well I have trimmed all the edges and sanded all the the parts. I decided to primer them before assembling them. I didn't worry about taping off the areas that will be glued because that area needs to be sanded before glue gets applied. I was just a bit careful not to coat those area with the primer. I also order some canvas belts form Mark. Thanks Mark! I started on the helmet last summer and well it has looked like this sense then. I don't think I have too much more to go on it. I got the Great Decals from TK4510!!! The helmet bring up a question about the aerators. I'll ask that in the right section of the forum. HERE I also made the inner pieces to the Drop Boxes yesterday. You can see them Here. We I worked on taping the legs together last night and started gluing them together today. More to come soon... Thanks Kevin W.
-
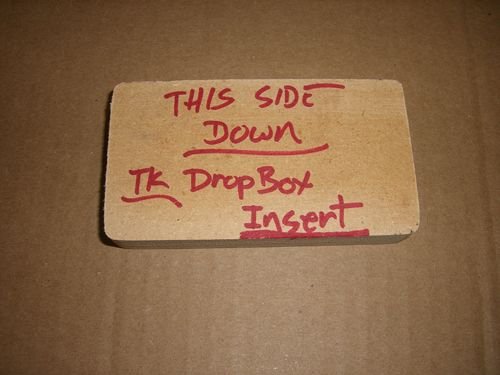
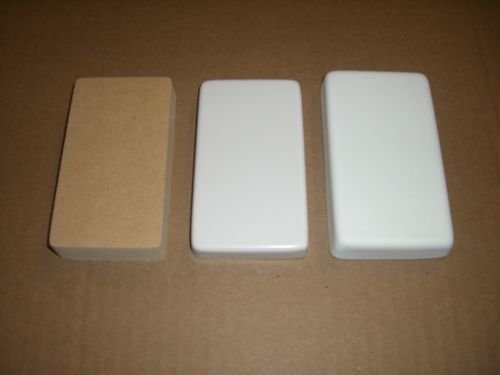
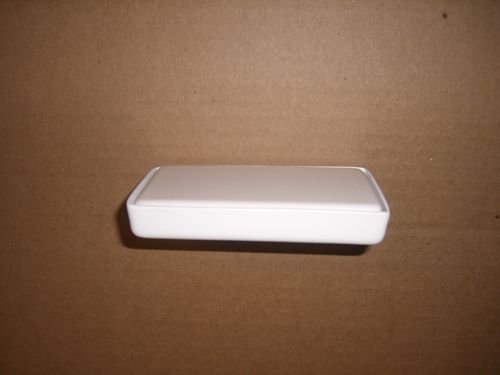
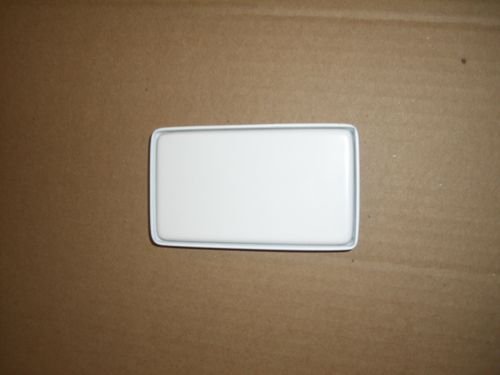
Well I am in the process of building a TK set and saw in some screen shots of an ANH trooper with 2 parts to each drop box. So I made the master yesterday in about 20 minuets. Master... Master and First Pull... Master, Inner Drop Box and Outer Drop Box... Here is is just sitting inside. It is not glued in yet, I ned to rivet the white attachment strap first. Thanks for looking let me know what you think. Kevin W.

-
Thanks Jim for the comparison. I only have my ANH v2.5 available right now. The V2.0 is no longer available. Thanks Kevin W.
-
Good video tutorial Andy. I would suggest using an old rag instead of cotton-balls. I would use a wider brush in the larger areas and use the thinner bush for the edges. Question: Did you need to buff them afterwards? and if so what did you use?
-
I'm planning on attending only on Saturday. I will do my best to make it to the 501st 8am photo shoot on the back stairs. At least thats when and were it was last year. I think it's the same place and time this year.
-
The material is Rigid Urethane and it is best to let it sit out before covering it with paint. Also this material is very strong! Don't worry about the slightly thin spots where sharp edges are. Like where the ears meet the sides. It will be fine. I hold all the helmets up to the light to be sure before I send them out. Thanks for starting your work in progress on this. Kevin W.
-

Oversized accurate helmet
kwdesigns replied to SuperTrooper's topic in Hard Armor (General Discussion)
I don't mean to take this off topic but here is the thread I started about my ANH V2.5 (no 3 yet)LOL ANH V2.5 Thread I was wondering why I was getting so many emails about my helmet lately. Well I will be doing a small run next week. If you want one let me know ASAP so I can get one made for you. PM's or emails are fine. -
Request for Screen Grabs n Visual Refs
kwdesigns replied to Daetrin's topic in Stormtrooper Commander
It's like a cross between Clone armor and Stomtrooper armor. -
Hey Paul Titanium PP sent for all the hard work you have done for us. Thanks for keeping the site going.
-
Tell her it will be your early Christmas gift. And if she wants one you can get one for her too and save money.
-
I'm working on that! LOL
-
Wow thank you everyone for your nice comments. That picture in the first post is a picture of me wearing the Short Kit. I am 5'10" 170lbs. The Short Kit will fit someone 5'8" -5'10". I also have a Tall Kit that fit someone 5'11' up to 6'4". There is no way clone armor is a one size fits all. That is why I had to sculpt 2 different size kits to achieve the most screen accurate look for various sized people. Thank you for reading... Oh Ya, I do have some kits available right now. Kevin W.
-
Thank you Bill. So the white 3/4 inch elastic strap just wraps around the Canvas belt. Right? Or is something used to keep it from sliding side to side? BTW Your armor looks great Bill. Nice detail.