

Tilheyra
-
Posts
462 -
Joined
-
Last visited
-
Days Won
10
Content Type
Profiles
Forums
Gallery
Articles
Everything posted by Tilheyra
-
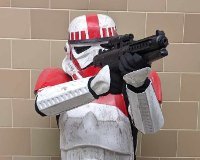
Welcome! What stormtrooper are you thinking of building? Here's a list of the different stormtroopers: https://databank.501st.com/databank/Costuming:FISD_CRL
-

Legacy Fem, Version A Build
Tilheyra replied to Tilheyra's topic in Legacy Stormtrooper Build Threads
Work and life have been much busier than I anticipated, so I haven't been able to make much progress on my Legacy, despite my goal of having most of the armor complete by a major convention the last weekend of April. I made the best of the situation and made the little progress I could and accepted that I would use the con to test out as much of the armor as I could. As this armor requires many alterations for me, I do not want to rush anything and make mistakes! I was able to wear most of the armor to Indy PopCon on Saturday (April 27th), and even though I had an incomplete set of armor, I amazed and impressed my fellow members of Star Wars Indiana! I was pleasantly surprised myself as I pulled it off better than I had anticipated! Here are a few photos! As my helmet is not complete, I went with a wig and some makeup to complete the look! And we were able to get a photo with Xavier Jimenez (Tusken Chieftain from The Mandalorian)! As can be seen in the photos, major things to complete are the lower leg armor, the helmet, and the belt boxes. I also wore different boots than what would be approvable (I didn't want to worry about such a tall heel during this con). Many, many more details need to be completed as well. I need to add shims and apply ABS paste to the sides of the thighs, the forearms, and parts of the top strap of the chest armor. My biceps and shoulder bells need to overlap a bit more, so adjusting those straps will be necessary. There is a tiny bit of a visible gap between the top of the abdominal plate and the bottom of the chest plate, so more strapping needs to be secured (I had previously put 3 straps on the interior of this area, but only secured 2 of the straps as I wondered if that would be enough. Well...looks like all 3 need to be secured when I wear this). Also, as there is a visible gap between the abdominal and kidney plate I will want to extend those edges to close that gap. Fortunately, I knew most of these issues before doing the test at the con, so few of these corrections to make were unanticipated. Work continues! -
Here's what I use and really like: https://www.michaels.com/product/dritz-heavy-duty-snap-pliers-10664599?michaelsStore=9601&inv=4 I buy these snaps: https://www.michaels.com/product/silver-heavy-duty-snaps-by-loops-threads-10354209?michaelsStore=9601&inv=3 As you know, there are many other snap pliers and snaps out there that work really well as well. What it tends to come down to is what you can find of the right quality and price for you based on what you are able to access.
-
Welcome! Happy to see a new Valkyrie in the ranks! You may be interested in our Vader's Valkyries section of the forum (in addition to many other areas): https://www.whitearmor.net/forum/forum/255-vaders-valkyries-armor-open-discussion/ Also, if you haven't yet started a troop log, I highly recommend doing so! That way you can show the awesome photos and adventures you go on as you troop!
-
It's a cautionary tale of recognizing that, although we know our blasters are not real guns, that may not be clear to the general public. All cosplayers/costumers need to be mindful of this concern.
-
SublimeBW's Armor Master's (AM) ANH Stunt Kit - Build Thread
Tilheyra replied to SublimeBW's topic in ANH Build Threads
Sometimes one never knows the issues and ideas that will pop up until one gets out there and troops. In my few troops so far, I have found people to be very understanding when I ask them to repeat something because I couldn't hear. After all, they can easily imagine not being able to hear if they were wearing the same helmet! For me, I have found the bigger problem is that I do not have a voice amp, which is something I am working to add before too long. My helmet fans are near my mouth, so the microphones I have tried mostly pick up the fan noise. I'll find a solution at some point. -
TK ANH Stunt by CloseTheBlastDoor
Tilheyra replied to CloseTheBlastDoor's topic in ANH Build Threads
I'll second Glen's recommendation of elastic to allow for some movement. In reference to the discussion a few posts up, I also recommend at least having the forearms be able to separate from the rest of the arm armor. Even though I only have 5 troops under my belt, being able to remove my forearm armor has come in handy a number of times. This is usually when I've had to eat but didn't want to take off all my armor. It's surprising how much mobility just taking off the forearm armor will provide you! -
TK ANH Stunt by CloseTheBlastDoor
Tilheyra replied to CloseTheBlastDoor's topic in ANH Build Threads
As Glen mentioned, lifting the cover strip as you go from one to another should be enough to get it free. If you can't get it started, use an Xacto knife to cut jut enough glue to allow for leverage when lifting. Just be careful to not scratch the surface of visible areas. This is the reason E6000 glue is recommended for a build. You can disassemble the pieces much more easily than with other glues, yet it holds really well under the pressures of trooping! -
I'm so happy / TK-11454 reporting for duty
Tilheyra replied to dblcross's topic in Newly Approved Members - Sound Off!
I was talking with my family the other day about how happy I am to be part of the Legion. It is wonderful that we can all be part of something that transcends our backgrounds, cultures, and generations! Few organizations are like this, and I am happy to be part of such an amazing group and community! -
Congratulations and welcome!!! Awesome that you have already attended your first troop! If you haven't already, I highly recommend making a troop log to show off your awesome trooping photos and tell us about the fun adventures you are having! Here's more information:
-
This is fantastic! Thank you!!! A good lesson for me in checking with the original source! I'll update relevant parts of my posts above to clarify this information! I'm working on the Legacy kit now and I am very happy with it! The extra ABS you included with my kit has come in handy as I have needed to add extra material. I'm really excited to see it through to completion!
-
Potential Recruit - Dune Sea Garrison
Tilheyra replied to jefoid's topic in New Member Introductions
Welcome! It's great you were able to connect with local members! The Dune Sea's commander is an awesome person! Although I myself have not built to Centurion, it is best to be attentive to that goal throughout your build. Many people who regularly post here have built to the Centurion level (as well as at least a couple folks in the Dune Sea Garrison), so asking about those requirements as you build is a great way to get feedback and make sure you can achieve Centurion! Once you purchased your armor kit, I highly recommend creating a build thread to post your progress updates and any questions you have as you work! -
Donated!
-
Any modifications like this should be run by your GML to determine if it will be approvable at the basic level. However, the CRL does note that it needs to be one piece, so although I cannot predict what your GML may say, that is pretty restrictive language in the CRL. One possibility is that you could increase the overall circumference to make it easier to put on and take off. The CRL notes where side shims may be added to increase the circumference but still conform with the requirements for basic approval.
-
Unlike a hard hat, your bucket has a face shield! It offers even more protection! A bucket should be standard PPE.
-
Imperial Super Commando Build WIP
Tilheyra replied to Whicko76's topic in Imperial Commando Build Threads
Great work with the paint job! -
Some costumes have required action figures be used as a reference. However, that is typically when there are no little to no screen references to work from. It is fortunate that there are screen references for Captain Enoch and Night Troopers. That doesn't take away from the coolness of this set, however, which is really cool!
-
The requests are checked as frequently as able. Given the volunteer nature of FISD, it may take a bit if life gets busy. A.J. will be here as soon as he is able.
-
Legacy Fem, Version A Build
Tilheyra replied to Tilheyra's topic in Legacy Stormtrooper Build Threads
It worked!!! It took multiple attempts and I got glue in a lot of places, but the forearm is generally put together and I can fit my hand and arm through without cutting off circulation!!! After letting the glue dry for 48 hours I removed the clamps and magnets. I was a little concerned about how well I overlapped the cover strip with the edges of the forearms, but it appears I decently centered the cover strip across the gap! The wrist area is wide enough to accommodate not only my wrist, but also allow me to tuck in the edges of my gloves! I will need to do some cleanup work to remove the glue that ended up getting all over the cover strip and the edges. Removing the glue will then allow me to properly add the ABS shims to fill the current channel in the forearm armor. Some trimming is also needed for the return edges near my elbow. The outer side looks as it should! As I finally found a good way to construct the forearms I will construct the other forearm piece in the same way! It feels great to be making progress again! -
TK ANH Stunt by CloseTheBlastDoor
Tilheyra replied to CloseTheBlastDoor's topic in ANH Build Threads
This is the same issue I had with my kit. As Glen indicated, I think this results from the way the kit is made. This is one of those situations where it would be good to check with your GML to see what guidance they can provide. I had to try twice to get my sniper knee into the right position. Also, I still have about 1 or 2 mm of a gap between the front cover strip and the sniper knee itself. This wasn't an issue for me as it is on the underside of the sniper knee where it really isn't seen. -
TK ANH Stunt by CloseTheBlastDoor
Tilheyra replied to CloseTheBlastDoor's topic in ANH Build Threads
Here ya go! That specific photo shows an error I had to correct. As you show in your dashed lines, the ridge in the sniper knee needs to line up more closely with the ridge that you've indicated with the red dash line. I had to cut the glue and move that corner of the sniper knee up a little higher. I was not able to close the gap entirely, but I did get it up a few milimeters, and that was enough to get my armor approved at the basic level. I also cut away more material from the sniper knee plate itself. Here is what my sniper knee looks like now: In terms of your questions, that downward taper (I'm assuming you are talking about the downward curve I cut) was cut in my best effort to match the look of the sniper knee in the reference photos. The reference photos also show the rearmost edge of the sniper knee aligning with the corner of the ridge on the lower leg armor itself. I do, however, see some variation by a few milimeters in the reference photos. I cut the return edge away in that location. Getting rid of the return edge helped me fit the sniper knee to the lower leg armor. Also, I'm glad my build thread was helpful! -
Legacy Fem, Version A Build
Tilheyra replied to Tilheyra's topic in Legacy Stormtrooper Build Threads
Progress!!! I finally figured out a way to glue the wide cover strip to the inside of the forearms! As noted a few posts up, I decided to use wide interior cover strips to increase the circumference of the forearm armor, as well as decided to glue the cover strip to one side of the joint before gluing the other side. I then figured I could finagle things to where the other side of the cover strip would be able to be glued in prim and proper fashion. Welp...the cover strip and the other side of the joint would not line up properly in terms of their angles, so I had to think things through further. Shaping is key in this issue, but I figured it would be easier to shape this cover strip if it were not attached to anything. I decided to cut the glue on one side of the cover strip to free it from the forearm armor. I then put on (the stove) a pot of boiling water and dropped the cover strip in the boiling water for 90 seconds. After fishing the cover strip out of the boiling water, I then put a small curve into the cover strip along the center of its length. This photo gives an idea: Now I had a cover strip with a slight curve, but needed to now glue it to both sides of the joint, all while accounting for the increased circumference that I want in the forearm piece... Spacers!!! I can cut spacers with a width according to the increased circumference (I remeasured and got 2cm)! But how do I keep the spacers in place to do their job? The forearm pieces are rigid enough that I only need a spacer on each end of the cover strip, and I can use the clamps to keep the edges of the spacers aligned with the edges of the forearm armor! Having the claps clamped on the spacer joints will keep everything in line! Here's what that looks like now that I have everything glued (I got a little glue on the spacer, so I'll have to cut that when I remove the spacer): Getting it all glued was a challenge, and the photo below shows that I got glue in many areas I did not want, but I'm not going to mess with it further for fear I could undo all of my work. Only one forearm is being glued right now. I'll glue the other one when I see the results of this forearm: -
Here you go! Make sure to include a link to your troop log in your post.
-
And you can't unsee it! No film will ever be the same as you will now look for all the details, errors, and any variation between different stormtroopers! It's exciting! My favorite error is in ESB when a stormtrooper has one of their bicep pieces rotated 180 degrees from its proper position.
