

Suspend
-
Posts
157 -
Joined
-
Last visited
-
Days Won
2
Content Type
Profiles
Forums
Gallery
Articles
Everything posted by Suspend
-
So, fighting off the incredible urge to start with the helmet......I'm starting with the biceps......and I've already got a question....but it's somewhat theoretical.... So here's the AP (untrimmed) bicep: You can see the molded in trim lines fairly well so cutting shouldn't be a big issue. It looks like their trim lines would leave enough plastic for a 40mm cover strip. :-) Not going to need that. I'm tall but I've got the arms of a teenage computer nerd. I started off standing with sandpaper.....then moved to a sanding drum on a dremel....and finally went for the big guns..... This worked the best but you have to be really careful about what you are doing. Here's where it gets a bit interesting. I fit the biceps to my arm and it looks like I'll be fine with the standard 15mm cover strips. So I did a "rough" trim for the 15mm.... And ya know what? It's still a little big. I'll probably just end up leaving it but here comes my theoretical question: what if I did want to trim off more? What's the procedure? The reason I ask is because the AP kit has this little "raised ridge" that the cover strip gets glued on to. It has this ridge on both halves. If I trim off more, the cover strip will be hanging off what's left of those raised ridges. That doesn't seem right. Mark
-
OK.......lets start this..... I'll update my parts list as I go: (placeholder post) Name : Suspend Height : 6" 1" (185 cm) Weight : 195 lbs (88.5 kg) Armor : Authentic Props Boots : Imperial Boots Hand Guards : JustJoseph63 TD Clips : Ukswrath Holster : Darman Props Neck Seal : Darman Props (but I might still change as I'm not overly happy with the bib closing in the back) Dark Green Lens / S-Trim / Rubber Gloves : TrooperBay Nomex/Leather Flight Gloves : EBay E-11 Blaster : Doopydoo's with T-Jay's Completion Kit + Suitcase Props Parts Undersuit : Currently, Pathfinder/Kodiak Thermal Underwear from Walmart That's my parts for now. I'm holding off on the belt and helmet electronics until later. Mark
-

Suspend's Doopydoo's E11 (with T-Jay's Kit + Suitcase Props) Build
Suspend replied to Suspend's topic in ANH BlasTech E11
Shameless plug.... I spent a few days making a stand for my E-11. Check it out, if you are interested.... Mark -
Hey guys and gals, I finally finished my Stormtrooper blaster and I've been searching all over the internet for a suitable blaster stand to put it on display. I'm not really a fan of the transparent acrylic ones and any other stands I saw were either no longer being made, out of stock, or just too darn expensive. That's when I stumbled across Matt's Shack (click for the original blog article). Matt has created a great little stand that you can do on a budget. Parts were about $20 and the data plate was about $20, although I did have some paint and a wooden dowel left over from my blaster build so I didn't have to buy those. You can certainly follow Matt's article but I thought I'd post my build here since I made a few modification to the dimensions and hole spacing. Here's the completed stand: It's really easy to put together and something I built in a few days. Most of that time was waiting for paint to dry. Materials: Base : An oak board I got from Home Depot. 3/4" thick, 3 1/2" wide, 4 feet long, but you really only need 2 feet. Poles : 5/8" Wooden Dowel. 10 inches long is fine. Holder : 1 1/2" ABS Plastic Pipe Coupling cut in half Plaque : E-Bay (captain-america-tfa) Misc - 2 small screws for the data plate, 4 drywall screws for the dowel ends, black EVA crafting foam and contact cement for the padding. Build: Starting with the base. The 3/4" thick by 3 1/2" wide were already perfect. I just needed to trim the length to 2 feet. I used a router with a roman ogee bit to give some detail to the edges. Give it a quick hit with sandpaper to clean up the edges so there are no little bits of wood left hanging on. Next I painted the base with wood primer. My original idea was to get rid of the wood grain. I thought if I painted on several coats of primer and then sanded it down I would get rid of the grain and leave a smooth surface. That wasn't the case. After 4 coats and sanding, it pretty much did nothing to hide the grain and wasted a lot of time. Then I switched to filler/primer I had leftover from my blaster build and still no change to the grain. I figured fine, I'll keep the wood grain look. :-) Next I moved onto the pipe coupling... Using the grid guide on my cutting mat, I found the center point and cut the coupling in half. I sanded down the cut areas so they were nice and smooth and used a Dremel with a sanding drum to take off the little ridge in the center of the coupling. I marked the center point where the dowels would attach and drilled a small pilot hole. Then I used a 5/8" spade bit to make a recess for the dowel to fit into. Be careful not to drill right through your coupling. I cut a 5/8" wooden dowel into two segments. One 4 inches long and one 5 inches long. I painted the wooden dowels with primer and sanded them down with 400 grit for a slightly smoother finish. Next I drilled a pilot hole into the ends and used a black drywall screw to attach the pipe couplings to the wooden dowels. Next I used masking tape to mask off the center part of the coupling where the crafting foam will be glued. Then I used some leftover spray paint. I used Tamiya Grey Primer to prime the dowels and couplings and painted them with some Rust-oleum Silver I found in the cupboard. I then removed the masking tape from the couplings and cut two rectangles of black crafting foam which were glued onto the coupling with contact cement. Next I drilled the holes for the dowels in the base. I used the same 5/8" spade bit to drill a recess where the dowels will fit into. Maybe 1/4" deep. Again, be careful not to drill right through the base. These are the spacings I used for the holes. Measurements are taken from the outer edge of the board (not the edge of the routering) to the center of the hole. Then I painted the base. I had quite a bit of spray paint leftover from my blaster build. So even though it's not really meant for wood. I primed the base (again) with Tamiya Grey Primer and gave the base 3 coats of Tamiya TS-14 Black Gloss and 2 coats of Tamiya TS-13 Gloss Clear. These are the same paints I used for the handle (grip) of my E-11 so I had lots left over. Sorry, no photos of the painting in-progress. Once everything was completely dry flipped the board over to work on the bottom. The spade bit I used for countersinking the dowels on the top left a nice (smaller) hole in the bottom for the drywall screw. I just had to countersink this hole so that the base would sit completely flat. I drilled a pilot hole in the bottom of the wooden dowels and screwed the drywall screws in from the bottom to hold the dowels in place. (There's lots of overspray but I didn't care what the bottom looks like) Lastly I attached the E-11 Plaque I found on ebay from Captain-America-TFA. If you click this link it should take you to the purchase page but in case the listing changes, just search ebay for "Custom E-11 Blaster Plate" and you should find it. I think he's on ETSY too. I just used some small black screws I had leftover. That's it. I'm pretty happy with the way it came out. Mark
-
Suspend's Doopydoo's E11 (with T-Jay's Kit + Suitcase Props) Build
Suspend replied to Suspend's topic in ANH BlasTech E11
Thank you CableGuy and T-Jay for the replies on mounting the counter. Things have really fallen into place over the last week, so here's an update.... Weathering: So I'll have to start by saying that my blaster is pretty much done. I tried a few methods of weathering, but I have to say that the "dry brush" technique sure worked nice in my opinion. I started off with the scope. I had purchased a little tin of humbrol Antique Brass and after applying a coat of Tamiya primer to the scope, I thinned this paint down and used an airbrush to paint the scope antique brass. This was my first time using an airbrush. I purchased just the sprayer and attached it to an existing air compressor that I already had for power tools. But I have to say that I wasn't too pleased with the results. As with other builds I have read, the tone of brass just wasn't what I had imagined. It was quite orange in color. In the end I sprayed over the Humbrol brass in matte black and used the dry brush technique using Testors Gold to make it look like some brass was showing through. I think the Testors Gold was more the tone I was looking for. Then I continued with the rest of the blaster, everything Tamiya matte black and then I used Metallic Aluminum to very gently highlight the edges using a brush. I would dip the brush in the Humbrol metallic aluminum and then wipe the brush off on a paper towel until nothing was visible coming off the brush anymore. Then I would very gently touch the brush to an edge and find that there was still WAY too much paint on the brush and I'd wipe the brush off on paper towel a lot more and try again. Eventually I found I could nicely highlight edges and rough areas to make it look like the black paint was thin or coming off in areas. This was a lot of fun. I used the same Testors Gold on the back 1/2 of the counter. For the bolt and the shinier metal around the trigger assembly, I used the metallic aluminum as the base. Then I would paint gun metal in the crevasses and wipe it off right away with a rag. After that dried I would use matte black, again painted into the cracks and crevasses and wiped off. This made the more metallic parts look kind of dirty/oily/grimy and not so bright/shiny/clean. The handle/grip was painted gloss black with a gloss clear coat. My hopes is that the clear coat will protect a handle a bit more since this will probably be the most handled part of the gun. After this everything was assembled and some retouching on the weathering. I think the weathering is quite lite. I didn't do any heavy paint chips or larger areas of scratched off paint. Personally I like the more gentle weathering. Here's how I ended up attaching the counter and scope to the scope rail... And here are some pictures of the blaster. Sorry the quality of the photos aren't the best, but you get the idea.... I really want to thank everyone who helped out and tirelessly answered questions. T-Jay, CableGuy, DracoTrooper, BaneLives85, Wook1138 and everyone else who helped out. You guys are awesome and I couldn't have done it without you. If I take some better (outdoor) pics, I'll post those... Mark -
Suspend's Doopydoo's E11 (with T-Jay's Kit + Suitcase Props) Build
Suspend replied to Suspend's topic in ANH BlasTech E11
Hey guys, I haven't had too much time to work on my blaster this week but I'm still working on the weathering. I was going to ask, does anyone have any photos or descriptions of how they attach the counter? I have Tino's Completion Kit and I'm assuming the separate "L" bracket is mounted under the scope rail using one of the screws that goes into the scope. I'm also assuming that the other part of the bracket points downward and that the counter gets attached to the side. Do most people use E6000 or put a screw through into the counter? Thanks, Mark -
How was the Counter installed on the E11 blaster
Suspend replied to Bigturc's topic in ANH BlasTech E11
Hi, this might be a stupid question, but does the "L" bracket point down? Meaning one piece of the L attaches to the bottom of the scope rail and the other part of the L points down and attaches to the counter? Is that right? Mark -
CableGuy's DoopyDoos (feat. T-Jay kit) ANH E-11 WIP
Suspend replied to CableGuy's topic in ANH BlasTech E11
Very nice!!!! Mark -
That's awesome!!! Mark
-
Suspend's Doopydoo's E11 (with T-Jay's Kit + Suitcase Props) Build
Suspend replied to Suspend's topic in ANH BlasTech E11
Weathering : "Teaser" Pics Just two "in progress" samples.... Mark -
Suspend's Doopydoo's E11 (with T-Jay's Kit + Suitcase Props) Build
Suspend replied to Suspend's topic in ANH BlasTech E11
Update : Paint Ok, I can't believe I've burned a week and a half (evenings) just testing paint. Enough. I have a game plan....if anyone follows this for their build, this is what I'm doing.... (I'll update this image if/as things evolve) Counter, Power Cylinders = 1, 2 Handle Grip = 1, 4, 5 Handle (non-grip) = 1, 2, 9 Stock, End Cap, Trigger Guard = 1, 3, 2 Scope = 1, 2 with weathering of 6, 7 Receiver Tube = 1, 2 Bolt Area = 1, 9 with weathering of 8, 7 The T-Tracks = 1, 2 but may follow with something more matte. Everything here seems to play well together. The base layers are all lacquer and the Testors/Humbrols are enamel so any layering should be fine. I opted against the Testors Matte Black spray I was testing because it was REALLY matte. I changed my mind and liked the way the Tamiya Matte Black still had a bit of shine to to. I think it makes things look a little more like metal. How much more? I'll post a couple of "teaser" pics in a sec.... Mark -
Great summary!!! I'll definitely be referring to this as I start building my AP kit. Thanks for this!! Mark
-
Freddy's ANH E11 Blaster Build - a student's path to join the Empire
Suspend replied to Freduster's topic in ANH BlasTech E11
Hey Freduster, I found out yesterday if you hit the leftover crayon with a hair dryer you can easily get rid of the remaining crayon residue off the scope. Mark -
Dude!!! That's some serious work you've put into the clip. It looks great!! One question: and I may be "nit-picking" but... is the LED maybe sitting a little "tall"? Mark
-
Suspend's Doopydoo's E11 (with T-Jay's Kit + Suitcase Props) Build
Suspend replied to Suspend's topic in ANH BlasTech E11
Hey guys, I'm really loving all the paint comments. It's great to get a "collective" opinion from people who have experience. Ultimately, it's up to you (the builder) as to how much work you are willing to put in what what paints you have available. I ran a few more "tests" and managed to get some "wrinkle" results with the VHT Wrinkle Plus. Maybe I should have read the directions first. So, it appears as though some paints work differently. The Rust-oleum and Tremclad seem to kind of "spit" out the paint for a textured surface (not a fine mist) and then rely on different paint densities and reflections to give an apparent hammered effect. Doing several light coats (with a bit of dry time in between) gives more "spit" and as a result, more texture. The VHT is different. It seems to rely on a "constriction" effect as the paint dries to form ridges. It goes on smooth and wrinkles over time. I got fairly major wrinkle results following the manufacturers directions. Spray a heavy coat, wait 5 minutes, spray a heavy coat at a different angle, wait 5 minutes, spray a third heavy coat at another different angle, then wait two hours. After 2 hours you should see a wrinkle effect. If you don't, you need heavier coats. Then you have to wait 48 hours for the paint to completely dry. Here's what I saw: Now, I think I know why they call this a Wrinkle effect, not hammered. I would describe hammered as little pits or dents or bumps in the paint.....either as a texture or as an effect. This wrinkle paint I would describe as tiny little lines all over the paint. Almost as if someone took an X-Acto knife and put billions of tiny cuts in the paint, all perfectly straight but going different directions and probably 1/2 mm in length. It's an interesting effect, but maybe too much? I wonder what lighter coats would look like? From what I'm learning from hammered paints, probably a lot of this wrinkle texture is coming from the hard reflections from the gloss paint. Hitting it with matte black or a matte clear coat should really reduce the wrinkle appearance... It kind of hard to capture in a photograph. It looks ok. Kind of different. You could probably get a nice texture with more experience. But here's my concern, if the VHT Wrinkle Plus needs 2 or 3 heavy coats to wrinkle, that will probably decimate any detail in the resin. I don't think I want to take that chance. This might be the type of thing you apply in a few areas to look like rough metal and probably not something you want to spray over the entire barrel. I think I'll stick to the hammered paint and just end up with a less "textured" finish. Mark -
Suspend's Doopydoo's E11 (with T-Jay's Kit + Suitcase Props) Build
Suspend replied to Suspend's topic in ANH BlasTech E11
So, I've got a couple of tests to share. Sorry the photos aren't the best... Ok, my first sample is the Silver Tremclad Hammer paint. I did 3 light coats about 15 minutes apart. This was the first one I painted, maybe a week ago. I liked the look of this one. A dimpled/pitted finish. But once I hit it with a light coat of Testors Matte Black, the detail was gone. The surface just wasn't textured enough to survive. The next one was the Rust-oleum Hammer Paint, Antique Pewter. Again, 3 light coats, 15 minutes apart. I had painted a scrap of this a few days ago and I hit this one with a really light coat of Testors Matte Black. A bit of the texture remained, but not a whole lot. I think I'd like to test the Tamiya Matte Black as well to see if it applies any thinner. Maybe it will preserve more of the surface detail from the hammered paint. I used the Tamiya Matte Black for the counter and power cylinders, but I think I'd call it more of a satin finish rather than a true matte so I was leaning away from using it for the receiver. More tests to follow.... Mark -
Suspend's Doopydoo's E11 (with T-Jay's Kit + Suitcase Props) Build
Suspend replied to Suspend's topic in ANH BlasTech E11
That's an interesting point, T-Jay. My thinking was that I should go for a hammered silver as the base coat. This way I get the hammer texture and at the same time get the silver undercoat. Then cover with a matte black. This way I could sand through some of the black and reveal the silver underneath as weathering. But perhaps it's the matte black that is causing the loss in detail. Hmmm......that's another test to run.... Mark -
Suspend's Doopydoo's E11 (with T-Jay's Kit + Suitcase Props) Build
Suspend replied to Suspend's topic in ANH BlasTech E11
One thing I'm beginning to notice with these Tremclad/Rust-oleum hammer paints is that they seem to also rely on "tricks" to make the paint look hammered. I imagine they are using different pigments in the paint where bright colored (silver) pigments float to the top (after spraying) and darker colored (gray) pigments sink to the bottom. This really gives the appearance of hammered silver surface but doesn't actually "texture" the surface. Wook1138 mentioned doing a heavier coat and the manufacturer also recommends one heavy coat but whenever I do a heavier coat, the texture is gone. The paint still looks somewhat hammered when it dries but there is no surface detail. So if you cover it with a coat of flat black, your "apparent" hammer finish is gone. I found found (at least with these two hammered paints) that 3 to 6 very light coats, separated by 15 minutes, seem to leave much more of a hammered texture in the surface of the paint. The Tremclad having more of a pitted/dimpled texture and the Rust-oleum being more of the traditional hammered texture. I'm going to run a few tests and I'll post my results.... Mark -
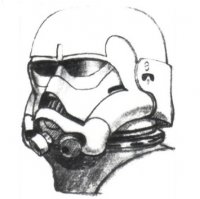
Hi, your helmet is looking great! I'm interested in hearing what you decide with the spacer. I haven't started my AP helmet build yet but I definitely did notice the ABS seems really thin where the hovi tips would connect. Mark
-
Suspend's Doopydoo's E11 (with T-Jay's Kit + Suitcase Props) Build
Suspend replied to Suspend's topic in ANH BlasTech E11
I can tell you that I've been sticking with the Tamiya TS paints because they are readily available and look nice, but they produce quite a smell. I've also tried Rust-oleum Hammered, Tremclad Hammered and VHT Wrinkle Plus and none of these smelled anywhere near as bad as the Tamiya. However, I wasn't that happy with any of these wrinkle paints. The Rust-oleum Hammered has a very high gloss finish and what I would call "minor" surface hammer texturing. The Tremclad Hammered has a glossy finish with more of a "pitted" effect which still looked nice. However, after painting a coat of matte black over top, the pitting I saw really was an effect. There was almost no actual texture and it was hard to tell the difference between it and just a straight matte black with no hammer underneith. The VHT Wrinkle Plus had me the most excited from what I saw from Tennantlim's Build (Check out the link). But after priming and painting a piece of scrap plastic, then waiting the full 48 hours dry time, I saw no wrinkle effect. Even though that's what Tennantlim used. Those appear to be the only Hammered/Wrinkle paints that are available in hardware stores in my area. (Home Depot / Canadian Tire / Rona). Mark -
Suspend's Doopydoo's E11 (with T-Jay's Kit + Suitcase Props) Build
Suspend replied to Suspend's topic in ANH BlasTech E11
Definitely don't feel like you are hijacking my thread. I want to open this discussion about paint. I'm also less than happy with most of the hammered spray paints available at hardware stores. Even when I purchase the exact same hammered/wrinkle paint as someone else, my results are quite different. I imagine that has to do with the thickness of the spray (how thin the layers are sprayed) as well as temp and humidity. Most of the time I'm spraying inside my closed garage. It's a bit drafty so the smell dissipates reasonably quickly. But because it's winter, I have a hard time getting the garage above 14 degrees right now (57 Fahrenheit) so that's not an ideal situation either. It's dry right now, humidity around 30%. Sometimes I'll spray and then bring the part inside to dry but I haven't really seen any difference when I do that. Mark -
Suspend's Doopydoo's E11 (with T-Jay's Kit + Suitcase Props) Build
Suspend replied to Suspend's topic in ANH BlasTech E11
Lets Talk About Paint (Story Time) When I was about 10 years old I had a Stormtrooper blaster. This was in the late 70's. At some point my 10-year-old self decided that the blaster would look better white. So I got some of my dad's spray paint out of the shed and painted it white on our back lawn. Weeks or months later, I realized the error in my thinking and spray painted it black again. But this time, the paint crinkled and wouldn't cover. It separated leaving cracks of white showing, like a dried out lake bed. The blaster was ruined and ever since then, I've been afraid of layering paint. After starting on my current build, I did a bunch of reading in scale model forums and they seem to be no strangers to this effect. That's when someone mentioned LEA.....not LEIA, like the Princess, but an acronym. LEA = Lacquer , Enamel, Acrylic. If you are layering different types of paints, this is the order you are supposed to follow for the greatest chance of success. Apparently all spray paints use a base which is a sort of solvent, some will react poorly with others. The worst (strongest solvent) seems to be lacquer and the weakest (solvent) seems to be Acrylic (almost water). Most lacquer paints will dissolve Enamel and Acrylic and many Enamels will dissolve Acrylic, but Acrylic won't dissolve anything. Hence the order to layering. However, not all paint manufacturers tell you what the base is. Home Depot will sell a Clear Coat without mentioning that it's Lacquer. I found that in the material safety sheet on a different web site. Then you see that the paint has three 1-star reviews. People say the clear coat is horrible, don't buy it, it destroyed my beautiful paint job. Hmmm, yes, that's because it's lacquer and you probably sprayed it over Enamel or Acrylic But there seem to be many exceptions too. Tamiya uses "synthetic lacquer" which behaves differently and some people get away with normal lacquer clear coats over Acrylic if they are applied as several, very thin, coats. It's all incredibly confusing. So, back to my paint job. Humbrol sprays are Acrylic. Acrylic is safe over pretty much everything. I wanted to use Humbrol Spray paint but you can't get Humbrol Sprays in Canada. You can get Tamiya (another scale model paint) in Canada, but Tamiya is Synthetic Lacquer. Warning Flag. So right now my plan is : - Start with the Tamiya Gray Primer - Mask off the gun and paint the grip a Tamiya Gloss Black and maybe follow up with a Tamiya Gloss Clear-Coat (these should all behave together) - Unmask the gun and mask off the grip then paint gun and stock Rust-oleum Hammered Silver (no info on base Rust-oleum uses but probably lacquer) - Paint over the hammered silver with Testors Enamel Matte Black - Weather - Follow up with Matte Clear Coat (this is the dangerous part as most clear coats are lacquer) I'd love to hear experiences (both good and bad) that people have had layering paints... Mark -
Hello again, I figured I'd better post an update or everyone will forget about me.. Since Christmas, I've been working to complete my E-11 Blaster so I've been putting off starting on my armor. My blaster is now pretty much at the painting stage so I'll have time to begin things while I wait for paint to dry. So, when I last posted an update I had my BBB under the Christmas tree. Well, after thinking things through, I didn't leave my BBB present under the tree. I figured the repercussion from MY present being larger that my 6-year-old's presents was too great, so I hid my present downstairs. When I finally opened my gift to myself, it truly was a White Christmas... So that was back in December....and the box has sat in my bedroom for the past 2 months. But now I'm going for it.... It's an AP (Authentic Props) kit. Untrimmed with an unfinished helmet. It looks like everything is there. In fact, I seem to have two sets of hard guards, which is a little odd. I did a lot of research before purchasing. I'm 6' 1" and around 195 lbs. That puts me in a bad spot, in my opinion. I'm kind of tall for a "regular" kit and kind of thin for the kits for "larger" troopers. I narrowed it down to AP and RT-Mod. The AP kit is regular sized and the RT-Mod kit is 5% larger. I was (am) really concerned about the amount of black showing for the arms and legs. I was also concerned that I would end up needing to reshape the RT-Mod kit because it would look too big on me. In the end, two things influenced my decision. The first was that (at the time) AP had a surplus of armor and could ship immediately, no long wait. It was my understanding that RT-Mod generally has a 1 year wait. The second thing was that Harrison Ford is just a hair under 6' 1" and he fit into a regular Stormtrooper outfit in Star Wars. So AP won. If the AP ends up with too much black showing, I may end up making a mannequin and turning it into a really awesome display for a home theater room......assuming I ever get a home theater room. Mark
-
Suspend's Doopydoo's E11 (with T-Jay's Kit + Suitcase Props) Build
Suspend replied to Suspend's topic in ANH BlasTech E11
Thanks again, guys. I'm excited to see it painted but not excited to wait for paint to dry. Update - Assembly / Primer Slowly things are coming together. When I order the other 3D Printed parts from Shapeways (Suitcase Props) I also picked up the flash guard / ejection port guard. The Doopydoo's version is kind of thick. I sanded them down a little to remove some of the 3D print texture, hit them with grey primer and sanded them again. They were then glued on using CA glue and later I went around the outside with green stuff to further fill in the seams. I started doing a bit of weathering on the spring and end of the bolt. I need to complete the painting before I permanently install this as once it is glued, it's not coming out. But here's an "in-progress" shot... Next I hit the handle with some primer and got it attached. I was going to completely paint the handle first before attaching, but we seem to have quite an issue in my area with getting descent spray paint. Humbrol Spray Paint is completely out of the question. After weeks of searching I decided there is no Humbrol Spray in Canada. None. I would have liked to stick with Humbrol because I know it has worked with other builds. Tamiya spray paints are readily available which is what I use for Primer and the black of the power cylinders and Hengstler Counter. I'd like to use a different black for the matte black of the gun itself so I'm trying to track down some Testors Matte Black. It's also enamel so they should play well together. Anyway, after striking out with the Testors I decided I would just attach the handle and mask it off later. I'll try some other stores for the Testors spray later in the week. The front and rear scopes were attached. The end cap clip was attached. Seams that didn't look completely tight were filled in with green stuff and sanded after they dried. Then, finally, the whole gun was hit with Tamiya grey primer. (I shoved a few paper towels into the receiver tube so that the inside wouldn't get any over-spray) And here's the close-up I promised of the bolt/ejection port.... I've also been doing a ton of reading about paints. Very interesting. I'll do a separate post just for paint. Mark -
Full resin E-11 from DoopyDoo's with some modifications
Suspend replied to T-Jay's topic in ANH BlasTech E11
Hey T-Jay, I would love to hear more on your "paper dabbed hammer paint" technique. It looks incredibly realistic. I tried to find the references you made to DarthChridan's and Felice's posts but I could only find DarthChridan's and all his images are gone. I have tried a few different hammer paints that are available in Canada and I haven't been really impressed with any of them. Thanks, Mark
