

Suspend
-
Posts
157 -
Joined
-
Last visited
-
Days Won
2
Content Type
Profiles
Forums
Gallery
Articles
Everything posted by Suspend
-

Suspend's "The Mandalorian" Blaster Build
Suspend replied to Suspend's topic in Other Non-Approved Star Wars Costumes
There are two disks on the right side of the blaster that need to have a weathered metallic look. I decided to tackle this next. I reverted back to a trick that I did on my E11 blaster. I did some zombie makeup a few halloween's back. I still had some liquid latex leftover, although it was almost drying out. But what I did was paint the area around the two disks with liquid latex. It forms a mask so that the painting of the metallic paint is cleaner. Because these two disks are circular, they would be really hard to mask off with tape. Liquid latex is a lot easier. Just paint it on, mask the remainder off with tape and a paper towel, then peel everything off when you are done painting. First thing I did was paint on the liquid latex around the disks and let it dry for a few minutes. Then masked off the remainder. Next I used a Tamiya gloss black to provide the base of the metallic chrome color and then using an airbrush, sprayed Alcad II Chrome paint overtop in very light coats. Once everything was dry, which for the chrome paint is mere minutes, I peeled off the tape and latex. Done, but still needs weathering. I'll leave that to the end. Mark -
Suspend's "The Mandalorian" Blaster Build
Suspend replied to Suspend's topic in Other Non-Approved Star Wars Costumes
Next up was a bit of assembly. I glued the grip frame onto the blaster, painted the receiver top part black and glued the barrel and receiver onto the blaster. Unfortunately I forgot to take more photos but this is what I have... And lastly I couldn't resist checking to see how the newly painted grips fit. They are not glued in, just sitting in place. They look a little red in this photo but they are actually more brown. I'm happy. :-) Mark -
Suspend's "The Mandalorian" Blaster Build
Suspend replied to Suspend's topic in Other Non-Approved Star Wars Costumes
Grips. The grips gave me a fair bit of trouble. Firstly the Elegoo Mars is not the most dimensionally accurate of printers. I originally printed the grips in resin but there were always scaling issues which caused issues with how the grip fit into place. After a ton of sanding and filing I did manage to come up with a set that fit, but I decided to also try going back to my FDM 3D Printer, a CR-10. I still had some wood filament which is a sort of plastic mixed with wood dust. I had heard the wood filament will accept wood stain so I was eager to give it a try. The print came out very well with no fitment issues. I sure like FDM printers for their accuracy. After sanding down the print layer lines, this is what I had: My first attempt was to try staining the print just as you would wood. I purchased some Dark Walnut wood stain, (Varathane Ultimate Wood Stain) brushed on the stain, let it sit for 15 minutes (instructions say 1 to 3 minutes), then wiped off the stain. I'm not familiar with staining wood but I'm assuming the stain should have soaked into the wood leaving a nice finish. This is not what happened. When I wiped off the stain it basically just came off leaving the print just slightly darker than it started as. So my second attempt was to brush on the stain with a brush and to leave it "streaky" so that some of the lighter print showed thru the stain. This one I didn't wipe off. I just left it for a couple of days to completely dry. This looked pretty good to me. Not perfect, but certainly passable. Then I tried painting on a clear coat sealer for the wood and things turned bad again. The clear coat didn't seem to apply well and had very tiny little bumps everywhere. I thought maybe they were just little bubbles that might pop as the clear coat dries. They didn't, and when it hardened I had a pretty bumpy surface. I wasn't happy. I tried acetone to remove the clear coat but in the end just sanded down the grips again and started over. The third attempt worked OK. I used the same streaky paint brush technique to stain the print. Let it dry for 2 days and this time used a spray lacquer that a friend suggested. It was by a company called Mohawk, and it was Tone Finish Clear, Satin. It took quite a number of coats to hide my aggressive sanding that I had done to get rid of the previous clear coat. I think I should have followed up my sanding by going down to 600 grit, but live and learn. After building up enough clear coat it hid most of my sanding lines. Here's the result. First just the streaky brushed on stain.... And then with the clear coat... The clear coat dried fairly glossy. I imagine if I hadn't given it so many coats it would have been more of a satin finish. But I'm OK with this. Some weathering and finger prints will tone down the shine. :-) Mark -
Suspend's "The Mandalorian" Blaster Build
Suspend replied to Suspend's topic in Other Non-Approved Star Wars Costumes
So, a few updates since last posting.... The Alclad Gun Metal color didn't work out. It appears that the gun metal color lays down VERY VERY thin when you airbrush it on. It also has some reflection to it. It ended up showing every minor flaw in the surface of the frame of the blaster. There were just enough highlight reflections to show that I should have sanded the surfaces more. So I actually did sand it more and reapplied the gun metal and again I could still see flaws. Then I ran out of Gun Metal paint and switched to Testors Flat Black which I know has no reflections to it as I used it on my E11. The Testors Flat Black worked great and the surfaces looked really nice.......but......I ran out of propellant in that can and guess what, it's now impossible to find locally. So I gave up on Testors as well and switched to a Krylon flat black, which again has a bit of a satin finish causing reflections. But at this point I've got so many layers of paint that it's hiding any flaws and the surface looks completely smooth. So, yeaaaaah. Got there by accident. :-) I repainted all the black parts with the Krylon flat black and moved on. While those were drying I assembled the barrel and slide rail. They both print in two parts due to the size of my printer, but the seam of the barrel is hidden inside the receiver and the seam of the rail I filled with a bit of resin, cured it under UV light and sanded it down before painting. I also painted the grip frame at the same time. You can still see a few print lines on the grip frame but those will be hidden by the grips once they are attached. Next I was ready to assemble the frame. The way I designed the blaster there are two springs that get installed. One on the hammer pulling it forward and the other on the trigger to pull it forward. This way the trigger actually functions. Once I was happy with the placement I glued the two halves together. Then I primed and attached the nose piece, masked off the trigger and touched up the black paint. This is where the actual switch to Krylon happened. The grips provided their own set of problems. But that's a story for next time. :-) Mark -
Suspend's "The Mandalorian" Blaster Build
Suspend replied to Suspend's topic in Other Non-Approved Star Wars Costumes
So I did a bit of an experiment today. I needed to paint the hammer gun metal so that it could mount inside the frame when the frame is glued together. Again, it's easier to paint it before assembly. I decided to also paint the muzzle to see how the metallic paint turns out. The muzzle prints in two parts, front and rear. I did them in two parts because the front part is black (gun metal) and the rear part is more of a chrome. By printing them in two parts I don't have to mask them off for painting. Here are the muzzle parts... I got the parts primed and painted with Alclad Gunmetal lacquer paint. Then I painted the muzzle rear a gloss black and airbrushed light dustings of Alclad Chrome over top of the gloss black. I'm pretty happy with the result. The metallic chrome was actually more reflectivebefore I hit it with a clear coat. The clear coat dulled the reflections a bit but it still has a metallic look to it. Mark -
Suspend's "The Mandalorian" Blaster Build
Suspend replied to Suspend's topic in Other Non-Approved Star Wars Costumes
The slightly difficult thing about this blaster is that the trigger is brass. This really complicates things with painting because it's difficult to paint the trigger brass once the blaster has been assembled. Here's the trigger. It has an opening in the front to mount a spring for the working trigger. It's probably easiest to paint the trigger before assembling the frame. And if I'm going to paint the trigger brass now, I might as well do the few other pieces that are brass as well. I started off by spraying a primer onto the parts. I also test fitted the trigger spring and once I attached it, I couldn't get it off anymore. :-) So I might as well just cover it with some masking tape and move on. I'm partial to Tamiya lacquer paints because they apply thinly, don't obscure detail and dry quickly. Although they are a little expensive. For these parts I used Tamiya Surface Primer and once dry, followed up with a Tamiya Gloss Black. The parts that are brass are the trigger, cleaning rod, cleaning rod holder, safety switch and this little block on the ejector port. Actually, the little block on the ejector port flip-flops between silver and brass on the show. The safety switch changes orientation too, but at least stays the same color. :-) The other paint I'm partial to is the Alcad line of metallic paints. Their chrome is amazing but like most of their paints, needs to be applied with an air brush. For the brass color I used Alclad Pale Gold. I think they used to have an Antique Brass paint but I haven't been able to find it anywhere locally or online so I'm thinking it might be discontinued. Anyway, the pale gold looks good and again these lacquer paints dry almost instantly. Much of the trigger will be hidden inside the frame. One thing I started doing with smaller parts was to place a "ring" of masking tape around my finger, sticky side out. Then I can attach small parts to my finger for painting and slide the tape off and stick it to a table to dry. And here are the parts. I think I'll still apply a clear coat to these once they are completely dry. And yes, the cleaning rod looks bent. It's pretty flexible but once attached to the blaster it will be held straight. Mark -
Suspend's "The Mandalorian" Blaster Build
Suspend replied to Suspend's topic in Other Non-Approved Star Wars Costumes
Thanks, guys!! I'm going to start by gluing the frame parts together. Due to the size of my resin printer I had to print the frame in 4 pieces. So there's a left side A & B and a right side A & B. The seam on the right side will be hidden by a "plate" that the blaster has. The blaster was based on a very old Bergmann pistol from the late 1800's. In the actual "real world" weapon, this plate swings away and you would insert the ammo clip there. In this blaster it perfectly hides the seam on the right side. The left side is a different story, the seam goes right down the side of the blaster, so that will have to be hidden. I use regular CA glue to glue the parts together. Here are the left halves... And then the left and right parts glued together. It's hard to see the seam due to the semi-transparent resin, but that will change pretty quick.. Some of the glue came out of the crack on the top piece but I was able to sand it away leaving just a small seam visible between the parts. I use Rust-oleum Filler Primer on most of my 3D printed parts. You spray it on, give it 1/2 hour or an hour to dry, then sand with 400 grit and repeat. The tiny sanded particles fall into any cracks and begin to fill them. After 3 or 4 passes of spraying and sanding, it filled in the small gap between the parts. Then I went up to 600 grit. I think that's it for today. Mark -
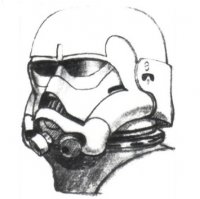
Hey everyone, a couple of years ago I was on these forums doing an E11 Blaster and an ANH Stormtrooper build. Now I'm back doing The Mandalorian's Blaster. I decided to post here first because of the incredible group of people here helping others. I haven't found anything like the help I received here on any other forums. You guys and gals are great and really make people feel like they belong. Ok, so I can't get over how much things have changed in the past two years. We used to order a resin kit and then spend countless hours modifying it to make it screen accurate. Now, you can design the parts yourself and 3D print them at home in resin at the cost of only a few hundred dollars for a resin printer. Enter the blaster from The Mandalorian. I printed a couple of different 3D versions that I found online (both paid and free) before deciding that they weren't screen accurate enough for me so I designed my own. Using any photos I could come across I recreated the blaster in about 2 months using Fusion 360. It's gone thru countless revisions but I think it's getting pretty close now. If anyone is interested in the files, I have a shop setup on ETSY under the name OuterRimWorkshop. This is a rendering from Fusion 360: I designed the parts to make it easy to paint and assemble the individual components. I also wanted a working trigger, so I built that in as well. I won't get into the intricacies of 3D printing. Like anything, there's a lot of trial and error. The technology isn't perfect and resin printing, while it looks good, is still very prone to warping. I generally print using inexpensive resin but for this model I purchased some more expensive resin called Blu by Siraya Tech which is supposed to be stronger and more accurate in terms of dimensional accuracy. The only odd thing is that the resin comes as a sort of transparent blue/green color which makes it a little difficult to see fine details until it's painted. The printer I have is an Elegoo Mars which is a very inexpensive resin printer. The downside being that the build plate can only print 4.7 inches by 2.6 inches by 6 inches. I think it took me about a week to print all the individual parts. Here's a photo of all the parts... The grips were printed in wood PLA plastic on an FDM (non-resin) printer. I've heard you can stain 3D printed wood just like normal wood. I guess I'll find out. The Mars printer is capable of printing pixels at about 47 microns in X/Y which allows for some fairly nice detail. Here are close-ups of the hammer and a switch that's on the side of the blaster: I can't wait to get started on assembly and painting. I'll post updates when I am able but life seems to find a way of delaying any projects I want to work on. :-) Mark
-
Definitely look up an Elegoo Mars. It's a resin 3D printer. It's around $360 Canadian or closer to $230 US. Can print close to 0.02mm pixel size. Almost no layer lines, and any that are there easily sand off. I just finished a blaster from the Mandalorian show and you can't tell it's 3D printed. Only down side is that the resin is messy and the build volume is fairly small. It uses a cell phone LCD panel as a shutter with a UV light underneath. Fairly simple. So the build volume is something like 4.5"x2.5"x6". But man, if I had this while I was building my blaster, you could just fabricate the parts in a cad program and print them out. Your custom clip, the bolt, the sight.....everything that wasn't exactly right on the Doopy's kit could be printed. And then, if you design an impressive part, people sell the digital files on ETSY. Or if you aren't good with CAD, you just find free STL files or buy them online. It's a game changer, for sure. Mark
-
Congratulations, Jesse!!! The blaster looks fantastic!!! I hadn't "checked in" for a while either (life, I know, it's interruptive..) and I was surprised to see a conclusion to the saga of Dracotroopers blaster. I picked up an Elegoo Mars resin 3D printer and it's amazing. If I had that while I was still working on my blaster it would be a whole different build. No more fabricating parts.....just print them out of resin in perfect quality. :-) Anyway, congrats again!!! Looking forward to your (eventual) trooper build!! Mark
-
I had the exact same issue. There seem to be two pages floating around with paint colors and they reference different colors. I had the wrong one at first too, but realized before actually starting any work.
-
AP Armour - Trimmed - ANH Centurion - First Build Thread
Suspend replied to Mr_Fahrenheit's topic in ANH Build Threads
Hey, I think there's a bit of confusion here. I think Wook meant that Mark at AP may sell larger shoulder bells. I'm just using the regular AP bells. Pandatrooper had a nice shot showing different bells. Apparently the AM bells are quite a bit larger. Maybe something to consider if nothing else works out? Mark (Suspend) -
Lorelei's 5'4" ATA ANH-S Centurion-Hopeful Build
Suspend replied to TheLorelei's topic in ANH Build Threads
How do you eat an elephant? One bite at a time.... You're getting close.....keep chugging..... -
AP Armour - Trimmed - ANH Centurion - First Build Thread
Suspend replied to Mr_Fahrenheit's topic in ANH Build Threads
Just thought I'd throw in my 2 cents. After I glued on my cover strips and let things set for several days, I did a hot water bath of the forearms to round out the opening at the elbow. This really helped to relax the tightness on my forearm muscle and made it fit my arm shape much better. Mark -
Hey all, I just realized that I jumped ahead a bit. I was so excited to post a pic of the armor that I forgot to finish my posts on the helmet. The green lens material that comes with the AP kit is a little "thin" in my opinion. Apparently it's accurate to the movie but I preferred something a little darker so I picked up the darker lens from TrooperBay. I tried fitting the material in as a single strip, but I couldn't get the material to sit flush against the eye sockets, so I option to install the eyes individually. First this was to head to Home Depot and pick up some Tee-Nuts. Leaving the base as (roughly) a circle was going to make them too large so I cut two sides off the base using my dremel. This allowed me to position the T Nuts around the eye socket. I then cut away the plastidip around the eye and used Sugru to surround the bases and attach them to the helmet. Sugru is kinda hard to find in Canada. I finally found some at "Home Hardware" but they only had the mixed box of colors. So I ended up with black, grey and white. Oh well, I'll paint over them. :-) Give the sugru lots of time to dry. I think they said it dries at a depth of 2mm per day. While waiting I did a "rubbing" of the eye sockets and then hand drew a cleaner version with a buffer around each lens to attach each to the T nuts. And cut out the lens material... I resprayed the plastidip around the eyes then I marked the hole locations on the lens material, drilled the mounting holes and screwed down each lens. I picked up some tactical helmet pads from Amazon. It took some experimenting to decide the best locations for the padding. I wanted it to grab onto my head so the helmet wouldn't flop around. It works pretty well, although I think I'd still like a bit more on the sides of my head. Next I started work on the fans and microphone. I picked up an Aker MR1505. I found you can remove the metal head band and just keep the mic and boom. It velcro's nicely to the side of the helmet. Then I picked up an Anker "big lipstick" style USB battery and I got a fan kit from Ukswrath. I got the fan bracket as well but ended up only using pieces of it. The bracket that the fans attach to is really cool. It fits perfectly in the helmet and looks awesome, but the only place I could find to fit my big usb battery was a the back of the helmet. With the battery there, I couldn't make use of the fan bracket. So I took the bracket apart and used velcro to attach the fans inside the helmet. I took the power switches off the bracket and attached them to the lower ear screws. One on each side. So if I'm trooping, I can individually turn the fans on an off while in costume. It works really well but that USB battery might just be a hair too big. I can BARELY squeeze my head in. Once I'm in, it's fine. Mark
-
Sounds like EXACTLY the same issue I had.
-
Hey Arlo, I would suggest very carefully checking to see you've wired the mic jack properly, both to the audio board and the jack itself. I had tons of trouble with no audio from my mic. I was using a mono audio jack on the TKTalkie. I'm still not sure if it was the way I wired it up but when I switched to a stereo mic jack, suddenly I had audio from my mic. I can only assume that perhaps I wired it to wrong channel and by switching to a stereo audio jack I had both the left and right wired to the TKTalkie so it started working. Not sure about your "weird sound" issue, but I'd concentrate on problem #1 and see if problem #2 goes away once your mic is working. Mark
-
Hi Nick, I was just wondering what (if anything) you ended up doing with the top of your right thigh? I've got the same "mismatched height" at the top of the right thigh either side of the cover strip. Did you try to round off the height difference or just leave it as it is? Thanks, Mark
-
I used the decals that came with the AP Kit. :-) I put the decal in place and then hit it with a hairdryer. The hot air softens the decal and let’s its drape over the button without wrinkles.
-
What happened to me was that the reticule lines were in focus until I installed the little lens at the front of the scope. Then everything went out of focus. Presumably because the length of the hollowed out blaster scope didn't match the length of the monocular. I just left it but I'm not sure if there would have been a way to correct that? Mark
-
Ok, after several attempts I re-positioned the belt. First it was a bit low. Then it was a bit lop-sided. Then it was a bit too high and covered too much of the blue button on the smaller panel. Then finally I got it not lop-sided and not covering too much of the button. Thoughts? Lighting is not the best because it's night time. Here's the first shot will all the gear on. Exciting!!!! My "to-do" list still includes painting the helmet screws, adding a bit of foam to the left thigh at the knee, and finishing the helmet fans and speaker.....but at this point, unless there are still some glaring mistakes, I could probably take some better photos and submit for pre-approval. Woohoo!!! Mark
-
Yeah, right now I've got a battery pack in middle/back of the helmet (big lipstick tube type, same as in the video above) to power the fans inside the helmet. I have an Aker 1505 amp which people seem to really like. I'm going to mount that in the chest along with the TK-Talkie and another battery pack. The Aker microphone seems pretty good to me. It comes with a wire (coat hanger) head band but the wire band easily detaches, leaving the boom and mic.....perfect. It even has a little plastic box on the end of the boom. I velcro'ed this to the inside of the helmet and it still allows me to bend the boom to position the mic. I haven't finalized the wiring of the fans yet but you get the idea... I'll get some of that coiled headphone cable so that it will stretch when I take the helmet off and not pull everything apart. I guess I'll just run it down my neck seal and out the undershirt into the TK-Talkie in the chest. Mark
-
Thanks!! My latest adventure is trying to tweak the position of the bucket fans so that they circulate air without blowing on the microphone. :-) Mark
-
Hey all, I just wanted to post a little build-thread here so that maybe some people might learn from my mistakes. I was looking at a few of the different voice effects units out there for a TK build. I really wanted the static burst at the end of communication and I didn't really like the idea of having a dedicated phone running under my armor. That kind of narrowed it down to two solutions: the iComm and TK-Talkie. I like the idea of the iComm because it is so well used, but with current technology, it seems kind of LARGE. Plus I saw a few complaints about internal batteries dying after a year. I'm sure it's also a great solution but I ended up trying TK-Talkie. It's a bit smaller, a bit cheaper and pretty much "state of the art'. :-) TK-Talkie runs on an ARM processor based USB board called a Teensy 3.2. It really IS teensy. You add a sound board and a bluetooth module for configuring and you've got yourself a TK voice modulator. There's an app for your phone which connects via bluetooth and allows you to change settings. Those settings are then saved to an SD card on the Teensy so you only need the phone to make changes. I think my parts came in at about $50 US. The guy (who is on this forum as lerxstrulz) has everything on his web site. Parts Lists, tutorials, source code (firmware), sound files and even the case and lid as 3D printable objects. He sells completed units but I chose to build my own. It's fairly easy to assemble providing you have basic soldering skills, that you are somewhat computer literate and you can follow the tutorials on their web site. The first two came reasonably easy for me, the last "not so much." I made a few mistakes during assembly which caused me to take apart (un-solder) the entire unit and re-assemble it correctly to get things working. I figured I'd post my experiences here so that others don't follow in my original footsteps. :-) I'm not going to post a full tutorial. They have that on their website. www.tktalkie.com This is just going to hit a few highlights in the idea of a basic description and a few "what not to do" examples. So here we go.... This is the Teensy 3.2 along with the header pins (legs) in the lower-left. The first thing you are supposed to do is chop up the headers and only solder on the legs that are actually required. I think there are 28 pins but only 15 (or so) are actually used. I thought, "Why chop them up? I'll solder them all. It will just take a minute." While I can't say for certain that this caused any issues, when I completed all the steps, I had very low volume and the bluetooth wouldn't connect. So play it safe and chop up the headers like they say and only solder the required legs. It's the safe thing to do. Next up here is the audio board along with a mono 3.5mm audio jack I purchased. This one DEFINITELY caused me issues. My problem with almost no volume was because the mono jack wasn't sending the signal correctly. I can only imagine the mono jack did not connect left and right together but only sent audio down the right.....which was not what either the TK-Talkie or the Aker amp was expecting. Once I rewired using stereo jacks all my audio problems went away. So again, play it safe and just use stereo jacks to begin with. You solder the Teensy board onto the sound module, then add the leads for the bluetooth module. I started with a nice connector to connect the bluetooth module (shown below) then later removed the nice connector because it was too big and wouldn't fit in the case. And be SUPER careful of the bluetooth wiring. I messed this up as well. All I can say is READ THE TUTORIAL CAREFULLY and look at the photos when wiring the bluetooth module. Watch where the wires go. There's only 4 of them. Transmit on the Teensy goes to Receive on the bluetooth. Similarly Receive on the Teensy goes to transmit on the bluetooth. Make sure you get these right. Sometimes the tutorial shows the bottom of the board and sometimes the top. Pay attention. I shrink wrapped the mic and line-out connectors. This is probably a good time to test everything and make sure it works. You need a Micro-SD memory card to write the basic setup and audio files to. I used my computer for this. Then you plug the memory card into the Teensy Audio module. The Teensy itself uses a micro-usb connector for power and/or programming. You plug the Teensy into a computer via USB and install some Teensy software. It's like a programming kit. Then you download and write the firmware (from the tk-talkie web site) to the Teensy. May as well go for version 4 of the firmware, it's the latest. At this point it should be working with default settings. You can disconnect it from your computer and now just power it off the same USB connector via a USB battery pack. Once my USB wiring problems were fixed I was able to connect to the app on my phone. Here I had to boost the mic level and adjust the sensitivity. Fairly easy but it seemed to be time dependent. I had to make changes and save quickly. If I waited too long it seemed to disconnect and I would have to connect again. Lastly, a fellow TK-Wannabe, Mr_Fahrenheit, was gracious enough to print out the box and lid for me on his 3D printer. Here's the raw box before any cleanup... I cleaned up the sides and holes. Did minimal sanding and painted it black. It's going inside my helmet so it won't be seen. I jammed everything into the box only to find the bluetooth module was a little too big. As mentioned, I removed the connector I was using and cut the legs off the bluetooth module, soldering the wires directly to the bluetooth board. Then I even dremmel'ed away at the lid slightly to give me a millimeter or so of additional room on the inside. Then everything fit. :-) The blue and white thing in the side is the memory card. And here's a quick sample of the audio... I hope this helps. Learn from me, people. :-) Mark
-
Allright, solved the bluetooth problem, too. I upgraded to version 4 of the firmware and checked all my wires and found I had two misplaced. Be very careful of the wiring if you put one of these together. It's fairly straightforward but I think there's some vagueness in the tutorial when referencing the transmit and receive pins. Transmit on the Teensy goes to receive on the bluetooth. Receive on the teensy goes to transmit on the bluetooth. Seems simple but don't skim the instructions like I did and you won't make this mistake. :-) Works great now. :-) Mark
