
tydirium1
-
Posts
233 -
Joined
-
Last visited
Content Type
Profiles
Forums
Gallery
Articles
Everything posted by tydirium1
-
Great advice considering trooping is a representation of something that we all grew up with Star Wars. We wouldn't want to give children the wrong idea about their heros as they are growing up. I know trooping is volunteer work or just a hobby and alot of fun , but I agree there is a time and place for everything. Alcohol or any other drug use should not happen while trooping .... period. All that plus you put yourself at more risk walking around intoxicated with a bucket on your head. That's not very smart.
-
Why not leather ?
-
Tomorrow. ... Revenge of the 5th.
-
I heard it was only the ones made in Canada. Unfortunately they let some rebels work at the manufacturing facility. The recall is to fix some sabotage. But , no one is supposed to know about that.
-
My understanding is, Anovos does make top notch armor. Although all armor no matter who you buy it from does need to have some minor modifications made in order to get to the centurion level. Also, the armor must be made to fit you personally. All pieces should hang properly as well. Ex. Shoulder bells could be hanging to far to the back creating too much under suit being seen in the front. It doesn't look quite right. Those among other things that you can find out about in this forum are what will get you up to par for the 501 st . Going for centurion level will take some work but your enthusiasm to do so is what makes all the people on this forum keep doing what they do. Troopers helping troopers. Stick with it and prepare to have plenty of patients. Some things take a while. I also ordered from Anovos and will not get my armor until later this summer. Hopefully. .... I hear it can take time. I've built 2 different blasters while waiting for my Armor. That was a lot of fun. Anovos is a good selection ,but be sure and do some research you learn a lot about this stuff that way. MOST OF ALL... DO NOT BUY FROM EBAY. <br><br> Happy trooping and Happy Star Wars day.
-
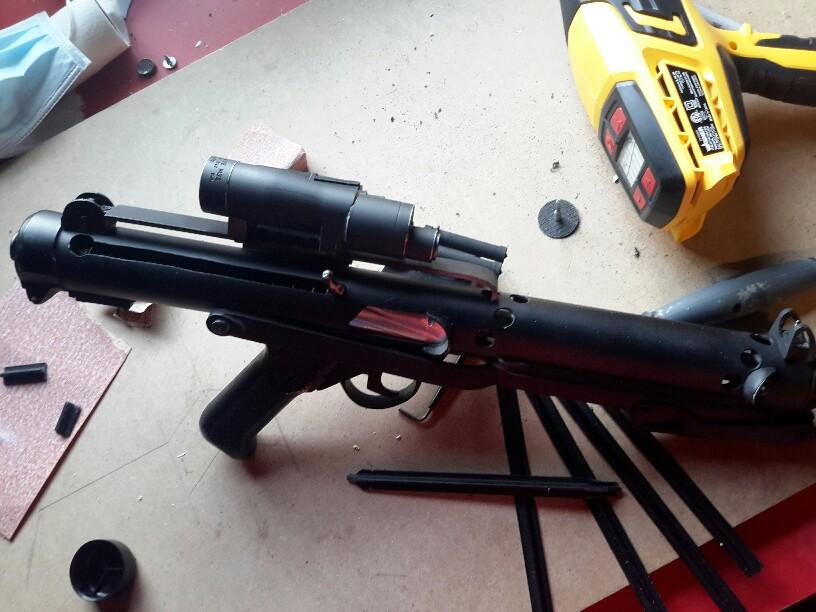
T tracks were bought from todds costumes . Plastic. Very easy to work with . I have them in place now . I'll post a pic soon. The bolt is actually resin , from doopys. I covered it in high heat silver tape. Used for HVAC work. The red color is just a reflection. Once you carefully place the tape you must rub the tape with something . Preferably hard and smooth so that it will take on the look of what is under it, but not scratch or rip the tape. Fairly easy to do and and great result.
-
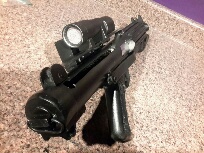
Didn't have time for a build thread, but there are plenty of those here. It started out as a piece of 1 1/4" fence pipe. Bought a doopy kit from another trooper here in the usa. Counter is just a resin cast . I want to replace it soon with something a little more detailed. The scope is a fine piece of workmanship. I'll post more on that soon. I can't say enough about it. It was 80 bucks and well worth it. Still working on the T strips and some work to do on the power cylinders. It's been great fun so far.
-

Tydirium1 - Armor making from scratch.
tydirium1 replied to tydirium1's topic in The Foundry - Armor and Prop Making
Armor making has came to a halt for now. Gonna have to get a set of armor to get a better idea on how to make these molds. I just can't seem to get it to look right. A closer inspection of the real thing and some hands on is needed. Entirely too impossible to do simply by looking at pics. Hopefully by the end of the summer I'll have some armor to go ofF of and I can start carving some molds that are the proper size and shape. In the meantime I'll be working on some weapons. Perhaps I'll put together some short threads on those over in the weapons area. Or maybe just some pics. Let's face it . Every trooper should have a weapons locker full of cool fire power. Can't wait to get started on the armor again. For now I wait on BBB day. For more than one reason. -
Heat source for vacuum fourmer
tydirium1 replied to Stormy3D's topic in The Foundry - Armor and Prop Making
You definitely want to get something that will heat the entire piece of plastic and evenly. If not you will waste alot of plastic and money. Also you will want to time your heating process once you get to that point to keep from over or under heating. Find what time works best. There are numerous types of heaters that you can use. The one for you depends on what kind of former you are building and what size. Try to buy one that puts out alot of heat and also distributes the heat over the whole piece of plastic. Don't go small, you will only heat the middle. The outside edges of the plastic will remain cool and will not form to your molds. If you are heating your plastic from the underside , I've noticed that alot of people use the infrared patio heaters. Although I'm not sure if they would be good as a top heat source. Heat rises and may damage the unit after some time. Hope this is helpful. -
Also notice the underside of the vocoder has more detail. It is actually comes unattached then attached back again. It is only the middle pieces that do it .
-
DLT-19 Scratch Build with Wood & PVC (w/ templates)
tydirium1 replied to HappyTrooperDotCom's topic in BlasTech DLT-19
Hmmm. Used my old computer and everything worked just fine. All printed out perfect -
DLT-19 Scratch Build with Wood & PVC (w/ templates)
tydirium1 replied to HappyTrooperDotCom's topic in BlasTech DLT-19
Having issues trying to get the templates to print at the correct size. They are all too small. I have tried to print at A4 pate size like someone else suggested and it did get bigger , but still not the proper size. Really scratching my helmet on this one. -
All of those who create armor molds are striving to create something that looks exactly like that which we have seen on the big screen. So, unless someone has actually witnessed someone else creating molds from someone else armor then how can they accuse that person of recasting. Even if all of the dimensions are the same. If the person making the molds acheved this then they did a great job. I'm quite sure there are several different ways to recast. That in it self could be a job . Here is a good question. If someone has a set of armor. Takes really good measurements of it , then carves some new molds to those measuments. Is that a recast? Would that be a copy? Not recast? The person would be making the molds by his or her own hand. I'm just trying to figure out what constitutes a recast.
-
Tydirium1 - Armor making from scratch.
tydirium1 replied to tydirium1's topic in The Foundry - Armor and Prop Making
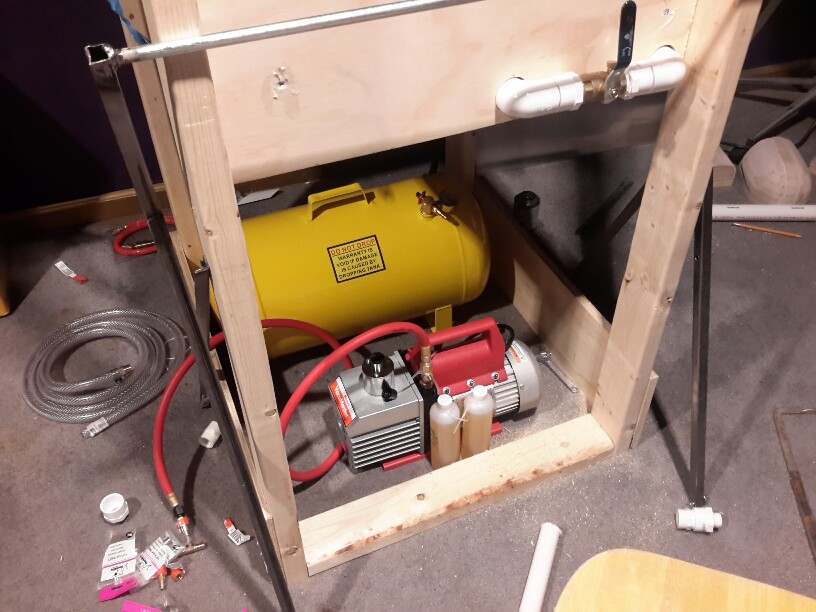
Ok. The vacuum forming machine works pretty good with the shop vac. I tried to replace the shop vac with a vaccum pump. I think in order to do that I'm going to have to build a new platen. The problem is, the platen that I have now has too much air volume. When I open the valve the system first has to evacuate the large volume of air before start to evacuate from around the mold. I would probably need 30 gal. worth of tank to do that and make a large pull. I think I'm going to hook the shop vac up to it and keep it that way. I'll build a whole new machine specifically for the pump and tank system. I wanted to upgrade the heating system anyway. Another good learning experience. When building a vacuum system , you have to be mindful of the volume of air that you are evacuating. It will save on time and extra equipment. I'll post later on that as I get started on it. I hope this keeps others from making similar mistakes. -
Tydirium1 - Armor making from scratch.
tydirium1 replied to tydirium1's topic in The Foundry - Armor and Prop Making
Thanks for the input guys. Much appreciated. -
Tydirium1 - Armor making from scratch.
tydirium1 replied to tydirium1's topic in The Foundry - Armor and Prop Making
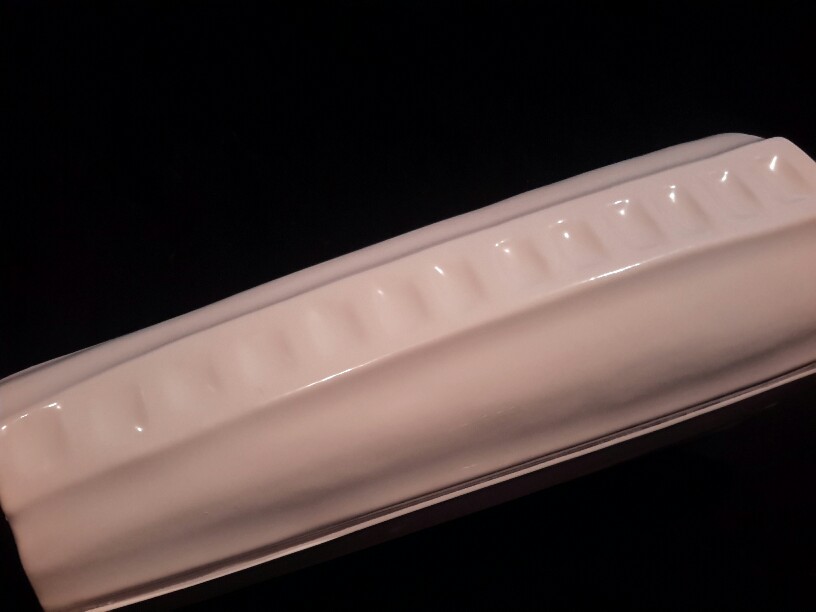
Example of the lack of detail on the forearm. I even have holes drilled in the mold to assist in pulling the plastic into those detailed areas. The plastic is cooling before the vac can attain the detail. Stronger vacuum will pull faster , before the material cools past the point needed to get the detail.<br> Also, these are still some practice molds and I may have to make these detailed areas a little deeper to get the proper look. Once I get the new vac system up and running then I'll be able to tell. Either way the shop vac is not strong enough to do what is required.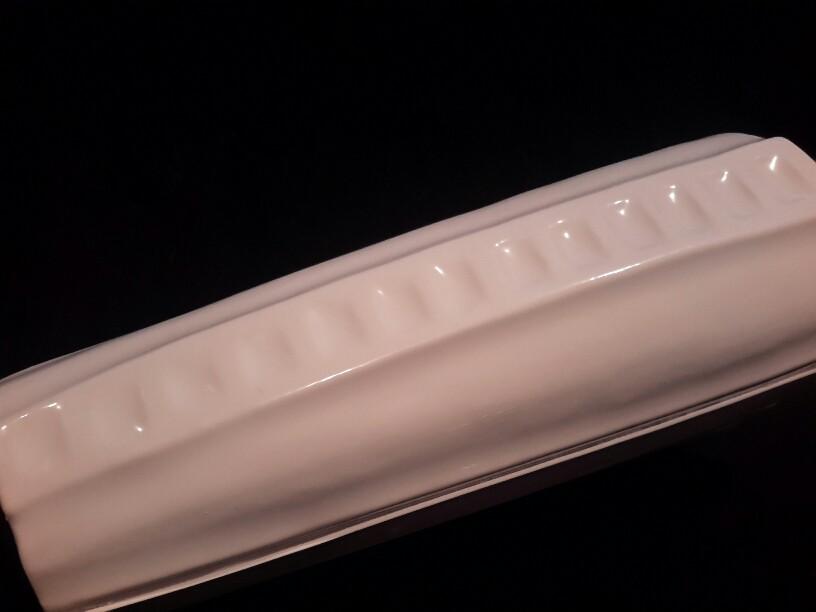
-
Tydirium1 - Armor making from scratch.
tydirium1 replied to tydirium1's topic in The Foundry - Armor and Prop Making
Ok. So , using a 6hp shop vac worked pretty good. Still not giving the detail that I would like to see. So I'm switching over to 8 cfm vacuum pump and a 11 gal tank. I may have to add another tank as not to lose vacuum in the middle of a pull. Especially if I want to use a thicker material or when I get into some of the bigger pieces that require pulling out a bit more air. I would recommend using a vaccum pump type system to anyone that is serious about building nice looking armor. <br><br> The added vacuum pressure may cause me to build a new platen , this time from 1/4 " aluminum. Let's see how that pans out.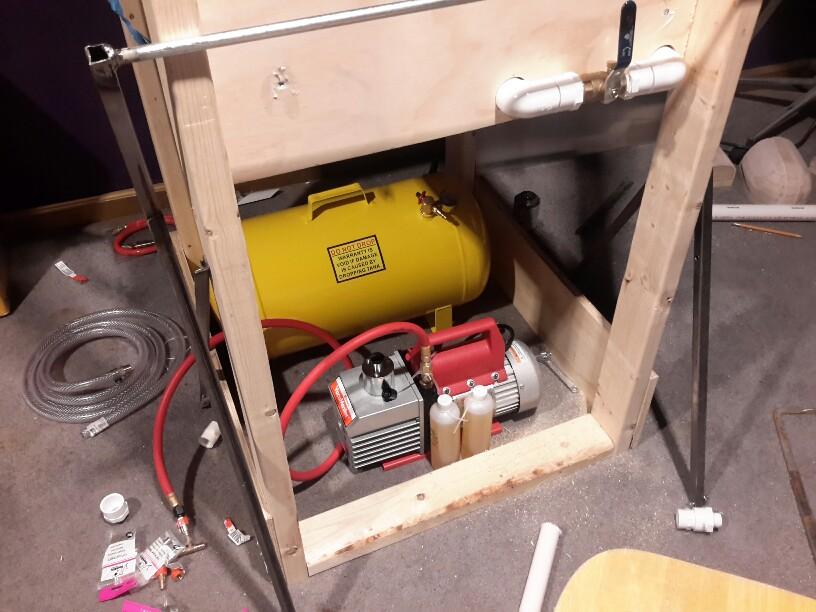
-
ABS is not too hard to work with as long as you have a Dremel. Makes cutting and sanding a breeze. Of course the final sanding should be done by hand. I do like the shiny look. Even if you are going to do some weathering. They all started out shiny. I would imagine.
-
Tydirium1 - Armor making from scratch.
tydirium1 replied to tydirium1's topic in The Foundry - Armor and Prop Making
<br> Some more experimental molds. Found out that the wrist end of the forearm needs to be bigger. Need to get a hand through that end . Great learning experience. Also, these were taken before the risers were added to the bottom of the molds. Very important to add risers if you want to get straight edges on your armor. Without them you end up with curved edges. A little thinking ahead. If using a shop vac you may have to use 1 inch or better risers.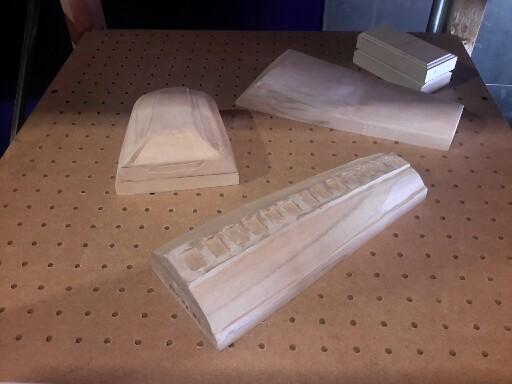
-
Tydirium1 - Armor making from scratch.
tydirium1 replied to tydirium1's topic in The Foundry - Armor and Prop Making
<br> Just a little easy experience on making molds. Not final mold.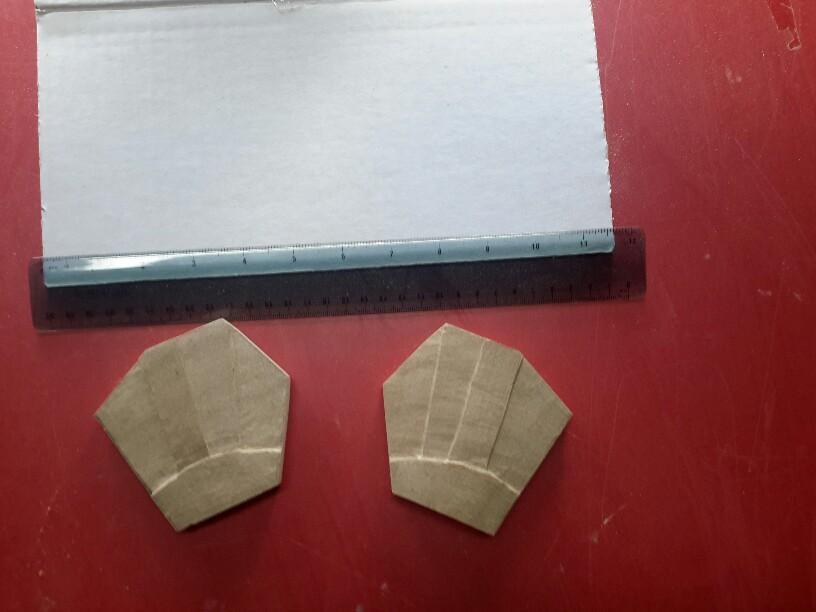
-
Tydirium1 - Armor making from scratch.
tydirium1 replied to tydirium1's topic in The Foundry - Armor and Prop Making
homemade vacuum forming machine. Early going. Lots of modifications to be made. 24" ×24" with 6hp shop vac. Works good , but going for a vaccum pump probably around a 8 to 10 cfm. That will help to make deeper pulls with the thicker material. Also to add another mold or so and save on material.<br><br> I'll be posting some pics of molds soon. They are very time consuming, but I will try to post some step by step mold making pics.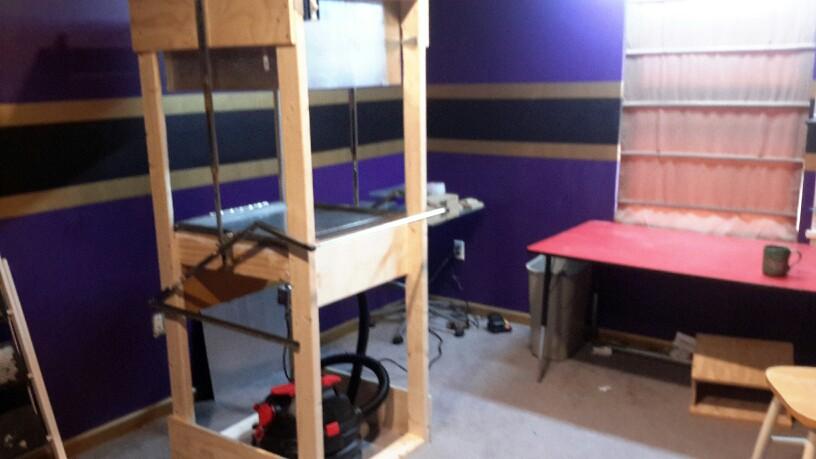
-
Starting this thread to document my progress. Also to help others that are thinking about making armor. Hopefully pick up some advice from those who have gone before me.
-
Need tips and tricks for making armor
tydirium1 replied to Hansolo227's topic in Getting Started - Read this First!
It can be very very time consuming. You have to ask yourself if you are in for the enjoyment of making the armor and wearing it. Or do you just want to have some armor to wear. If you are looking for the cheaper way to attain armor, then just buy some. By the time you finish building everything you need to form your own armor. You could have bought some for less.<br><br> However, if you are really into building your own then welcome to the club. I'm currently looking for some detailed dimensions for armor. Trying to do it by looking at pics is a lot of trial and error. Lucky for me I already have the tools necessary for building the molds. Getting them to look exactly like the real thing is not easy.