tennantlim
-
Posts
112 -
Joined
-
Last visited
-
Days Won
2
Content Type
Profiles
Forums
Gallery
Articles
Everything posted by tennantlim
-
 Your build is coming along beautifully! I am so envious of your electronics.
 -
TRIGGER MECHANISM Drill a hole through the left face of the grip frame and just enough on the opposite wall to mark the trigger pivot point. Drill a hole here for the spring to sit in. Grind two slots leading to the trigger pivot point for the pin to slide down during installation. Drill a recess in the back of the trigger and insert a toothpick to engage the spring. This is fixed with epoxy. I posted a video on Facebook demonstrating the working trigger. Hopefully you can view this: http://bit.ly/2wPKsHa Putty added to the top of the trigger pin slot to lock it down. Cover up the hole on the grip frame.
-
Thanks!
-
Thanks Germain! 1. Semi gloss black base coat and light weathering with silver guilding wax (like Rub and Buff). Seal with clear coat. This will show through the "openings' of the wrinkle layer later. 2. Brush and dab toothpaste on areas where you want the base layer to show through. Allow to dry. 3. Spray a light but thorough coat of wrinkle paint. I use VHT Wrinkle Plus. Allow 48 hours to dry. 4. Use a dishwashing scrub and remove the toothpaste under running water. Now your blaster smells fresh and minty! That's it!
-
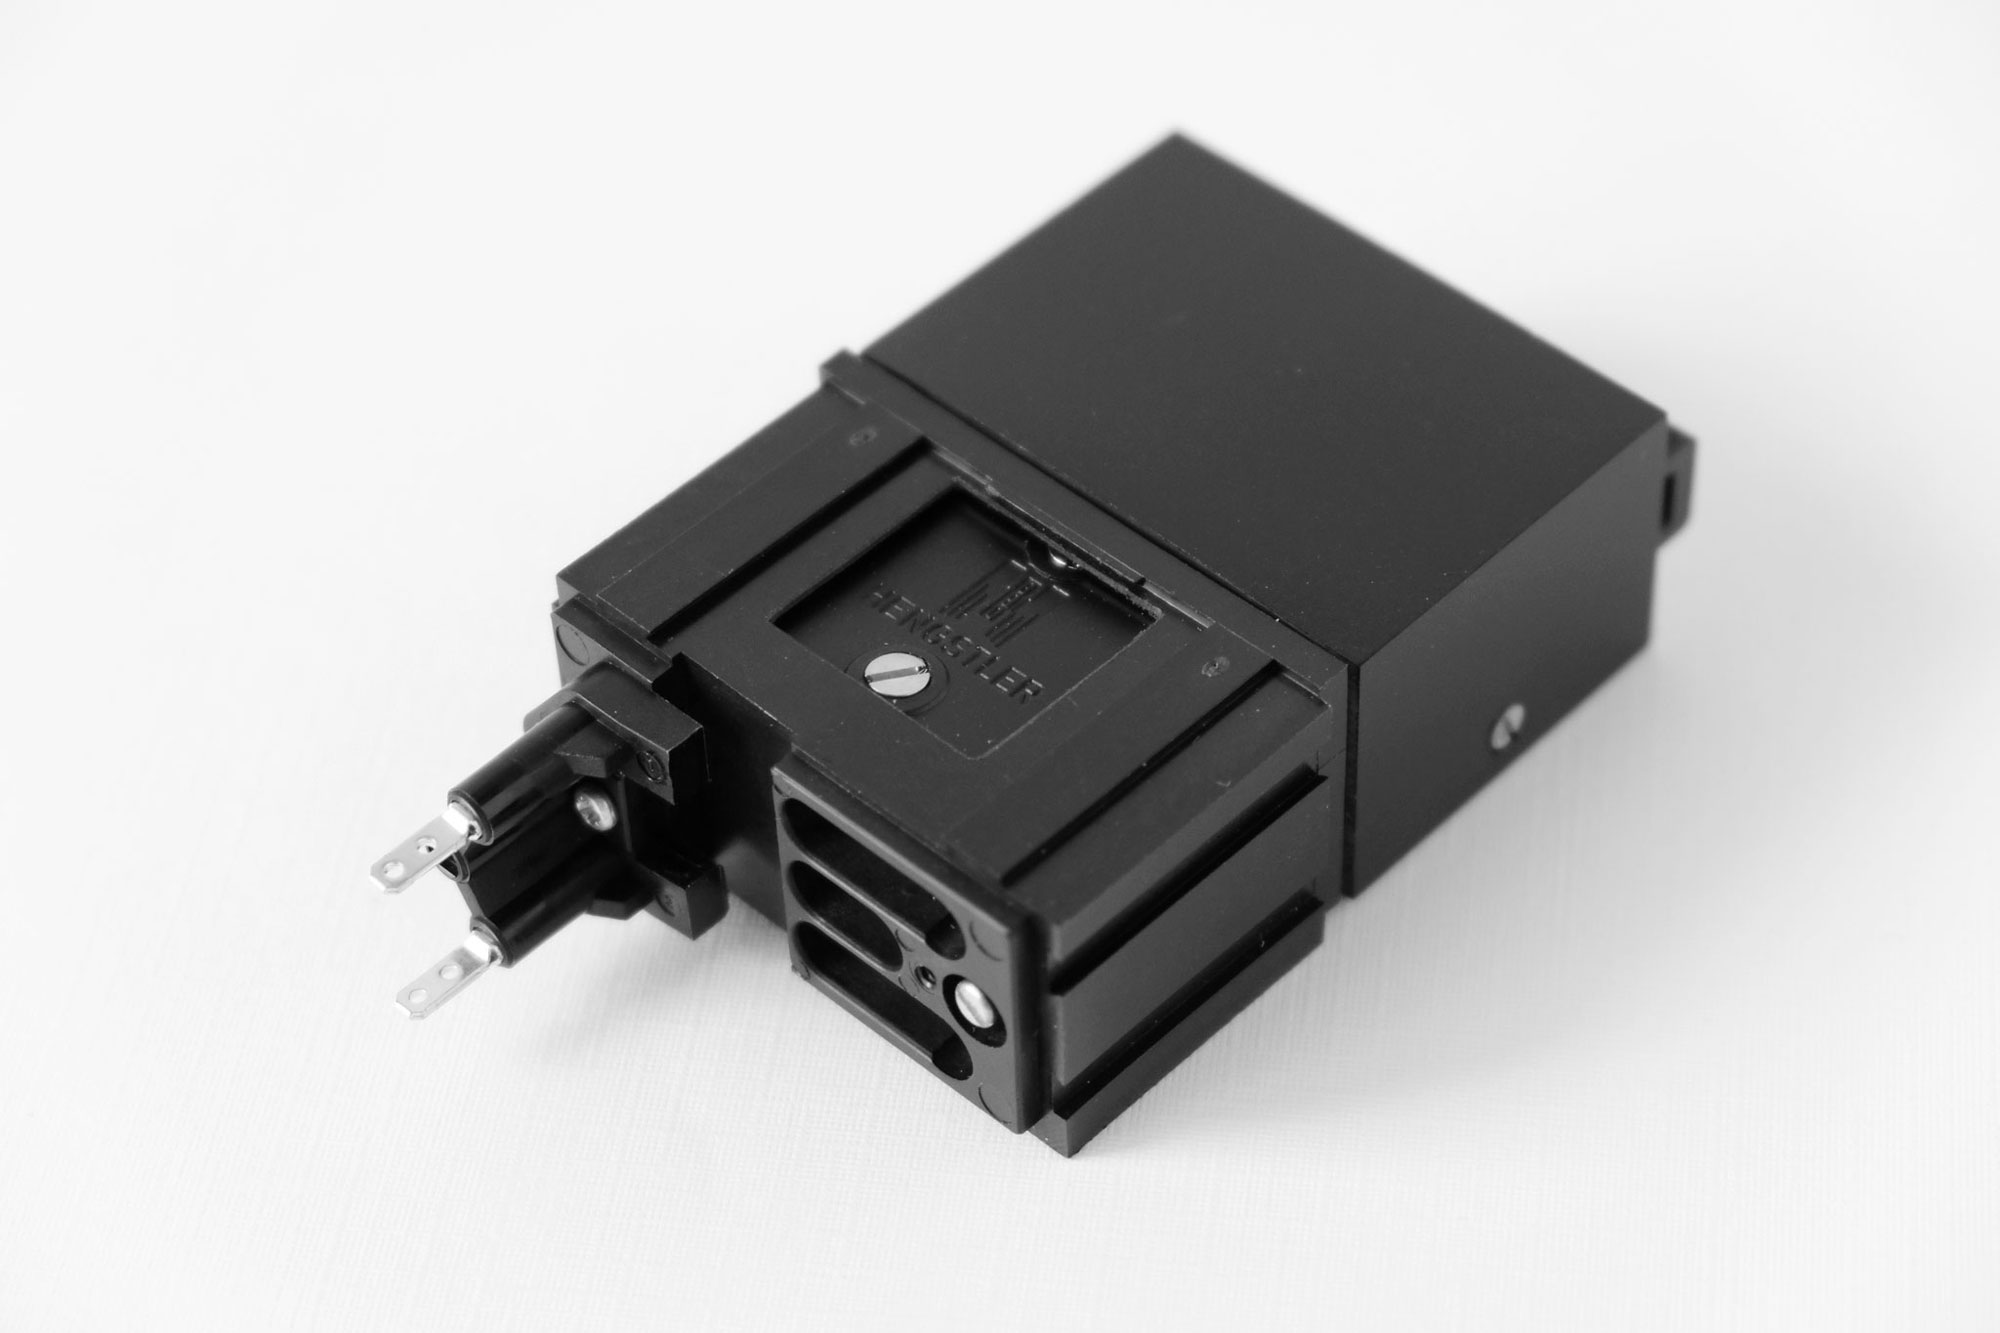
Some progress over the past week. Applied a subtle layer of wrinkled paint and general weathering. Attempted to simulate the cadmium coating on the Hengstler counter. I am aware this is not screen accurate.
-
Thanks Tino. I suppose it's my way of showing respect to the franchise and to the vendors for producing such fantastic products. It helps that I'm not in any rush since this is a personal project and not meant to be trooped with. There are several challenges ahead with this build that will require some elaborate modifications, so hopefully all will be well in the end.
-
And here we go!
-
BACK CAP CATCH This simple but brilliant idea was adapted from another build thread here. Cut a collar stay to size, fold it and glue in place. Done!
-
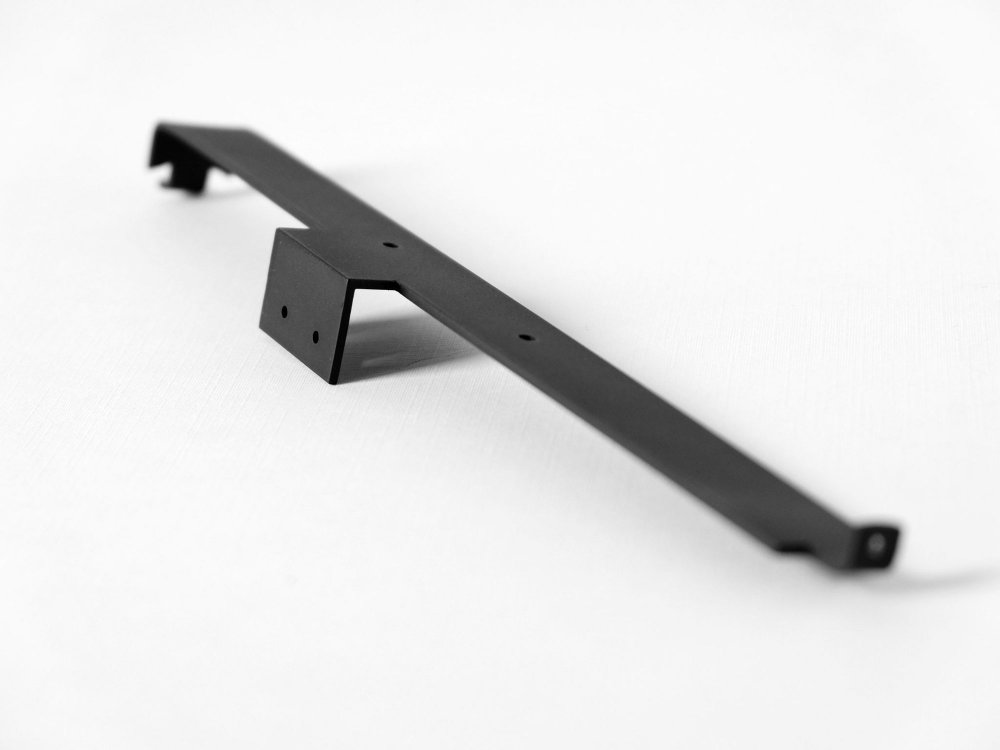
SCOPE RAIL I "aged" the scope rail by dabbing flat black paint in various layers, each one with different amount of thinning to create texture. The edges were lightly weathered with silver Rub n' Buff but not much since it is unlikely to receive much contact during usage. BEFORE AFTER
-
M38 TANK TELESCOPE I have obsessed over the paint and weathering for this scope for more than a week! I used brass guilding wax as the first layer, sprayed satin black over, and used a cotton bud dipped in thinner to gently remove the black in areas where contact is likely, revealing the brass beneath. Here was my first attempt; My only references were photos I found online, but somehow I was never satisfied with the results. Fortunately, a buddy of mine recently acquired an actual scope and offered to loan it to me. Right way I noticed the brass color in the actual scope is less vibrant, so I ordered a bottle of AK Interactive pale brass online and got it the next day. In my second attempt, I scaled back on the weathering and focused more on the areas around the lenses. Here are a few side-by-side comparisons. Left one is the real scope. Here is the real telling sign between them and I can't figure out how to replicate the sharp letterings. Thoughts?
-
Thank you Tino. I have viewed your build threads so many times in preparation for my build, so your reply here is tremendously motivating. Really appreciate you sharing your knowledge with the community.
-
Hi Germain! We meet again Indeed I'm not striving for a screen accurate configuration, but it would be ideal to check off as many boxes as I can nevertheless. Thanks for your information. I'm going to scan through my bluray video and see if I can get a better look. I understand there were at least 4 ways the rails were attached, so it's a matter of picking one I guess. It's a shame many build threads here have been ruined because of Photobucket. I tried searching and kept seeing invalid image boxes
-
Bryn's E-11 Doopy Build - Better late than never.
tennantlim replied to sla73's topic in ANH BlasTech E11
I just started on my build and your thread provides a wealth of useful information and tips. Your blaster looks great! -
Is there a specific type of screw required to attach the rail to the rear sight? The screw in the photo is just a random one I found at home that fits.
-
Hey Ted! Nice meeting you here as well. From what I've seen on your FB page and the photo you posted above, your blaster looks pretty awesome already! I will share my process in more details in the upcoming posts.
-
Thank you for your kind words Jesse. Indeed the remarkable craftsmanship on these parts deserve to be shown in their best light and I hope my build do justice to them. I look forward to seeing your armor and blaster come together!
-
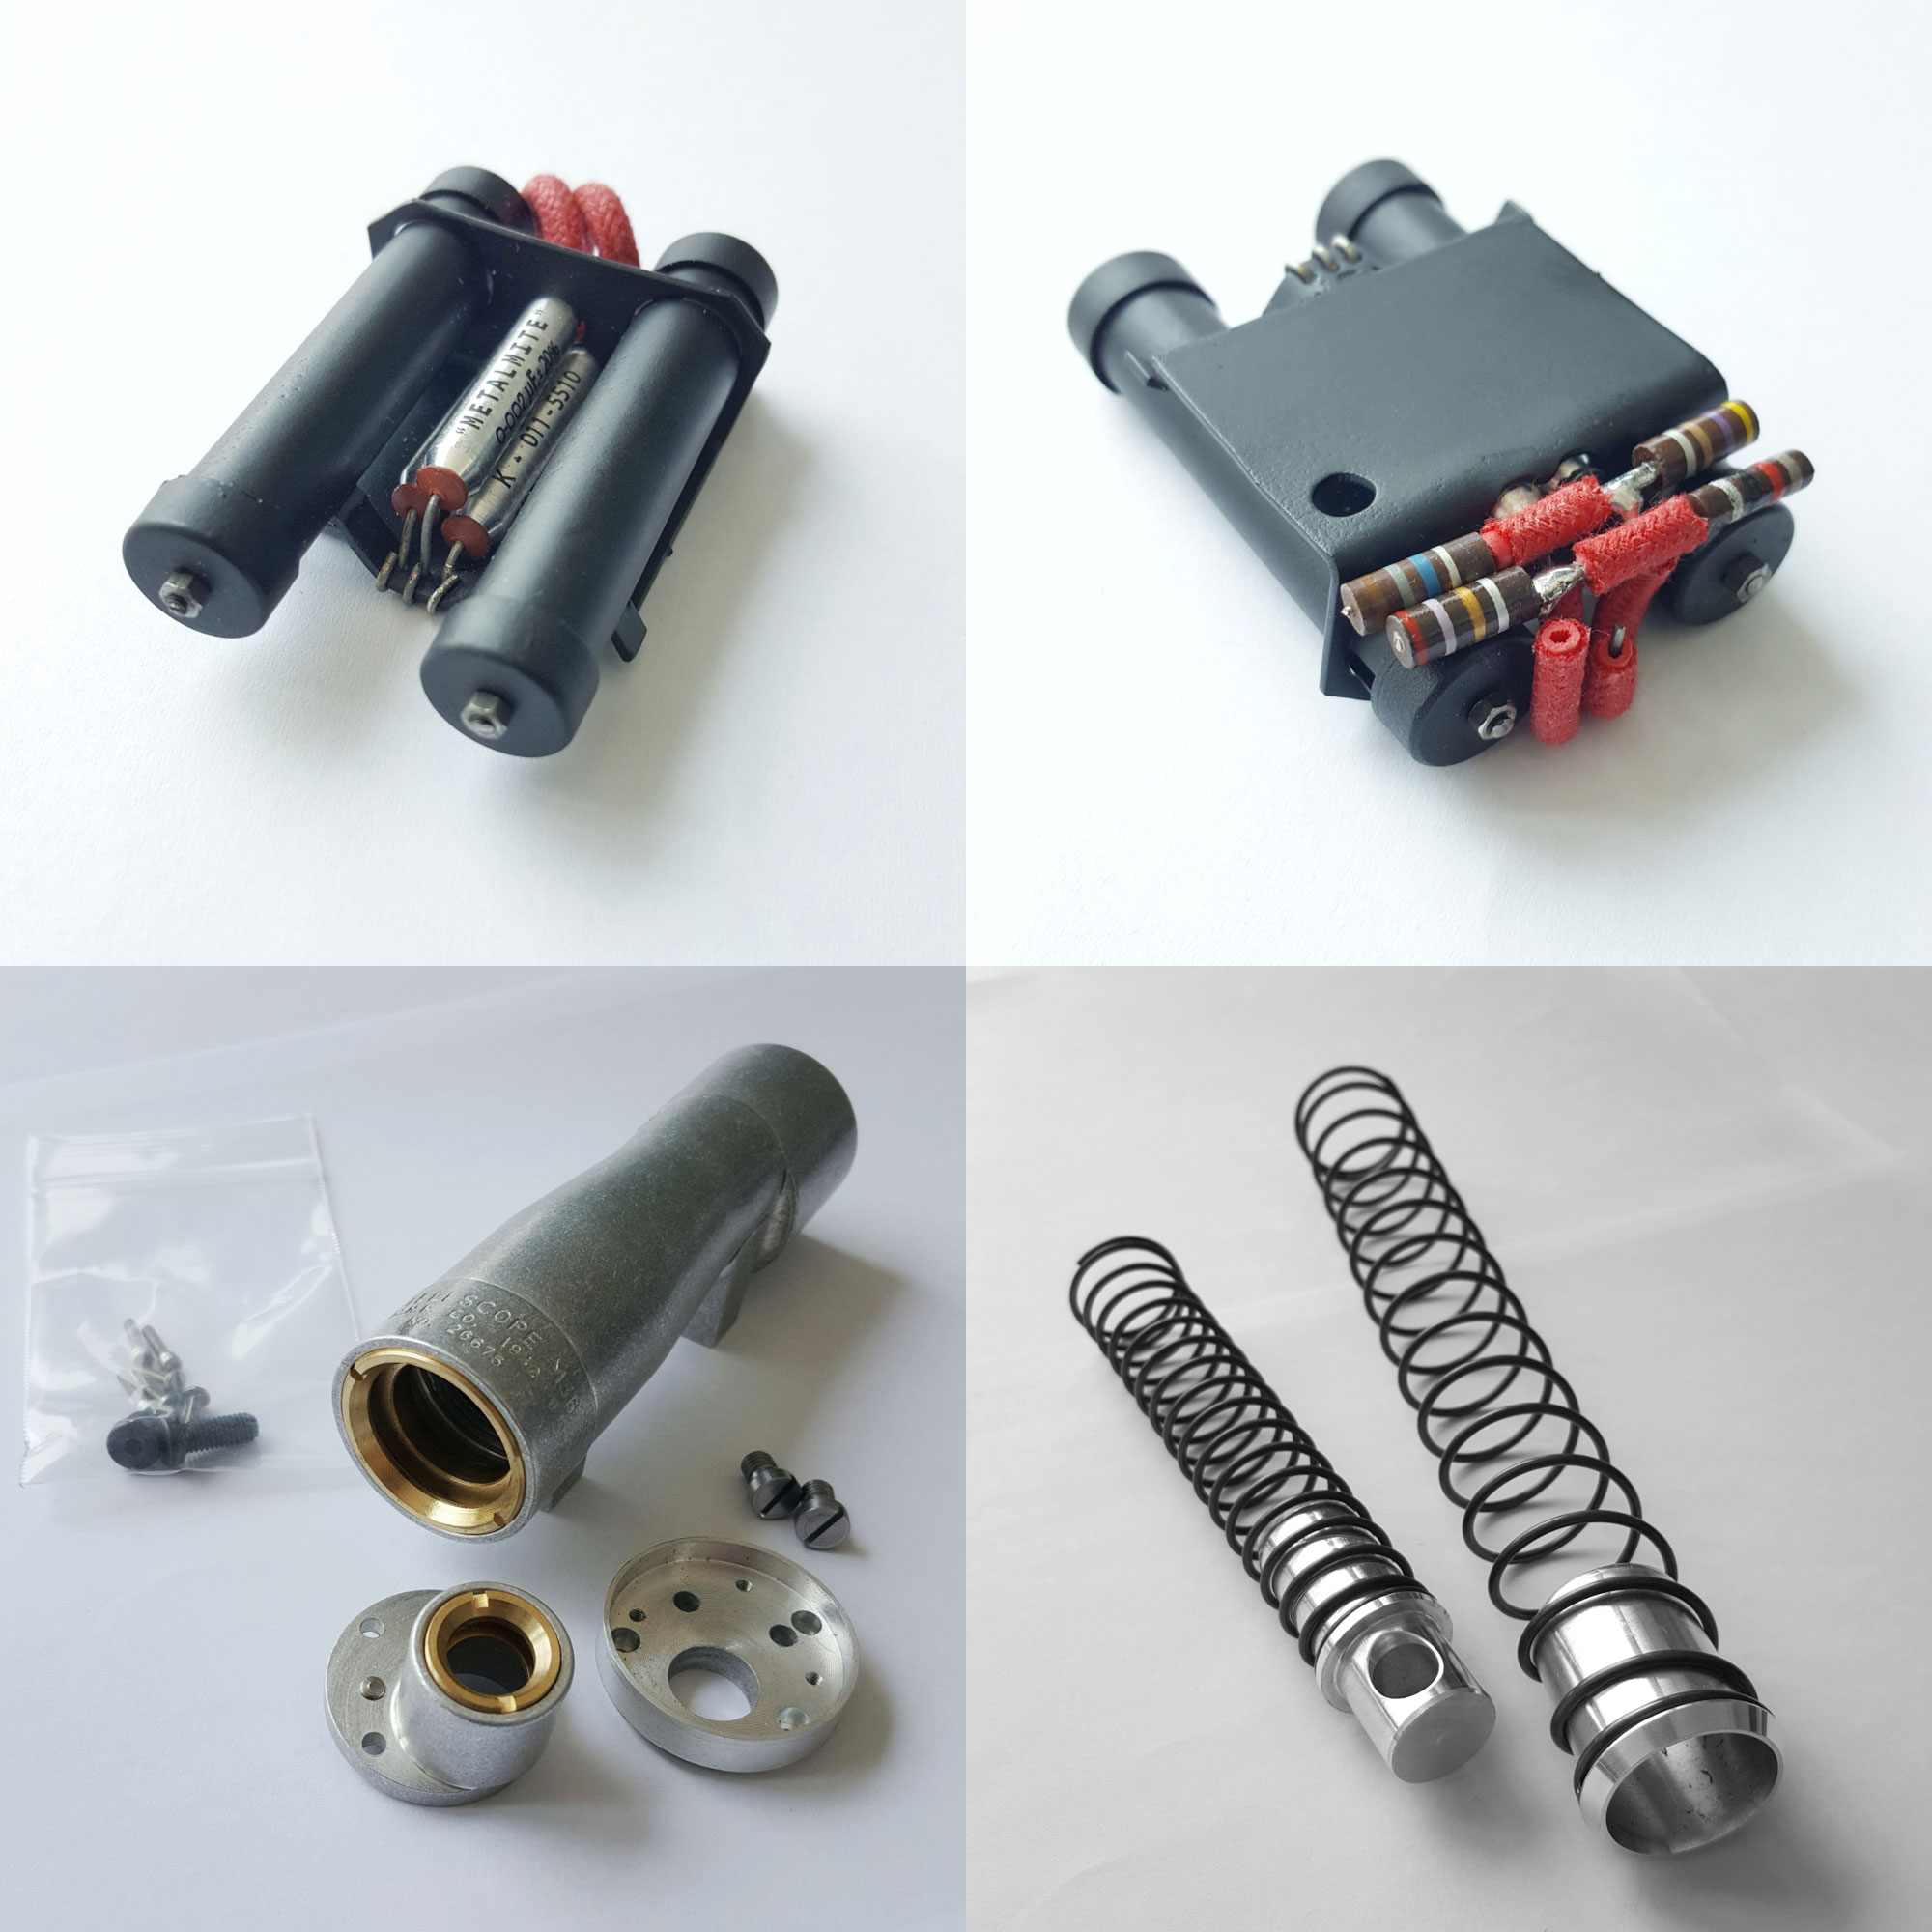
POWER CYLINDER I reluctantly painted the power cylinder but with thinned black wash so the nice details still show through. FOLDING STOCK
-
BOLT ASSEMBLY
-
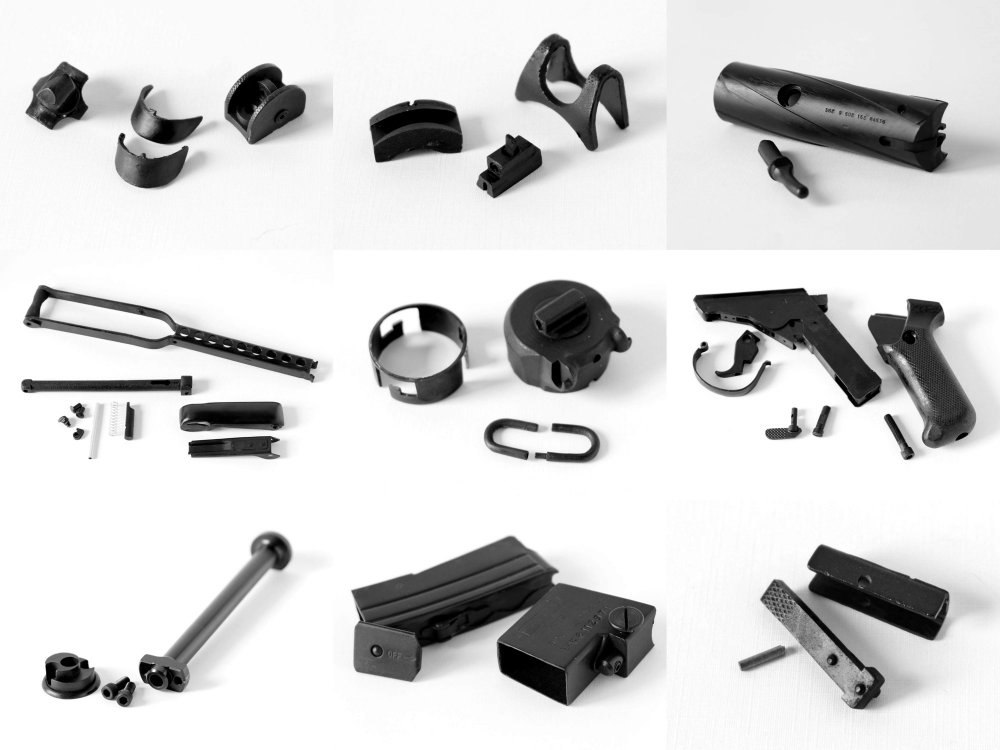
Greetings Troopers and Builders, Although I am not building a TK armor, I have decided to embark on an E-11 build because I have always loved this iconic blaster even though the Stormtroopers never seem to hit anything with it. The blaster will not be strictly based on any canon version so purists should just move along now. It will mainly be a display piece with some level of functionality; working folding stock, removable magazine, cocking bolt, etc. The documented parts below were as I received them, before I started working on them. To start off, I acquired most of the Sterling replica parts from Robert aka swpropman on eBay who makes beautiful, detailed casts in plastic. Even the textures of the original gun were perfectly replicated, so it was just a matter of sanding down the seam lines and weathering them. Not pictured here is his 38.1mm OD PVC tube. I am sure anyone reading this will know who Chris aka Field Marshal is. These are just a sample of his amazing productions, and I am now sorely tempted to order a few more parts to replace the plastic ones. This super accurate Hengstler Counter replica is from Dennis aka Blue Snaggletooth who has a sales thread here. Scope and counter rail from Tosche Traders. T-Tracks from WannaWanga.


-
Just another F-11D blaster build
tennantlim replied to tennantlim's topic in Weapons of the First Order
If you are reading this, you may have noticed Photobucket has broken the links to my photos, as with everyone else using their free account. I have since deleted my account and I don't think I will re-upload the photos in the thread here. if you like, my build thread can be viewed here: https://www.facebook.com/tennant.lim/media_set?set=a.10154113391975974.1073741864.606335973&type=3. -
I have ordered several parts from Robert and a counter from Dennis as well, and I am happy to see your positive feedback on their products. Looking forward to seeing your build! All the best man.
-
I concur.
-
That would be sweet! I'm also eager to see the development of your foresight assembly.
-
Just another F-11D blaster build
tennantlim replied to tennantlim's topic in Weapons of the First Order
Thanks Chris -
Just another F-11D blaster build
tennantlim replied to tennantlim's topic in Weapons of the First Order
Thank you so much Germain. Your feedback have been extremely helpful in my build.