

Tee-Kay Fisto
-
Posts
295 -
Joined
-
Last visited
Content Type
Profiles
Forums
Gallery
Articles
Everything posted by Tee-Kay Fisto
-
Brian's Anovos ANH Stunt TK Slow Build
Tee-Kay Fisto replied to Tee-Kay Fisto's topic in ANH Build Threads
Hi The next task on my list is the dreaded Anovos shins. I know a lot has been said about the mis-labelling of some Anovos kits so I have gone down the route of using the shape of the pieces to decide where they belong. I have tried to get each calf to have the inner and outer pieces follow the muscle. It has been said several places that there should be a longer curve on the outer calf and a shorter curve on the inner calf. This is a picture I found on a thread somewhere. Sorry I can't remember who posted the image, but all credit to them as it is a huge help. Calf shape by brian.mcdavid, on Flickr Please help and advise if I have them correct or need to rearrange them. In the photos I have 1&2 as the right calf and 3&4 as the left calf. Shins 1&2 right leg. 3&4 left leg. by brian.mcdavid, on Flickr Shins 1&2 right. 3&4 left by brian.mcdavid, on Flickr Right shin by brian.mcdavid, on Flickr Left shin by brian.mcdavid, on Flickr Thanks in advance for any help and advice. Brian -
Brian's Anovos ANH Stunt TK Slow Build
Tee-Kay Fisto replied to Tee-Kay Fisto's topic in ANH Build Threads
Once BBB day came there was a flurry of activity. Firstly because no-one was home to receive the delivery which meant going to the local Fed-Ex depot to collect it and then trying to get this muckle great box into the back of an Audi TT. I honestly thought I was going to have to unpack the box in the car park, but it fitted - just! Opened and checked the contents but decided not to post pictures of it lying all over my sitting room floor as we all know what it looks like. Forwent the obligatory Bucket pic as well, although I wish I had taken one as my bucket has been lying in bits for ages now awaiting repaint and adjustment to get rid of the HUGE gaps around the ears and fit a longer brow trim, as the original was about 1/2" too short. Bucket in bits for improvements by brian.mcdavid, on Flickr Started on the trimming using the score-and-snap method as I'm used to working with a stanley knife (I think many people call it a box cutter) so this seemed the easiest way to go. By the 25th February I had two piles of white ABS, one good - one bad. Trimming finished 25th Feb 2016 by brian.mcdavid, on Flickr Left-overs by brian.mcdavid, on Flickr This was as far as I went for quite some time. Started doing loads more reading as really apprehensive about making a right pigs ear of this. The main WIP's I kept going back to were UKSWRATH's build, Christopher Pearsons WIP's both here and on theUKG, KMan's Adventure Build and Tony 'boneyboy' Lee's build threads. There were many, many more viewed but these were my usual go-to places. As I was going to be doing a lot of this on my own I decided to do the very uncomfortable task of making a duct-tape mannequin for my armour. My very understanding wife had the task of turning me into a hot, sweaty, immobile statue, and fortunately agreed to cut me out of it when we were done. A most unpleasant experience (and I swear that the duct tape stretched out of shape when I was cut out of it as I am never that shape! ) Armour taped onto the mannequin gave me a warm feeling seeing it together (roughly) for the first time on 14th July. Taped onto mannequin by brian.mcdavid, on Flickr First proper assembly was on the forearms. Cut to cover strip width on the front and glued the cover stips to one side of each forearm only using lots of clamps to hold in place. Allowed glue to dry then glued the other half of the forearm in place and allow glue to dry this time with a couple of clamps and lots of magnets to hold. Sorry no photos. Next up was the thighs. Used the same process as with the forearms doing one half to the cover strip with clamps, then doing the second half using clamps, magnets and tape to hold until the glue set. Thigh Outer Halfs with cover strip glued by brian.mcdavid, on Flickr Thighs with front cover strip glued by brian.mcdavid, on Flickr This is where I am up to now. I'm gonna have to get a move on if I ever want to get this finished. My plan was to do one side of all the limbs and then do all my sizing, cutting and glueing of the backs of all the pieces. Thanks for dropping by. All advice gladly accepted Brian -
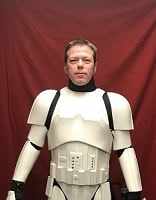
Hi All I thought it was about time I started putting my very slow TK build out there. I'm running a WIP over on the UK Garrison, but I thought I would put almost the same thing on here too, so here we go with another Anovos TK build, and please be patient with me as it's going to take a while (both the actual build and the WIP). Started off in 1977 with wanting to be a Stormtrooper when I grew up. Here we are 39 years later trying to make that happen. With the dicovery of Anovos I decided to have a crack at doing this and started reading A LOT of stuff here and over on the UK Garrison forums. I pulled the trigger on Feb 9th and placed my order (this was one of their last 300 kits from the original production run). I wish I had done it earlier and saved some money but hey-ho I'm in it for the love of Star Wars so the money is (almost) not important. Also at this point I wish I had been able to see into the future and see that Anovos were going to offer the second run minus the soft goods for 200 bucks less!! I have already replaced my supplied soft good anyway! It was at this point that I decided that if I was going to do this then I was going to go all the way and aim for Centurion level. Ambitious for a new builder I know, but also achievable after seeing how other people have progressed. This decision determined what other lovely things I was going to have to spend my hard earned money on. Can I just say that Americans have it so much easier that us Brits. Getting a lot of things in the UK in near impossible and importing costs an arm and a leg. We have to pay import duty and tax on imports so our costs rise. Big Brown Box arrived Feb 17th and the build started. Big Brown Box 17th Feb 2016 by brian.mcdavid, on Flickr As well as the armour I started ordering (hopefully) everything else I was going to need. Boots from TK Boots TK Boots - Very nice by brian.mcdavid, on Flickr New stronger belt from Rob Kittell on FISD Flexible latex hand guards from Trooperbay Bracket system from MrNostripes Belt, Brackets and Hand Guards by brian.mcdavid, on Flickr Helmet pads to replace the terrible Anovos helmet liner. Replacement Brow trim as the one on my bucket was at least 1/2" too short. Helmet Pads and new Brow Trim by brian.mcdavid, on Flickr After reading so many WIP's both here and over on the UKG I also realised I would have to buy some essentials for actually building the armour so more money had to go for the cause. In return for my hard earned I now have lots and lots of strong rare earth magnets, several tubes of the evil smelling E6000 glue and, thanks to a comment by Christopher Pearson in his build thread, many many small clamps. You can never have too many magnets and clamps. Bought loads of elastic in the different sizes and colours I found mentioned in various WIP's Various sizes and colours of elastic by brian.mcdavid, on Flickr Bought new base layers as I wasn't sure at that point how good the Anovos soft goods would be. Turns out that was the correct thing to do. Invested in a few new tools and build consumables as my garage already contained most of what I would need. Also bought a Doopy E11 blaster kit which is built and will crop up later in this build with details of all the extra bits that went into it to make it more accurate. I didn't take build pictures of that as my construction method had absolutely no method to it.... was just making it up as i went along. When I read an interesting post on someones build thread I would think "that's cool, maybe I could do that" and it was all change. Will post more of my painfully slow progress soon in the hope of being able to pick all the woderfull brains out there to stop me making a right pig's ear of this. Thanks for stopping by. Brian
-
Oh Hell No!!! How are we mere mortals supposed to live up to your amazing standards Tino [emoji38] This is a spectacular show of blasters. I'm still trying to find the time to finish my first Doopy build which is going to hide itself in the shadows after seeing these photos. Need to start planning the next one much more seriously. Sent from my iPhone using Tapatalk
-
Yeah going to have to go a different way with fitting lenses. Actually managed to get a new scope from Doopy without having to wait for for stock!!! I'll try using resistance fit like you suggest. Thanks. Brian Sent from my iPhone using Tapatalk
-
Love your thread. <br> I drilled through my Doopy scope and fitted the lenses from Tino's completion kit. Unfortunately I made a right mess of it when fitting the lenses and ended up with CA glue all over the small lenses ( I fitted the second small lens from the monocular half way down the main scope body ). <br> Have ordered another scope from Doopy so that I can start again. Hopefully I can get it to the same standard as yours.
-
This is some fantastic work. I'm continually amazed at the level of skill and dedication that the people here have.
-
Great job Steve. A great lesson for us noobs. Where did you get the replacement Brow Trim? Mine is about 1/2" short so I'll need to replace it when I'm rebuilding my bucket. Cheers Brian
