


Machinimax
-
Posts
100 -
Joined
-
Last visited
Content Type
Profiles
Forums
Gallery
Articles
Everything posted by Machinimax
-

SlyFox's ANH Airsoft Conversion w/ Real Parts
Machinimax replied to SlyFox740's topic in ANH BlasTech E11
The airsoft Sterling is great for a blaster build. I love the mods you're making with the grip and other parts. -
Yeah I think I'll stick with the regulator for now. Thanks again for your help! I started working on my circuit yesterday and everything is going very well!
-
Ahh! Hence why we hook it up to the 12 volt line as opposed to the 5 volt. Gotcha.
-
You'll probably have to click a link since I'm posting on a mobile device but I've drawn a (crude) wiring diagram of my own outlining how I<br><br> believe the voltage reg should be hooked up to the SHA. Tony could you confirm this or notice any mistakes? Thanks!<br><br> <a data-ipb='nomediaparse' href='http://i1238.photobucket.com/albums/ff484/Machinimax05/Mobile%20Uploads/image_zpsfqs8n0q4.jpg'>http://i1238.photobucket.com/albums/ff484/Machinimax05/Mobile%20Uploads/image_zpsfqs8n0q4.jpg</a>
-
Gotcha and (hopefully) one last question and then I can stop being a pain lol. <br><br> Why use the 5 volt regulator on the SHA? I thought it used a 9v battery normally.
-
Also a question of curiosity. Is there a reason there aren't any capacitors used with the voltage regulators in these circuits? I thought they were used in conjunction with the regulator to help maintain a steady output voltage.
-
Yeah I had seen that and that's what gave me the idea.
-
So what do you guys think about this? I'm going to use an iComm as my effects module. I was thinking of modding it so that it would be powered by the XP-5 instead of that little lithium battery. It should be simple enough. I'm thinking just swap the battery out with a 3.6V voltage regulator and then hook it up to the the 5v output of the battery. Any thoughts, suggestions, or concerns?
-
Does anyone here know if the iComm can safely accept 5 volts? I'm following Ukswrath's tutorial for building an external power supply for your helmet electronics and I was thinking of modifying the iComm to run itself off the power source rather than the battery.
-
If it helps anybody I picked up these:<br><br> Fuse holder: <a data-ipb='nomediaparse' href='http://www.amazon.com/Vktech-Inline-Screw-Holder-5X20mm/dp/B00J95SJRI?ie=UTF8&psc=1&redirect=true&ref_=oh_aui_detailpage_o00_s00'>http://www.amazon.com/Vktech-Inline-Screw-Holder-5X20mm/dp/B00J95SJRI?ie=UTF8&psc=1&redirect=true&ref_=oh_aui_detailpage_o00_s00</a><br><br> Fuse: <a data-ipb='nomediaparse' href='http://www.amazon.com/Bussmann-GMA-5A-Acting-Cartridge-Listed/dp/B000HOSZVA?ie=UTF8&psc=1&redirect=true&ref_=oh_aui_detailpage_o02_s01'>http://www.amazon.com/Bussmann-GMA-5A-Acting-Cartridge-Listed/dp/B000HOSZVA?ie=UTF8&psc=1&redirect=true&ref_=oh_aui_detailpage_o02_s01</a>
-
Thank you, Tony. I will be using this for my own armor build.<br><br> I wasn't a fan of having to use batteries for each system in the bucket but this will change everything! I just got the XP-5 yesterday and am now waiting on a few more small parts as well as my SHA system. I'll be sure to post pics of my SHA wiring to confirm everything will be properly in place and to provide reference pics for you guys.
-
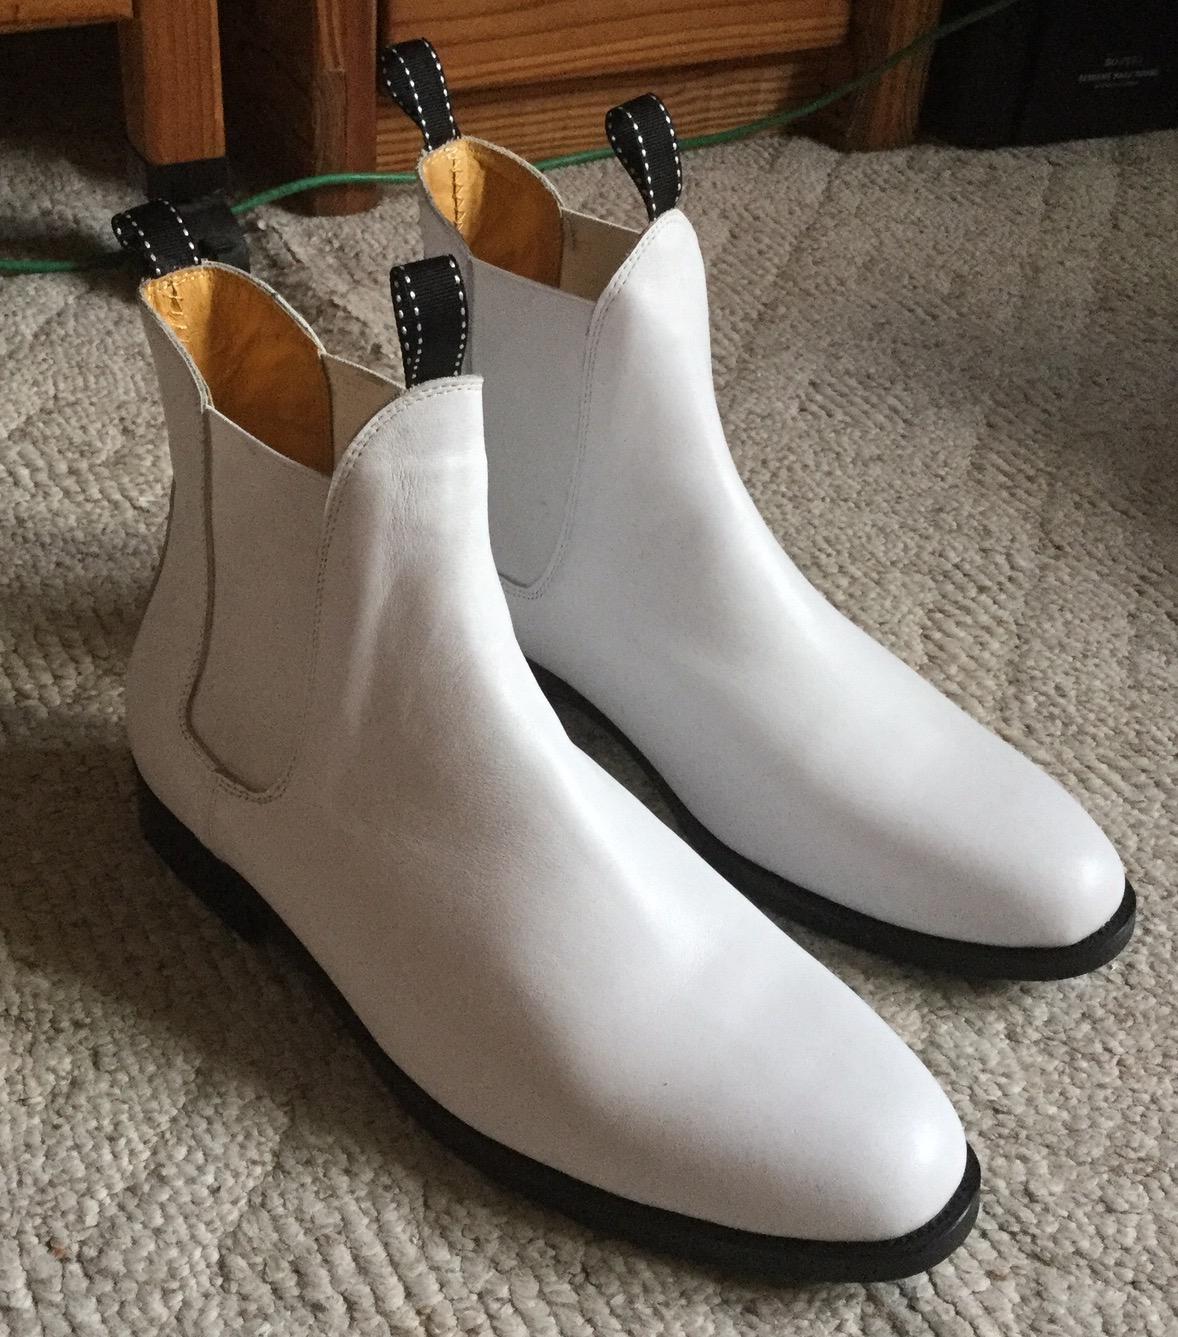
Mine just came a few days ago if anyone would like to take a look. I typically wear a size 12 or 13 shoe so I got the 12. Love 'em! They fit nicely and are very comfy. I look forward to trooping in them!
-
Made my order! Can't wait!
-
Machinimax's Anovos ANH Build
Machinimax replied to Machinimax's topic in Build Threads Requireing Maintenance
So today I decided to do some helmet work since I now have all my upgrade goodies! I tore everything out and started by cleaning up the eyes. Much better now. Sorry I forgot the "before" pic. Next I toughened up the bucket using the Plasti Dip and cheesecloth technique. This was actually kinda fun and I'll be happy knowing I gave the helmet I little extra support. I now need to decide If I will put the lens back in the way Anovos had it or if I'm going to cut out smaller sections from the larger piece. More to come soon! -
Is this suitable for an under suit?
Machinimax replied to welshchris77's topic in Boots, Soft Parts, and other Accessories
How's this? Picked up from WalMart yesterday. Full black and the chest armor should cover the Russell logo up. ------------- -
Machinimax's Anovos ANH Build
Machinimax replied to Machinimax's topic in Build Threads Requireing Maintenance
Look at these! Trooperbay latex hand guards and canvas belt. The belt is SOOOOOOO much sturdier than the Anovos one. I've already removed everything from the stock belt I just need to drill out the old rivets. Trimming is coming along. Only one thigh and the calfs left to go. I started doing some preliminary fitting. Feeling pretty good so far. Looks like I need to trim more of the return edge on the elbow side for better mobility. I have also decided to purchase my own under suit, in case I'm not a fan of the Anovos one. I picked this guy up for a steal at WalMart! What do you guys think? This will work, right? Next update we will take a took at the helmet. The last of my new helmet supplies should arrive tomorrow! -
Machinimax here adding another Anovos build thread to already growing list! This is of course to document my progress and make sure I'm doing everything proper for 501st approval. I've been working for a while now and finally starting the thread. My goal is Centurion but I will settle for no less than EIB after initial entry. However I'll cross that bridge when I get there. For now there is work to be done. First off, BBB! Very pretty! No tracking or signature. It just showed up the day it arrived! Woo hoo! Of course first out of the box was.... ...the helmet. I absolutely love it but as you can see my friend FN-5792 is not to sure he likes the new guy. I definitely will be removing the Anovos head gear and will replace with padding. Any particular padding or manufacturer that you guys prefer? Trimming came shortly after. I started with the right forearm. Obviously there is much more to go with these parts. Like I said these were the first two a trimmed and sanded and that was about three hours work across two days due to my inexperience. However I have gotten much more comfortable with the process and have found the techniques that work best for me. This was the result of about 2 hours work all in one night: The image you see are the rough cuts but each of those parts of now been cleaned up with the dremmel. Selfie time! Sorry for the bad pic. That's what happens when taking a selfie in stormie armor with no glasses on and your opposite hand holding the armor in place. As far as trimming goes, I have another arm, the entire left leg, and the right calf left to go. I also have an order from Trooperbay on the way that includes a much sturdier canvas belt, the Centurion required rubber hand plates, and some shims. I might need to make some extra room. I will keep you folks posted as the build progresses. I can't wait to get fully armored up!
-
So it looks like I'm going to need some shims for my Anovos build in order to better fit me into some parts of the armor. My question is how do we attach them while still making the armor approvable for EIB or Centurion? Does anyone have pictures the can share. It's looking like I will need them for biceps, thighs, and the kidney plate. Thanks all!
-
So I'm currently waiting on an ANOVOS armor kit but I want to have a fall back just in case since we've been seeing some issues already. I'm thinking ATA. Is it possible to get a link or an idea of price?
-
I just want to ask this. I know we won't have all the details until we have the armor in our hands and our experts take a look at it but do you think the ANOVOS kit has the potential (with some mods like the belt) to be 501st approved?
-
Wow this is a jaw dropping build! Beautiful is an understatement!
-
Custom E-11 Carrying Case
Machinimax replied to Machinimax's topic in Build Threads Requireing Maintenance
Precisely the reason the clip sits separately! -
Custom E-11 Carrying Case
Machinimax replied to Machinimax's topic in Build Threads Requireing Maintenance
Those are the next steps! -
While I await the arrival of my armor, I wanted to work on a little side project for my blaster. I was watching Tested on YouTube with Adam Savage one day. In the episode I saw, he was working on a custom display case for his Blade Runner blaster. He wanted to design it to look like something you would take to the firing range. Since I plan on trooping one day, that made something come to mind. Why don't I do something similar? So I decided to make my own E-11 carrying case, something that looked cool and would keep my blaster safe during travel. After numerous measurements, sketches, and planning I came up with this... It started off as a big sheet of 1/4" plywood and has worked its way to something awesome. I still need to apply finish but other than that it is fully assembled and ready to go. The blaster is seated within "pluck & pull" foam so it can't move around. To ensure it stays seated, I laid a piece of egg crate foam in the lid. Once I apply the finish, I'm hoping to make some decals on a vinyl cutter including the Imperial logo and some warning labels in Aurebesh. As I keep working this I will update you guys here. Thanks for looking!


