hon143
-
Posts
211 -
Joined
-
Last visited
Content Type
Profiles
Forums
Gallery
Articles
Everything posted by hon143
-
As others have said, it's probably better to just remove the rivets and start all over. Note, this is why it's a good idea (according to several tutorials here) to not rivet the helmet in the beginning. Just use nuts and screws to put the bucket together while you assemble the bucket. When everything is done, you can always go back with the rivet gun. That said, you can always carefully use a heat gun to mold the plastic pieces closer together. My tubes didn't line up exactly too. So, I just used a heat gun to heat up the tube area and used a soft microfiber cloth and just rubbed the heated bucket into the shape I wanted. However, my bucket wasn't that off.
-
I ordered a few days before Xmas and got it today....roughly a month later. I'm in CA.
-

First bucket (ATA) need some opinions
hon143 replied to wonko's topic in Hard Armor (General Discussion)
Honestly.....I think it looks pretty good already. But, if you want to decrease that gap, you need the ear to come down slightly. That's what is causing the gap. So, I'm guessing that the backside of the ear needs to be trimmed slightly....near the upper arch. That will shift the ear downward and will decrease the gap on the top portion. However, there may still be a gap laterally. For me, that's when I cheated slightly and used my heat gun! I carefully heated the ear right at the bend and just gently pushed it inward. This then closed the gap laterally. -
Mix and matching bucket and armor kit
hon143 replied to hon143's topic in Hard Armor (General Discussion)
thanks for the info, everyone! -
I'm considering getting a MTk armor kit to go with my ATA bucket. Will there be an issue with approval if the bucket doesn't match the armor vendor?
-
My MTK build thread.( ANH Stunt)
hon143 replied to Polar's topic in Build Threads Requireing Maintenance
The thing with troopetbay and/or mtk is that it seems he doesn't respond to emails...or maybe it's just with me! Cuz I've tried contacting him on numerous occasions about trooperbay items and he never responded. -
My MTK build thread.( ANH Stunt)
hon143 replied to Polar's topic in Build Threads Requireing Maintenance
thanks for the comparison shots between the ATA and MTX buckets. ppl here were right.....the MTX bucket is bigger! -
My MTK build thread.( ANH Stunt)
hon143 replied to Polar's topic in Build Threads Requireing Maintenance
Does the color of the ATA bucket and MTK armor match up well? I already have an ATA bucket and am considering the MTK armor as well. -
Flat film lenses on your bucket ( how did you do it? )
hon143 replied to Veeds's topic in Hard Armor (General Discussion)
Sure.....I'm just saying for ppl to be careful with CA glue. I've used CA glue before and have had experiences with it adhering to oils on plastics. -
Yeah....I placed an order for the hasbro blaster kit in mid Dec before Xmas. I haven't heard anything yet....only an order confirmation email.
-
Flat film lenses on your bucket ( how did you do it? )
hon143 replied to Veeds's topic in Hard Armor (General Discussion)
Doesn't CA glue adhere to oil and fingerprints? I'd be very wary about using CA glue for anything that needs to be optically clear like ophthalmic lenses. Because if there's any oils present, CA glue (even the fumes) will adhere to the oils and create an opaque film on the clear media. -
Flat film lenses on your bucket ( how did you do it? )
hon143 replied to Veeds's topic in Hard Armor (General Discussion)
I just cut one long "goggle" piece of the lens material that went around both eye holes. Then, I got a wooden cylindrical rod that I got at Michael's and cut six pieces of about half an inch long. I sanded the pieces down to allow the lens to fit flush against the mask. I then glued those pieces onto the mask with E6000 glue....two anchors on the top brow area per eye and one on the bottom near the lower eyelid area. These will act like anchors for the screws. Once the glue dried, I just screwed the lens to the mask via basic screws that were about 0.25 inch long. I also used strips of velcro ( the soft felt-like side.....not the hook side) as padding on the lens strip since my cheeks touch the bottom portion of the lens strip when I have my mask on. The nice thing about this setup is that you can remove the lenses whenever you like--i.e. when I wanted to added another coat of black plastidip. -
I coated the inside of my ATA bucket with 2-3 layers of black plastidip. And, it looks fine from the outside. The inside looks nice too....gives it a real nice black finish. If you don't like it, you can always just peel it right off.
-
My First Bucket Build: ATA ANH Stunt Bucket
hon143 replied to CommanderZel's topic in Build Threads Requireing Maintenance
The plastic around the teeth is VERY thin. So, you can totally use an exacto knife to do very small, fine precision cuts. Use the very tip of the exacto knife as the cutting edge. Gently make little cuts. The blade will slide right in very easily. I made diagonal cuts into the teeth area and then cut off those cuts into little triangular cuts to make straight cuts. -
ATA Armor Build_My First TK
hon143 replied to russellr2d2's topic in Build Threads Requireing Maintenance
i think it was in late oct or early nov.....not that long ago. so, i've been collecting all the needed supplies, built my bucket already, and am currently working on my hasbro blaster. just waiting for the doopy doo kit to arrive. -
My First Bucket Build: ATA ANH Stunt Bucket
hon143 replied to CommanderZel's topic in Build Threads Requireing Maintenance
on the two head pieces, i'd recommend not cutting the outside edges until nearly last. you can actually assemble the bucket nearly to completion without having to cut the outside edges. i know that all the tutorials have you cut them first. i did that too but realized i would have liked more material to make the bucket opening larger to fit my big head! for the ears, everyone dreads them. just take it slow. i used a flat plane sander and finely trim my ear pieces. -
ATA Armor Build_My First TK
hon143 replied to russellr2d2's topic in Build Threads Requireing Maintenance
how long did you have to wait for the ata armor? i'm on the waitlist and it's excruciating. -
I just received the size 10 US and I think they look pretty good. The fit is "just right", I think as far as the width. However, I think the area around the ankles are a bit loose. I have a pair of Chelsea boots that I often wear with jeans and those fit a little tighter around the ankles. But, I think if I wore thick socks with these TK boots, it shouldn't be a problem. There are some slight imperfections on the white leather. But, the same could be said with other TK boots vendors too.
-
For those who have received these already, do they run narrow, wide, or just right?
-
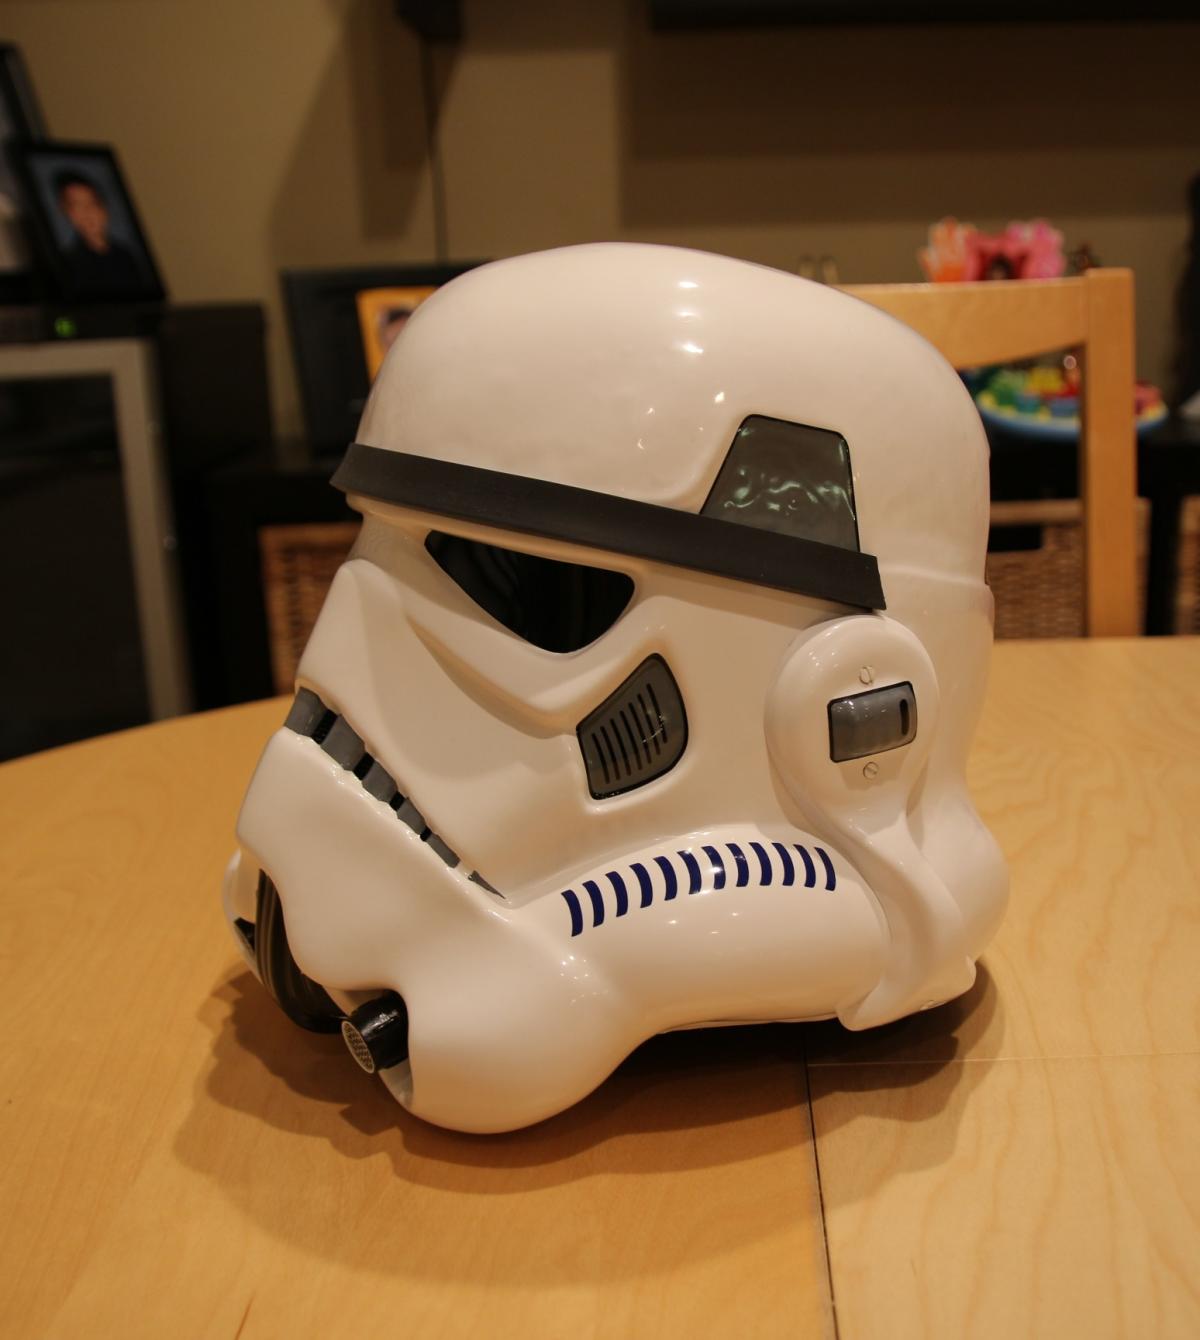
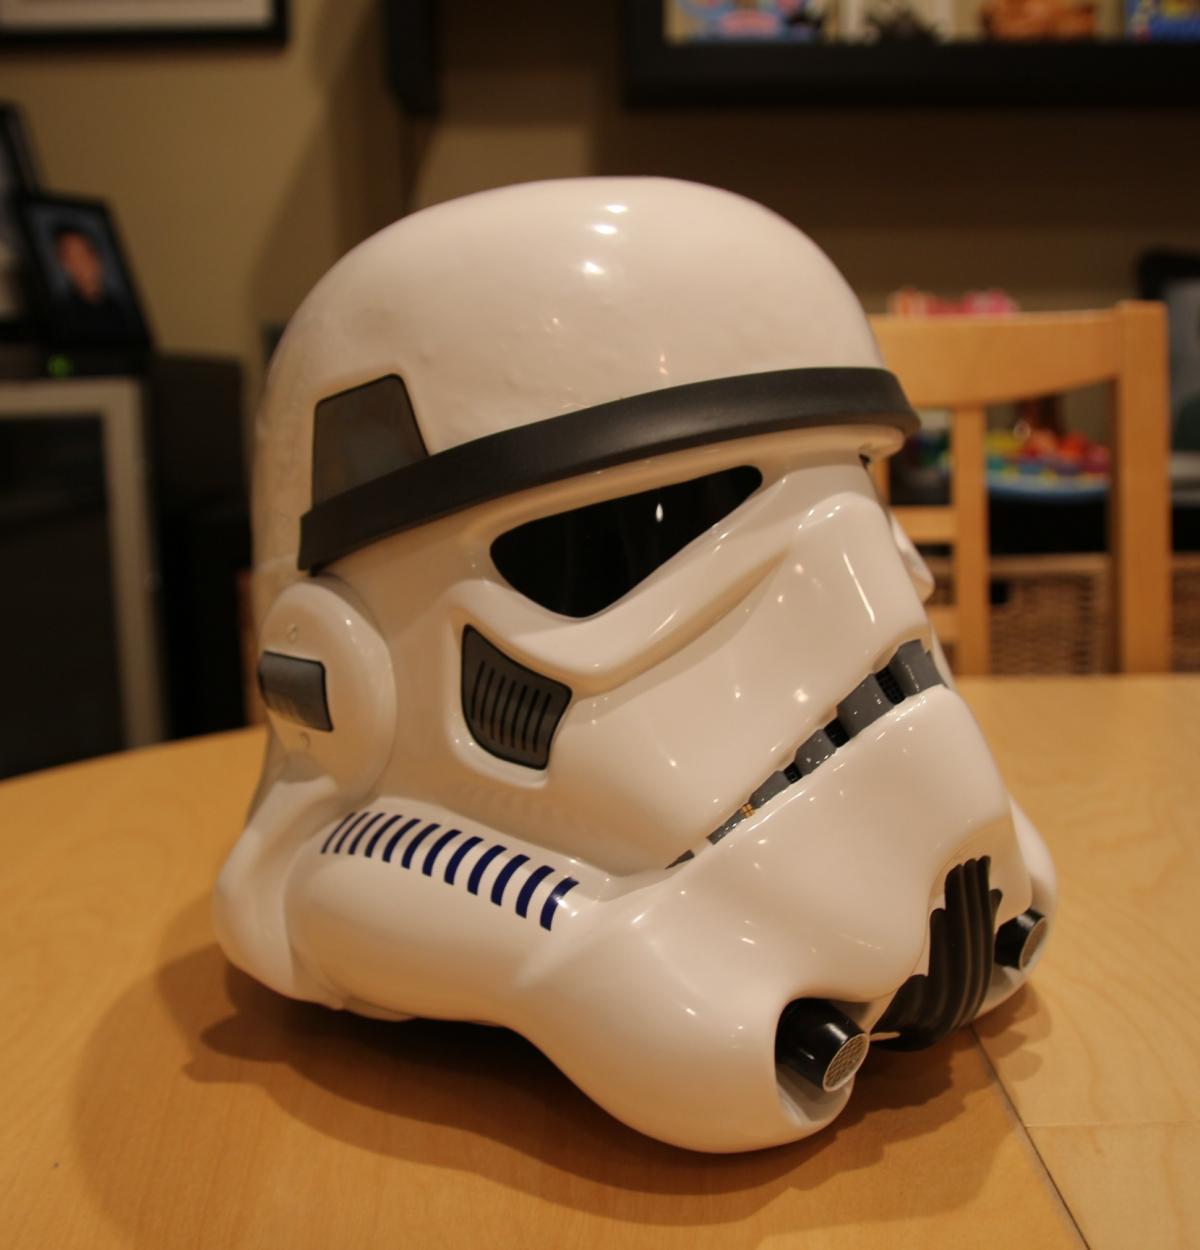
My ATA helmet build.....what do you guys think?
hon143 replied to hon143's topic in ANH (Stunt and Hero)
I went back and rounded out the grey teeth paint. And, I filled in those white spots you mentioned. I just added the chin strap last night. So, I think I'm totally done with the helmet. It's going to be a LONG wait now for the armor! -
My ATA helmet build.....what do you guys think?
hon143 replied to hon143's topic in ANH (Stunt and Hero)
The fit was pretty good. But, I also added a bit of the polyseam tub and tile sealant to make it look even better. -
My ATA helmet build.....what do you guys think?
hon143 replied to hon143's topic in ANH (Stunt and Hero)
I didn't even notice that.....I'll have to touch that up. -
My ATA helmet build.....what do you guys think?
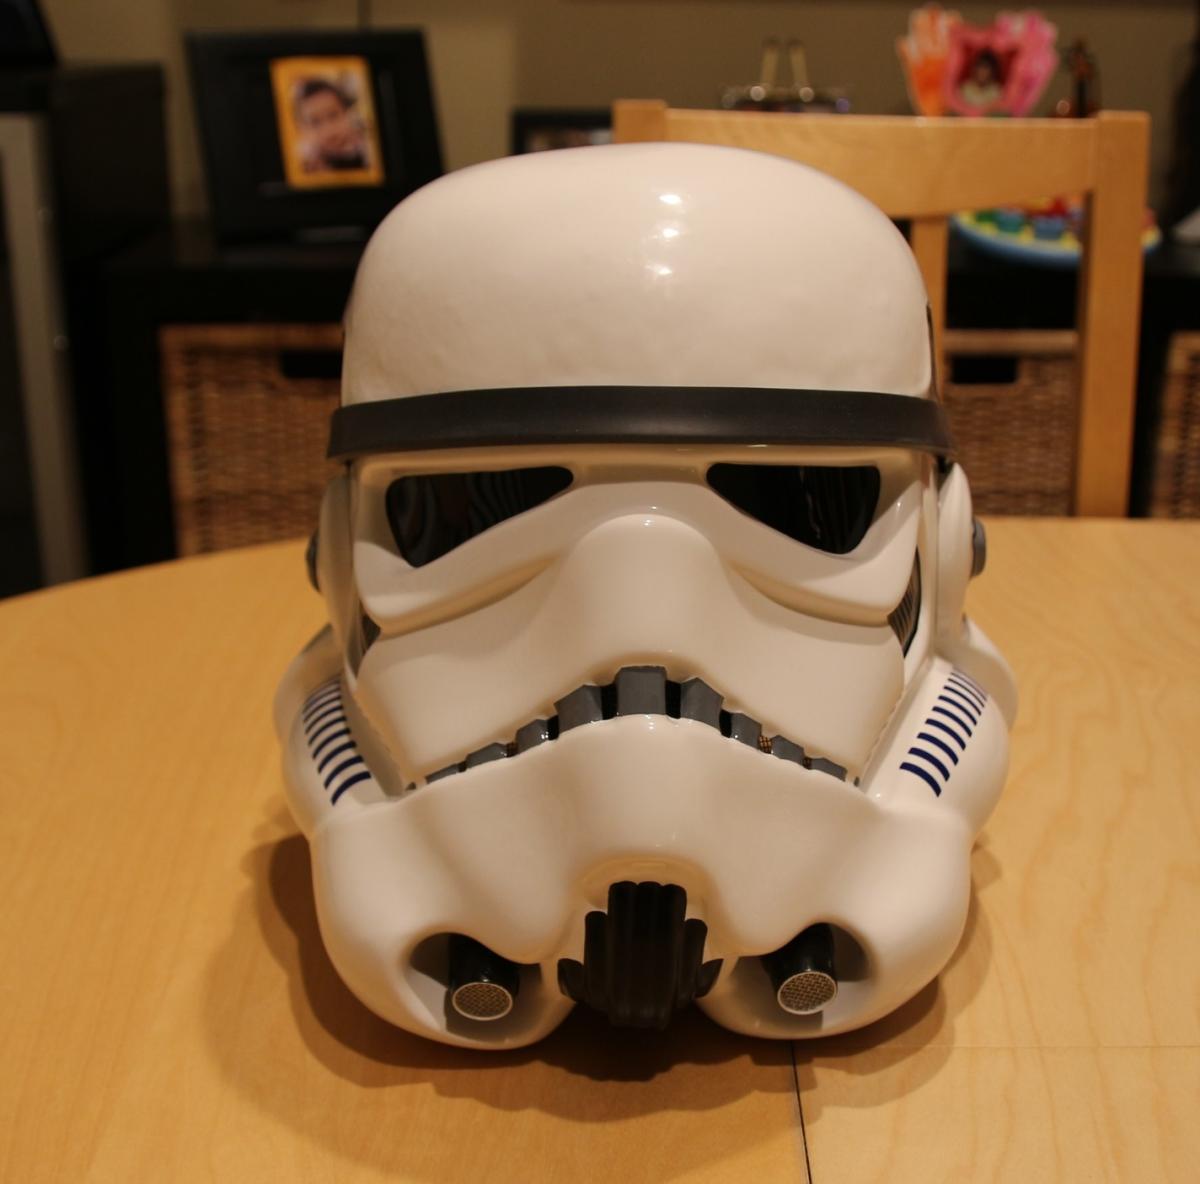
hon143 replied to hon143's topic in ANH (Stunt and Hero)
Here's the front view.
-
After studying all the great tutorials and helmet build threads, here's my attempt at my first helmet build. Took me about 2 wks a couple hours a night after putting the kids to sleep. But, it was rewarding and enjoyable. Of course, the ears were a pain in a$$!

-
Has anyone used/purchased the T/MC assembly kit? What exactly is included in the T/MC assembly kit? Does it include all the straps, elastic strips, and snaps needed for armor assembly? Is it better to just make your own straps and snaps? Will the kit work for other armor kits?