


ukswrath
-
Posts
14,622 -
Joined
-
Last visited
-
Days Won
180
Content Type
Profiles
Forums
Gallery
Articles
Everything posted by ukswrath
-
Nice work Brien
-
If you want a complete, ready to wear helmet the Anovos premiere line can be found almost anywhere for $250 and lower, there's even a few up for sale on Ebay for $200. Other than that most, if not all builders are charging $250+ for an unfinished helmet.
-
As stated by fellow members, below my comment. If done correctly you'll never have to worry about this section as long as you own the armor. In addition, this is the same procedure used for thigh suspension.
-
Agreed, uniformity is more important than technical specs in most cases.
-
Beautiful work Dana. As for the bicep to forearm connection canon is highly suggested however, there's nothing wrong with snaps either.
-
Good info Josh thanks. What kit do you have? Hope to see you at SWAT, officer #32 here
-
Sean's WTF ANH stunt build (first time builder!)
ukswrath replied to Seansull's topic in ANH Build Threads
Well done Sean. It could just be a photo issue but it looks as if some of the cover strips may be extending past the armor, specifically on the biceps. Helmet looks awesome. -
Not that I'm aware of. I'm sure if Adam (your GML) has any concerns he'll contact me anyways lol
-
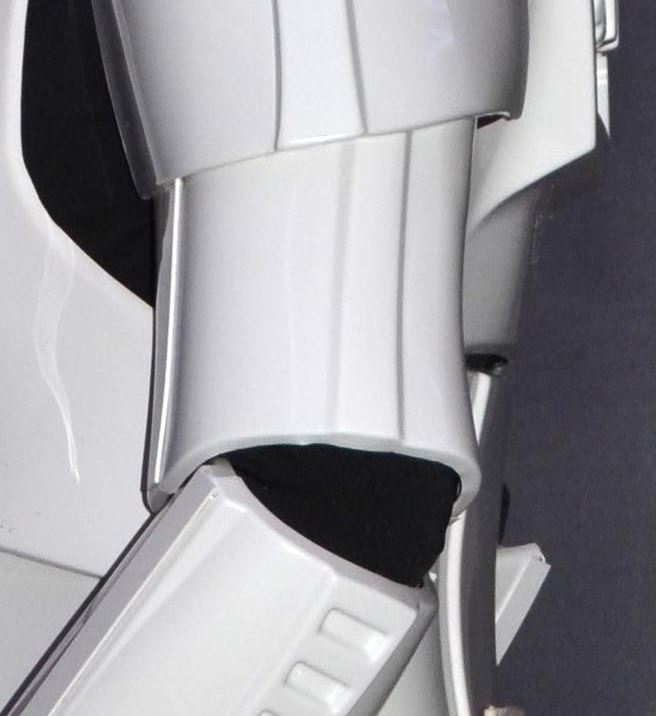
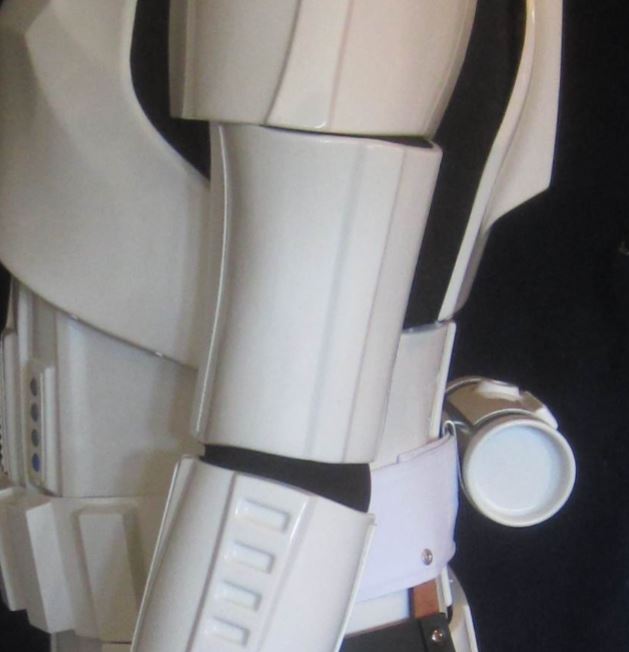
It's suggested you add shims as needed to obtain the angle you need. Afterwards install the 20mm cover strip, not tapered. Hope this make sense.
-
Yea... no, I would have never spotted that lol
-
lol that could have been bad haha
-
It's usually in it's own bag with all the connection strapping. Correct?
-
Check the right side also. It's hard to tell from your photos and the angle.
-
Looking good. Not to be the bearer of bad news but it looks as if you have assembled the left outer bicep section up side down. Not sure how it happened, or wasn't noticed earlier. Can you post a couple photos of each bicep? Yours Should look like this
-
Rubies E-11 Conversion for EIB?
ukswrath replied to kawnr's topic in FISD Expert Infantry Badge (EIB) Requirements
Rubies is ranked right up there with Hasbro. Neither is adequate enough to meet Centurion standards. Though Rubies is not mentioned it is still recommended it be replaced with something more accurate at the higher level. That said, as Andrew and I always state the accuracy of your armor, weapon included, is ultimately up to you. Hope this helps -
Rubies E-11 Conversion for EIB?
ukswrath replied to kawnr's topic in FISD Expert Infantry Badge (EIB) Requirements
Properly modified the Rubies is accepted up to the EIB level, after that it will need to be replaced regardless. Hope this helps -
... as opposed to "leaving everything out on a bench so you have to hunt for missing parts later" achievement ..... lol
-
Thanks Stephen
-
Anytime
-
To avoid damaging your boxes it would be simpler to either glue the connecting straps directly to the box or use a pop rivet.
-
Keep up the good work Andrew
-
TK 38987 requesting ANH Stunt EIB (wtf) [788]
ukswrath replied to DamnitDavid's topic in Request Expert Infantry Status
Hey David, welcome and thank you for your EIB application. Let's have a look at our final applicant of 2017. CRL and EIB Application Requirements: All submission photos have been posted and we have great news, your armor displays all the necessary elements to qualify for Expert Infantry. Congratulations! Other-Armor Fit/Assembly: In this section we review observations made by your fellow troopers and ourselves. Some observations may lead to suggestions to improve the overall look of your armor. We have a couple minor suggestions to mention here. Areas to work on to enhance the overall accuracy and look of your armor. Starting at the top and working our way down the right side tear stripes could be a little thicker, especially when compared to the left. Little extra paint should do the trick. Left side looks ok Reference photo While in the area it looks like a single tube stripe is trying to escape the fold. We're suggesting get this critter back in line with the rest. Reference photo Next up it looks like your back plate is overlapping your Kidney, it should rest on top of it. A simple strapping adjustment should do the trick. Reference photo Nice work on the Ab button details, we only have one suggestion here and that is there's to be no return edge on the Ab plates, specifically the vertical button plate. The edges should trimmed similar to the reference photo provided. Reference photo Next up the Thermal Detonator looks a bit long. Total overall length should be roughly 7-1/4"-1/2". We've provided a reference photo with the TD component specifications to help guide you. Reference photo Not related to the armor but worth mentioning is the scope details on your blaster. There should be less brass showing. Were suggesting you darken the circled area to match the blaster body. Reference photo Centurion Suggestions: Because Centurion photos show much more detail than EIB, items pertaining to Centurion might be seen there and not here. We try to point out all we can from what is seen but the final accuracy is the responsibility of the trooper. From what we can see, the only item that stands out is your drop box positioning. They should be aligned with the outer most edge of the ammo belt and just below it with little to no gap. Gluing the drop box strap to the cloth belt should help keep them in place. For level three certification (if applicable): Drop boxes are vertically aligned with the end of the ammo belt with minimal gap between belt and box. Reference photo That's it David, congratulations on a great build . We hope to see you next year at Centurion. -
TK 38987 requesting ANH Stunt EIB (wtf) [788]
ukswrath replied to DamnitDavid's topic in Request Expert Infantry Status
Thank you -
Hey May, after looking at some reference photos you're absolutely correct, good catch. I'll correct this.
-
Thanks JC. Hope to see your app here soon also, or at least on a troop my fellow GGG brother Thank you and fingers crossed for all those with pending orders
