

Templar726
-
Posts
241 -
Joined
-
Last visited
Content Type
Profiles
Forums
Gallery
Articles
Everything posted by Templar726
-
So after pouring over these screenshots I have decided to remove the antennee from my pack and close in the top handle space to more match this shot. I think it will make it more accurate. Should have a few picks by this weekend.
-
Thanks man. Troopers helping Troopers is what it is all about. I can't wait to see your build!
-
Looking good sir. I like it!
-
TK-77477 Requsting ESB EIB Status(TK Armor)[449]
Templar726 replied to Veeds's topic in Request Expert Infantry Status
Veeds, Looking good sir. Good luck with your app and I like the Vader piggyback rider! -
Hard plastic lens attatchment help needed...
Templar726 replied to justjoseph63's topic in Assembly, Mods, and Painting
Well this was a happy find. I just got my new darker lens strip in and was wanting to switch out the strip that came with my AP bucket because you could see my eyes in the right light. After reading through your posts I went with the TKBondservnt 2392 method. Took me about 10 minutes, I left a nice vent space below the eye for air flow and you can't see it at all. The screws hold it in nice and tight and after a nice trim of the lens I have the exact amount of room as before. Thanks to you all for the great options and discussion. Really helped me knock this project out. -
Question guys. When I applied for HWT with my Garrison the GML said my pack did not meet the main picture of the trooper in the CRL. I explained that the new pack is down in the details section and after looking at that pack he approved my pack. Are you guys planning on changing that picture? I think the top pack is all Sandy Pack. You have a couple of Centurion HWT's with some good application shots to choose from.
-
Oh yeah!!
-
Yes!!! Feels awesome. Thanks to all you EIB's and Centurions for taking the time to give me advice and help me along. You guys are what Troopers helping Troopers is all about. If you are ever in Atlanta for Dragoncon or have overlapping days at Disney Star Wars Weekends let me know. I would love to shake your hand and buy you a drink!! Thanks so much!!
-
Charles Ecton 72627 EIB Letter
-
Whoops! Forgot the bucket off shot. Here it is.
-
Ha! Same here we are working the event when he is in Atlanta. Enjoy!
-
TK 72627 Requesting ANH Stunt EIB Status (FX)[446]
Templar726 replied to Templar726's topic in Request Expert Infantry Status
Blaster has been upgraded in a frenzy of cutting, sanding, drilling, more sanding, and painting! Blaster with no holes. Grinded down and sanded Drilled and re sanded Painted. -
TK 72627 Requesting ANH Stunt EIB Status (FX)[446]
Templar726 replied to Templar726's topic in Request Expert Infantry Status
Yep! I figure I can grind it down then sand it smooth, drill and retouch paint. Might even give it a more battle tested look? Either way this baby is getting holes tonight!! -
Thanks Tony! This has been a blast to build and it was awesome to finally get it done and wear it around. Very light and easy to move around in. HWT's!!!!
-
I had the same problem. I removed it, used a warm water bath to make the plate soft then pinched in the sides and let it cool. When I reglued it the edges were closer to the front allowing the sniper knee to protrud forward more and it stopped snagging. It still looks good and you would never know it was pinched inward.
-
TK 72627 Requesting ANH Stunt EIB Status (FX)[446]
Templar726 replied to Templar726's topic in Request Expert Infantry Status
Question for you guys. Can I just grind down the lower T track on the picture below until it is flush and then drill the holes? I am counting 7 holes on the example so that is what I am shooting for. -
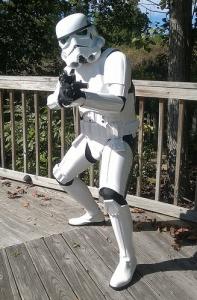
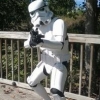
Heavy Weapons Trooper (Shock Trooper) Charles Ecton TK 72627 Templar 726 Georgia Garrison Ocmulgee Squad Fire Team Terminus Height: 5'11" Weight: 185 lbs Armor: FX 501st Approved 10/13/2014 Helmet: Authentic Props (AP) Helmet Electronics: Evil Boy dual fans, Rom FX Static Burst kit Boots: liquidsolidchewy FISD Member Neck Seal: TrooperBay Gloves: Chemical gloves rubber Hand Plates: Hard Plate (FX) Main Belt: FX plastic front with button modifications and removable ammo boxes for TK/HWT kit Canvas Belt: TrooperBay. HWT Ammo Pouches attached with no holster per FISD EIB standards. Ammo Pouches: Three leather slim pouches per screen shots from Battlefronts Game by Blaster8266 FISD Member. Pauldron: Hal Clay 501st Backpack: Scratch built by Templar72627 modeled after Battlefronts Game screen shots. Straps from Pesticide sprayer. Base is an oil change pan. Boxes are project boxes with custom cuttings and linoleum sticky back floor tiles cut to match screen shots. Cone is a plastic cup with a Disney Frozen Olaf drink cup trimmed and painted. Build thread located at http://www.whitearmor.net/forum/topic/30222-templars-hwt-pack-build T-21 Rifle: Custom built by Blaster8266 with working inner sound board and LED blast effects. The bright mobile light washed out some of the scorch marks applied to the armor so I added a few shots of the individual pieces for review. I took the photos with my sling off the rifle to better show the armor but did include a follow up picture the sling attached per CRL.
-
TK 72627 Requesting ANH Stunt EIB Status (FX)[446]
Templar726 replied to Templar726's topic in Request Expert Infantry Status
Whoohoo!! Thanks guys. It feels great to know the work on the armor paid off. It was really fun and rewarding. I will get started on the blaster tonight and also submit for Heavy weapons Trooper EIB since I am sure my T-21 makes the grade. Thanks again and I can't wait to join the ranks! -
TK 72627 Requesting ANH Stunt EIB Status (FX)[446]
Templar726 replied to Templar726's topic in Request Expert Infantry Status
Gazmosis, Here are two shots I took. Not the best. Hope they sufice. I was so focused on armor shots I forgot to get good blaster shots. Hope these work if not I can get some when I get home tonight. Thanks -
TK 72627 Requesting ANH Stunt EIB Status (FX)[446]
Templar726 replied to Templar726's topic in Request Expert Infantry Status
I forgot to add my card pic. Our Georgia Garrison GML did this for me. I got an action shot! Phew phew!! -
Charles Ecton TK 72627 Georgia Garrison Ocmulgee Squad Fire Team Terminus Height: 5’11†Weight: 185 Armor: FX 501st Approved 10/13/2014 Helmet: Authentic Props (AP) Helmet Electronics: Evil Boy dual fans FISD Member Audio: Rom FX Static Burst kit in homemade chest sling or inside chest via installed mounting setup Blaster: Hasbro with Stryker kit Boots: liquidsolidchewy FISD Member Neck Seal: TrooperBay Gloves: Chemical gloves rubber (2) Hand Plates: Flexible rubber (TrooperBay) and Hard Plate (FX) Thermal detonator: Authentic Props (AP) with Evil Boy clips Canvas Belt: TrooperBay Holster: Custom made Front Back Back Arms Raised Right Side Arms Raised Left Side Arms Raised Ab Plate Inner Inner 2 Seperated chest and back. Rom FX brackets shown. Also added side strap for snug fit. Crotch Pauldron strapping Drop boxes Side w belt Holster attachement Thermal detonator Front Left side Right side Back Mic tips Fans and lens color Ammo knee Sniper knee Rubber hand plates Neck seal Rom FX in custom built chest sling Blaster side Blaster rear Bucket off Action More action!
-
Thanks sir. I will add a few more pics today to fill in some of the build gaps.
-
OK guys here is a brief explanations of my pack build. This is not a detailed "How To" per say it is just a good visual showing how I solved some of the build issues. I will answer any and all questions regarding how I did any part of it if you are interested. Just drop me a PM. Here is a quick overview: For the base I used an oil pan. Company and item number are shown in the pics. Starps were taken from a $9 Walmart packpack and bolted onto base. Boxes are project boxes from radio shack. I chose them based on best fit from the screengrabs in the HWT thread and the posts from Quartermaster showing his awesome pack builds. Covers were made from sticky back floor tiles from Lowe's at 88 cents each. Used one and a half of those babies! The buttons were furniture end caps from Lowe's and all the boxes were rivited to the base before the covers were put on. Slanted box was hand cut then re assembled. Tube is a handi wipes or bug repelant tube with the face cut out so I could rivet it to base. Pre drilled and test fitted all rivets before painting. Tube was painted, riveted, and piece from another tube was painted black and glued over opening. I think rivets make the overall pack more sturdy. Radio box was two project boxes bolted together then the face was made from floor tiles and painted before applying after riveting boxes to base. Pictures show the cups I used to make the funnel. Yes that is Olaf! I ended up riveting a flat piece to the bottom of the cone and then using that to glue the cone to the base. Getting it on the pack is the tricky part due to the shape. I did not get a good picture of this but if you need one to help explain I will get one for you. Tube is 1.5 PVC and caps are 1.5 end caps then cut to 1" and glued on after tube base was painted. Side cap is 2" PVC cut to match screen grabs and then small ABS strips left over from my TK build were cut to length, heated and bent to shape and glued to try and match screen grabs. I riveted that to the pole. That's really it and I hope it helps. Again any questions hit me up and I will do my best to help.
-
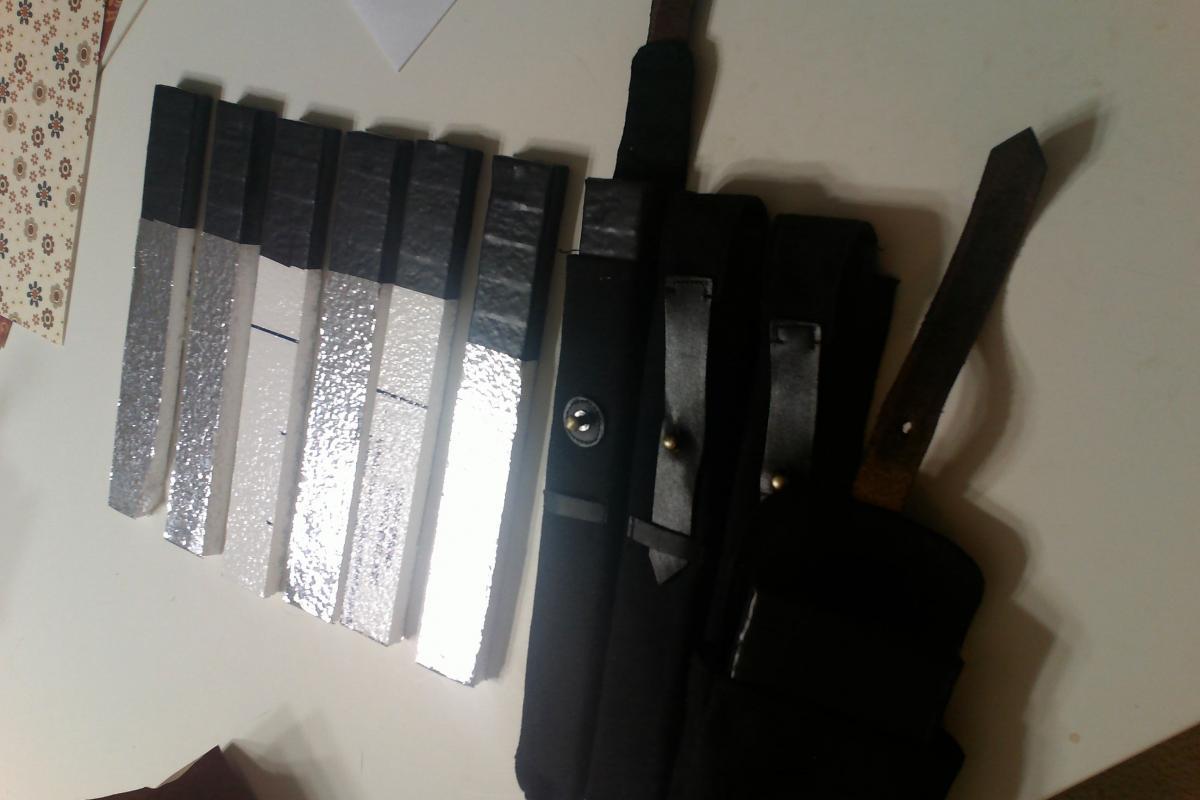
I used insulated siding just because I had it laying around. Cut to length and duct tapped the ends. Went ahead and made some extras for future pouches. They have a good weight and look good.
-
Thanks again Tony. I dropped him a PM. Question for you: would you recomend the charcoal dust mock up for the armor for the pics or dive in full and build a seperate kit. I was worried the armor may not clean up if I really mock it up good for submittal.

