

Starfox2010
-
Posts
486 -
Joined
-
Last visited
-
Days Won
4
Content Type
Profiles
Forums
Gallery
Articles
Everything posted by Starfox2010
-
You mean Negro/Black = Spanish/English. I would just use it on the blaster. If you use it on the armor it might smudge and look bad. See if you can return it for an even exchage on a clear one.
-
Fuumantroop's AM armor build
Starfox2010 replied to fuumantroop's topic in Build Threads Requireing Maintenance
Alright, bro! Congrats. Looks sharp. -
TT8s AM Armor Build
Starfox2010 replied to TriumphTrooper8's topic in Build Threads Requireing Maintenance
Right in the childhood! Those ab plates, though. -
awesome! Thanks.
-
Thanks, Fixed. Ok so here is my belt, I haven't attached the drop boxes yet because I want to make sure they are on the right spot. i'm planning on allign the edge of the box to the edge of the plastic on the belt. Is that correct? I've heard to allign it there and heard align it to the circle tabs. i'm also planning on leaving about 5mm of space between the belt and the boxes.
-
Fuumantroop's AM armor build
Starfox2010 replied to fuumantroop's topic in Build Threads Requireing Maintenance
I doubt there should be a problem with that. -
TT8s AM Armor Build
Starfox2010 replied to TriumphTrooper8's topic in Build Threads Requireing Maintenance
I started working on my belt today and these little guys were time consuming. Is there a specific measurement that we need to have with them? -
It's happening! [*CAP]
Starfox2010 replied to Grimez's topic in Build Threads Requireing Maintenance
I used these. I got them at OSH but im sure you can find them at Lowes -
I'm going to wait to fix the tube, I think i'm go have to trim it to 7.25 in order to scoot in the clips and screws inward. So here is my left forearm. I took a zoom pic so you can see the spot I think I missed holding down with magnets.. It's not too noticeable but the more I look at it, it starts to look huge. I'm gluing the snap here but this is the front view of the left forearm. Besides that, I was working on the arm connections for the right side. I wanted to show the elastic strap connecting the bicep to the forearm and ask if its correct but I don't think you can see it (that would be the point right? ) This is the right side, just took a mirror pic. What do you guys think?
-
It's a little over 7.5....
-
I tried heating it up a bit, but as a rookie I think I heated the middle a bit more and it drooped. I panicked and just stopped messing with it, so I just put it to the side until now. Update: I added the clips to the TD, hope I did it right.
-
Fuumantroop's AM armor build
Starfox2010 replied to fuumantroop's topic in Build Threads Requireing Maintenance
I think mine is going to be an oval shape. The only way I got it to be flat is how Rystan explained it, cuting one side into a curve. Im going to let it sit until tomorrow night and cross my fingers. Did you glue the nylon webbing on the drop boxes or did you install them with a rivet? -
Good looking out Regarding the rivets, Andrew is correct. You can get them through Echo along with the rivets needed for your ab plate: http://www.whitearmor.net/forum/topic/23970-fs-centurion-level-rivet-sets/ Regarding the forearms, I was planning on putting them off as well. I must have used a little more than half tube of E6000 trying different methods. I think making a curve in the center like Mike discovered: http://www.whitearmor.net/forum/topic/28145-am-20-build-anh-stunt-by-rystan/page-8
-
Wow! You got some skills there Lian Neeson. Awesome work.
-
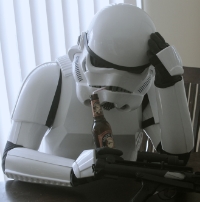
Hey anyone viewing, I'm back. My wife grounded me and had to work on my armor in secret when I had the chance. So here is where i'm at right now (with questions ) Thermal Detonator I glued the center piece I just dont know if the TD clips go as shown in the picture or touching the end caps. I've seen both ways but I don't know if there has been one enforeced. (magnets are just to hold while I take the pic) Also, will these screws work? On the plus side! I was able to glue the cover strips on the right forearm, with some struggle. and crossing my fingers that the left one would stay I was able to add my sniper plate and my thigh ammo pack Some struggles I made the mistake of using elastic on my thighs to connect to my belt, I had to take them off and made new ones with nylon webbing. One of my shoulder bells was drooping from adding the bicep, also I was having problems with movement of my arm because the elastic on the bells was too tight. I trimmed down the return edges a bit. This is a pic with the bell on the left is trimmed. Last but not least for the update Im finishing up on my blaster (sorry for blurry pic, had to take it before I got cought, lol)
-
Yea thats correct. Cutting will depend on your size. Check out Fuumantroop's build, hes been trimmind down a lot of areas, I might trim down the lower part of the back plate.
-
Fuumantroop's AM armor build
Starfox2010 replied to fuumantroop's topic in Build Threads Requireing Maintenance
Hey Guy, I haven't posted anything on my thread because I got grounded lol The thigh belt looks good. Mine looks exactly the same, and I've seen others just like ours. Your butt Plate, I took out that lip off and left enough to leave a return edge. check out my thread. For your shoulder straps, put them more to the outside edge (your top view pic). that way your helmet blocks off the inside. I'll try to post something tonight. i'm secretly working on my build and its hard to take pics. -
Fuumantroop's AM armor build
Starfox2010 replied to fuumantroop's topic in Build Threads Requireing Maintenance
I have not yet trimmed down the metal button plate, I would need to either make a hole in the ab plate to fit them in or replace the nuts. I did however the other one, it looks like you have to glue it on right on the dot or it kind of slides off a bit. -
Forgot to add this one: http://www.whitearmor.net/forum/topic/26301-ne-helmet-build/?hl=%20helmet%20%20build I don't think anyone was brave enough to use it since there's no do-overs when using it.
-
You could also do this in Photobucket if that's where you're storing your images. I use it to resize and crop them before posting them here.
-
Before anything, the helmet was a bit difficult for everyone. Make sure you use the E6000 only on this in case you mess up. 1) Yea the helmet is alligned good, and clean at that. 2) You dont need to add the ABS pieces in the back, I don't think anyone of us did that. 3) Take a look at a few of our build for it, maybe our helmet builds could save you some time and suffering (mainly the temple area) There's Dwilly1986's http://www.whitearmor.net/forum/topic/28154-my-am-armor-build/ Fuumantroop's http://www.whitearmor.net/forum/topic/28115-fuumantroops-am-armor-build/ Rystan's http://www.whitearmor.net/forum/topic/28145-am-20-build-anh-stunt-by-rystan/ TT8's http://www.whitearmor.net/forum/topic/28183-tt8s-am-armor-build/ ZeroSkillz's http://www.whitearmor.net/forum/topic/28516-zeroskillz-am-build/ PGHtoolman's http://www.whitearmor.net/forum/topic/28133-pghtoolman-am-armor-build/ and mine http://www.whitearmor.net/forum/topic/28109-ricks-am-armor/ Hope I didn't miss anyone.
-
I try not to remember the struggle with the helmet. lol I'll check it out and help you out.
-
The plastic pieces are for the helmet liner as Sly11 stated. The little nuts and screws are for your ab buttons. You should have 2 sets of ab buttons to chose from.
-
Fuumantroop's AM armor build
Starfox2010 replied to fuumantroop's topic in Build Threads Requireing Maintenance
Well i'm glad I waited, lol -
That looks about right. Take another pic like John asked, and another one with them a little more straight. Check out fuumantroop's or my build. There's a couple of others that had the same problem (first release of AM 2.0). If it turns out to be the same shin, email mighty tank and he'll send you the correct ones. He has excellent customer service.
