

Starfox2010
-
Posts
486 -
Joined
-
Last visited
-
Days Won
4
Content Type
Profiles
Forums
Gallery
Articles
Everything posted by Starfox2010
-
its gona look great on my mantle...
-
10 Hours of Princess Leia walking in NYC ... LOL
Starfox2010 replied to R4ZORBL4DE's topic in Off Topic
Lol,Lando was persistent. -
Aaand trimmed down my TD down to 7 1/2 Inches ( I had it at 7 3/4)
-
Ian- thanks, im starting to help my brother with his armor and just looking back to where i started is a good feeling, especially for someone thats never done anything crafty before. Chris- yea, I left it blank like that because I've seen other helmets that way. I think different helmet makes have the frown dimples different allowing them to paint threw the last dimple. Andrew - im not quite sure if im going to trim a little more before heat bending, but mine do stick out as well. The chest...Im most certain I will eventually do something to it, it chokes me out sometimes when puting it on, lol
-
Thanks again everyone, Ok now my quest for EIB. I'm working on my back plate, it seemed to overlap a great deal at the bottom so what I did was bend the top left and right flaps a bit so it could raise the plate without letting it stick out like a cape when everythings attached. I trimmed out about 1.5 inches at the bottom, and had previously added the snaps inside to attach with the kidney. Here's what it looked like before Here's what it looks like now Back Right Side I also included the snap on the top of kidney ( I know its mainly for Centurion but i'd rather do it now than later) Left Side I also trimmed down the top flaps of the chest plate, i'm in the process of gluing back the ribbed shoulder straps back on. sorry, I forgot to have my wife take a pic. What do you guys think? Do I need to do a return edge at the bottom?
-
TK12177 Requesting full access please. http://www.501st.com/members/displaymemberdetails.php?userID=17782
-
Enjoy the road! and thanks for your service
-
P.S. From what I was told on my helmet, the frown has to end after that last dimple. Nice job on the paint.
-
Wait untill you have unexpected guests.... You can pretty much tell them you've murdered someone and they'll just do the o'l nod and smile while looking at your boots.
-
BatNinja's AM 2.0 EIB ANH Stunt Build Thread
Starfox2010 replied to batninja's topic in Build Threads Requireing Maintenance
The bottom of the shins -
I've used a white erasor but the marks were not that dark. Give it a try
-
Thanks Everyone! Andrew - Looking to make it #2 for IEB soon as well. Michael - I found out there are a few in our town. 1 is mainly on the GGG forums. Mabe we can all do the kiddy kapers parade next year.
-
I got approved!!!! Wohoo!! Now onward to work on IEB status!
-
Hopefully they used E6000 to join the pieces or you should be needing a refund. The chest, back, shoulder bells and maybe the butt plate look ok. Lots of trimming down on the biceps and forearms are needed. Can you take off the belt and take close up pics of the ab,kidney and thigh piece. The shins look like they are too big, cant really see the detail but the backs look like they overlap. It's fixable but it will probably take as much time as if you had done it yourself. Hopefully a pro can chime in.
-
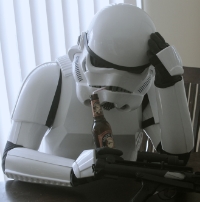
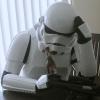
Hey Everyone, Here's an update: It turns out that my rookie mistake at the beginning stalled my application a bit, also because i'm the first to submit my new AM armor. Here is my rookie mistake and fix Rookie Mistake (10 holes on frown instead of 8) Reason: I kept hearing 4 teeth on each side from the center tooth, I thought complete teeth. Looking at the reference pics I noticed they were mostly different and thought mine was ok because of the one on the upper right (has hole at the end and no grey paint ending the frown) FIX: As soon as I read the fix I needed, I went to Home Depot and bought some Acetone and made some abs paste. It was a little weird applying it but i'm satisfied with the result. Sent these pics out this morning, hopefully hear from them soon. I'm dying of the suspense lol
-
Having some shin trouble. What do I do?
Starfox2010 replied to cm325i's topic in Hard Armor (General Discussion)
Should be ok. Mabe have the cover strip a little more on the left side? If you are planning on making a rounded edge at the top it shouldnt look too noticible. Mabe someone else can add their opinion. -
Nice shot!
-
Looks like a good cut.
-
Thanks Andrew, Ill keep you guys posted.
-
Thanks,the waiting is torture. I got an email last night from my garrisons GML that its in review. Can't do any additional tweeks in case they need better pics, so im on stand by.
-
What to do in the meantime
Starfox2010 replied to Stevetheemu's topic in Getting Started - Read this First!
LOL, the list goes on and on. Since you you're getting your armor in a month, I would suggest getting your supplies and tools first (mentioned in above posts). It took me a couple of months to get the armor built so maybe order your belt and holster when you are planning on working on the belt (usually towards the end). The gadgets and blaster you can save for last. What I recommend is looking for deals in the craft stores like Jo-Ann's or Michaels when getting your elastics, e-6000 and or scissors etc, they almost always have 40-50% off coupons. Harbor Freight has pretty cheap clamps and tools. What should have been my first suggestion is find builds based on your armor and follow them so you can have it saved, study what you will need to do in order to reach IEB status and Centurion, lots of research. Lastly, if you have any loved ones, talk to them about this little project. I've been grounded from my build by my wife and kids for spending more time on it than with them -
What both Andrew's said on the trimming, just keep posting more pics if needed or worried.
-
What to build with AM2.0
Starfox2010 replied to SeanTX's topic in Getting Started - Read this First!
A lot of stuff has been updated. From my understanding, the back plate is the only piece that needed replacing as shown in the above pic. Now I hear the chest piece as well but I am still trying to find out why, even though I remember reading a post by TG stating that it is Centurion acceptable now. I would suggest working on reaching IEB status for now, I know TG is working on the replacement back plate. I am currently awaiting my Standard approval from my local garrison but if you take a look at Fuumantroop's he has just been IEB approved. As for your brother, there is so much I had to trim off of every piece that he should be ok. I don't know how much he weighs but there are plenty of topics posted by big guys. Hope this helps. Also, there's a few of us AM guys, feel free to hit us up if you are needing help. -
Adam's AM 2.0 Build Thread
Starfox2010 replied to idontgiveADAM's topic in Build Threads Requireing Maintenance
For the pics, upload them to photobucket or flickr, you can edit them there and post them here. can you take closer pics? the forearm looks like it could use a bit more trimming, can't really tell on the biceps though. Don't worry about the strapping, that will come in due time.
