

Starfox2010
-
Posts
486 -
Joined
-
Last visited
-
Days Won
4
Content Type
Profiles
Forums
Gallery
Articles
Everything posted by Starfox2010
-
 My new spats are FINALLY on their way. I should hopefully be done with those and ready for the next phase next month (next year sounds long lol). Let me know when you want to team up again.
 -
Starfox2010's TFA Stormtrooper Build
Starfox2010 replied to Starfox2010's topic in Build Threads Requireing Maintenance
Heat bending the clips. and glued the top rib thingie on bicep. If my build wasn't frustrating enough, I somehow bent the screw that goes into the holster with the bearing. I'm having a hell of a time looking for a place that carries it. But i'm almost done..... -
Starfox2010's TFA Stormtrooper Build
Starfox2010 replied to Starfox2010's topic in Build Threads Requireing Maintenance
Long time no post. Ill try to keep it up more frequently, nothing much to really update unless you want to just see "sanding" on every post lol. Bellow is one of the parts I was stuck in. there was too much of a gap and it was worse in person than in this first pic: Before After sanding the top and bottom sides. very scary, I practiced on the resin cast that came with the Anovos kit before committing to R2 Dans. (yes missing top plate ). looks so much closer and I haven't attached the nuts on the inside. -
Is it possible to post bigger pics, only one that's full blown.
-
your teeth are fine, just have to remove the paint around it. maybe someone can chime in on removing it, I was able to whipe and scrape off but this was soon after painting.
-
Starfox2010's TFA Stormtrooper Build
Starfox2010 replied to Starfox2010's topic in Build Threads Requireing Maintenance
It's a big bottle. Are you getting close to that stage? Maybe we can do another Armor Party soon and use it there and then see how I can leave you some in a container. I used quite a bit for having to re-apply lol. -
Starfox2010's TFA Stormtrooper Build
Starfox2010 replied to Starfox2010's topic in Build Threads Requireing Maintenance
Using the one Tony recommended. along with a blue colored hardener. Poly-Flex flexible polyester glazing putty - http://www.amazon.co...ailpage_o03_s00 -
Starfox2010's TFA Stormtrooper Build
Starfox2010 replied to Starfox2010's topic in Build Threads Requireing Maintenance
you wont believe, lol. I spoke to someone from Mando Mercs, he stated to use a golf ball size putty with pea size hardener and its looking a lot better. Of course I got to finish sanding with an extra fine sand paper but for now, I can yell Eurika! Here's what I got: Feels smoother than looks in person. TD, still working on it, gona add a second round, I dont feel it completely smooth on this one. I also need to fill the joining teeth. This is the part I want to add more to, not completely rounded off. The following look ugly but they are smooth (lol) Biceps: Forearms: Like I said, still have some work to do but for now it's good news. of course i'm going to have some garrison members take a look at it when i'm "done" to see if i'm good to go. -
I think I might go with the pro-paint option, I may know someone that may let me borrow the gun and maybe place (Novice option?). However I might have someone in the garrison take a look at my armor before I commit, as you seen, my armor came with what seems like a double coat of gloss.
-
LOL, Was telling my brother that I couldn't go to celebration but my work is sending me over there this weekend. think i'm going to take pics and put in garrison page asking where everyone is at.
-
Waiting for YOU I gave up for a while. I added the bondo for the 10th time and it keeps coming up shucksty. Im afraid that if I keep that going, ill wear out the plastic. I'm going to Celebration this weekend, so if you want to plan something for the following, im down.
-
Starfox2010's TFA Stormtrooper Build
Starfox2010 replied to Starfox2010's topic in Build Threads Requireing Maintenance
It just puts a damper on my spirit for not meeting my personal deadline. From what I've been told, I may be mixing wrong. A friend suggested I mix the bondo a certain way, so ill give that a go this weekend. If this fails, ill just take him a part and have him show me. -
Starfox2010's TFA Stormtrooper Build
Starfox2010 replied to Starfox2010's topic in Build Threads Requireing Maintenance
Ok I gave the putty and sanding another go. I also added the nipples, lol. I tried adding the putty to little spaces in the center cavity but I think im going to carve it out and keep trying to completely fill the little hole (top left in blue) with the devcom. everything else seems pretty smooth all around. BTW, anyone know of the best way to sand these little resin pieces. the nipples were a beast to sand, and worried about the forearm pieces. Im going to try and see if I have any friends in the auto repair business. I still dont feel comfident about the spot putty. I find little pockets and when trying to gently sand into them, I just end up clearing the whole thing off. or the edges arent smooth enough to where I completely remove it. I tried taking a break and helping my brother with his Scout armor to prevent me from flipping the table over so I think im going to seek in person advice. This side was better off without the putty. This side is ok for the other forearm, I really like the outcome for this side.looks like crap to me but felt smooth all the way down. For the left and right ab piece, I honestly think I dont really need the putty.I think I did a good job adding a lot of devcom all the way down. except for some pockets, im sure ill end up sanding down all the putty. Well thats what I have for now. -
Starfox2010's TFA Stormtrooper Build
Starfox2010 replied to Starfox2010's topic in Build Threads Requireing Maintenance
I' still working on this, I swear. Nothing much to post but me sanding my life away. I'm going crazy! When I think i'm done with a piece, I tilt a bit and bamn, I forgot a spot. I sand and then tilt at another angle, and bam nope keep sanding. and these are tedious pieces. I threw a fit last month and I kinda sanded it with a heavier grain on my mouse sander and now I see some scratched swirls. I feel like Frank Costanza -
Starfox2010's TFA Stormtrooper Build
Starfox2010 replied to Starfox2010's topic in Build Threads Requireing Maintenance
Well I did a few pieces, A while ago Walter and I found that there were some differences in out armor, one was that mine was extra glossy,Sort of like my AM armor, and boy is it difficult to sand off. the chest plate I did a while ago and now I have carpal tunnel (still need to remove bondo) I ended up getting a little mouse sander and it does help a lot but have to go over it a few times. Anyways, here's a little update pic, since I feel my thread is fading away. Ill try to do a better shot of a comparison but here's one -
Starfox2010's TFA Stormtrooper Build
Starfox2010 replied to Starfox2010's topic in Build Threads Requireing Maintenance
Will do, Thanks. -
Starfox2010's TFA Stormtrooper Build
Starfox2010 replied to Starfox2010's topic in Build Threads Requireing Maintenance
Hey guys! Sorry I haven't done much lately. I started working on a quick costume for Halloween since I didn't meet the deadline. Yea i'm using bondo. So weird, I even bought an extra pack in case the first one was bad (had it for a while) and same thing happened. I sanded the areas, washed with dish soap let it dry then applied the bondo. I had to wait until next month (next week) in order to buy the poly-flex putty hoping that does the trick. -
Starfox2010's TFA Stormtrooper Build
Starfox2010 replied to Starfox2010's topic in Build Threads Requireing Maintenance
Hey Everyone, it's been a while. Lots of family events, birthdays and the kids got over the dog so now he follows me around everywhere (Even to the bathroom, Walter. Can't work on my armor in there anymore (INSIDE JOKE)). Anyways, I've ran into a big problem where I've had to re-do the putty on the chest, forearms and left shin. It fells like every time I put it on, it still feels like it hasn't hardened. and then I get little holes to where I practically sand everything down just to even it out, needing to start all over. I think for now im just going to start sanding everything down before I work on the puttying. I feel like i'm getting nowhere. Here are some pics so far. Sanded left shin and comparison Center chest piece. AREAS THAT I NEED TO REDO the wings, although its smooth I have some rough areas that don't go away. Forearm This piece alone had dented my ego lol. These are the little holes I get. Hope you can see them. I've never had a problem with my daughters Sabine helmet, but that was made from resin. Any suggestions? Thanks. -
Looking great. I know what you mean about being busy, i'm trying to continue with mine.
-
Starfox2010's TFA Stormtrooper Build
Starfox2010 replied to Starfox2010's topic in Build Threads Requireing Maintenance
Supposedly I'm getting a replacement from Anovos for it, this one was defective but I messed with it to where I could smooth it out. If I get it on time, ill see about removing this one some how and replacing it. otherwise, ill try your method. Thanks. Yea, crazy indeed. I haven't ordered the paint. I'm going to check with a couple of local shops for their cost. I have one in particular where I know the owner through a friend. so crossing my fingers he'd give me a good deal. Otherwise ill need to result to using the cans, not a bad thing but I've seen some bad outcomes from it. and people having to sand down and start over. this finished glossy plastic would have been perfect if we didn't have to do all these mods to the armor. It reminds me of my ANH armor from AM. -
Starfox2010's TFA Stormtrooper Build
Starfox2010 replied to Starfox2010's topic in Build Threads Requireing Maintenance
Tadaaa! had a bit of an oopsie. 1. I Left the magnets inside so I had to make an opening to get then out....lol 2. I swore I had this piece leveled out but I think the magnets slipped a bit. Nothing huge but I hope you cant tell much when putting the black tape on it. I also took care of these. Right thigh holster piece. Reinforced the inside of the yoke shoulders (I hope) Glued the thingamabobs to the Grebles thingie. Just need to glue the female snaps. And I hope I did this right but I put cal glue in the chest plate openings so they wont be so deep... The return edges are also flattened out to flow through. Lastly, I took a step back and seen what I have accomplished so far. and the couldn't help but put it on... So I believe im 1/3rd of the way there . Next up, Puttying (that's a word right?), yet more sanding, the belt and adding the metal holster. -
Starfox2010's TFA Stormtrooper Build
Starfox2010 replied to Starfox2010's topic in Build Threads Requireing Maintenance
LOL yea, you need to catch up. -
Starfox2010's TFA Stormtrooper Build
Starfox2010 replied to Starfox2010's topic in Build Threads Requireing Maintenance
Here's the TD piece. I filed and sanded it down, i'm just going to ad some cal glue from the inside to give it some strength. You can see through it in the light. Also going to make sure it faces the back plate. -
Starfox2010's TFA Stormtrooper Build
Starfox2010 replied to Starfox2010's topic in Build Threads Requireing Maintenance
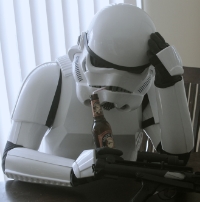
But I feel like this coming home from work, lol: -
Starfox2010's TFA Stormtrooper Build
Starfox2010 replied to Starfox2010's topic in Build Threads Requireing Maintenance
Haven't been able to do too much, getting close to that end stretch of putting things together and start on adding the putty and fine tuning things. I believe these ribbed things are called "thingamabobs" but I could be wrong , anyway, I fogot to put them on the last time. Started working on the TD, I figured i'll probobly get that replacement part from Anovos in about a year, so I sanded down that little bad area (will show later) I only glued this part though, will work on the rest this week. (everything looks even, although it doesn't look that way in this pic. Glued the pieces on both spats and created the hole for the snaps. My drill bit was't big enough so I had to improvise. I kinda messed up here but not in a bad way, I wanted to add the cal Glue on the areas that were under the chest plate so I wouldn't have to do the putty however I didn't fill it in to all the areas. You can see the dust settle into the cracks, I will fill it in later. Lastly, I also filled in the little gaps from the biceps as well
