


The5thHorseman
-
Posts
2,768 -
Joined
-
Last visited
-
Days Won
16
Content Type
Profiles
Forums
Gallery
Articles
Everything posted by The5thHorseman
-

Joblesspunk's Ap Stormtrooper Build
The5thHorseman replied to JoblessPunk's topic in ANH Build Threads
Very nice, good job. You won't regret to have taken the time to resize your biceps -
Joblesspunk's Ap Stormtrooper Build
The5thHorseman replied to JoblessPunk's topic in ANH Build Threads
Unfortunately for you, yes the screws are always set that way on the originals. But let's be clear, the positioning of these screws will not prevent you from reaching Centurion, however i agree with Tony that itt would be a good thing to fix it. Regarding Evilboy's thread title, some people write "screen-accurate" only for buyers to feel more confident in purchasing their items, whether this "screen-accurate" statement is right or wrong :/. In the end, it comes down to you to check if everything is indeed accurate. Also, instead of buying new clips, you can always cut the excess of aluminium above the holes with a hacksaw or dremel (cutting aluminium isn't that hard). Then you will just need to unglue the detonator panel and reglue it back into the correct position . -
Yes, these V cuts are here just to improve mobility. Basically, if you're a short trooper that's something to consider if you have trouble walking, especially in the stairs.
-
Joblesspunk's Ap Stormtrooper Build
The5thHorseman replied to JoblessPunk's topic in ANH Build Threads
The list's getting thinner and thinner! Keep going -
Joblesspunk's Ap Stormtrooper Build
The5thHorseman replied to JoblessPunk's topic in ANH Build Threads
Of course. I posted the Amazon link just for additional visual reference. 4mm seems a bit small to me though, i would rather go for something slightly bigger like 6mm (1/4"). -
Joblesspunk's Ap Stormtrooper Build
The5thHorseman replied to JoblessPunk's topic in ANH Build Threads
So far so good! For the TD, the screws are: black slotted pan head screws, such as these http://www.amazon.com/Machine-Slotted-Thread-Length-Threaded/dp/B00F3304S2 However, i don't remember what should be the size of the head. I guess you can just estimate it by comparing it with the clips width. -
I doesn't seem that bad too me. Honestly, wait for your shins and torso armor to be assembled and then you'll be able to find out if you need to trim your thighs or not. Don't forget that you can notch the back of the thighs and shins to ease your walk, it might be enough in your case:
-
Joblesspunk's Ap Stormtrooper Build
The5thHorseman replied to JoblessPunk's topic in ANH Build Threads
Looks good! Well done. When you snap your belt to the abdominal plate, make sure the drop boxes elastics are placed on the outside of the ab snaps so they line up good with the ends of the ammo belt. On your pics, i believe the right/hand drop boxe is on the wrong side of the snap. Also, you might want to size down your biceps at one point, they're quite roomy right now . -
I'm personally convinced the ANOVOS armor will be better than ATA. It might just not be any faster to get one though (i think they are around 6 months late on their Vader stuff).
-
Advice needed on A.P. Biceps and Forearms.
The5thHorseman replied to PGHtrooper21's topic in Assembly, Mods, and Painting
The AP overlap ridges have some extra ABS on them to allow the kit to be adapted to different morphologies. Basically, you should reduce them of an equal amount on each side until it fits your arm without having too much room. -
ATA Armor Build_My First TK
The5thHorseman replied to russellr2d2's topic in Build Threads Requireing Maintenance
What you can do is choping off the excess on the clips, and then unglue the main panel of the TD and reglue it in position. The panel might become a little bit too low but i think it should be fine. -
Very nice texture! I personally think your black looks really nice like that, no need for that extra layer of flat black.
-
ATA Armor Build_My First TK
The5thHorseman replied to russellr2d2's topic in Build Threads Requireing Maintenance
Unfortunately this tutorial is certainly not perfect... The first screws should be located right under the edge of the clips: -
E6000 and metal reaction question
The5thHorseman replied to Somatophylax's topic in Boots, Soft Parts, and other Accessories
It's impressive how this myth is die-hard! First of all i think its origins were involving HIPS + e6000 + metal and not ABS. Secondly there has never been any clear evidence of this supposed reaction. Thirdly, the e6000 doesn't create heat when drying, it's just not how it works. Lastly, like the others above, i've done many tests and i've never had any problems at all... -
If you weather your helmet, i hope you'll weather your armor too To seal your weathering i guess you can use a rattlecan of Clearcoat. However, be careful, some are dull, others satin, and others gloss, so choose it according to the finish of your helmet. But to be honest, i have no experience in clearcoating a stormtrooper helmet so i'd wait for other advices.
-
Rubbing your armor with wet Black & White newspaper gives some really nice results. As far as if it will hold on, unless you use paint, pretty much every weathering method won't stay if you don't seal them. http://www.whitearmor.net/forum/topic/28549-fully-finished-anh-stunt-tk-15mm-abs-from-troopermaster-with-some-modifications/?p=364988
-
ATA Armor Build_My First TK
The5thHorseman replied to russellr2d2's topic in Build Threads Requireing Maintenance
You want it perfect so i'll throw this out, even if these are really little details: - Your ammo belt isn't properly trimmed. The horizontal cuts should be right on top and below the boxes. You still have some flash around on yours: - Also the corners of the abdominal buttons should be squared and not rounded as you did: -
Supply list for your OT TK build....
The5thHorseman replied to justjoseph63's topic in Getting Started - Read this First!
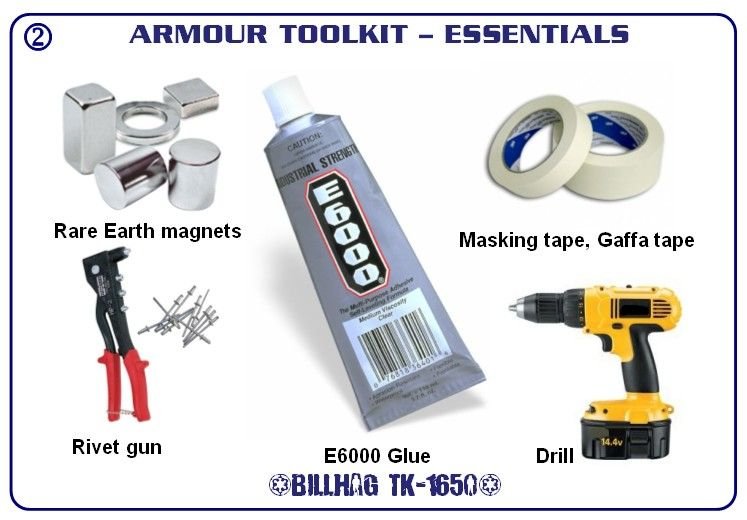
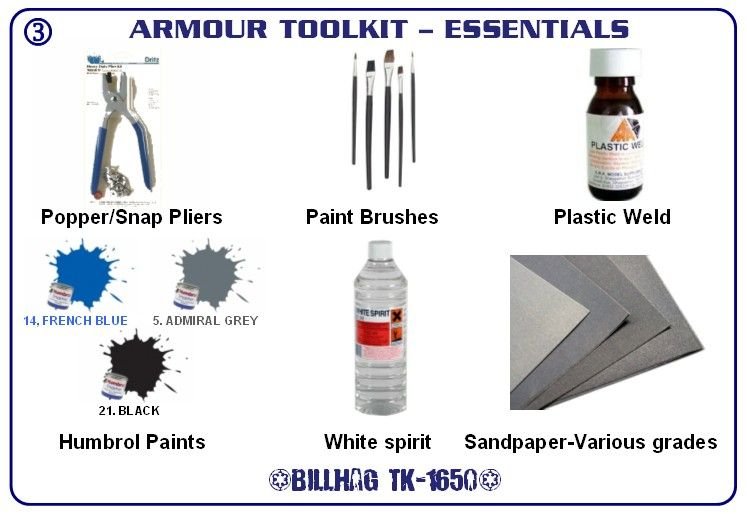
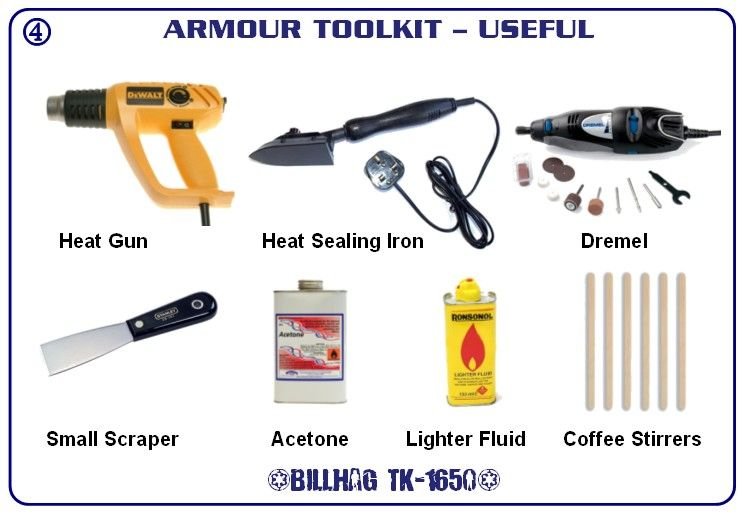
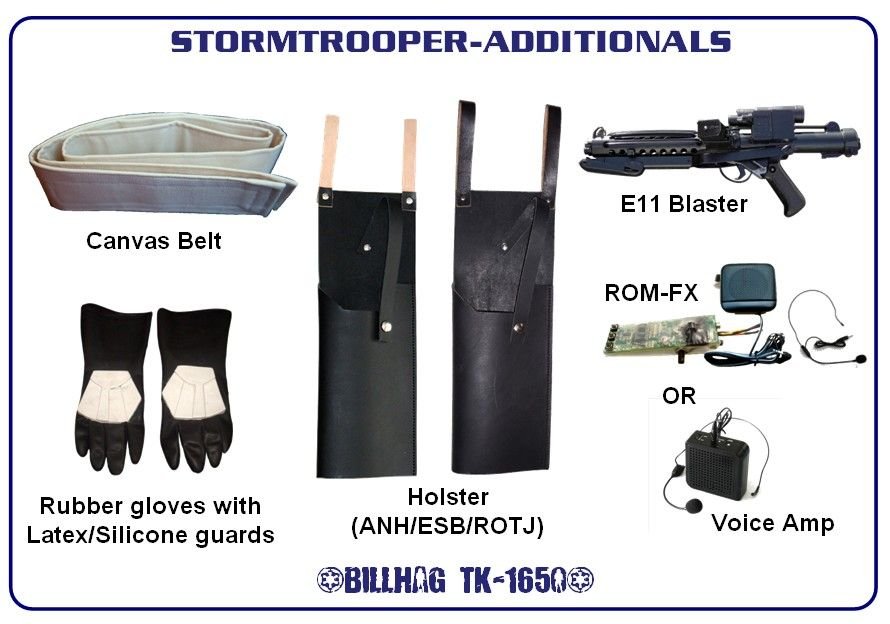
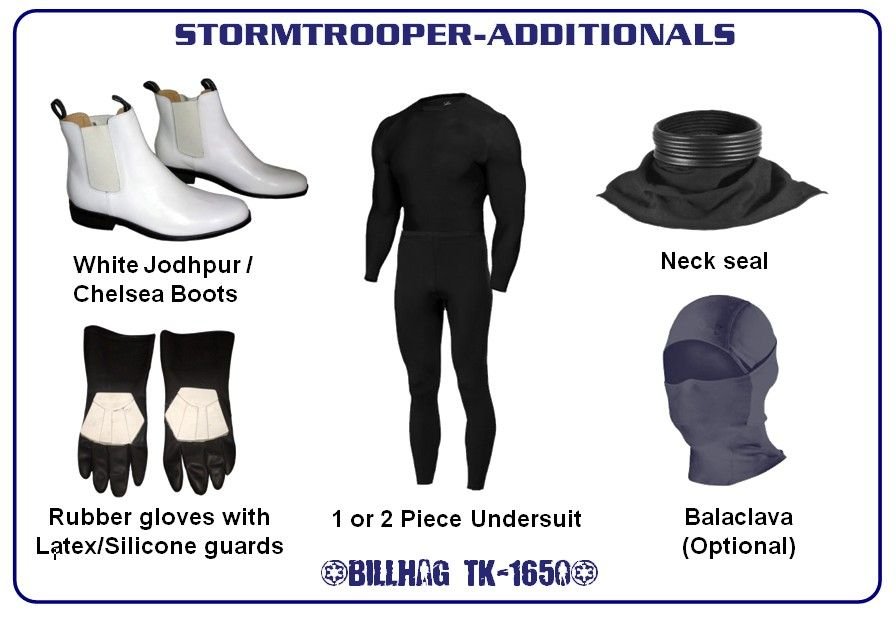
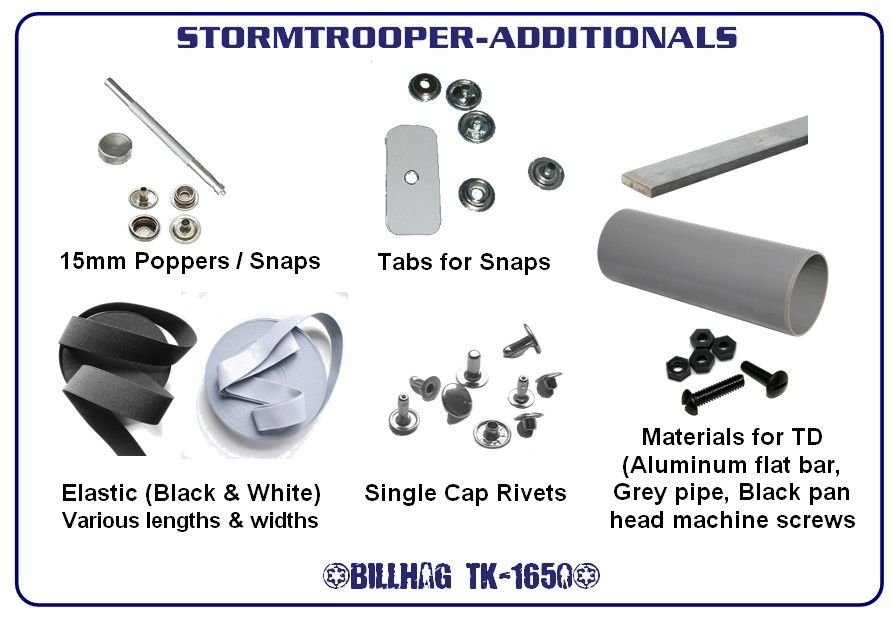
In the same spirit, i've always found these diagrams by Billhag extremely handy for new comers.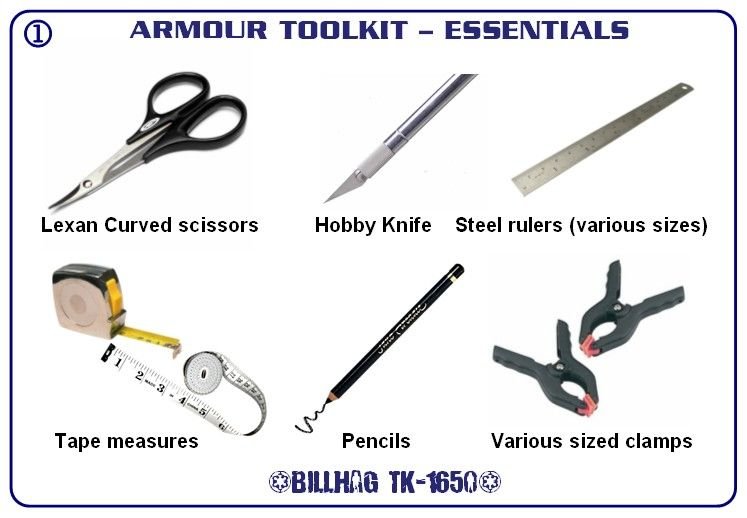

- 265 replies
-
- 13
-

-
Reference pictures of the new TFA E-11-7?
The5thHorseman replied to Bone's topic in General Weapons Discussion
There's also this one for the front of the blaster: And here's a glimpse of the blaster's underside: -
Reference pictures of the new TFA E-11-7?
The5thHorseman replied to Bone's topic in General Weapons Discussion
Hands-up! ---------- -
Reference pictures of the new TFA E-11-7?
The5thHorseman replied to Bone's topic in General Weapons Discussion
Here's some close-ups of the decal: I don't remember having seen one but i'll keep an eye open if ever i come across a picture of the underneath, and front of the blaster. Edit: It ain't what you're looking for but this one might be of some interest too: -
Correct white adhesive for elastics
The5thHorseman replied to Stig's topic in Assembly, Mods, and Painting
The only down side to the e6000+Paint combo is that the Stelmax 1985 glue is a really strong adhesive that tends to warp a little the areas where it is glued with the ABS. You won't get that effect with e6000. -
Well, unfortunately what i can say is that your tubestripes are reversed. You used the stencil for the left cheek and the right cheek and vice versa. You see, the top of the first stripes are supposed to sligthly lean toward the front, but on your helmet it's the bottom that does that:
-
It's hard to cross post from the RPF as the pictures hosted on it can't be copy/pasted on another board. But the topic is public and everyone can access it. In fact, it's just the adapter for the e-11 which goes onto the thigh rig that would need this method to be removed. The blaster might be easier to attach.