gmrhodes13
-
Posts
31,219 -
Joined
-
Last visited
-
Days Won
1,070
Content Type
Profiles
Forums
Gallery
Articles
Everything posted by gmrhodes13
-
Hello and welcome aboard
-
 Hello again, I did post some info in your welcome thread but will repeat here, as yet there has not been a discussion about the version of TK in Mandalorian as many around the world had not had access to the series and we didn't want to spoil it for those people, the UK I believe has only recently seen the first few episodes, once more have seen the series I'm sure more investigation and discussion will ensue. Here is some info on new to the legion costumes; https://databank.501st.com/databank/Costuming:CRLGuide Good luck with the build
 -
Hello and welcome aboard, no decision or discussion has happened as to if the Mandalorian TK's are actually Rogue One or a variation as yet as many around the world have not had access the Mandalorian Series, I believe the UK has only seen a few episodes as yet. Once most have seen the series the discussion will no doubt continue Good luck with the journey.
-
No good videos that I'm aware off, you may want to look through some of the build threads to pick up some tips, also check out the gallery sections for details.
-
LEGOeatPokemon requesting pre-approval (SDS)
gmrhodes13 replied to LEGOeatPokemon's topic in Request TK Pre-Approval
Welcome to the ranks trooper -
Snaketcher Requesting Pre Approval (AM)
gmrhodes13 replied to snaketcher's topic in Request TK Pre-Approval
Correct -
Most of us just copy the separate links, doesn't take that long
-
Congratulations and welcome to EI trooper
-
I had to add some foam in my shins and thighs as I have the same thin frame, things had been wobbling about without it Hopefully your new pieces turn up soon.
-
Snaketcher Requesting Pre Approval (AM)
gmrhodes13 replied to snaketcher's topic in Request TK Pre-Approval
Nice work, something that immediately stands out is your large ab plate, needs rotating. Drop boxes should align with the ends of the plastic belt section. You have different gaps between your chest and shoulder bells. Thigh heights need to be even Also looks like your shoulder straps are in different positions, could try to even those. Good luck with approval -
Congratulations trooper and welcome to the EI ranks
-
Hello and welcome aboard
-
LEGOeatPokemon requesting pre-approval (SDS)
gmrhodes13 replied to LEGOeatPokemon's topic in Request TK Pre-Approval
Nice work, just on your TD I would try to get the ends to curve flat, (if you really wanted too make another set the screw holes go further to the ends) Will any new photos just try to be aware of gaps between the armor sections, try to get them to match on both sides, also watch the closure on the rear shins, one appears slightly open. Great job on all the fixes, SDS does need quite a bit of work to get it screen accurate and you have done well. Good luck with approval -
Tk15148 requesting ANH stunt EIB (RWA) (956)
gmrhodes13 replied to tythetrooper's topic in Request Expert Infantry Status
Congratulations trooper -
Perhaps reach out to one of the staff: Detachment Leader: Sarah Pugliaresi (TB 546) [email protected] Detachment XO: Jason Luu (CC 48027) [email protected] Detachment Webmaster: Sarah V Pugliaresi (TB 546) [email protected]
-
Hello and welcome aboard
-
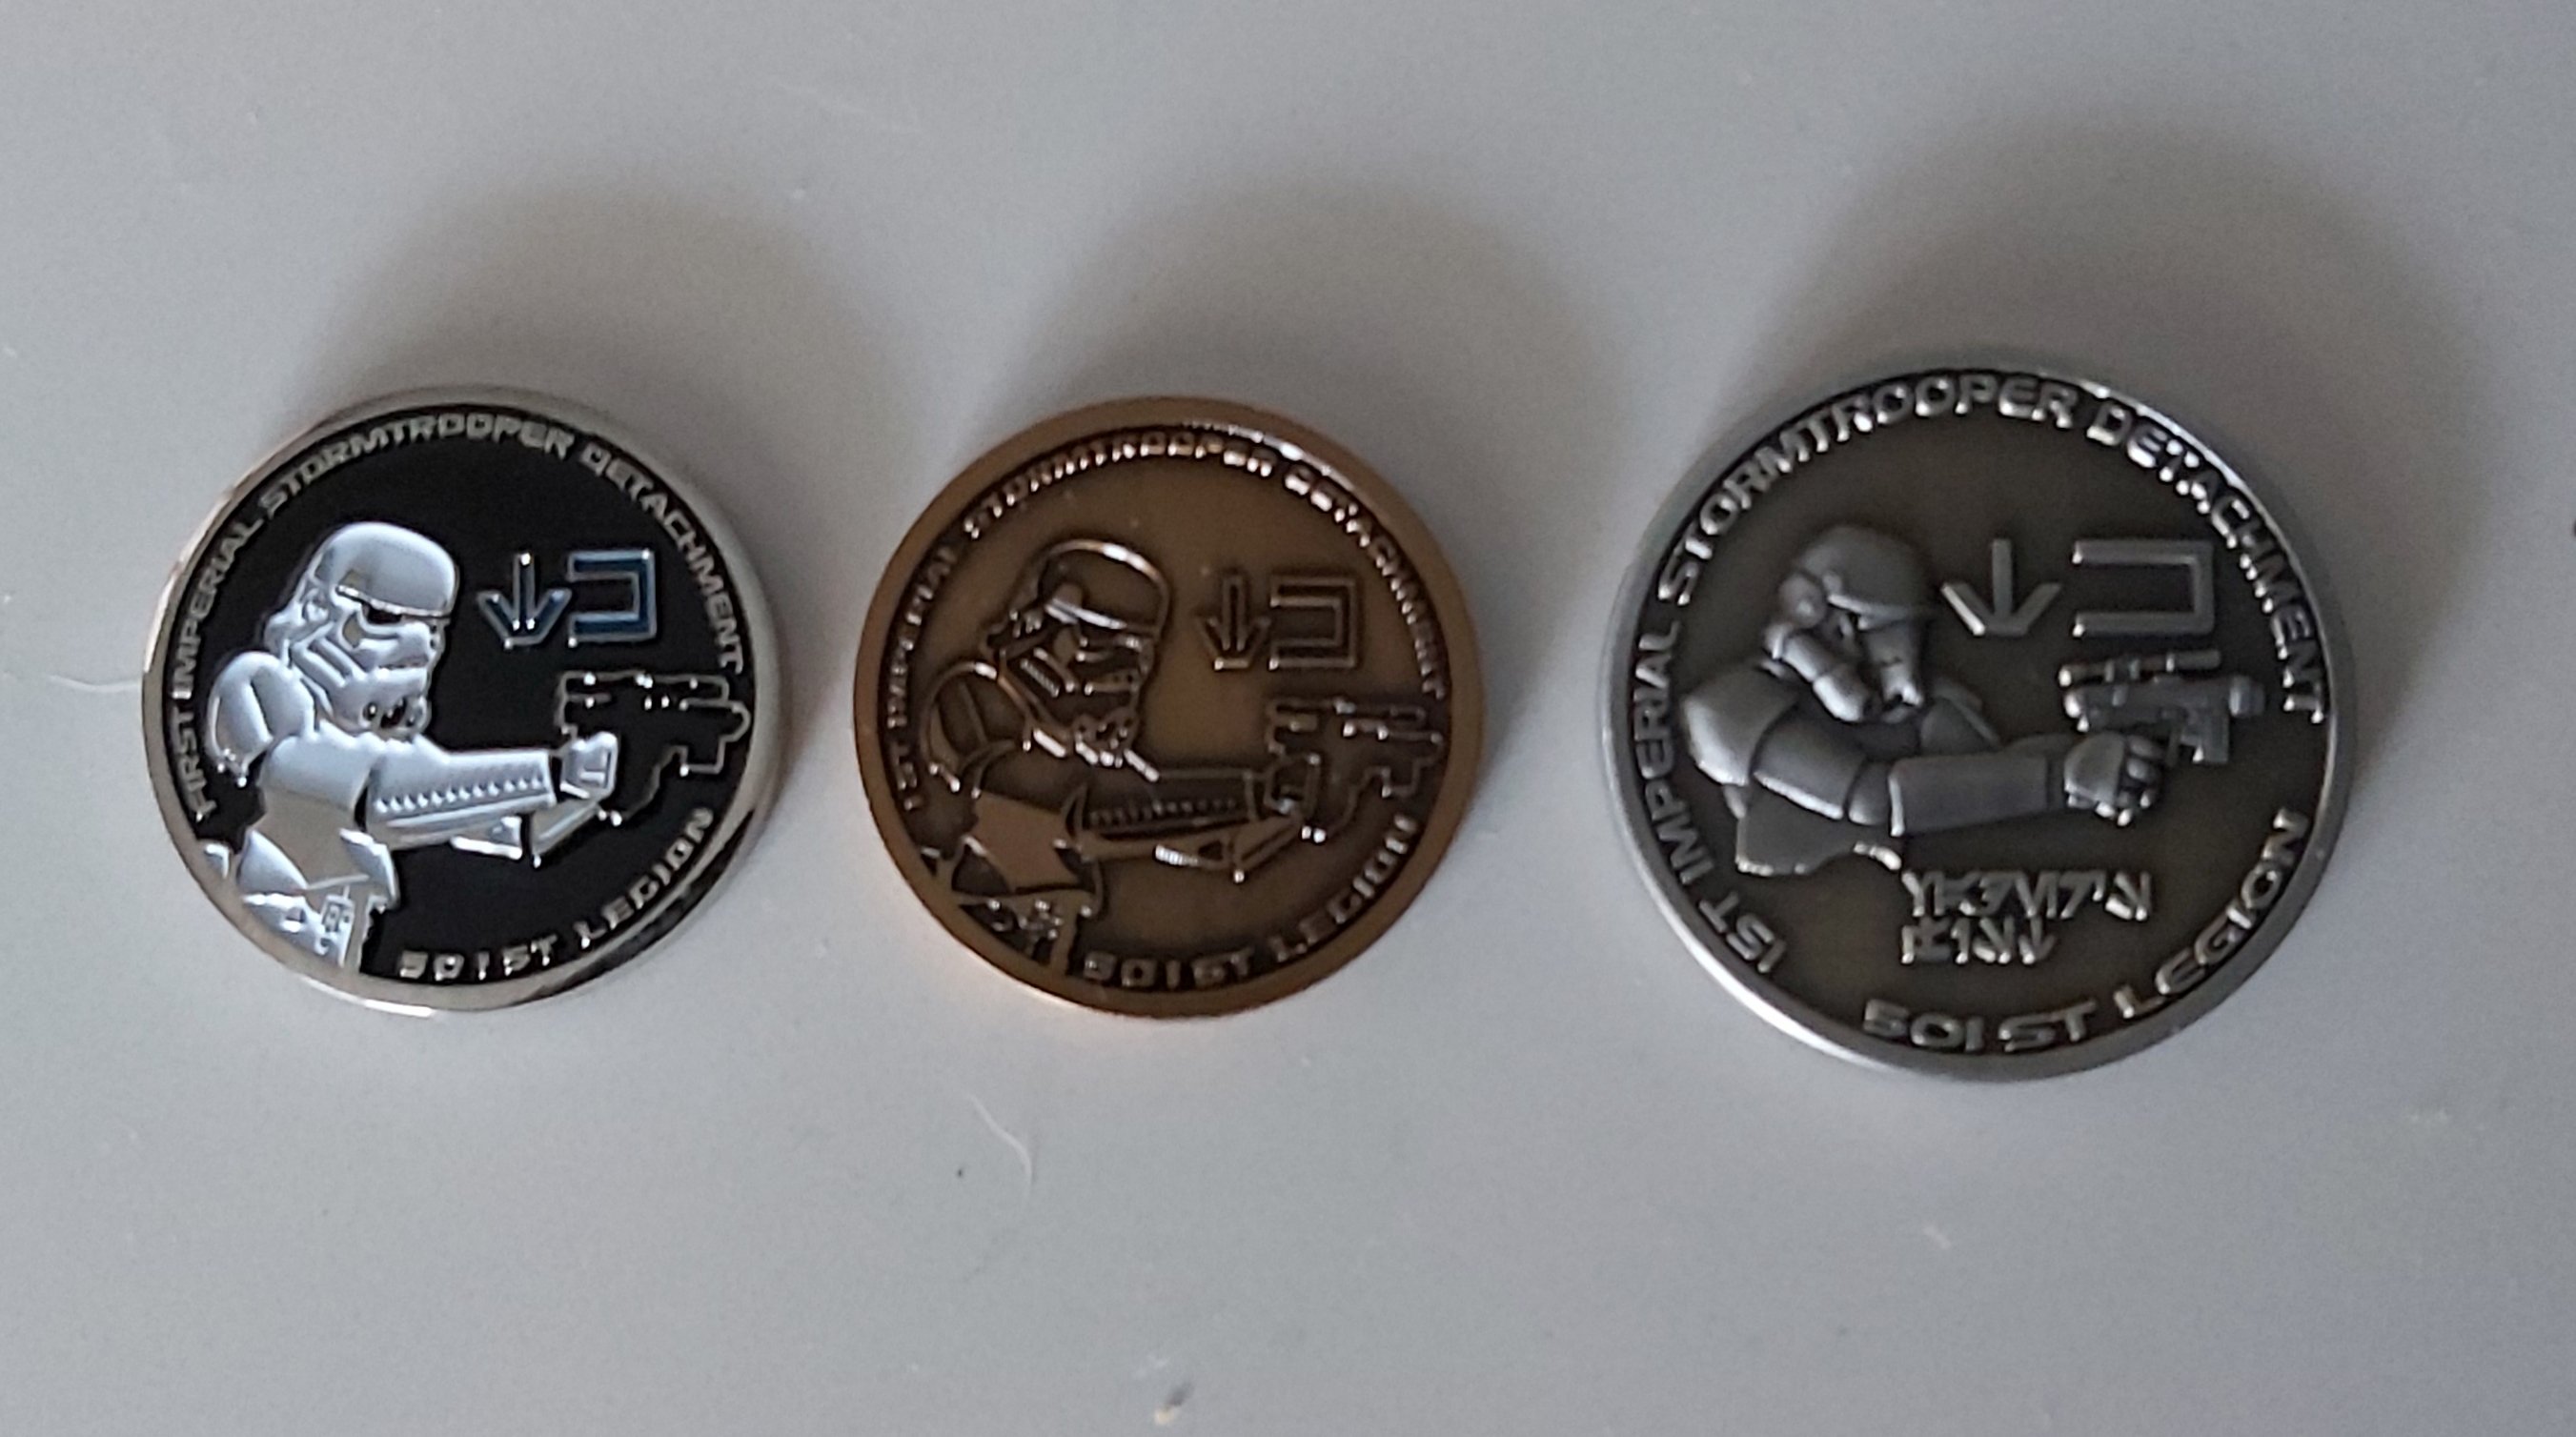
Big thank you to Paul @Daetrin I get to add these to my FISD coin collection

-
Nice work and good luck with approval. Just watch the position of you drop boxes You may want to check the distance between the end caps and plate on your TD
-
Hello and welcome aboard
-
TK-61601 Requesting ANH Stunt EIB Status (AM) (954)
gmrhodes13 replied to Eagle's topic in Request Expert Infantry Status
Congratulations trooper -
Nice work, you may want to reduce the amount of paint on your ab buttons, also appears you may have trimmed off the plate on the large ab plate. You could also trim the smaller ab plate a little more You will need to adjust your right shoulder and equal the gaps at your forearms/wrist area You could trim the excess material from your belt, normally they end just at the end of the TD You have a lot of shoulder strap on the rear and not enough on the front, you could move it down on the chest. Normally on the front it is 1 large tab and 4 to 5 smaller tabs BUT ATA straps are short so I could only have 2 1/2 small tabs on my fronts. Appears you have attached the holster straps in the wrong spot, should be on the lower part of the belt not in the middle. They should also start closer to the plastic belt section. You need to add black line around your ear bumps. Angle of your ears are a little off and too far back. Frown paint should taper a little more on the ends Tube stripes on your left are not straight on your left, should be same distance along the cheek, a pencil width You could also add a little more paint to the steps of the vocoder Side ab snap should be a little higher. Screws on the TD should match both sides, in type and position You could trim a little more off the top and bottom of the plastic belt section (its a little jagged) as well as the ends. Also reduce the gap to the drop boxes. A few adjustments and you should be good, best wishes.
-
Glad to hear you made it home safely, 14 days at home, what will you do
-
Nice work trooper, a couple of things you may want to adjust, your drop box strap may need to be loosened a touch, does appear quite tight and angled in some images. Appears you have a small amount of paint on the gum area, from the CRL: Frown is painted gray and does not leave the teeth area. Just a little tweak, although not a big thing, the end of the TD brackets should be straight, no curve You may also want to add a close up of you ab/kidney rivets. Good luck with approval
-
Tk15148 requesting ANH stunt EIB (RWA) (956)
gmrhodes13 replied to tythetrooper's topic in Request Expert Infantry Status
You are required to request stormtrooper access prior to submitting for EIB Also try to use the "direct link" to your images on imgur and post into your thread (or right click select copy and paste directly) -
StarTrooper's TFA/TROS FOTK Build Thread (KB Props)
gmrhodes13 replied to StarTrooper's topic in TFA Build Threads
Great work on those gaskets