TKittell
-
Posts
197 -
Joined
-
Last visited
Content Type
Profiles
Forums
Gallery
Articles
Everything posted by TKittell
-

My Tupperware AM Build[*AM]
TKittell replied to TKittell's topic in Build Threads Requireing Maintenance
I've discovered another unique method for this AM kit. The ab and kidney sides are long enough to use industrial velcro to bring the sides together. The advantages of this are 1) absolutely no black showing 2) velcro allows you to adjust as your weight fluctuates. The disadvantage is you can't put the 6 rivets on the sides because the side edges won't remain permanent. So I've decided to go velcro. Pictures coming soon. Helmet was painted yesterday. Boots arrived on Thursday. -
Proposed Change - Side Gap Language
TKittell replied to Daetrin's topic in FISD Expert Infantry Badge (EIB) Requirements
I know you didn't mean any disrespect. None was taken. I was trying to give my opinion with a bit of military background to back it up. -
Proposed Change - Side Gap Language
TKittell replied to Daetrin's topic in FISD Expert Infantry Badge (EIB) Requirements
Funny this topic came up when it did. I'm currently working on my AM armor and I had the cut lines drawn so that the ab and kidney pieces met up. My local garrison XO recommended that I take advantage of the long lengths of the AM sides and to just overlap and velcro them... knowing EIB requirements were "no black showing". So, I didn't cut them. I know I'm not a voting member, but I think you should grandfather those permanently. Give them the opportunity to change their gear, only if they want. When they were accepted, you gave them requirements, and they met them. I'm sure those with fabric will see the new requirements and make the effort to maintain current EIB requirements if they value the standards of FISD. Obviously, they do because they went through the trouble in the first place. Is the FISD staff really going to review ALL past submissions to see who has fabric sides and track all the re-submissions? Sounds like a lot of work to me. I'd recommend enforcing the new requirements with the new recruits (including me). I can't believe you're also entertaining the idea of changing the color of the badge. The badge is fine the way it is. There's no need to change colors to indicate how you earned it. The fact is... you earned it and you're part of the brotherhood. I'm in the military (which is what FISD is trying to emulate with the badges and achievement ribbons) and that idea just made me cringe. -
My Tupperware AM Build[*AM]
TKittell replied to TKittell's topic in Build Threads Requireing Maintenance
Tom, Yeah, I don't think I'm going to put on the abs strips. The way this armor is molded, it leaves a flat area that's a bit too wide to place thin "canon" strips on the front. I think the armor looks fine without them. Panda, I was going off of some AP helmet images on star wars helmets website. I liked the look of one that had slightly rounded tooth corners. After thinking about it, it's going to be real hard to notice the difference after they're painted, with black mesh behind them. Besides, nothing else on the helmet is straight (besides the brow line). These are all the arguments that went through my head during the teeth trimming. LOL -
Ugh, I've only got my AP to compare to, but it looks like your cap and back was trimmed too short on that side. What kit is this lid from? Sorry I can't offer too much help on this one.
-
They just got in a shipment! I paypal'd them my money yesterday. Size 13s. They said they had five pairs of 13s made and all five are pre-sold (1 pair were mine).
-
My Tupperware AM Build[*AM]
TKittell replied to TKittell's topic in Build Threads Requireing Maintenance
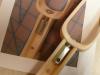
My AP lid has arrived! I've posted new pics of my build on photobucket. Some below... Riveted on MALE snaps to abs tabs. Tabs going on with E6000. Let them cure overnight! AP Helmet progress in work. Check out the photobucket link to read how I cut out the teeth. How's it look? Tabs applied to butt piece. Make sure they line up with the kidney tabs. Forearms glued. Make sure you leave enough space for your gloves. Drop Boxes. I cut out spare material to make backs for the drop boxes. I'll use styrofoam strips to sandwich glue the pieces together for added strength (more surface space than just gluing the edges together). I'll rivet the white straps to the backing strip and cut a slot in the top just big enough for the strap to exit the box. That'll help keep it flush with the body. I'm I going too anal on drop boxes or what? Right thigh with battery pack riveted on. Left shin with knee plate riveted on. Notice, I didn't apply it flush with the shin. I wanted it to flare out a touch to prevent the thigh piece from getting stuck over it. Make sense? Right thigh and left shin pieces together. Suspenders will carry the weight of the ab in the front kidney/butt in the back. Notice I cut off the clips from the suspenders and sewed on nylon straps to attach the female snaps. I bought the suspenders at Kohls. They're harder to find than one might think. Garter Belt for the thighs completed. I'm getting close to finishing! I just sent TKboots.com a payment for my boots. BTW, they JUST got in a new shipment. So all that's left is finishing up with applying the tabs, making the elastic straps, cutting back the ab/kidney/butt sides, and finishing the belt. Enjoy! -
My Tupperware AM Build[*AM]
TKittell replied to TKittell's topic in Build Threads Requireing Maintenance
At this point, the ends are just pushed into place (and quite secure I might add). I've reviewed the other threads about making the TD a storage compartment. I'd like to get in a couple of troops before I decide if I want to do that. The only thing I'm thinking of doing is gluing one of the end caps on permanently and having the other end attached to a piece of elastic that'll be glued to the inside of the tube. That's easy enough. The biggest thing I learned with the AM Thermal Detonator was to use the internal strips of ABS to bind the seam line and E-6000 glue. At first I tried ABS glue and that didn't work. I also used the end caps to help keep the two pieces in shape while the glue dried. After the glue dried, I sanded the excess glue off the exterior and then re-painted the seams. Good luck with yours. You'll be happy with the kit. It is very well designed. I'm just going slow with the help of my local garrison members to ensure I don't make any mistakes. -
Quick question, does the shell ejector port on the E-11 have to be grey/metallic for EIB requirements? I just saw a EIB submission approval and the E-11 ejector port was black. So maybe I just answered my question, but I'd like confirmation. Thanks.
-
My Tupperware AM Build[*AM]
TKittell replied to TKittell's topic in Build Threads Requireing Maintenance
Wings have been cut. I decided to glue down the front pieces of the ribbed shoulder straps. I had originally used velcro to keep them in place. I didn't like that solution because the velcro could be seen from the sides and the straps weren't flush enough. Also, Thermal Detonator is completed. -
My Tupperware AM Build[*AM]
TKittell replied to TKittell's topic in Build Threads Requireing Maintenance
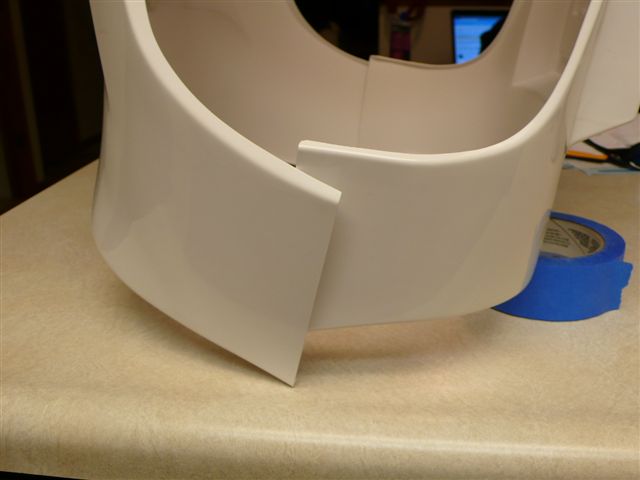
New pictures added of where I want to cut my chest and OII pieces on the sides. I want to cut along the outer-facing edges of the blue tape. Can I cut? I eyeballed the tape lines after looking at the screenshots from ANH posted online. Update: I ended up only cutting 2 inches off of both sides. Roughly, the inside of the tape "lines." Looks good, and I can alway cut more later if I want to. -
My Tupperware AM Build[*AM]
TKittell replied to TKittell's topic in Build Threads Requireing Maintenance
Boys, I've got some trimming to do. -
My Tupperware AM Build[*AM]
TKittell replied to TKittell's topic in Build Threads Requireing Maintenance
I guess I didn't ask my question clearly enough. I understand the kidney and ab plates come together. My question is referring to the overlap of the chest and back plates. What I meant to ask was how far back do I cut the pieces? Is there a certain angle? A certain amount of black showing? Thanks for the help. -
My Tupperware AM Build[*AM]
TKittell replied to TKittell's topic in Build Threads Requireing Maintenance
Slight problem. It seems this kit comes with long sides on the chest and back pieces. I can actually overlap them while wearing it. What do you guys recommend? Cut them? If so, how should I cut them. Both sides? Or just the back wings or the front wings? Another option I was thinking of was to velcro them together. If I'm a betting man, I'm guessing you all are going to tell me to cut both wings and have a piece of elastic to hold them together. Anyone have a good reference picture of how I should cut them? Angles? Is this just a unique problem with the new AM armor? Rob ***Link udated with ab button panel work***
-
My Tupperware AM Build[*AM]
TKittell replied to TKittell's topic in Build Threads Requireing Maintenance
Update to questions above: I'm making an ANH, Stunt. I just picked up my ANH Stunt leather holster from Anrev up in Denver. My bucket will be AP, but hasn't arrived yet. So just waiting for books from TKboots.com (they said they'll be getting a shipment in this week) and my bucket. I bought some black nomex flight gloves from the local AF base (it helps to be in the AF sometimes). -
My Tupperware AM Build[*AM]
TKittell replied to TKittell's topic in Build Threads Requireing Maintenance
I'll be going for EIB. I know riveting the shoulders together wasn't canon, but I wanted to take advantage of the longer straps with the chest/back AM molds. I'm also planning on doing the left side torso rivets. -
My Tupperware AM Build[*AM]
TKittell replied to TKittell's topic in Build Threads Requireing Maintenance
Bill, I'm 6'2" and 195 pounds. I had to trim almost every one of the pieces to get my custom fit. But your workload would be the same. You'd just have to make your trims wider than mine. Yes, I bought the light kit (no bucket). I've ordered an AP, hopefully it's in the mail as we speak. I made some progress on my kit last night and today. I just got done with the rivet gun and button snaps for my snap system. -
Nice one Joey... "Star Warish" LOL. Next time I go into the Tandy Leather store, I'll ask for "Star Warish" rivets for a canvas belt.
-
I bought under armor knockoffs at Target, made by Champion. Both top and bottoms were close to $15 each. I also bought a "mock" turtleneck styled one that I sewed mini black buttons so I could snap my neakseal to it. That took a long time, but it works. I also sewed elastic straps at the end of the arms for modified thumb holes. Helps keep the arms from riding up.
-
Just a couple of notes to start off. Communications with Tupperware were superb! My kit did not come with a bucket, although he's currently working on a new and improved helmet. ABS was pre-cut and has a high gloss to it. This is formed for the larger troops and every piece needed to be trimmed to get the perfect fit. BTW, I'm 6'2" and 195 lbs. Photobucket Link ***NEW PHOTOS AS OF 15 FEB*** New photos of my arm straps and snaps for the canvas belt.
-
Snaps Problem... Backsides of tabs are not flush
TKittell replied to TKittell's topic in Assembly, Mods, and Painting
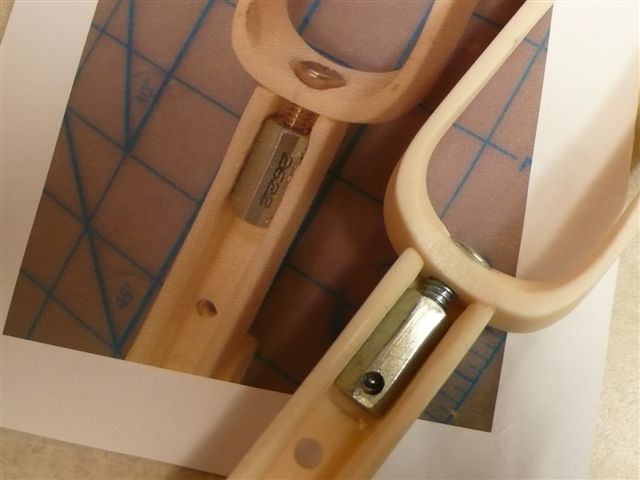
Thanks for the link Panda. This is the third idea of yours I'm going to copy. Maybe one day I'll come up with an original fix. Wait! I think I can improve upon Panda's design (I feel a tremor in the force). Instead of pounding down the crap out of the expanded rivet shaft inside the female snap, why not remove the rivet from the "nail" shaft, cut the length down with a dremel, and then reapply it to the shaft. I'll have to try it tomorrow. -
Snaps Problem... Backsides of tabs are not flush
TKittell replied to TKittell's topic in Assembly, Mods, and Painting
I made some longs ones, but the majority of the ones I made are square, roughly 1 x 1 inch. -
I'm in the process of making my "snap tabs" using a hammer and kit that comes with the Dritz Heavy Duty Snap Kit (5/8 inch) I bought from JoAnn's Fabric Store. A problem I'm facing is that the metal backing is not flush with the ABS material which will cause a problem when it comes to gluing later on. If I had used the hand-held clamping tool, would that have elimitated the gap? Should I go get the tool? Damn thing costs $22, and I don't want to buy it if it isn't going to fix the gap. I'm thinking of boiling the tabs and letting the plastic settle to eliminate the gap. Any help would be appreciated. I'm planning on using ABS glue to attach them. I tried to upload a pic, but I'm limited to less than 680 bytes.
-
I used headliner fabric with foam backing from JoAnn's Fabric Store. When sewed together, the lines create the "bead" effect. Take a look at Pandatrooper's post, my neckseal using Panda's design is posted. If you decide to use this material, remember to cover the foam with masking tape. My sewing machine didn't like the foam material and wouldn't guide the fabric through evenly. Tape fixed that problem. Good Luck! Panda's neckseal tutorial
-
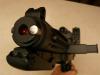
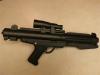
Pandatrooper's Hasbro build
TKittell replied to pandatrooper's topic in Build Threads Requireing Maintenance
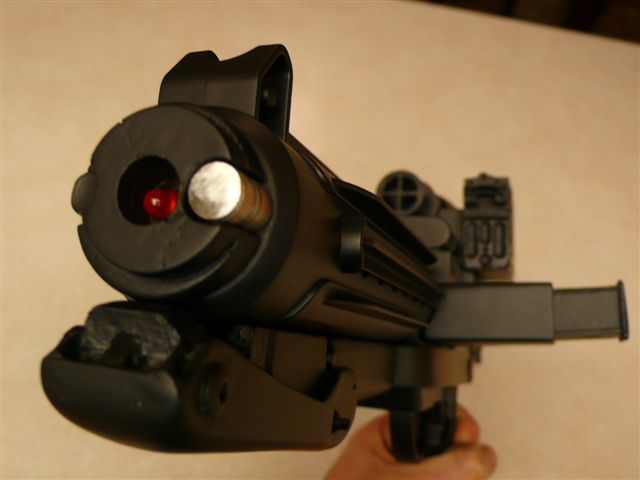
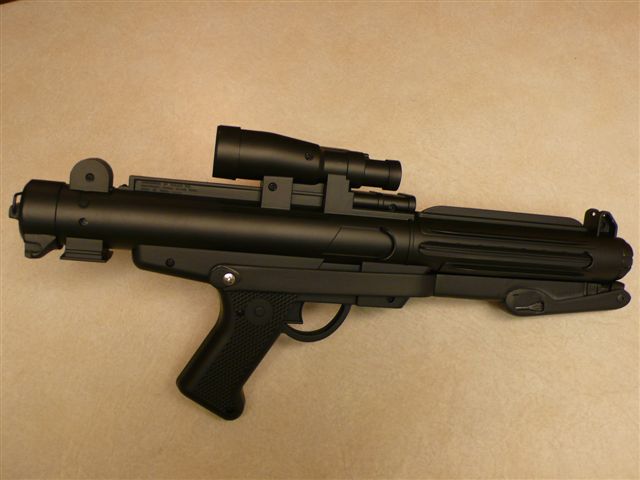
They say imitation is the sincerest form of flattery... I thought your ideas were great so I used your techniques on my hasbro. Using your ideas, there is really no reason to epoxy the swing arm to the gun. Thanks for your help! Photos updated. The silver and bronze under lying paint have been applied. Black paint next. At this point you'll notice I've left off the tip and painted it seperately (to get the inside of the barrel black without the LED light in the way). Final pics posted 12/15/09. I'm happy with the results.