Leaderboard


Popular Content
Showing content with the highest reputation on 01/07/2026 in all areas
-
I like it!2 points
-
Andrew, Tony, and Anthony thank you for the notes! I love it! This is what I was hoping to inspire. Andrew and Tony, great additions to put in my tub for my main repair bag. I'm already going to copy some of those! Anthony, interesting idea on the drop boxes. I've heard of something like that, but I hadn't run across a pic example of that before. Thank you for sharing. Does the drop box close and stay closed by velcro? I have another post I'll be doing soon is on using the ammo belt for storing mini kits kind of based off of what I saw in the Ultimate Star Wars, New Edition. I may be dropping my micro med and micro repair kit for what I'm doing on these next. More coming.2 points
-
Cheers! Good luck on EI and beyond1 point
-
Thank you very much! Have a fantastic day! Sent from my iPhone using Tapatalk1 point
-
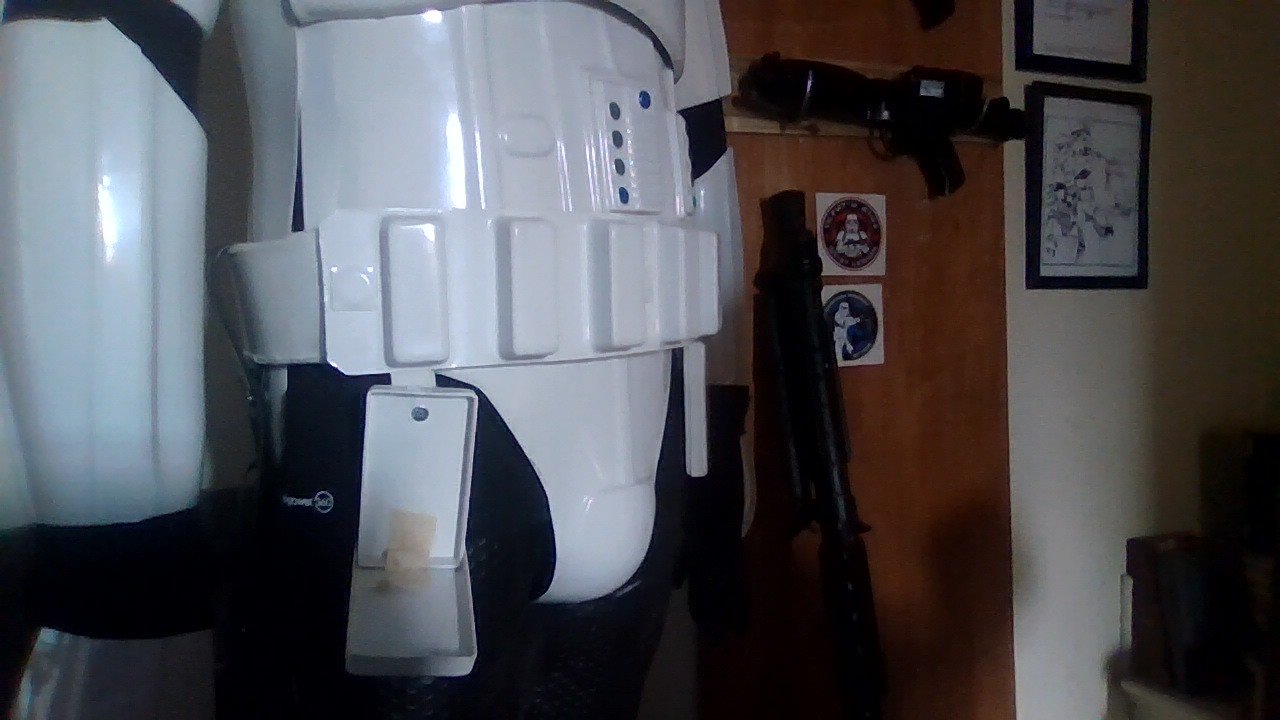
Before I started trooping I made my detonator a carry container, I had thought of carrying keys and credit card, shortly after I heard stories of TK's having their detonators pinched, probably pesky Jawa's.1 point
-
Thanks for your replies. I will certainly go take a look at the armor in real life. The person is on holiday now but he sent me some pics from his last troop, everything seems pretty good. If it all fits well and only minor adjustments are needed, I will probably take it :)1 point
-
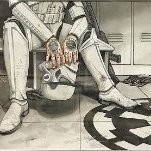
Fantastic Info ! Making Use of internal armour space ! Haven't seen many make use of these spaces. I did make cloth cotton tape hinges on my drop boxes & use 2 small pieces of Velcro (1 hook & 1 loop) to secure them closed. Also available spaces are the belt boxes ! I know, to get to them a trooper would need to take the belt off. Thought this can be done away from public eyes.
 1 point
 -
Case: Super glue Hot glue gun Mini mart, no joke On me (palm of one glove): Cash, credit card, pain meds1 point
-
Great thread, Justin I carry several similar items, but I really love your onboard Med kit, that's an excellent idea. Always carry a repair kit in my armour case, I'll add an image later, but the list of items are as follows. I carry stuff not just for my own repairs but others because someone always needs something on troop day. 1. Touch up paint Blue and Grey for Ab plate buttons 2. CA Glue, several small tubes, as someone always needs to do a quick fix. 3. Adhesive Velcro 4. Spare snaps and snap tool 5. Spare Elastic in several sizes 6. Small amount of Novus polish 7. ABS Scraps for crack and reinforcing repairs 8. Sandpaper 9. Sharpie pen (to conceal blaster scratches and scrapes) 10. Washers 11. Spare fly screen mesh pre-cut for behind frown 12. Spare AA and AAA batteries for helmet fans 13. Toothpicks for fine paint work 14. Thin paint brush 15. Small utility blade 16. Small polishing rag1 point
-
Thank you both for the recommendations. I'm going to ponder my options some more on the Han snap. I'm leaning towards removing part of the return edge first before cutting more off or re-drilling the snap. In the meantime, I worked on the V-tabs this week. I made the cuts for the pieces. I went with close to 3"x1" pieces. I made three of them so I could afford to mess up on one. I made the cuts and then did the heat bends to first make the "U" shape. After the U shapes were made, I then used heat to bend the V portion. I messed up the first tab by bending too much, but I learned and was able to make the v portion better on the second attempt. I painted the inside of the V black and then used E-6000 to mount them to the inside of the posterior plate. I was careful with clamping this time! Next, I will do a partial kit up to check the 3 dressing issues that I had: Calf alignment, posterior plate alignment, and positioning of the thin white elastic that holds down the shoulder straps. Pics coming for those with questions. I'll come back to the Han snap after these are done.1 point