Leaderboard


Popular Content
Showing content with the highest reputation on 08/04/2025 in Posts
-
While I was in the UK, one of the highlights of the trip was meeting with *the* Rob of RS Props. We sat down and chatted for almost 90 minutes, from which they posted this 30-ish minute video on YouTube at the link below. I someone seriously joke that there a betting pool with the FISD staff on if I could leave his shop without ordering a set of kit. While I hadn't intended on doing so (as I have a nice TK already), I was so impressed by Rob and his commitment to quality that I'm now trying to get my name added to the queue. If you ever have a chance to go to Manchester or meet with Rob, I encourage you to do so. He and his crew are true craftsmen and also some of the nicest people you'd ever meet. Can't say enough good things about them. Many thanks to everyone at RS for creating a truly memorable experience and sharing your passion and expertise for Star Wars costuming. You guys rock!3 points
-
Using a PC did the trick apparently, can´t see why it´s not working on my phone all of a sudden but oh well, atleast this works. So, this pic have been seen plenty enough by now and nothing more exciting to say about it other than the coverstrips are now glued and will be trimmed down later. Also painted the shoulder bridges to better match the armor, not perfect but good enough, the + side of doing a Night Trooper is all the weathering and bandages that help hide imperfection Painted the "buttons" and glued on the ab details. In order for the centerpiece to fit I cut out a square in the ab, one can see the outline but it works as the screen used suits sort of have that detail. Next I decided to work on the front half of the belt, making the little "teeth", adding the ammoboxes and dropboxes. For the teeth I put the belt on the ab and drew some lines and used the old score and snap to bring them out. I opted to use chicago screws to install the belt, posts are hidden under the ammoboxes which were dremmeld out were the posts are, I used 4 points of attachement. The sides are loose and will close over the back portion af the belt with velcro. I also gave the teeth a little chamfer as that´s how I think they are, was originally planning on using 2 layers on the belt for that reason so I could make the belt thicker and easier to make said chamfer but naaa to much work and it works fine as is Next I eyeballed the position af the boxes and started by gluing the boxes that had the "slope" on top as they were somewhat easy to get the right spot for, then added the rest. They are glued but I will put in a few screws just to be safe. Put the ammo and dropboxes together. Dropboxes hade a nice space to glue but the ammoboxes sadly didn´t so it took some time to dremmel out (super hard printmaterial) All done `n dusted! Looks lite it´s ready to crawl away somewere... Locked it in the cuboard just to be safe2 points
-
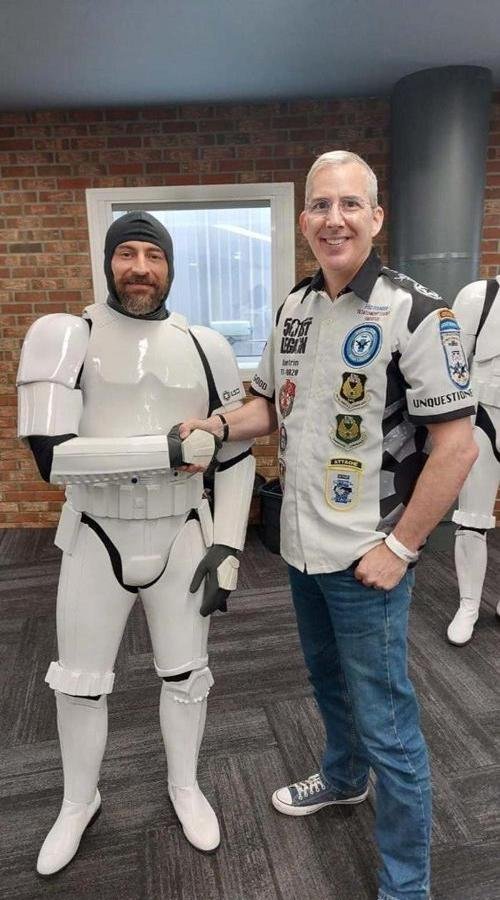
Hey everyone, Just a quick message to introduce myself—I’m Ben Weiss from the UK. After what may be the longest build in UKG history (a solid 10-year WIP… yes, really!), I finally suited up for my first troop in Manchester this past weekend—and absolutely loved every second of it. A highlight of the day was meeting Paul Hoeffer, and I had the honour of him placing my UKG insignia on my armour—definitely a moment I won’t forget. I’m really looking forward to meeting more of you in the future. All the best until then! Ben
 1 point
 -
Here are my thoughts on ab trimming. In addition to the top, I noticed I left quite a bit of material at the lower kidney so I'll probably trim it. I noticed in other builds that there is some space between the bottom of the kidney and the top of the posterior, whereas mine currently overlap. The bottom pic was taken in 2019 and the top pic was taken last night - you can see how much the ab yellowed by me letting it sit out in my garage (which has windows.) Some additional random progress: Here is one shoulder tab and the shoulder strapping snap installed: I forgot I haven't yet sanded the outside of the yoke (the way I printed it, that was the part on top of supports) so that will be slightly unfun to finish: I also used my trusty heat gun to reshape the posterior. I'll probably do a bit more. I was originally going to use an 850 posterior piece since it's smaller but the plastic is paper thin so I decided against it. Here's a comparison of both pieces prior to reshaping:1 point
-
Congratulations and welcome to FISD.1 point
-
Thanks for the tips, no matter how I go about it it’s just the link that shows, I’ll try with a PC later and see how that goes.1 point
-
Correct, gallery section is full of references of screen used armor1 point
-
I have a build thread (link here) where I turned an ANH E-11 into an ESB, Terry. I have the greebs available** (except for the "swoosh" and small round "buttons" on the right side, which can be made from scrap ABS). The pan head and star screws to attach the left side greebs can be found at your local ACE hardware store. Shoot me a PM if interested. ** No charge, just cover postage.1 point
-
So as I alluded to a few posts back, I was happy about the chest and back sizing, but now quite unhappy about the helmet size. It somehow doesn't show as much in photos, but in person I felt like a FOTK Funko pop. I really really didn't want to have to print the helmet, but seeing how amazing @zediyeti looked made me finally bite the bullet. Like Zediyeti I sized my helmet to 92%, but I had to slice it into parts due to my smaller printer bed. Each part took 12-ish hours. 1) Top. I used a support blocker under the dome, but you can see how a bunch of supports are needed under the brow. Concerned about the finish, I decided to use PLA as the support interface, and it worked amazingly. The black is PLA: The brow surface: 2) Bottom rear. I was a little too aggressive with support blocking which caused some artifacts near the edges but nothing unfixable: 3) Bottom front: And a size comparison with the Anovos: It is certainly going to be a chore to finish the helmet, but I didn't see a better path forward. It's possible I could have been approved with the Anovos helmet but I know it would have just driven me up the wall every time I looked at it.1 point
-
Out of frustration, I put the build down for about 4 years, until after I got a 3D printer and I realized I might be able to 3D print some pieces of armor. I actually bought 2 sets of files, this one from Etsy and this one from CGTrader. Edit: I think the chest is from CGTrader and the back is from the Etsy files. I wish I took better notes. :) I also decided on PETG for heat resistance. I scaled the back and chest down (I can't remember how much; I think it's at 90% scale) and did a few test prints: Two different sizes. Left is 100%, right is 90%. A partial print: A comparison of the KB back and the 3D printed back: Test prints of the back and chest: The final back: The final chest. It turns out zip kicker yellows PETG. Who knew! The fun thing about 3D printing is that you can also modify the files before printing. I don't actually know how to use any modeling software, so I did everything in the slicer. Some simple mods were: Cutting slots in the yoke, and I also shortened it so I could better fit my arms through (not shown in this pic). Lowering the neck of the chest, and slightly shortening the tips: Lengthening the 'wings' of the chest so they overlap the back more: Here's the result of that. I'll fill the extra square: I printed the yoke so that it will flex with the layer lines, but with the back being in 4 pieces, I'm worried about the flex, so I backed the seams with some extra ABS: Here's a sizing check. Some tweaks for comfort and fit, but I was much happier with the size: A comparison of the KB chest on the left and the printed chest on the right. You'll notice that the smaller chest reveals a new problem, which is that now the helmet looks too big...1 point
-
There's been quite a few sold, some mention "costume created by 501st legion" but others have not, guess it's buyer beware. They've been selling for @ $10,000 US and over. A stormtrooper suit from Jon Favreau's Star Wars television series The Mandalorian. Stormtroopers appeared throughout the series in costumes created by the 501st Legion, a fan group dedicated to creating screen-accurate Stormtrooper suits. This particular suit was worn in the final episodes, "The Reckoning" and "Redemption".1 point