Leaderboard

.thumb.gif.3133dfe8baa328ad146bfe40afe330f0.gif)
Popular Content
Showing content with the highest reputation on 05/15/2024 in Posts
-
This is the current "new gen" neckseal from KeepTrooping. It has the stitched, ribbed material at the base (same as the undersuit, L3 compliant) and a thinner ribbed material for the actual neckseal, unsure exactly what type the top part uses but it's similar to that of a wetsuit.3 points
-
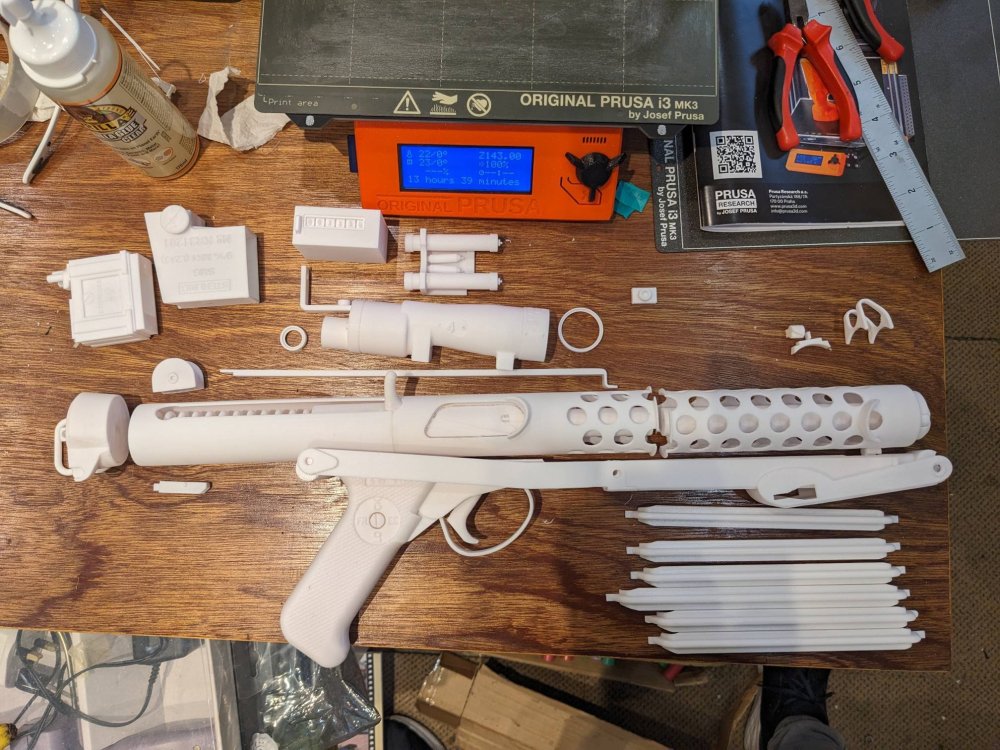
Here's some pics of my E11 blaster prints. Any comments welcome please! If there's anything not right, I'd rather know now than after I've started gluing them all together!2 points
-
Hello troopers First time ANH Stunt Stormtrooper builder here. I found my way here from the 501st UK Garrison forum (thanks for the invite themaninthesuitcase) Bit about me: I'm old enough that I saw Episode IV in the cinema when it was just called STAR WARS. I've decided to treat my 8 year-old inner self and build my very first stormtrooper costume ? I'm currently awaiting (impatiently!) for my vacu-form kit of ABS parts to arrive. In the meantime, I've been keeping my 3d printer busy printing parts for an E11 blaster that I'm making. Don't think I've been this excited about a build project since... ever! Onwards and upwards...
 2 points
 -
Name: Ron Hoffman ID: TK-15310 Username: ronhoffman2 Garrison: Garrison Carida Armor Maker: Anovos Helmet Maker: Anovos Blaster Maker: QuestDesignCanada 501st link: https://www.501st.com/members/displaymemberdetails.php?userID=33303 Height: 5’11” Weight: 163 lbs. Boots: Imperial Boots Canvas Belt: Imperial Issue Hand Plates: JustJoseph Electronics: UKSWRATH Neck Seal: DarmansProps Holster: DarmansProps Full Body Front: Back: Left side: Right side: Left side detail: Right side detail: Action shot: Armor Details Ab button plates (close-up): Cod and posterior plate connections showing rivet/snaps (exterior): Interior strapping: Wrist openings (close-up): Sniper knee (left and right sides): Thigh ammo pack (left and right sides): Helmet Details Front: Left side: Right side: Rear: Back-lit shot showing lens color: Close-up of Hovi tips: Accessories Neck seal: TD front and rear showing screw type: Holster attachment: ABS/canvas belt (rear): Boots (showing tops and sides): Rubber gloves: Blaster Details Left side: Right side: Rear showing D-ring:1 point
-
I started posting these on the FISD Discord server and thought I might share them here on the forum as well. Discord makes sharing images really easy since you don't need to host them, but I can just throw these on imgur about as easy. But I digress. Lesson 1: a phrase most are likely familiar with. L, O, and N are very easy in Aurebesh, since they're so similar to English. L and N are backwards and O is a round triangle. G is laying on it's side. V is a Y in Aurebesh.1 point
-
Looking good trooper, before the DO's start your review you may want to remove a little of the pain on the gums: For Basic approval and above, Frown is painted gray and does not leave the teeth area. Eight total teeth on the frown are cut out. You will need to remove a bit more material from the front of your forearms, comparison1 point
-
Looking great John. Bellow a reference for you to check the scope and Hengstler counter correct position and other details for your build. Good luck and looking forward for your advances. Perhaps some info here can be useful for you.1 point
-
Thank you! I've commissioned Ross at RWA to vacu-form me a set of 2mm TK armour (ANH stunt) including helmet, canvas belt, neck seal, aluminium thermal detonator clips, popper strapping kit and leather holster. I've also ordered a pair of white boots from Ryan at Imperial Warfighters. Should I make my WIP thread in the https://www.whitearmor.net/forum/forum/80-anh-build-threads/ forum?1 point
-
thank you for the build thread links - very helpful! I've got a build thread started already on the UK Garrison forum, but I'll start one here too and keep them both updated., I think I'll be needing as much help as I can get! ?1 point
-
Congratulations trooper and welcome to the Legion!1 point
-
Lenses were there but under armor so I've moved it to under the helmet area. Neck seal some references here but hard to make out, we know it's ribbed around the neck though1 point
-
One more today. A short word but a fun one. We got the B above. Next to it is a U which looks a lot like both itself and the aurebesh G. P is a pain (and not present above) because it's a backwards aurebesh U. C has the 3 lines. That's one I just memorized. You see it often enough and it's a very unique letter in the aurebesh.1 point
-
Another phrase that should be familiar, as we see it fairly often in Legion. We also see "FISD" in Aurebesh somewhat often. The bottom word is only one letter off. T is upside down in Aurebesh. It's a down arrow basically. I is a 1. S is used often. It's an arrow pointing down to the right. F is upside down and slightly stylized. --------- More tomorrow.1 point
-
Looks very much Gold in this screen cap. Also adjusting the brightness and contrast, it stays the same colour as the end cap on his blaster.1 point
-
These have been over in the Pre-Approval forum for a bit, but I suppose I should post my photos now that I have been approved! I do intend to get back to updating this thread, as I'm feeling much more confident in sharing my build now that it is complete. I also am helping a few squadmates with their builds, which will afford me opportunities to take more photos of my process on subsequent go-arounds. I think it came out well enough and hope this thread has been helpful to others even in its current state, and I'll do my best to finish it out in the future.1 point