Quinn_101 Posted November 9, 2009 Report Share Posted November 9, 2009 Hey FISD, I uh... kind of dropped my helmet when my friend jumped on my back for a piggy back ride, and I noticed when I got home that my right ear cap was basically busted due to cracks. Any source of replacements? Thanks, Jesse I'll post some pics up after school tomorrow. I got two cracks on the lower front part of the caps that go to the side face of it if that helps for now. Quote Link to comment Share on other sites More sharing options...
TK bondservnt[501st] Posted November 13, 2009 Report Share Posted November 13, 2009 Hey FISD,I uh... kind of dropped my helmet when my friend jumped on my back for a piggy back ride, and I noticed when I got home that my right ear cap was basically busted due to cracks. Any source of replacements? Thanks, Jesse I'll post some pics up after school tomorrow. I got two cracks on the lower front part of the caps that go to the side face of it if that helps for now. marysville california? I'm in chico... we should troop. Quote Link to comment Share on other sites More sharing options...
SuperTrooper Posted November 13, 2009 Report Share Posted November 13, 2009 Might help to know what kind of helmet you have? Quote Link to comment Share on other sites More sharing options...
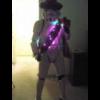
Quinn_101 Posted November 15, 2009 Author Report Share Posted November 15, 2009 (edited) no, marysville washington. Didn't know cali had one. Its a recast of TE2 i believe... stupid ebay... heres some pictures. sorry for being late bout the stuff. Edited February 2, 2021 by gmrhodes13 photos updated gmrhodes13 2021 Quote Link to comment Share on other sites More sharing options...
TK 9718 Posted November 18, 2009 Report Share Posted November 18, 2009 I saw a topic about fixing cracks in armor recently. You take e-6000 and soak a strip of cloth (canvas, but other materials can be used). Then you apply it to the back of the crack and it should hold. There's also a sort of way to fill in abs with abs. It requires small bits of abs, like shavings of it, and some acetone. You only add the acetone little by little until you get the abs into a sort of paste. Then you fill in the crack and sand it. Although I admit after typing all that replacing sounds a lot easier lol. Anyway let's see what the pros have to say. '-')/ Edit: I must say the I like the helmet, good luck on getting it up to snuff. Quote Link to comment Share on other sites More sharing options...
tk-trooper[TK] Posted November 24, 2009 Report Share Posted November 24, 2009 Hey bud, I tried to upload that picture from my cell to the laptop, but couldn't get the chip to download. I should be home on wednesday and can send you the photo. I didn't forget about you. I'm offshore working. Quote Link to comment Share on other sites More sharing options...
tk-trooper[TK] Posted December 4, 2009 Report Share Posted December 4, 2009 I sent you a photo via email. Quote Link to comment Share on other sites More sharing options...
RogueTrooper[TK] Posted January 3, 2010 Report Share Posted January 3, 2010 (edited) Hey Quinn, Yeah, if it is ebay (MAKER OF THINGS).....it is a re-cast of TE2. Here is a way to fix you broken ear. Things you will need: Styrene "FOR SALE" sign: you can purchase it at Home Depot, Lowes, Walmart. ------------- E-6000: you can purchase it at Home Depot, Lowes or most any hardware store. ---------- a few small Spring Clamps: you can purchase it at Home Depot, Lowes or most any hardware store. ---------- Bondo: you can purchase it at Home Depot, Lowes, Walmart. ----------- A small brush. Like a art brush. You can purchase at any hobby and craft store. -------- A very sharp or heavy duty pair of scissor. First , trace the both sides of the curved part of the ear that is broken onto the 'FOR SALE" sign. Once that is done, Draw a little tab onto the tracing of the back of the ear for bracing . The tracings should look like the photo below: ------------ Now cut the two tracings out of the "FOR SALE " sign. Now you have bracing for the broken areas of you ear. Go a head and dry fit the front piece on the inside of the ear. The cut out tracing should fit well. If needed, trim the cut out until it fits... Now that you have the cut out tracing of the front area of the ear fitting well to the inside of the front ear, then brush some E-6000 inside the front of the ear and brush some E-6000 on the cut out tracing for the front part of the ear. Place the cut out on the inside of the ear like you did when dry fitting it. Using the small spring clamps to hold the cut out tracing to the inside of the front part of ear until E-6000 has set up. Now to the broken back area of the ear. ---------- I see that it is missing a good chunk out of it. And will need a stable area to glue to. That is why I had you draw a little tab to the tracing of the back area of the ear. Take the tab of the cut out tracing and bend it into a 90 degree angle . It should look like the pic below: ----------- The tab is now bent it into a 90 degree angle. It should fit on the inside of the ear circled in red. ---------- Now all you need to do is dry fit the cut out tracing to the inside of the back of the ear. If needed, trim the cut out tracing until it fits... Once that is done and the cut out fits well. Brush on some E-6000 into the inside of the back of the ear and brush on some E-6000 onto the cut out tracing and DO NOT forget the the tab. Using the small spring clamps to hold the cut out tracing to the inside of the ear until E-6000 has set up. When the E-6000 has set up. you will use the Bondo to fill and blend any areas that need it or until the desired look is achieved. Sand the Bondo with 400 grit sandpaper. Before you paint, use a tack Cloth to remove all the dust, lint fibers or anything else that could mess up your paint job! ----------- Cheers! Tom Quinn_101 said: Its a recast of TE2 i believe... stupid ebay... Edited February 2, 2021 by gmrhodes13 link not working, removed gmrhodes13 2021 Quote Link to comment Share on other sites More sharing options...
vicsouders Posted January 3, 2010 Report Share Posted January 3, 2010 Wow Tom. Way to help. That seems pretty complete. If the ear isn't missing a chunk (it looks like its just twisted to me) then you should be able to figure it out easy enough Quinn. Now, please don't take this the wrong way, but as long as you're doing a quick little mod, it might be time to repaint those ears too. You can get a clean black stripe around the bumps by going to a hobby shop and buying model car pin striping tape; it's quick, easy and replaceable. Just a thought. Quote Link to comment Share on other sites More sharing options...
RogueTrooper[TK] Posted January 3, 2010 Report Share Posted January 3, 2010 Thanks for the compliment Vic. That's how I ROLL!! Quote Link to comment Share on other sites More sharing options...
Quinn_101 Posted January 3, 2010 Author Report Share Posted January 3, 2010 WOW thanks Tom for the how to. Very detailed. But I got it fixed, I ordered new ears from AP. I wouldn't want to to keep that ear anyways because where the cracks were it was basically almost as thin as a cup lid from taco bell, wendys, BK, etc. Quote Link to comment Share on other sites More sharing options...
RogueTrooper[TK] Posted January 4, 2010 Report Share Posted January 4, 2010 Hey Quinn, Glad to hear that you got it fixed!! A bucket with out an ear is a terrible thing Tom WOW thanks Tom for the how to. Very detailed. But I got it fixed, I ordered new ears from AP. I wouldn't want to to keep that ear anyways because where the cracks were it was basically almost as thin as a cup lid from taco bell, wendys, BK, etc. Quote Link to comment Share on other sites More sharing options...

Recommended Posts
Join the conversation
You can post now and register later. If you have an account, sign in now to post with your account.