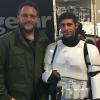
Battle Lion[501st] Posted December 5, 2016 Report Share Posted December 5, 2016 501st profile: http://www.501st.com/members/displaymemberdetails.php?userID=19629 Armor Maker = MTK Helmet Maker = MTK Blaster Type = DLT-19, Resin cast Garrison: Dune Sea Name: Matt F Hand Plates Type = latex on rubber chem gloves Boots: TK boots No holster, DLT-19 wont fit in one. (several other ANH TKs didnt have holsters when carrying DLTs) Quote Link to comment Share on other sites More sharing options...
ukswrath[Staff] Posted December 6, 2016 Report Share Posted December 6, 2016 Hey Matt Sly or myself will be with your shortly. In the meantime the ANH stunt requires a holster regardless of weapon. You'll need to install one before we can move forward with your application, it's a 501st requirement. Once you've made the correction please post another picture, fully suited up and showing the holster attached. HolsterFor 501st approval: Holster is made of black leather or leather-like material. Holster is worn on left side of belt and is attached via two leather or leather-like material straps to the belt from behind instead of front.No loops cover the outside of the belt. The holster is affixed with only two fasteners at the bottom (one per strap).The fasteners may be rivets, snaps, or Chicago screws. We also need to see a few more areas, please provide the following photos: 1) Exterior Posterior and Cod snaps 2) Helmet "S" seal 3) Blaster, left side, full view Thank you Quote Link to comment Share on other sites More sharing options...
illusionz_09[TK] Posted December 7, 2016 Report Share Posted December 7, 2016 Exactly what sly said. The other troopers you saw probably had basic approval only. to get more advanced status, you need to make sure you have all the standard equipment (i.e. holster) Quote Link to comment Share on other sites More sharing options...
Battle Lion[501st] Posted December 11, 2016 Author Report Share Posted December 11, 2016 Quote Link to comment Share on other sites More sharing options...
illusionz_09[TK] Posted December 17, 2016 Report Share Posted December 17, 2016 looks good. i'm sure you will get approved in no time. Quote Link to comment Share on other sites More sharing options...
Sly11[Admin] Posted December 19, 2016 Report Share Posted December 19, 2016 Hey Matt Thanks for the updates, will be with you very soon. Quote Link to comment Share on other sites More sharing options...
Battle Lion[501st] Posted January 4, 2017 Author Report Share Posted January 4, 2017 Hey guys, any updates? Quote Link to comment Share on other sites More sharing options...
Sly11[Admin] Posted January 4, 2017 Report Share Posted January 4, 2017 Hey Matt thank you for your EIB application. CRL and EIB Application Requirements All submission photos have been posted. Your armor displays all the necessary elements to qualify for level 2. Welcome to Expert Infantry trooper! We would like to say, thank you for your patience and for including the holster in your build, well done. Other-Armor Fit/Assembly: In this area we post suggestions made by your peers and or us the DOs. These are designed to get you looking the best you can, but in some cases, may be required if you were to consider the next level, If so these would be mentioned in the sections above and below. We do have a few things that need just a little bit of attention. Mainly alignment and fit so nothing to major. Would be great to see the shoulder bells virtually touching the shoulder bridges, but we also think dropping the biceps and forearms will even out the gap at the wrist end of your arms. reference image Moving down we come to the drop boxes. (This will require fixing for a Centurion application) These should also almost touch the bottom of the plastic ammo belt. Your alignment with the ends is perfect. They also look a little thick and should be approx 15mm. The ends of your butt plate are popping out, and though it is hard to tell from your internal strapping image, as we cant see clearly, normally the recommendation would be to move the outer most straps, further out and shorten their length. Even the addition of an extra set can stop the pop from becoming so dramatic. Reference image Another commen problem we see is the sniper plate getting caught behind the thigh armour. This is easily remedied with a pice of foam placed in the back of the lower thigh. This causes the front to sit closer to your leg and prevents the plate from getting caught. Alternatively, a piece of foam placed in the front of the shin, pushing it slightly forward, will yield a similar result. Centurion Suggestions: As we have mentioned above, the Drop boxes will require fixing to meet the Centurion requirement. Here is the CRL wording For level three certification (if applicable): Drop boxes must have full inner drop boxes to close the back. Flat covers are not allowed. Drop boxes are vertically aligned with the end of the ammo belt with minimal gap between belt and box. The corners of the plastic ammo belt shall be trimmed at a 45 degree angle. It would be great if you could also thin the Drop boxes down to approx 15mm. Last of all we look at the Thermal det belt clips. If you are considering Centurion, and we think you should, these clips will require some modification but most probably replacing The rivets will need to be replaced with the correct type of screws (slotted pan head) and the ends of the clips will need to be squared off as in the below reference. The end of the clips should also be touching the button plate. May we suggest making a new set. Well done Matt, you have a nice set of armour and with those few things mentioned above, Centurion is well within your reach. Congratulations Trooper Quote Link to comment Share on other sites More sharing options...
gmrhodes13[Staff] Posted January 4, 2017 Report Share Posted January 4, 2017 Congrats trooper and welcome to the ranks Quote Link to comment Share on other sites More sharing options...

Recommended Posts
Join the conversation
You can post now and register later. If you have an account, sign in now to post with your account.