bradberry00 Posted March 31, 2017 Report Posted March 31, 2017 Got mine in its chocolate brown base coat. Also, used a lightly textured spray paint before the brown. If mine turns out half as good as yours I will be happy. 1 Quote
mr paul Posted April 7, 2017 Author Report Posted April 7, 2017 (edited) My Anovos Shoretrooper Helmet has arrived. Here are some pictures of it before the new paint application. You can see it does not have the unique texture of the screen used versions and the weathering is lacking. I also need to repaint it to colour match it to my armour. It is a great looking bucket an I am looking forward to tackling the painting of it. Edited October 10, 2017 by mr paul 1 Quote
Ackbar16 Posted April 18, 2017 Report Posted April 18, 2017 Your paint work is amazing Mr.Paul. I am using this thread to guide me through my shoretrooper build, it's been very helpful, thank you.<br><br> Would you be willing to share what you used to texture the paint under the Sahara Beige? 1 Quote
mr paul Posted April 19, 2017 Author Report Posted April 19, 2017 Your paint work is amazing Mr.Paul. I am using this thread to guide me through my shoretrooper build, it's been very helpful, thank you.<br><br> Would you be willing to share what you used to texture the paint under the Sahara Beige? Hi and thank you for your comments. I am about to start the re paint of the Anovos so I will go into the texture over the next 2 weeks. Thanks for following Quote
mr paul Posted May 4, 2017 Author Report Posted May 4, 2017 (edited) Shoretrooper Helmet Paint Tutorial Here are some pictures showing the textures of the Shoretrooper helmet under different lighting and across different costume displays. Aside from a similar roughness on the hip plates this texture does not seem to occur anywhere else on the armour. It seems deliberate by the art department that painted them and I do not think it is to replicate ware and tare or corrosion. Instead I believe it is intended to give the helmet a cast metal appearance like that of cast iron or steel. A similar rough and varied pattern like that seen on a Sherman tank. This rough texture gives the Shoretrooper a very unique aesthetic one of which is not seen on any other Star Wars helmet so it should not be overlooked nor dismissed. It is important to note that while the texture covers the entire helmets surface it is not present on any of the black areas i.e. the snout, forehead brim, ovals on the ears and areas inside the ears, vertical vents along the back, the detailing under the brow above the lens, fin greeblies under the front, black rim around the neck, the 2 horizontal slots along the bottom back edge, the thick and thin black stepped bands behind the forehead at the side including the beige band in-between and the 2 short slots cut into either side cheek. The picture below shows the paint flaking off and revealing the brown material the helmet was cast in. This flaking paint can also be seen across all the costumes over all parts of the armour in various displays post filming. I do not believe this flaking effect was intentional and is a result of usage on set from filming and stunts etc. Images from the Rogue One Visual Guide and the leaked image (shown below) do not show evidence of the flaking therefore on this paint application I will not be masking areas for the paint chipping effect. Instead I will be replicating the scratching and scuffing that is seen in the image below and the visual guide. Masking With a small, old paintbrush Humbrol Maskol can be used to carefully mask all the areas mentioned above. A hairdryer will speed up the process. I apply 3-4 coats to make sure there is no paint bleed later on. Masking tape is used for the larger areas. Take time to mask the areas carefully. The lens must be masked properly. The Anovos is glued together well and has to be painted assembled. Paint bleeding onto the lens would not be clever. I have made sure the masking tape is tucked under the edges and sealed it with Maskol just to be sure. Important not to let any paint get inside the helmet onto the padding. Once all the areas are masked give the surface a very light sanding and a wipe down ready for the paint application. Adding Texture I am using these 2 texture paints to get the correct look. Rust-oleum Brown Hammered Finish and Rust-oleum Cast Iron (I also use a third texture paint, a light spray of Rust-oleum Aged Iron which helped to get a little bit of the grainy feel to some parts of the helmet) The paints were applied in the following order. Light covering of cast iron and light covering of hammered. Coat the helmet in cast iron. Coat the helmet in hammered. The result of these 2 paints being layered in such a way looks like this. The texture is not too tight and not too loose. It is at this point I gave it some light passes with the aged iron effect Rust-oleum for more grainy areas. To knock it all back and to give a little variation and irregularity in the texture across the surface of the helmet I sanded areas with a very fine sanding block. Nothing too severe. The final texture looks like this. Removing the Masks The reason I applied the Humbrol masking fluid so thick was to make it easier to peel off with the many layers of heavy duty paint on top of it. Very carefully remove the masks from the all the areas of the helmet except the front fin greeblies, the lens, the snout and the neck rim around the bottom. Once all the masking fluid has been removed give all the surfaces a gentle wipe down ready for final paint. Painting It has long been known that the armour was cast (not painted) in a dark brown almost black colour as stated by Glyn Dillon the costume designer of the Shoretrooper. I have heard the colour scheme of the Shoretrooper was influenced by German WW2 Messerschmitt fighter planes and I expect this brown chosen was intentional. I feel it is important to include it in the paint scheme. There are a few reference pictures where it has been possible to see the brown colouring of the material used for the armour. One of the more recent images is from the bonus features on the Rogue One DVD shown below. Here is another image showing the brown being revealed beneath the paint flaking off from the abdominal plate. More brown material showing through on the front of the bucket. Allthough the exact colour has not been confirmed as yet, it looks to be a dark red/brown. I have chosen Vallejo Dark Rust. Not available in a rattle can so will have to be ran through an airbrush. In order for the brown to remain dark and to avoid it "popping" and being too bright it is necessary to spray a matt black base coat first. I have used an inexpensive Halfords Matt Black however any brand will suffice. Once the black base is completely dry. Coat with the Vallejo Dark Rust 302 and cover until a flat even coat has been achieved. You can see in these pictures where the masking has done its job. When the brown is dry add 3 to 4 coats of clear lacquer. The images below show a comparison between the screen used colour and my version and some shots under different lighting conditions. Top Coat Using the Montana Gold sahara beige I apply light even coats until the helmet has an even flat coverage. For this application I am not masking off areas for the paint flaking effect. The sahara beige goes on quite thick and acts like filler when added over the textured surface which works to an advantage. Painting in the details Using a stencil the forehead emblem is added using Halfords Toyota Red 3E5 (the same red used for the Shoretrooper's right bicep) The masking from the snout and the fin greeblies can now be removed. The outline of the snout is masked off again ready to give it a matt black finish. The snout is not grey as I first thought. I run Vallejo matt black acrylic through an airbrush and apply it straight on top of the Anovos paint. I do not use any primer. When finished I give it a couple of light coats of Humbrol acrylic matt varnish. All the black details are now carefully filled in. I hand paint them with a brush using the matt black acrylic. After all the details have been painted, the helmet is given a couple of coats of Humbrol satin coat acrylic varnish. All of the masking tape can now be removed. Weathering To add the dirt and damage I am using 2 colours. Black and burnt umber acrylic. 60 grit sandpaper is used to recreate the scuffs and scratches that are seen on the screen used helmet. The paint is mixed thin and watery. I also apply it thickly. Important to note where the dirt is applied to the helmet. I am going to mimic what I have seen on displayed costumes. The weathering does not go up into the recesses around the eyes or under the forehead above the lens. This area is quite clean across most of the helmets I have seen. I am going to do the same because I like the look. Using a large brush I stuff the paint up into the corners and edges of the helmet. With an atomiser spray clean water over the wet paint and let it run down into the recesses. A hair dryer helps to speed up the process. Using a sponge I can dab off the excess paint leaving the remainder to settle where I want it to. 60 grit sandpaper is used to scuff the edges and tear away the paint. Very carefully and lightly hit the edges of the helmet and try to recreate the marks and damage seen on the screen used. Pay close attention to where the damage is occurring from reference images you are using. Try not to over do it. This is just the first pass so do not do it all in one go. After a few scratches have been added keep repeating this process of black and brown paint, atomise with water, let settle and dry. As the weathering builds up I start to use fine wire wool over the surface of the helmet to remove some of the paint but leaving it where I want it in the cracks and crevices. The fine wire wool also helps to continue smoothing out the surface created with the texture paints. Making it appear more of a loose texture than tight. This will also leave the dirt sitting in the recesses of the texture recreating the effect seen on the screen used buckets. Using a smaller brush I can build up the dirt heavier in the areas I want it. I keep at it until I am satisfied with the results. If the sandpaper has ground too deep and revealed the paint underneath it can be touched up to hide it. Using the Vallejo dark rust. When I am happy and everything is where it should be I give it a misting of Humbrol acrylic satin varnish avoiding the snout. The Finished Helmet Before and after picture. A comparison shot with the screen used helmet on the left. Displayed with the complete build. Edited January 6, 2018 by mr paul 4 Quote
Ackbar16 Posted May 29, 2017 Report Posted May 29, 2017 Your work is amazing, and this thread has been a huge help to me. I'm nearing the finishing touches on my own Shoretrooper helmet, and I wouldn't have been able to do it without this tutorial. Thanks for putting this out there to help others. 1 Quote
mr paul Posted June 24, 2017 Author Report Posted June 24, 2017 (edited) Just had a message from Photobucket telling me their terms and conditions have changed as of last week. The service I was getting free last week is now going to cost me $399.00 a year if I want to continue 3rd party sharing of my images. Every image I have ever shared on a forum has been taken down until I pay up. Sorry for the inconvenience. I have joined Imgur and hope to have all these pictures uploaded again asap. Edited October 11, 2017 by mr paul Quote
sskunky Posted June 24, 2017 Report Posted June 24, 2017 Oh! <br> Really? I haven't had that email. I use Photobucket. Guess I must check it out. Quote
mr paul Posted July 3, 2017 Author Report Posted July 3, 2017 You can find my tutorial here in my FB page. I will hopefully have this thread up and running again asap. https://www.facebook.com/pg/totalgrunt/photos/?tab=album&album_id=460012564345933 1 Quote
mr paul Posted October 11, 2017 Author Report Posted October 11, 2017 I have managed to repair and restore this thread for the paint tutorial. I need an admin to help me tidy up the thread. Could someone advise me please. i need a load of old posts removing. Quote
ukswrath[Staff] Posted October 12, 2017 Report Posted October 12, 2017 Excellent thank you Paul 1 Quote
TK20919[TK] Posted November 5, 2017 Report Posted November 5, 2017 I would love to start my Shoretrooper 501st cosplay with the bucket, but don't wanna spend 600$ on just one piece. Are there any kits availible? Which are a lot cheaper? I don't have any problems spending a lot of time with a kit to save money on it. It should be enaugh detailed to be 501st aproogved when assembled and painted correctly Quote
Surfintrooper[TK] Posted November 5, 2017 Report Posted November 5, 2017 3 hours ago, I71A said: I would love to start my Shoretrooper 501st cosplay with the bucket, but don't wanna spend 600$ on just one piece. Are there any kits availible? Which are a lot cheaper? I don't have any problems spending a lot of time with a kit to save money on it. It should be enaugh detailed to be 501st aproogved when assembled and painted correctly Hi bud, Check out "shoretrooper Fam" on Facebook . On the pinned post there is a list of vendors that do kits and helmets. bsp ( backstage props) and sgb ( Sky gun bro) are a couple that have helmets that have good accuracy and should fit in your budget. But there are a couple others also. Only people wanting the highest accuracy are using the anovos and repainting it. Quote
Addertime[TK] Posted November 5, 2017 Report Posted November 5, 2017 4 hours ago, I71A said: I would love to start my Shoretrooper 501st cosplay with the bucket, but don't wanna spend 600$ on just one piece. Are there any kits availible? Which are a lot cheaper? I don't have any problems spending a lot of time with a kit to save money on it. It should be enaugh detailed to be 501st aproogved when assembled and painted correctly I am a big advocate of people building from a kit or even from scratch. It's not just about saving money but also about the experience. We are a costuming organization after all. That having been said, be aware that this is not an inexpensive hobby. Even by cutting corners, the little things will add up. Tools, tape, paint, adhesives, elastic, foam padding, clamps, etc. will add a lot to the cost of even the most DIY project. Then, of course, the trip to your first SWC will dwarf the cost of your build and you'll feel all better about only dropping two grand on the costume. Heh! Quote
mr paul Posted November 7, 2017 Author Report Posted November 7, 2017 way past 2 grand on my build :C Quote
ukswrath[Staff] Posted November 7, 2017 Report Posted November 7, 2017 Good thing we're not talking about FOTKs. 4K+ into mine lol Quote
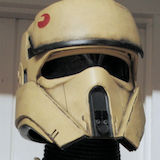
mr paul Posted November 14, 2017 Author Report Posted November 14, 2017 I have added a chin strap to the Anovos bucket. I have a couple laying around and I had some 15mm webbing and a spare 10 minutes. I have attached some chunky D-rings to the insides of the helmet with some velcro to make some mounting points. The chin strap is then threaded through them and fixed with the plastic sliders that the cups came with. All adjustable and removable. I must say it does increase the stability of the bucket on your head. Quote
ukswrath[Staff] Posted November 14, 2017 Report Posted November 14, 2017 53 minutes ago, mr paul said: I have added a chin strap to the Anovos bucket. I have a couple laying around and I had some 15mm webbing and a spare 10 minutes. I have attached some chunky D-rings to the insides of the helmet with some velcro to make some mounting points. The chin strap is then threaded through them and fixed with the plastic sliders that the cups came with. All adjustable and removable. I must say it does increase the stability of the bucket on your head. Paul do you have a source for the chin straps? Nice work BTW. Quote
mr paul Posted November 14, 2017 Author Report Posted November 14, 2017 24 minutes ago, ukswrath said: Paul do you have a source for the chin straps? Nice work BTW. I bought these last July and cannot remember the seller on Ebay but I have one spare if you want me to post you one? Quote
ukswrath[Staff] Posted November 14, 2017 Report Posted November 14, 2017 1 hour ago, mr paul said: I bought these last July and cannot remember the seller on Ebay but I have one spare if you want me to post you one? PM sent Quote
Surfintrooper[TK] Posted November 15, 2017 Report Posted November 15, 2017 Very good idea Paul. I did my first BSP v1 by glueing snaps to the inside of the helmet. So the strap could be removed also. But that is great for the anovos so not to have to alter the liner. Cheers Quote
mr paul Posted November 15, 2017 Author Report Posted November 15, 2017 17 hours ago, Surfintrooper said: Very good idea Paul. I did my first BSP v1 by glueing snaps to the inside of the helmet. So the strap could be removed also. But that is great for the anovos so not to have to alter the liner. Cheers Quote
ukswrath[Staff] Posted November 15, 2017 Report Posted November 15, 2017 Off topic is that a fan or speaker in the foreground? Clean setup whatever it is. What did you use to cover it? Quote
mr paul Posted November 15, 2017 Author Report Posted November 15, 2017 (edited) 6 minutes ago, ukswrath said: Off topic but is that a fan or speaker in the foreground? Clean setup whatever it is. What did you use to cover it? That is a squirrel fan from Troopacoola in the Uk. There is one either side. He makes them with a foam casing to contain them. Nice kits and keep the fog off that visor. Damn hot in that Anovos bucket. The air intake is though that circular mesh and it pumps it out the top corner toward the lens. Edited November 15, 2017 by mr paul Quote

Recommended Posts
Join the conversation
You can post now and register later. If you have an account, sign in now to post with your account.