Arnie_DK[TK] Posted February 23, 2012 Author Report Share Posted February 23, 2012 Quote Link to comment Share on other sites More sharing options...
Locitus[Admin] Posted February 23, 2012 Report Share Posted February 23, 2012 That was my plan... Well... don't. It's better looking to have that small gap in the front. And it's accurate. Not sure I follow you here?? Why wouldnt I need a strap connecting the bicep to the bell?? If you have the arm length for it, showing more bicep is better than hiding it under the shoulder bell. But your picture has proven me otherwise, so just carry on as you were. Quote Link to comment Share on other sites More sharing options...
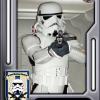
Arnie_DK[TK] Posted February 23, 2012 Author Report Share Posted February 23, 2012 Okay then I will leave the gap AND YAY!!!! Look what my room mate just brought up from the mail box (blaster not included hehe) Quote Link to comment Share on other sites More sharing options...
Locitus[Admin] Posted February 23, 2012 Report Share Posted February 23, 2012 Very nice! Quote Link to comment Share on other sites More sharing options...
troopermaster Posted February 23, 2012 Report Share Posted February 23, 2012 I'm glad the belt and holster have got to you in time to finish your build Quote Link to comment Share on other sites More sharing options...
Arnie_DK[TK] Posted February 23, 2012 Author Report Share Posted February 23, 2012 (edited) Yeah, the postal service worked this time 2 days getting from England to Denmark is really quite impressive. Edited February 23, 2012 by Arnie_DK Quote Link to comment Share on other sites More sharing options...
Arnie_DK[TK] Posted February 23, 2012 Author Report Share Posted February 23, 2012 I'm guessing this would be the correct way to attach the pieces to the belt? Quote Link to comment Share on other sites More sharing options...
Locitus[Admin] Posted February 23, 2012 Report Share Posted February 23, 2012 Looks good from the front. Drop boxes were attached with white elastic looped around the canvas belt, and holster pop riveted to the belt. If you want a less permanent attachment of the holster you can use a male snap as a washer on the inside of the canvas belt when you put in the pop rivet, and put female snaps on the holster straps. Quote Link to comment Share on other sites More sharing options...
Arnie_DK[TK] Posted February 23, 2012 Author Report Share Posted February 23, 2012 Need to resize the belt a bit. There are already elastic loops on the drop boxes, and have seen the snap solution somewhere else, and thats what I'm going to do Also, should I have the bend or the sew line on the canvas pointing up? Quote Link to comment Share on other sites More sharing options...
Locitus[Admin] Posted February 23, 2012 Report Share Posted February 23, 2012 Which way you have "up" on the canvas belt is irrelevant. I do believe most people have their belt so it opens up the same way like you have it in your picture. IE left side on top of right side. Quote Link to comment Share on other sites More sharing options...
Rich330[TK] Posted February 23, 2012 Report Share Posted February 23, 2012 There was no direct connection between the shoulder bells and the biceps on the original armour. Some suits had a hook on the biceps to hang on the elastic on the inside of the shoulder bells (see the picture of Han below) but there was no internal strap connecting these pieces. I'm quite short and don't connect the biceps to the shoulder bells in any way at all. The forearm part and the biceps part are connected but other than that, they are left free-floating. It's authentic this way fully functional. I find there is no need to fasten the biceps at a certain height. Your hand prevents the forearm armour from slipping over your wrist - the forearm armour prevents the biceps armour from slipping down over your elbow .... so, hear the word of the Lord ... Me in various TM suits with no connection from the shoulder bell to the biceps: RS, same story ... Quote Link to comment Share on other sites More sharing options...
Arnie_DK[TK] Posted February 23, 2012 Author Report Share Posted February 23, 2012 Well I can always leave it out and then just put it in later if I want to So point taken But with the belt... I need to shorten it a bit, as its aprox 10cm to long. I'm thinking taking 5cm of each end and reattach the velcro. Where the front will be attached. The blue tape shows where the overlapping part of the belt ends. Quote Link to comment Share on other sites More sharing options...
Locitus[Admin] Posted February 23, 2012 Report Share Posted February 23, 2012 I just find it somewhat scary to have the bicep free falling. It feels like it's going to slip over my elbow (I have really skinny arms) and make me unable to bend my arms. But those that can wear it without straps, I salute you. Quote Link to comment Share on other sites More sharing options...
xaoslord Posted February 23, 2012 Report Share Posted February 23, 2012 Your build is coming along nicely! Quote Link to comment Share on other sites More sharing options...
Arnie_DK[TK] Posted February 23, 2012 Author Report Share Posted February 23, 2012 Shoulder bells...how tight should the elastic in them be? Quote Link to comment Share on other sites More sharing options...
Locitus[Admin] Posted February 23, 2012 Report Share Posted February 23, 2012 Not loose, but you don't have to stretch it. Quote Link to comment Share on other sites More sharing options...
Arnie_DK[TK] Posted February 23, 2012 Author Report Share Posted February 23, 2012 So just right across thanks Quote Link to comment Share on other sites More sharing options...
Arnie_DK[TK] Posted February 23, 2012 Author Report Share Posted February 23, 2012 Well I'm at the last two pair of snap plates. The ones connecting the biceps to the forearms. But as far as I know, its not as simple as to just put them in the middle, right? Anybody got a picture of where to attach them? I know the screen used suits didnt have the snaps, but I'd like to take all the individual parts, well...apart. Quote Link to comment Share on other sites More sharing options...
Rich330[TK] Posted February 23, 2012 Report Share Posted February 23, 2012 No, it's not in the middle. It's on the outer edge in place which is very difficult to describe. I haven't got any good pictures of the originals but I think I got it roughly right on my RS build. On the originals it's wide elastic (around 50mm) ... I wouldn't rush in and use my photos as the perfect template. Maybe ask Paul if he has some pictures of his builds. He'll know better how to position it than me. In the meantime, I'll see if I can find photos in the LFL archive stuff. Quote Link to comment Share on other sites More sharing options...
Locitus[Admin] Posted February 23, 2012 Report Share Posted February 23, 2012 That reminds me that I should move my bicep-forearm elastic. Mine are in the center, and it's worked pretty good, but I have noticed some issues with it I think would be corrected by offsetting the elastic like shown above. Quote Link to comment Share on other sites More sharing options...
Rich330[TK] Posted February 23, 2012 Report Share Posted February 23, 2012 Here you go, some originals ... Quote Link to comment Share on other sites More sharing options...
Arnie_DK[TK] Posted February 23, 2012 Author Report Share Posted February 23, 2012 Awesome, thanks. So this would be the correct placement on the right bicep? Quote Link to comment Share on other sites More sharing options...
Rich330[TK] Posted February 23, 2012 Report Share Posted February 23, 2012 If that's the right bicep, I think that's in pretty much the right place, yes. Quote Link to comment Share on other sites More sharing options...
Arnie_DK[TK] Posted February 23, 2012 Author Report Share Posted February 23, 2012 Well, its been 6 days now, and as soon as the E6000 have cured, I believe its finished. To do list for tonight: Go have dinner with my Grandma...so I can borrow her sewing machine and get the belt resized Sew the straps for the thighs(elastic reinforced with webbing in each end). Attach the thigh ammo belt Finish the belt with holster. Should all be complete in about 24 hours Quote Link to comment Share on other sites More sharing options...
MartinSivertsen[501st] Posted February 23, 2012 Report Share Posted February 23, 2012 Holy smokes, you've worked fast! Impressive, most impressive. I like it! On the fast track to success Quote Link to comment Share on other sites More sharing options...

Recommended Posts
Join the conversation
You can post now and register later. If you have an account, sign in now to post with your account.