

Julianhuey
-
Posts
58 -
Joined
-
Last visited
About Julianhuey

-
FireBladejedi is appointed Detachment Armor Chief
Julianhuey replied to Daetrin's topic in Announcements
Dear Mark, Well Done. Steady hands is what it needs ! Regards, Julian. -
Hi There, I did it the same way as John and it works for me. I also crossed the main shoulder straps but found it still pulled down as I have a "Drop Shoulder." I made a cross bace (velcro fastening through loops on the main straps) for the front as well as crossing the straps at the back. If you also put a few small pieces of thin rubber or foam inside the bi-ceps it helps them stop working there way down and pulling at the shoulders so much. All helps keep things where you want them ! Cheers, Julian.
-
Looks good so far. I used 5min epoxy and E6000 for mine. Each got their pros and cons. The E6000 takes while to fully cure but dries clear and rubs off if it gets on the wrong places. It also remains a bit flexible which is great if and when the armour moves a little. The epoxy can come away from the plastic even after cleaning and roughing up. Two of my snap plates have been re-glued on with E6000 since the initial build. The epoxy doesn't dry clear or rub off ! Up side : it is workable in 30mins or so. The E6000 is very hard to find in the UK which is a shame. Could do with a few tubes in stock ! Cheers, Julian.
-
Dear Paul, I remember the day well. Lots of cling-film and the parts do not all go back in the box once unpacked ! Take your time. It was my first build too and it turned out ok for me. I love my RT armour. Watch out for the snipper plate it's a sod of fit and get to look right. Other than that shout up if there is anything I can help you with. Have fun ! Julian.
-
Hi, Can someone post the book's ID number please or author details ? Lizzeh : How's the armour coming along ? Cheers, Julian.
-
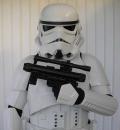
RT is good. Good quality and good service. Nice bloke. Not the cheapest but the lid comes built - so that is a load of stress you don't have to deal with. Can not recommend RT enough. My first armour and took to to Elite status with no real problems. Any problems or help I can give you, shout up. I have sent RT a load of pics from my build, which he says he will use in his next build manual. Cheers, Julian.
-
Cheers Mate, Already tried Phil at Seals Direct. He sent me a sample of the White seal (U46 I think) and it is great. Nice and soft, flexable etc. Only down side they do not stock it and needs an order of 200m to do a run ! Tried the TK sell on him and the World Wide sales within the 501st, but to no gain. As he does all most of the other seals we TK's need. Shame. Regards, Julian.
-
Placed here as applicable to ROJ TK's rather than Sales/Wants. Please move if needed. Hi There, I need a section of white trim edging for the bottom of an AT- AT helmet. Like the U shape strip that runs around the bottom edge of a TK helmet. Just like what is on the ROJ armour edges. Could do with a supplier in the UK that will sell a meter or two, else has anyone got enough left over from a build and could sell some to me ? Cheers, Julian. TK 7162.
-
TK 2490 Request Elite Status.[20][FX]
Julianhuey replied to Darth_Nickel's topic in Request Expert Infantry Status
Hi There, I have RT stuff and thickish thighs. I had to make up a shim for the right one and tapered the fitting so the bottom and top still fitted neatly to my leg. I used 1mm styrene as 2mm does not bend enough round your leg to give you the shape. Here are a few pics. It's not that obvious when it's all on and your trooping. Hope this helps. Cheers, Julian. -
8351 requesting ANH Elite status.[19][FX]
Julianhuey replied to davej's topic in Request Expert Infantry Status
Well done Dave. Welcome to the ranks. It's something to be proud of. The E-11 looks real nice and the folding stock, even better. Take care of it whilst out trooping and getting to / from events. Cheers for now, Julian. -
Dear Scott, Elite decals arrived today. I think they are great and a real bonus. Thanks for organising these treats for us. Best Wishes, Julian.
-
TK3390 Requesting Deployment.[36][FX]
Julianhuey replied to Ciscotiger's topic in Request Expert Infantry Status
Hi There, I managed to get mine to sit further back and a little lower. The bottom just sits above the lower speaker slots and the back half of the counter is where the speaker box finishes. Pic taken pre-addition of extra T-Track. Cheers, julian. -
TK-2055 requesting ANH Elite status.[18][FX]
Julianhuey replied to Terry19D's topic in Request Expert Infantry Status
Good Going Terry ! I'm not that tall, but have a badly broken leg (fixed now but still wonkey) and a drop shoulder, that makes it hard to get things to fit and look right - so know all about tweeking things to get them to fit you. The RT thighs are good, nice and tall and well shaped IMO. Welcome to the Club. Cheers, Julian. -
Hi Everybody, Well I promised I'd share a few of the things I came up with on my trip along the way to my finished TK. However, these will work with any costume if running a ROM/Fx unit. The first one is for a finger trigger. This is for the additional buttons on the ROM/FX Pro. The unit comes with three tactile triggers for additional sounds like a blaster or radio chatter effects etc. I asked about I no one came up with really good way of attaching them to yourself. I considered fitting them to my belt and ab-plate but decided a removable option would be better for me. The general way was for just wrapping electrical tape around them and sticking them to your fingers. I wanted something a bit better than that, so came up with the idea of inserting the trigger into a ring. My first attempt was to insert it into a "girls" fashion ring (solid plastic ring). This worked fine but the ring was quite chunkey and you could spot the ring through the glove if you looked for it. However, this proved it could work and just needed refining. Hence version two: What you need: The leads that came with the ROM/Fx or make up some new ones (wire / trigger and jack plug). 1 sewing finger shield. Hobbycraft in the UK £1.50ish. Maybe Hobby Lobby in the US, else a sewing shop. Superglue. Solder & iron. Electrical Multimeter. Some electrical tape. Picture one: Finger shield and trigger. First: Remove the trigger from the original lead, else make up a new lead and leave the trigger off the end. Second: Prep the finger shield for the trigger. Drill a small hole in the position where you want the trigger to go. To do this, try the shield on and feel where the best place is for you to get the trigger to "click". Keep opening out the hole and then file it out square for a nice fit. Third : Superglue the trigger into the shield so the top section just protrudes. DO NOT GET ANY GLUE ON THE BUTTON AREA ITSELF. It will glue the trigger open or shut and it is then useless. Fourth: Cut the two terminals off on the side you don't want. If you want the trigger on you left hand, first finger, then chop of the terminals on your little finger side. This means the wires run up the outside of your finger and into your glove. It doesn't matter really which side you cut off, it will still work, but I have made mine "handed" so I know which goes on which hand. Fold the lugs back out of the way. Now your ready to solder the wires. Glued in and soldered. Now check the continuity of the trigger, i.e. if it works. Either by an electrical meter or try it in the ROM. Once you know it works ok, I finished mine off with electrical tape to cover the solder, keep the two terminals seperate, keep the wires running where I wanted them and reduce the shields internal width so it fitted my finger snug. Done. This should fit into your glove and through the trigger guard of your blaster. No one will know it is there. You can shake hands no problem. Just don't do a full on "He-Man" squeeze grip, else one will trigger. Hope this explains the process ok, and someone finds it usefull. It is very effective and not that hard to do. They are removable and do not interfere with the armour. Cheers for now, Julian.
-
The Pics page : Love mine. Can not believe it is posted so fast. Gonna try and print one off. Still not got one on the UKG page yet ! But have one where it counts with the FISD. Looking forward to my t shirt and dog tags to arrive with the Elite Swag. The latter a nice little touch and appreciated. Regards, Julian.