

NoVATie
-
Posts
3,869 -
Joined
-
Last visited
-
Days Won
1
Content Type
Profiles
Forums
Gallery
Articles
Everything posted by NoVATie
-
So 4 AAs per fan? I am thinking about wiring 1 9V and 2AAs to get 12V for these things. My brain is starting to hurt
-
Were you pushing 9V to each 12V fan or 2 9V's per fan? Or, is it 1 9V and 2 AAs per fan?
-
I'm running a test on the battery right now. This was sort of a last minute thing because I have my first troop on Saturday. If these 12Vs don't work, I will wire it up with twin 9Vs per fan and push 18 through them and re-group after the weekend. I chose the slider switch just because I like the positive feel of the slider and I figured with this size I would be able to use it with gloves on. I plan to have the switch right under the ear and the batteries in the back. Here's a question: How long would 2 9Vs last?
-
Another quick fan tutorial for those of you that need some air in your bucket. And we'll be doing it on the cheap! . I found 12V fans online, and found some 12V batteries at Walmart that are used for key fobs, and other small electronics. I will be testing these batteries this weekend to see how long they can put out continuous power, but the price and the size was right. I didn't want a huge stack of AAs in my helmet. Parts List: 1. Two (2) Evercool 40mm fans from NewEgg.com, the model number is EC4010M12CA, item # 35-119-049 - $2.99EA x 2= $5.98 These fans come with a yellow wire as well for speed control. Since we're not using a controller I just cut the yellow wire down at the fan. 2. Two (2) "N" battery holders from Radio Shack. I think these are made for slightly wider batteries but the 12Vs I picked up fit just fine, item #2700405. - $0.99EA x 2 = $1.98 3. 1 Pack of 2 sliding switches from Radio Shack, item #2750401 - $2.99 4. 1 Pack of 2 A23 12V batteries from Walmart - $3.47 5. Spool of red 18 gauge wire from Walmart (was the smallest they had) - $2.68 6. Soldering iron - already had 7. Solder - already had 8. Scissors, wire strippers 9. Electrical tape Grand total for the project: $17.10. First off, the diagram. This is for one (1) fan circuit, and I used two in my bucket - one for each side. I just figured it would be simplest with 2 independent circuits. Now here's the wiring side of things: Solder the wire coming off the positive lead of the battery holder to one of the switch terminals: Solder the intermediate wire to the other switch terminal: Run the negative wire from the fan (black) straight back to the negative of the battery. You could use black wire if you wanted, but I only bought one spool of wire, so both my positive and negative wires are red. Solder the other end of the intermediate wire from the switch to the positive (red) lead on the fan. My intermediate wires are both about 12" but that will vary depending on how you want to route them in your helmet: And the two circuits complete and ready to be put in the bucket: The soldering and wiring took about 30-40 minutes, and I plan on just taping the circuits in. Quick and simple
-
Well at least you've got the parts laid out right . Look at the Dave's Garage videos on YouTube, and just ask questions if you've got them. I did the forearms first, and once you get the hang of how the parts fit together, the rest is easy.
-
That's a great idea
-
I'd give yourself a week. That will allow parts to dry and let you take your time to get a good fit with everything.
-
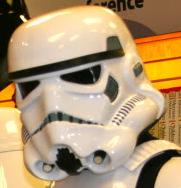
Exactly what I thought. Cool picture.
-
I got E6000 at Jo-Anns. I imagine Michael's or Total Crafts would have it too.
-
Haha. I think I have the positioning figured out. A little more room to move and the buttons aren't covered so I'm good
-
I let out my suspenders about 3 inches. I had that ab piece pretty hiked up there haha. It still sits close to the right places, but it gave me enough room so that the chest plate doesn't cover the buttons.
-
Just a quick question - how low does your crotch piece sit? I think that lowering my ab and back plate (i.e. lengthening the suspenders a tad) will help to close the gap between the thighs and the ab plate as well as keep my chest piece from hiding the ab buttons. Right now the codpiece is pretty flush to my body, do you all have some space down there?
-

FX Black buttons still accepted?
NoVATie replied to NoVATie's topic in Build Threads Requireing Maintenance
Yeah, that's what I was looking for... Too late now haha. If they don't pass with the colors I've done I guess I'll put them back to black for now -
FX Black buttons still accepted?
NoVATie replied to NoVATie's topic in Build Threads Requireing Maintenance
I've got a set on order from VaderDave, but I need to get my suit accepted for an upcoming troop. So I was just trying to see if I would need to paint the FX ones to install or if I could just go with the black ones. So I will paint the FX's for now and then swap the others when they get in. Thanks. -
Just want to make sure I read the requirements right - it's hard to discern the EIB requirements from the stunt ones. Are the black FX buttons no longer accepted? Are people with the black ones already just grandfathered in or do they have to change to the grey/blue if those are required now?
-
Well I guess that's better than it being the other way around . Thanks for the info.
-
I used the Troopermaster plans in this thread ------- and it holds my Hasbo just fine. Was really easy to make also.
-
TK-Recruits ATA Armor Build[*ATA]
NoVATie replied to TK-Recruit's topic in Build Threads Requireing Maintenance
As far as snapping and straps go, just go to your local arts and crafts store. Jo-Anns is closest to me and they had the industrial strength velcro I needed, along with snap tool and snaps. I found Plastic Weld at Autozone, but later found E-6000 at Jo-Anns. Since E6000 dries clear, that would be my choice for my next suit of armor. The Plastic welder dries yellow. I got sandpaper at Home Depot, just a little 3M block, and I also got a bag of clamps there for about $11. Hope that gets you started -
Sniper plate and shin armor twisting?
NoVATie replied to NoVATie's topic in Hard Armor (General Discussion)
Thanks, I'll try some foam maybe just below the knee. -
My left shin piece seems to rotate outward now that I have the sniper plate attached. I thought I remember seeing a thread on this but I couldn't find it. Do people put velcro or elastic somewhere to keep this piece from rotating around? The shin stays properly on my boots which is nice I guess, but it just rotates instead of staying put.
-
Looking good. Reminds me I need to add on my drop boxes
-
TK2165 requsting expert infantry status.[68][TM]
NoVATie replied to stukatrooper's topic in Request Expert Infantry Status
Looks great -
-----
-
Congrats! Suit looks great.
-
How much will I spend on supplies?
NoVATie replied to Agent RayBans's topic in Assembly, Mods, and Painting
Well, I picked up a $10 pack of clamps at Lowes, roll of blue painter's tape, industrial strength velcro, glue, all that was probably in the $30-$40 range. $20 snap tool from Total Crafts, which I thought was a total rip off and packs of snaps. The elastic/webbing is $1.50 or $2 per yard? Of course if you make mistakes measuring that webbing you have to buy more!