

shashachu
-
Posts
1,676 -
Joined
-
Last visited
-
Days Won
10
Content Type
Profiles
Forums
Gallery
Articles
Everything posted by shashachu
-

Sha Sha's (Slow) KB/850/3D printed FOTK Build for Short Troopers
shashachu replied to shashachu's topic in TFA Build Threads
Thanks! I was looking in the gallery but it's hard for me to tell. If you have good screenshots or references, I'd appreciate it. And re: the thigh clearance, I agree! I have been looking at a lot of builds and have seen anything from huge overlaps to large gaps. I'm glad you think mine looks ok. -
Sha Sha's (Slow) KB/850/3D printed FOTK Build for Short Troopers
shashachu replied to shashachu's topic in TFA Build Threads
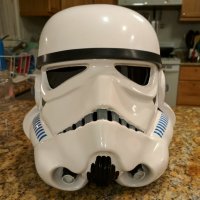
Looking at my Anovos helmet, the raised trap and area around the eyes looks glossy. The trap at the temple (the flat one) looks glossy or maaaaybe satin (it's a sticker). The frown looks satin, and the stripes at the bottom as well as the brow look matte. Does that sound correct? -
Sha Sha's (Slow) KB/850/3D printed FOTK Build for Short Troopers
shashachu replied to shashachu's topic in TFA Build Threads
For the helmet paint - what finishes are the blacks on it? Brow looks matte, and the raised trapezoid area at the end of the frown looks glossy. Is the rest matte? Satin? -
First Build Ever - Thread so I actually finish this adventure
shashachu replied to CptZteer's topic in ANH Build Threads
Welcome! The great thing about the ANH costume is that it's probably one of the most well documented costumes in the legion. There are a ton of great build threads (check the pinned ones in this sub-forum) so definitely spend a lot of time reading through them to get a sense of what's involved, the supplies you'll need, etc. The stormtrooper was a first costume for a lot of us (myself included) and you'll be surprised at how accessible a build it is. Since you're in Denver, you could also try to reach out to Mountain Garrison to see if they have any forums or build parties for prospective members. Take your time and good luck! -
Sha Sha's (Slow) KB/850/3D printed FOTK Build for Short Troopers
shashachu replied to shashachu's topic in TFA Build Threads
Onto more fitting. I knew that the thighs and butt armor overlapped pretty heavily, but it wasn't until recently that I realized how much: The green tape was a way for me to sort of indicate where I might need to trim. There are actually 3 strips of tape, and you can see the upper one is completely covered. On the photo from the right side, you can also see that one of the belt boxes is even overlapping the holster. Additionally, if I trimmed the right thigh far enough to not overlap the butt, there wouldn't be any room to install the clip greeblie. I started to panic that maybe I'd need to move the entire holster down, but then I had the very obvious realization that there was no reason I needed to trim from the top - I could simply drop the thighs low enough to not overlap the butt, then trim the thighs from the bottom. In fact, in looking at reference photos I've collected from other people's builds, my holster is sitting pretty high compared to the bottom of the thigh armor: So I went ahead and dropped the thighs, and trimmed them from the bottom. It turns out I had to trim a significant portion off: After trying everything on, no more overlap! My build does show more black above the thighs from the front than some other builds, but I think it looks ok, and actually if they were higher it would significantly impact my mobility. It's partly a dressing issue, but it also looks like my knee armor is a bit on the large side so I'll likely trim it down. I didn't document it, but I also decided to switch to the 850 cod piece because I'd slightly overtrimmed the KB one and it bothered me. Once I re-add strapping to the biceps, I should be ready for another full suit-up to see if I'm happy with how everything is sitting before moving on to painting! -
Wow, congrats! Makes me feel better about my ongoing 8 year FOTK build. :) Well done.
-
Sayless's 3D Printed R1TK Build Thread
shashachu replied to Sayless's topic in Rogue One Build Threads
I have no plans to make a R1TK but I love this build thread. The very definition of "well that escalated..." :) -
Sha Sha's (Slow) KB/850/3D printed FOTK Build for Short Troopers
shashachu replied to shashachu's topic in TFA Build Threads
I had a bit of an epiphany, which is that I could place some foam on the inside of the bicep piece to keep it pushed out and away from the chest. I tried it out and it feels a lot better: I'll always need to hold my arms out a little, but I no longer feel like I'm in a T-Pose. -
Sha Sha's (Slow) KB/850/3D printed FOTK Build for Short Troopers
shashachu replied to shashachu's topic in TFA Build Threads
I was messing around with the positioning of the biceps last night and I think one of the issues was that I added the strap to the gasket. While I like this because it's easy to strap in myself, it also pulls the biceps inwards which pushes them into the chest piece and forces me to hold my arms out. I think if I changed the strapping to be connected to the shoulder bells instead, it would pull the biceps away from my armor, giving me a little more room. Either way I think I'm going to be pretty mobility restricted, but I won't feel like my arms are being held out quite so much. It's funny too because there is a huge gap between how the armor looks (pretty good) and how it feels (not great) which I think is the way of the FOTK. I'm extremely excited to get this armor done but I also know there's a reason folks do not troop often in it. -
Sha Sha's (Slow) KB/850/3D printed FOTK Build for Short Troopers
shashachu replied to shashachu's topic in TFA Build Threads
Thanks so much for the kind words. And you mean something like JB Weld? These are the seams in the 3d print, for what it's worth. I agree they're going to be the weakest part of the build which is scary because they're also under the most stress. -
Sha Sha's (Slow) KB/850/3D printed FOTK Build for Short Troopers
shashachu replied to shashachu's topic in TFA Build Threads
In this photo the biceps aren't strapped at all so they're sitting pretty low. And actually last night I went ahead and trimmed one of the biceps 😅. It was slightly impulsive so hopefully they're not too short haha -
Sha Sha's (Slow) KB/850/3D printed FOTK Build for Short Troopers
shashachu replied to shashachu's topic in TFA Build Threads
I was thinking I was pretty close to the painting stage, so I went ahead and sanded all the ABS parts to get rid of the gloss and get a nice consistent surface. I did a pass with 120 grit, then 220 grit, then washed them. However, after trying on upper body again, I really think I will need to shorten the biceps because I feel like the kid from The Christmas Story who can't put his arms down: I am thinking that if I were to shorten the biceps from the top, they'll still hit the chest but not as badly. The thickness of the 3D print vs a vacuumformed chest is a big disadvantage here. In order to test out my theory, I made a bicep piece out of paper and trimmed it shorter: Taking a look at other builds, it doesn't seem to look ridiculous. When I was looking at my bicep pieces, I also saw the clip sits high compared to other people's builds, so I think I should be able to trim from the bottom as well, which should allow me to drop the entire bicep lower, and make it so I don't have to trim as much from the top. I like having the biceps high because it gives me a lot more arm mobility but this might be an area I'll just need to compromise. I've marked in tape where I think I'll trim. (The upper trim is at the top of the tape): As is the way of things, when I was pulling the back armor off, it split at the middle seam: I realized I'd only glued that seam, though, so I went ahead and 'welded' the entire seam together with a soldering iron, as well as backed it with a thick piece of ABS. I welded from both the inside and outside so that will make finishing a bit of a pain, but probably good that I reinforced the seam as the back armor gets a ton of flex when I put it on and take it off. Edited to add a photo of the welded back piece. Obviously it will take a lot more work to hide the seam: -
Sha Sha's (Slow) KB/850/3D printed FOTK Build for Short Troopers
shashachu replied to shashachu's topic in TFA Build Threads
Have been knocking off items from my TODO list. First I decided to add straps and buckles to the gaskets to keep the biceps in place: They work well to keep the biceps up and not hitting the forearms: It did remind me, though, that when my biceps are in place, I can't put my arms fully down because they hit the sides of the chest. I think if I cut the inside of the biceps lower I could make it slightly better, but it's hard to say unless I actually do it, and then if I change my mind it would certainly be a pain to fix. Since the biceps now pull a bit at the shoulders of the gaskets, I added a higher chest strap to keep things in place: The next project was to add elastic to the bottoms of my knee gaskets, attached to (cut up) ankle sleeves in order to keep the knee gaskets from riding up. It actually works decently well, so I was happy my idea worked out. I don't think I'll be able to 100% keep the knee gaskets from bunching up but it's a lot better. As a reminder, this is necessary in my build because my calves are glued shut, and I need to slip my feet into the calf armor/boots. You'll also noticed that I decided to rotate the knee gaskets by 90 degrees so the seam is on the inside of my knee. I found that having it on the back of my knees really made the bunching worse. This means I had to remove and reposition the knee armor velcro as well. -
TK-12953's Captain Cardinal build
shashachu replied to jsilvius's topic in Captain Cardinal Build Threads
Nice! the blaster was a fun build. -
Sha Sha's (Slow) KB/850/3D printed FOTK Build for Short Troopers
shashachu replied to shashachu's topic in TFA Build Threads
For your amusement, here are two videos of me getting myself dressed. It is much harder than the OTTK haha! This first one was the first try and you can see I did things in a non-optimal order which made things a lot harder than they needed to be: https://photos.app.goo.gl/AGHJoMYBU7XWxhmS7 The second time went much more smoothly: https://photos.app.goo.gl/3f23cqS73UQzKiW56 -
Sha Sha's (Slow) KB/850/3D printed FOTK Build for Short Troopers
shashachu replied to shashachu's topic in TFA Build Threads
With more items ticked off, I decided to do another suit up today. These are stills from a video so the image quality isn't amazing, and I dressed myself so there are a number of dressing issues, but I'm happy with how everything is coming together. Still TODO from from the fitting/assembly/strapping point of view: - I still need a way to keep the biceps up. I've been considering various methods such as strapping them to the shoulder bells (the same thing I did with my OTTK), or possibly adding some kind of strap with a snap or buckle to attach them to the shoulder gaskets. - There is also nothing keeping the spats in place on the shin, so I'll add some Velcro. - I have an idea to attach elastic to ankle sleeves, and attach them to the bottom of the knee gaskets in order to keep them from riding/bunching up. This is particularly necessary since my shin armor is fixed and I have to slip my legs/feet in vs closing the armor around my shins. - The inside point of the shin armor really digs into the inside of my knee (the top of my tibia) so I am planning on cutting them down some. Looking at the Anovos/Denuo Novo armor, the inside point is quite a bit shorter than the outside so I'm assuming this is fine. - Finally, one danger of taking 8 years to build a set of hard armor is accounting for body size changes. I have been lifting weights consistently for the last 6 years, so my arms and legs are bigger than they were when I first started this project. I already made the biceps slightly bigger, and I am considering doing the same for the thighs. After all the strapping and fitting it will be endless sanding and painting, but I do feel like the end is in sight! -
Sha Sha's (Slow) KB/850/3D printed FOTK Build for Short Troopers
shashachu replied to shashachu's topic in TFA Build Threads
Beyond those major updates, it's been tons and tons of small TODO items to inch closer to the finish line. I assembled and tested the holster: Attached the 'kit kat' boxes: (pre-sanding) Re-created the oval detail on the shins: Assembled the spats: Hea Heat shaped the knees and sewed Velcro onto the gasket to attach them: Created a tab/magnet system to keep the sides of the chest and yoke together: A short video showing it in action: https://photos.app.goo.gl/JPp7zLxjMh2unCoD8 I don't have any photos at the moment, but I also added snaps to the ab suspender and the underside of the yoke which keep it in the same place. I also have a nylon strap/snaps as a failsafe for the chest in case the velcro doesn't hold. Initially I tried to make the strap in ABS so that it could actually keep the chest on without any Velcro but I need to reposition the snaps or possibly use slightly thinner ABS because the snaps kept popping out. -
Sha Sha's (Slow) KB/850/3D printed FOTK Build for Short Troopers
shashachu replied to shashachu's topic in TFA Build Threads
In the meantime, I decided to finally finish assembling and painting the SE-44C that I'd printed a while back. I did make the trigger moveable but otherwise didn't add any electronics: https://photos.app.goo.gl/RgeCtCCKYu8H7RwCA It's not 100% flawless but I'm happy with the result. Thank you to @The5thHorseman for making these incredible files available to us! -
Sha Sha's (Slow) KB/850/3D printed FOTK Build for Short Troopers
shashachu replied to shashachu's topic in TFA Build Threads
I've been bad about updating this thread, but I have been working on the costume. First, the shin repair. As I stated above, I decided to swap the shins so that the messed up part will be on the inside. The KB shins appear to be identical, so it wasn't a huge deal. I used shims and ABS paste and some Bondo spot putty to repair the torn calf and it ended up looking pretty good. I'll need some more work to really make it disappear but otherwise I was happy with the result: During this time, I actually realized my feet are small enough compared to the size of the shoes/shins that I can just glue them shut. This also makes it so I don't have to worry about the repair flexing. I went ahead and glued them with E6000: -
Nice job! I remember really having to try hard to get the sniper knee aligned. As for the ammo belt, mine is also tilted up like that, so probably just the way Walt's molds are. I got Centurion several years ago, but it wasn't mentioned at all in my application.
-
TK-12953's Captain Cardinal build
shashachu replied to jsilvius's topic in Captain Cardinal Build Threads
I used Ruthar's build when assembling my belt. https://www.whitearmor.net/forum/topic/42295-ruthars-first-order-stormtrooper-build/page/3/#comment-585764 -
TK-12953's Captain Cardinal build
shashachu replied to jsilvius's topic in Captain Cardinal Build Threads
Hey James, this is 100% an 850 kit - I have one myself but the only piece I'm using from it is the butt plate because it's slightly smaller than the KB ones. The spats are those flat pieces in the upper right of your first pic, near the helmet. IIRC they're meant to be "rolled". FWIW if you are missing any parts I'm happy to look at my kit and send you any parts you need if you'd be willing to cover shipping. The reason I ended up not really using the 850 is that the quality of the pulls was quite bad. -
TK ANH Stunt by CloseTheBlastDoor
shashachu replied to CloseTheBlastDoor's topic in ANH Build Threads
I will be at the ESB screening Monday night as Chewie :) -
TK ANH Stunt by CloseTheBlastDoor
shashachu replied to CloseTheBlastDoor's topic in ANH Build Threads
I use these. They used to sell them at Home Depot but I think now they only sell the ones with ridges on the fingers. The hand guards cover up the logo on the back, and the colored edge is tucked into my under suit sleeves. https://gorillagripgloves.com/collections/core-grip/products/gorilla-grip-never-slip-work-gloves I just use the plastic hand guards that came with my kit. Do you still have yours? I use Velcro to attach them and they've held up for 8+ years. -
TK-71627 requesting ANH (STUNT) CENTURION Level (WTF)(414)
shashachu replied to TK 71627's topic in Request Centurion Status
Ah yes, shin-gate. I paired long with long and short with short but other folks have split them and in the end it all ends up looking fine. :)

