
TheSwede
-
Posts
4,757 -
Joined
-
Last visited
-
Days Won
101
Content Type
Profiles
Forums
Gallery
Articles
Everything posted by TheSwede
-

Rookie builds a rs anh-stunt tk
TheSwede replied to Lupus1202's topic in Build Threads Requireing Maintenance
It’s as it should, RS is creamy white up close but looks shiny white on photos -
Hydraken’s ANH stunt build AM 2.0
TheSwede replied to Hydraken's topic in Build Threads Requireing Maintenance
Awesome! more Stormtroopers Good luck on your build -
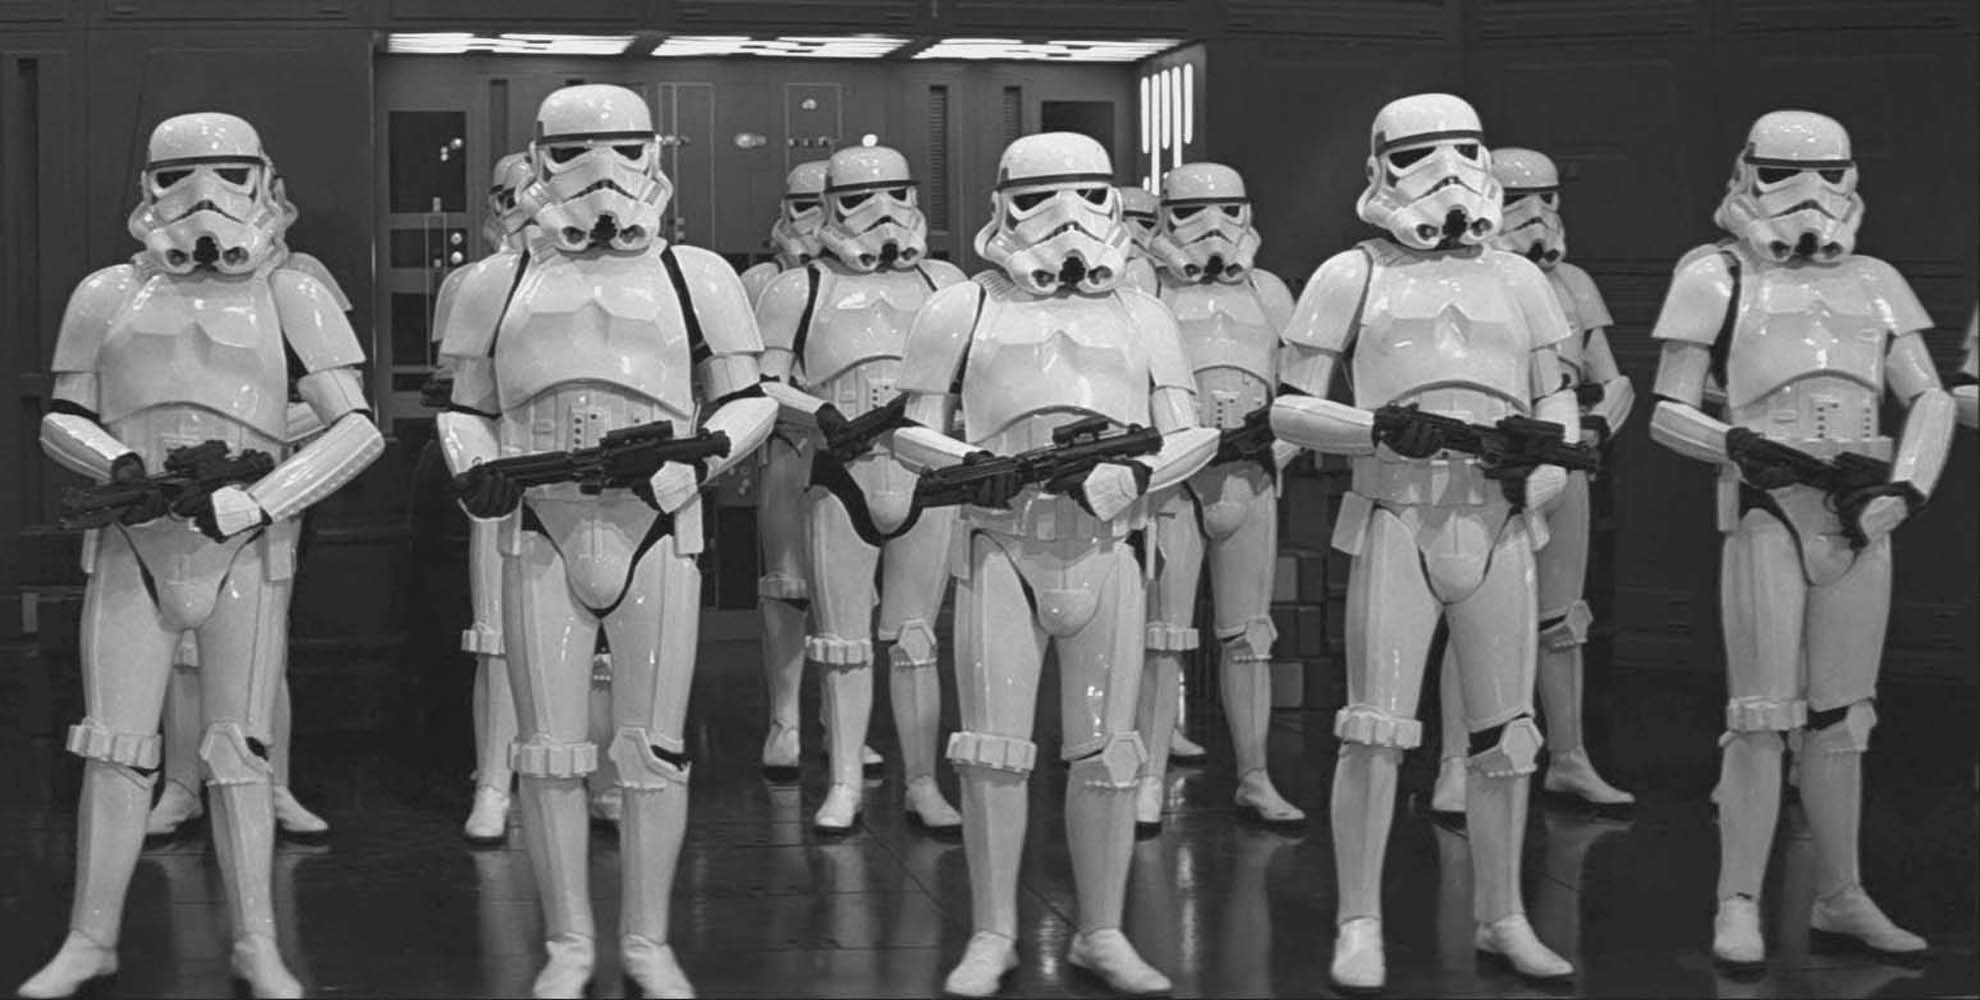
Screen suit for ref.
-
Well...very unexpected but KB received massive help and support and the FOTK is back on so I cancelled the claim....
-
Rookie builds a rs anh-stunt tk
TheSwede replied to Lupus1202's topic in Build Threads Requireing Maintenance
Yepp it`s two left shins and happy BBB-day! RS is a great kit with direct lineage from the Movie as they own a screen-used suit so you will look amazing And..to post your pics I recommend using Imgur, best of luck with your build -
Another Stormtrooper in the making - that`s awesome and welcome to FISD
-
NiceShot161 Requesting Pre-Approval Review (Anovos)
TheSwede replied to DeathTrap's topic in Request TK Pre-Approval
Looks great easy approval -
John9689 Requesting Pre-Approval Review
TheSwede replied to Johnson9689's topic in Request TK Pre-Approval
Congratulations and welcome to the Legion Trooper You can request access and Trooper-status here -
Freduster's ANH Stunt TK build (RS Props, aiming for Centurion)
TheSwede replied to Freduster's topic in ANH Build Threads
RS is a great kit so with your dedication going for Centurion this is what you will look like -
TK-99665 Requesting ESB Centurion Status [TM] [Approved 3rd]
TheSwede replied to TheSwede's topic in Request Centurion Status
Thanks Brien -
Very nice work
-
Basic approval is a given - great job
-
TK-99665 Requesting ESB Centurion Status [TM] [Approved 3rd]
TheSwede replied to TheSwede's topic in Request Centurion Status
Thank you Sir -
TK-40996 requesting ANH stunt EIB status (RS) (831)
TheSwede replied to TK-40996's topic in Request Expert Infantry Status
Looks great -
I have no Idea for SWAT but....what a beauty
-
TK-10171 Requested ESB EIS Status (AM2/TM) [829]
TheSwede replied to cjdesign's topic in Request Expert Infantry Status
Any time great to see you’re going for higher levels and I looked over your app and the TD screws need a little black paint but other than that you should be good for EIB - great work and good luck -
TK-40996 requesting ANH stunt EIB status (RS) (831)
TheSwede replied to TK-40996's topic in Request Expert Infantry Status
I understand you are eager to get approved (as we all are)please be patient and the team will sort you out as soon as they can - usually within a week or less -
TK-10171 Requested ESB EIS Status (AM2/TM) [829]
TheSwede replied to cjdesign's topic in Request Expert Infantry Status
Satin gloves are allowed so you are good to go OPTIONAL Level two certification (if applicable): If rubber gloves are worn the hand plates are affixed via an elastic strap over the palm. If silk or satin gloves are worn, the hand plates have the correct visible stitching pattern using black cotton, with a five point/star pattern, equally spread out with 2 on each side and 1 in the middle front, and needs to be double stitched at each point. -
TK-82214 Ready for deployment
TheSwede replied to DEVOLVER's topic in Newly Approved Members - Sound Off!
Congratulations! Well done and welcome to the Legion Trooper -
TK-99665 Requesting ESB EIB Status [TM] [Approved] 3rd
TheSwede replied to TheSwede's topic in Request Expert Infantry Status
Thanks -
TK-99665 Requesting ESB Centurion Status [TM] [Approved 3rd]
TheSwede replied to TheSwede's topic in Request Centurion Status
Oops I forgot! Will fix Edit: Done -
ATA TK Stunt Build - Canberra Australia
TheSwede replied to Cam Airburn's topic in ANH (Stunt and Hero)
Happy BBB-day Looking forward seeing your build -
Absolutely no worries Sir I´m just beeing an eager-beaver
-
Actually you alligne this lower detail and cut the tops or leave as is. I`m emulating this Trooper and you can see he has the mis-match, however I need to cut the coverstrip a bit to follow the "steps" as one can se here.
-
TK-99665 Requesting ESB EIB Status [TM] [Approved] 3rd
TheSwede replied to TheSwede's topic in Request Expert Infantry Status
Thanks Luc
