

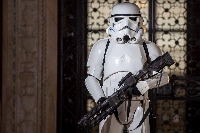
fragarock
-
Posts
231 -
Joined
-
Last visited
-
Days Won
3
Content Type
Profiles
Forums
Gallery
Articles
Everything posted by fragarock
-

fragarock's RS Stunt build - Not to scale
fragarock replied to fragarock's topic in ANH Build Threads
Thanks, seemed like I was winging it a bit on that ammo pack placement. -
fragarock's RS Stunt build - Not to scale
fragarock replied to fragarock's topic in ANH Build Threads
I decided to enhance the ANH notch at the top of the thigh. Here's how I did it, would have been easier/better if I had just done it when I first made the retrun edge though. Started off by marking off the area to change. Then made a cut so that I'd be able to fold down new return edges along my pencil line. Folded it over with the heat iron and at the corner where I made that cut I filled it in with some ABS paste then sanded it smooth. Not the prettiest but compared to the right one you can see there is a difference. Here's the ammo pack for the right thigh as it looks out of the box. Similar to the belt I started off by rough trimming this with scissors after reviewing the diagram. Then I measured 5mm out from the top and bottom of the boxes and cut. Once this was done I squared up the short ends. The length seemed to be perfect to wrap around the bottom of the thigh so I didn't trim anything else off other than squaring up the ends. Once that was done I cut in the curves. I made the radius on mine a little too big compared to the reference images. Hopefully that's not a huge deal. I then used the heat gun to put some bends into this so it would be contoured around the thigh. Next I drilled 1/8" holes into the ends and bored them out a little bigger so the rivet would fit through. I only had one closed cap rivet left so I decided to use split rivets which I had a few extras. Once I had the holes in the ammo pack I placed it over the thigh, aligned it, and marked one of the holes. Only do one for now. Then I drilled that one out too. To split the rivet took some work. Since this thigh is already assembled, getting a screwdriver or chisel in there isn't easy. I end up using a pair of plyers with a hammer to bang these down. Once I had one in I stretched the ammo box around the thigh again really tight and marked the second hole for drilling in the thigh. Then inserted that rivet. And here's the finished product. I wanted the boxes to be symmetrical around the front cover strip but it just didn't work out that way which I believe is just fine. I was worried about gluing the box to the thigh where it touches the bottom of that cover strip but once this was in place it was so tight that friction should hold it in place. You'll notice that the box is at an angle to be able to touch that front cover strip, I've seen this in many Centurion builds so I presume it's okay. -
fragarock's RS Stunt build - Not to scale
fragarock replied to fragarock's topic in ANH Build Threads
When I ordered my kit from RS it came with the black rubber gloves with latex painted hand guards. It also came with a spare pair of ABS hand guards. These gloves are perfect for screen accuracy and centurion level approval but they are way too big and way too hot. So like others I got a pair of black nomex flight gloves plus some extra latex hand guards. A little CA glue...well a lot actually and I now have gloves that fit better and will be more practical for trooping. Here you can see the size difference. The RS ones are large, the nomex are small for my dainty hands. -
fragarock's RS Stunt build - Not to scale
fragarock replied to fragarock's topic in ANH Build Threads
Hi Christine, They fit well proportionally and comfort wise. But I haven't hooked up the strapping yet so I have no clue how they'll work when I walk. Once I get the ammo pack attached I'll work on the belt and straps. I think I will make more of a notch at the top of the piece. Guess I didn't make it deep enough while remaking the return edge up there. Are there specific rivet locations for attaching the ammo pack to the thigh? Haven't found any. Also I presume these are to be split rivets?? Sent from my SM-G935V using Tapatalk -
fragarock's RS Stunt build - Not to scale
fragarock replied to fragarock's topic in ANH Build Threads
Welcome back to the show! I left off last time with magnetic shinn closures, a bit of cod cutting (ouch) and some button painting. Next task is to tackle the thighs so here we go! I started with the left as that one needed to fit over the left shinn/sniper plate that I just finished. Let's take a look at the pieces un-trimmed. You can see they are pretty bulky and have a lot of material to trim off. I started with the outer piece and removed the return edges at the top and bottom down to about 3mm. Photo below is the bottom. I just cut it out with scissors and then cleaned up the edges with sandpaper. Here's the top lines marked for cutting. Also had to trim the front area for the cover strip. Cover strips on thighs are to be 20mm so you need to cut down to 10m on each piece. Since the vertical raised edge on the piece is not perfect you'll have to mark a vertical line as close to the ridge as you can then offset another line from that one over 10mm. Here's the outer piece trimmed up. The inner piece trimming is the same. Here's the inner piece trimmed up. Once I had the edges cleaned up, it was time to fit this on my leg and see what else had to be trimmed to fit my skinny frog legs. I decided to throw the tape on the piece before I cut it down so I'd remember how big it was. it's about 16.75" tall. So what I did was tape the front together leaving the back untapped so that I could position it around my thigh and squeeze the backs together, overlapping to a point that felt and looked correct. I approximately followed the rule of leaving 1/2" of space between your body and the inside of the armor all around. Now the tough part is that to get a good idea how this needs to looks....you have to put on your armor. So I suited up my torso section, boot and shin. (I started with the left thigh). Once this stuff was on I overlapped the back pieces and could get a good feel for how much I had to reduce the diameter. Generally, I found that I had to take more material from the kneecap area compared to the top of the thigh.... a lot more. The back of the outer piece didn't have a nice edge so first I straightened it up a bit with some scissor action. Once that edge was straight I looked at my marks on the other side. For me it seemed best to remove all the material from the inner piece. That allowed the vertical line of the outer back to align with the front cover strip. You'll see in the photo the pencil line showing how much material needs to be removed. Similar to trimming down the wrists I would have to cut a wedge out of this. My top of line is over 1.75" from the edge and the bottom is about 2.25" over. Now I didn't cut right along this line. I cut away about 1/2" material less than the line. Tried on everything again, adjusted, and the trimmed closer to the line until I was happy. Better to trim less and take more time than to just cut it all off and then realize you just hosed yourself. Here's the final cutting. Once I was happy with the diameter reduction I tried everything on again and looked at the height of the piece. I figure I needed to remove about 5/8" to 3/4" off the top of the piece all around to keep it from poking me in the hips. So I marked out a 1/2" line all around the top of these pieces the cut away with scissors. Take some photos of the profile at the top/front of the pieces. RS has a nice shape to these pieces which is typical for ANH thighs. If you have to trim down the tops, try to reproduce this shape. And.....after cutting. Next step was to remake the return edge with the heat iron. At this point I'm feeling pretty confident with this thing just free-handing it. Basically bent over another 1/4" of material. Here's the inner piece. Now it's time for gluing. There's an inner cover strip that I didn't take pics of. Here's the outer cover strip going on. A small crack developed at the base. I packed the back side of the crack with ABS paste. Didn't feel like patching the front as it won't be visible behind the sniper plate. Repeat the process for cover strips at the back side. Here's the back cover strip installed. Excess E6000 just peals off with some tweaser help. Final left thigh pics The right thigh was the same process as the left. Here are some pics but I won't go into too much explanation. Needed to trim off some of the back outer piece to get rid of the extra material that was hanging past the actual raised edge at the knee area. Like the left thigh, I trimmed down the circumference from the inner piece. On this one at the top front the pieces didn't align nicely so I removed some. Then cut down the height and made new retune edges. Glued it all up just like the left thigh. Let's do some time traveling. Here are pics before I glued everything together. I had to reshape the right thigh a lot. As you can see, the left was circular while the right was elongated oval in shape. After some boiling water baths I had it mostly circular. Not sure why the RS pieces are like this. I'm just glad I did the left thigh first! That's it. Goodnight! -
Another RS build. Looking forward to seeing it. The birth of a new trooper is always exciting. Sent from my SM-G935V using Tapatalk
-
Cricket's RS Stunt Build (for the Vertically Challenged)
fragarock replied to Cricket's topic in ANH Build Threads
Awesomeness. So glad to see you get to this point. I know there's always something else to tweak but it looks great as is. Sent from my SM-G935V using Tapatalk -
Chopper857's ANH TK Stunt build
fragarock replied to Chopper857's topic in Build Threads Requireing Maintenance
Sorry I missed the fact that your kit was PVC. I don't know if you can reshape it in hot water but I would think so. RS would be able to tell you for sure. Sent from my SM-G935V using Tapatalk -
Chopper857's ANH TK Stunt build
fragarock replied to Chopper857's topic in Build Threads Requireing Maintenance
Looks really good for your first test fit, great job. I'd say you could adjust your shoulder bells a bit to reduce the gap between your chest. The back of the bells looks pretty good though. May have to shorten the strap, see how it looks. I had real problems with my RS shins meeting up until the back. Try a few boiling water baths, that did it for me. Sent from my SM-G935V using Tapatalk -
fragarock's RS Stunt build - Not to scale
fragarock replied to fragarock's topic in ANH Build Threads
Thanks, definitely feel like it's coming together now but trying not to get too ahead of myself. Still lots to do. Sent from my SM-G935V using Tapatalk -
fragarock's RS Stunt build - Not to scale
fragarock replied to fragarock's topic in ANH Build Threads
While working on the shins I tinkered around with a few other problem areas. When I put on the upper part of my kit I noticed a few problem areas. 1. The cod was severely rubbing on my thighs. No way was i going to be able to walk comfortable....I know i shouldn't expect to.....but I knew this area had to be trimmed. 2. The weight of my belt was pulling down on my ab piece too much and causing a gap between the ab and chest. I needed to install the buttons onto the ab piece. I had trimmed and painted them a while ago. Pretty straight forward install. Here's the current state of my kit. Top is getting there, need to install the new white Velcro behind my belt for support as the RS snaps that were already installed on the ab don't hold up anything. Need to permanently glue in the elastic connecting the biceps and arms. Currently they are Velcro. Need to install the white elastic loops over the shoulder straps. Need to paint the bolt and rivet heads white. May trim the bottoms of the shoulders slightly for a rounded feel. To fix the cod I decided to trim off some more material from the sides. When I first cut these I wasn't sure how much material was supposed to be there....still not sure. You can see the pencil line marking what is to be removed. After I did that I tried on the piece again and although it was better it still wasn't great. So I decided to do what many other short troopers do and cut the cod off. Eeek! I figured I'd remove about 1/2". Any more would have been a real problem as the cod was already a bit snug. Here's the cut mark. I used the lexan scissors on this with just the right amount of brute force. Chop chop! No way would I have dared do this 4 months ago when I first started out but now I've seen it done by several people and know it works well. Just place it right on top of the ab piece and align the vertical ridge. You'll want to trim away some of the oddball material on the sides now to get that curve back. And here's the piece glued down. Looks a little rough but it'll be covered by the belt. Raising this up helped to remove the chafing that was happening on my thighs more than trimming the sides of the cod. I wanted to make sure I got this part done before I worked on the thighs. The other thing I did (but won't bore you with pictures) was to take apart my ab/chest brackets and elastic straps. Once I get the three of them out I brought out the sewing machine and simply reduced the size of the elastic loops by sewing a new line across them. This shortened the loops which in turn now pull the ab piece up tighter to the chest. I hope this is the only fix I need for this as I haven't tried the upper kit on again....I really don't want to take apart these brackets again. I swear I've done it 10+ times already. Next step is to start the thighs and ammo pack and strapping and garter support/suspenders system....then fine tuning...then the bucket! Maybe I'll be done by spring -
"Banana in the tailpipe"? Sent from my SM-G935V using Tapatalk
-
I think the wrist end of your forearms look good. I wouldn't worry about trimming the return edge off of the dimpled area but you should remove those little bits on the sides or else they'll scratch your wrists. I also had to fix my side rivets and used nothing lower than 800 grit to sand them. I went up to 2000 when sanding then hit it with novus polish. Much of the area gets covered with the belt anyways. Just try to keep the sanding around the patch areas only. Not sure if someone commented on your thermal detonator already but I believe the clips should be placed so they're touching the end caps. Yours are aligned with the center control plate. Don't sweat repairing things, we all have to do it. It's a learning process. Keep on truckin' Sent from my SM-G935V using Tapatalk
-
Tormentist's AP ANH Stunt build
fragarock replied to Tormentist's topic in Build Threads Requireing Maintenance
Agreed, Align the elbow ends then do your trimming at the wrist end. You're gonna cut that return edge anyways for centurion. Just try not to cut into the dimples. You're almost the same size as me, just 10 pounds lighter so I bet you'll be trimming just like I did. Crickets build is good to follow too. She's about our size but much lighter and with mad skills when it comes to creative modifications. Sent from my SM-G935V using Tapatalk -
fragarock's RS Stunt build - Not to scale
fragarock replied to fragarock's topic in ANH Build Threads
Now it's time to show the process I went thru on my shins. A few posts ago I had trimmed them up and done rough fitting over my boots. Then I started to really modify them to use a magnetic closure similar to what Christine (Cricket) had done. It took me a really long time to do this step, partially due to deadlines at work and sick kids but also because it was hard to get it right...well mostly right...let's call it pretty good. Like the other parts of my kit, after trimming I added inner cover strips to the front of the piece. E6000, magnets, yada yada yada....yoda. I let this inner strip dry overnight...that's usually when my build time occurs, between the hours of 9pm and 11pm. Then the next day I glue the other side of the shin to the inner cover strip and usually use some tape to help hold it all together. Then the next night I glue on the outer cover strip which is 20mm wide. Now this is the part that took a lot longer than I anticipated. Basically it took me about a week to get the first shin assembled with the magnets. Then another night to fine tune the magnet placement and fit. First problem to tackle was that after cutting down the diameter to fit my legs, pieces just didn't meet up nicely at the back seam. You can see in the photo below how misaligned it was. So I boiled water in the largest pot I had which is pretty large but still not quite big enough to hold the entire shin. I taped the front joint/cover strips that I recently completed to hold that area together during the hot bath process. With the water boiling I submerged the piece for about 20 seconds, flipped it over and did the other end that didn't get wet before and then flipped it again for about 10 more seconds. Then, while wearing rubber dish gloves, I pulled out the piece, pushing it into the shape I wanted and ran it under cold water. I didn't get the piece to bend into position on the first try, I had to do this process 4 or 5 times to get it the way I wanted. After spilling a lot of water on the floor I finally got the back joint in alignment on both shins. Below is a phot pre-bath and you can see how off the top alignment is. Once the bath was over I cleaned up the bottom edge. Now to the fun part. I taped up the piece to hold it together. Then traced out where my magnets would go. I used (5) equally spaced along that rear joint. Then I used my dremel rotary grinding drum to cut out the hole on each side of the joint. This took about 15 minutes and here's the result. I think in this photo I hadn't given it the hot water bath yet which is why it's kinda wonky. Once this was done I added an inner cover strip that was bout 30mm wide. I actually glued it then removed it then glued it a couple times before I got it in the right spot. Even with the clamps it drifted a bit overnight and the next day I had to fix it again. You really need to get this in the right spot so that you have enough of it exposed to drill the other half of the hole for the inner magnets. Here's what I mean. I don't have a drill press or super large bits. I do have boring bits but they seemed to extreme to use on this piece. So I used my regular 1/8" bit and drilled out a few holes. Then I used this funky dremel bit to enlarge the bore hole. Once the hole was large enough for the grinding drum (my most used tool) I finished off the hole. Repeat this for all the other locations. You'll want these holes to be a about 2mm bigger than the magnets you're using, that will give you some slop and make a bigger hole for the magnets which will be on the other side of the shin to drop into. Next thing to do was to make the magnets that will sit under/inside these circular holes. You'll need (1) spare magnet that can get wrecked, one piece of ABS with a hole in it (hole to be larger than the magnet by about 2mm all around), and (5) pieces of ABS that the magnets will be pushed into. You're gonna put the magnet on the ground, put the ABS square over it then heat it with a heat gun. I set mine to 750 F and heated the area for about 10 -15 seconds. When the ABS square starts to bend/warp at the corners you're ready. Put down the heat gun and quickly push your other ABS piece with the hole down over the magnet. Push it firmly down all the way around the magnet. You want the magnet to be embedded as deep as possible. If it doesn't come out right, just heat it again (the ABS square will literally return back to its original shape) then press down again. Here's basically what it will look like. Then glue the magnets into place with E6000. Make sure they are all oriented the same way. Once dry, you can then glue these guys to the underside of you cover strip. After I did this, I found that some of them weren't pushed in far enough/deep enough into their ABS squares so I had to remove a couple and re-press them into the squares, then re-glue them to the cover strip. Next you can cut your outer cover strip. Normally this is 25mm wide. But since I used fairly large magnets I needed mine to be 30mm. Just like the inner cover strip you need to get this outer one placed properly so you have enough meet to cover the joint and the magnets you just installed. This took me a few tries....and a sacrificial cover strip that I cut at 25mm only to realize it was too narrow. Once you've got this glued to the other side of the shin joint you can then glue on your magnets. I again used E6000 for this. You can hold them in place with other magnets on the opposite side of the cover strip or with clamps. Now...I was swearing a lot during this process. The magnets are so strong that they kept jumping off to join up with their partners on the other side of the joint. You must keep these separated otherwise you too will have chipped magnets, and be covered in glue while trying to detach these little troublemakers from their partners. And voila! Here's the first one I did. I eventually went back and tweaked a couple magnets to set them deeper and in some cases make the receiver hole (where the inner magnets are) a little bit bigger to allow the outer magnets more room to land in. Here's the second one which went much smoother. These magnet closures are really strong. Haven't tested them out yet walking but I think they'll work out fine. Nobody commented on my sniper plate placement so I assumed it was okay and glued down the sides. Should be dry tomorrow. I also decided to add some elastic stirrups to the bottom of my shins to prevent the shins from riding up on my boot when I walk. Lots of people complain about this so I'm just gonna deal with this now. I have some 4" black elastic that I cut into 2" x12" long strips. I then cut out 3" long industrial Velcro strips. I sewed the soft side to the elastic using the sewing machine. Then stuck the prickly side to the inside of the shin. I kinda eyeballed the placement of this and how it would need to wrap under my foot then back up into the shin to attach. The end of the elastic is glued in the inside of the shin. The other end of the elastic which has the soft Velcro will loop under my foot and attach to the other side of the shin. Since this side is a Velcro attachment I'll be able to adjust it as needed. That's it for tonight. Tomorrow I'll show you the other miscellaneous stuff I've been doing. -
fragarock's RS Stunt build - Not to scale
fragarock replied to fragarock's topic in ANH Build Threads
Here are a few sniper plate placement photos I'm hoping you can review and comment on. I think it looks right but getting another set of eyes always helps. In these side photos the angled bottom of the sniper plate will align with the angled line at the top of the shin once I glue it down. Right now a couple drops of CA glue are holding the front of the plate on. And here's the bottom. I presume a gap is expected here and unavoidable on either side of the cover strip. Should I try to glue down as much of this bottom edge as possible or does it not matter? Thanks for stopping by and if you have any comments on this good or bad please let me know. -
fragarock's RS Stunt build - Not to scale
fragarock replied to fragarock's topic in ANH Build Threads
Thanks Christine. These photos are really helpful. You must have read a ton of posts because every time I have a question you seem to have the answer right away. Now I can get this installed once my shins dry. Sent from my SM-G935V using Tapatalk -
"Hyperfirm" E-11 accuracy and build questions
fragarock replied to Jaltrooper's topic in ANH BlasTech E11
Hi, I used boring bits to start the hole in my scope but found they just didn't work once the walls of the scope got too thin. I then switched to a boring bit on my dremel. You can look up my E11 mod thread to see how I did it. I'd post the link but I'm on my phone now. Just look up fragarock. Sent from my SM-G935V using Tapatalk -
fragarock's RS Stunt build - Not to scale
fragarock replied to fragarock's topic in ANH Build Threads
Hi Guys, It's been a while since I've updated this thread but there has been progress behind the scenes. I've been assembling my shins and should be done with them tomorrow. I'll post pics of this work later. While those pieces are drying I need some help with the sniper plate trimming. I couldn't find specific trimming dimensions for this piece so I referenced the RS Suit photo library and several Centurion applications to get an idea how much return edge there should be around this piece. Here are some images of the untrimmed piece for reference. I kinda eyeballed the cut lines based on the reference images. I made the return on the top 10mm and flared it out to 20mm as shown below. I then did the rough cuts with scissors leaving a bit outside the lines. I then trimmed up to the lines with my dremel sanding drum. Based on the reference photos it appears the side returns need to taper down to the ends. Is this correct? On the bottom of the piece I trimmed it up to about 3mm of a return edge thinking this would help it sit tight against the shin. Is this okay or should it be trimmed more? Finally, where are you supposed to trim the off the sides? Do you keep them as long as possible? I rough trimmed them just enough to get rid of the wonky ends that were part of the ABS pulling process. When you trim the sides off, should the line be angled or straight up-and-down? That's all for tonight. Thanks for reviewing and if anyone can answer these questions it'll help a lot. -
fragarock's RS Stunt build - Not to scale
fragarock replied to fragarock's topic in ANH Build Threads
Another week has gone by and we're into February. Can't believe I started on my kit in mid October last year. I somewhat jokingly told my wife it would take a year to put together. But its now starting to look more like 6 months may be possible. My goal is to attend the Makers Faire in my area at the end of July with the local Great Lakes Garrison. "Fingers crossed". I've been super busy at work and with two sick kids I've only put in a couple hours here and there over the past week. And I'm now sick with one of the plagues that my kids brought home from the chemical weapons factory know as day care and kindergarten. But I'm hanging in there! I'm still working on my shins. I dissected Christine's magnet shin closure pics and video and feeling confident, started boring holes in the back of the shins to replicate her assembly. I hope to do it half as well as she did. Pics on that to come later. While some E6000 is drying I did a little ab button work. Below is the piece out-of-the box. RS pieces are not marked with trim lines so I reviewed ukswrath's build to get an idea how to trim these. From the various builds it seemed there should be no return edge on these and they should be cut to fit directly over or just a tad smaller than the raised plates on the ab piece. So that's what I did. I used scissors on these and then put them on the belt sander a few times to get them down to the size I needed. Paints are Humbrol #14 French Blue gloss and #5 Admiral Gray. I used a very very small tip paint brush and painted the buttons trying not to paint all the way down to the flat part of the plate. Seems like everyone says the paint shouldn't cover the entire button but there should be a white gap around the base. Pretty simple I guess and they came out pretty good I think despite my hacking cough. At least it's progress right? That's all for tonight. One question for you all. One of the snaps that connects the belt to the ab broke. Specifically the female piece on the belt fell off. I CA glued it and it's drying now. I figure that should hold it but I don't think I can rely on it anymore so, does placing some industrial Velcro behind the belt seem like the best way to connect and hold up the belt to the ab again? I really don't want to replace that snap so I'm thinking the Velcro is best. Thanks -
fragarock's RS Stunt build - Not to scale
fragarock replied to fragarock's topic in ANH Build Threads
Hello Troopers, I should be going to bed now but I feel like I've gotten a lot done over the past three days and I want to share my progress. The kit is starting to really look like something other than a collection of random parts or like 3PO when Chewie found him in a junk pile in Cloud City. My last posts were about how to correctly align the ab and kidney pieces. After a back-and-forth with Christine, I realized I had to fix what I had done. I won't bore you with all the details but I had to patch some drill holes in my kidney, re-drill out the original ones I had, and then patch the incorrect ones. Paste, sand, paste again, sand again. Then sand some more. Eventually I got the ABS surface back in shape, not as good as the original but close enough. Part of the fix involved removing the return edges on the kidney. This caused me to have to replace the elastic straps inside the connection as they would now be too long. So out came the dremel cutting head and I chopped off the rivets on the ab side, made new straps and put on new rivets happily returning the ab and kidney together on the left side. I had trouble getting the shine back into the ABS after a lot of sanding. I went all the way up to 3000 grit sandpaper and several rounds of Novus but still couldn't get it right. So I experimented with some acetone. Pure acetone rubbed on your armor will chew it up fast. So I diluted some with just a small amount of water (originally tried 50/50 but that was too diluted). My in-scientific guess at my ratio is 95% acetone 5% water. I mixed this in a glass jar, dipped in a clean white cloth getting it good and wet then I rubbed it across the part that needed shining up. Surprisingly it worked fairly well. Next was to install a new snap on the right ab side. I lost the original which came already installed by RS when I trimmed down my ab piece. Drilled out a 1/8" hole, looked at online videos of how to install snaps and went to work. It was pretty easy. Then I made an elastic strap for the interior connection (I actually just adjusted the strap that came in the RS goody bag, replacing their snap with the ones I just bought. While I was working this right side connection I borrowed..."stole"...an idea from Christine who got it from Jorge (zv288bot). I'd quote them both directly but haven't figured how to link their usernames yet. I'd also make a right side stabilizer plate. Here's a close-up of the final tab install. I think I'll add another piece on the end.....kind of a stop to keep the tab from being inserted too far. While all this was going on, I started on the shoulder bell strapping. Since Christine was in the process of tweaking her assembly she helped me identify the RS bells as they're kinda hard to tell left from right. The left one seems to match Luke's left in the film. That's the best guess that I have so I went with it. I installed the black elastic across the bottoms. After these dried I read up on the strap/snap to connect the bells to the white elastic sew-in snap at the torso. Ukswrath is the source of all knowledge so I went there for answers and then worked out my own system. I installed the snap (torso hanging off the display mannequin). Then marked with blue tape the point where white elastic crossed over the black. After removing the strap I had this blue tape as the mark line. Then I placed another piece of tape (brown masking tape) to mark where the elastic strap will get glued to the bell. Note that from the original tape mark I went 1/4" closer towards the snap per Ukswrath's instructions. This shortens the distance and helps to pull the shoulder bells tighter into the chest....which you'll need once you hang the arm pieces off the bell. This pic is bit confusing because it's the other shoulder bell. Just image the tape is brown masking tape from the previous step. This is how I knew where to align and glue the strap onto the bell. Another item on the to-do-list was to make the bicep hooks. Again followed Ukswrath tutorial but after making them had to adjust the bend angles and size a bit to fit the RS biceps. I realized I'd need to trim off the return edge in the area that the hooks were to be installed. Before and after. Here's the completed install. For reference I made the top bend 20mm, the back section behind this bend was 30mm, the next bend down was 50mm, the one at the bottom was 50mm. Same shape as Ukswrath, just a bit shorter overall. A couple days later I started on the shins. The RS shins are identical so there's only one way they're gonna go together. I started by trimming the bottoms, no return edges here. I just left a bit of a rounded edge so it wouldn't dig into my boot. Top return edge between3mm-5mm. I rough cut these with scissors then dremeled my way to nice returns. Cleaned up edges. Once this was done I marked out the return edge line. First, identified the edge of the front ridge. The front ridge isn't perfectly straight up and down so you have to eyeball it and mark with a ruler. Then measure over 10mm for your cut line. The final cover strip will be 20mm. Repeat this on the other half. This is one of the harder pieces that I found to trim. It doesn't lay flat and could only clamp one side down to the table. The other end has the ruler clamped to the piece. I lightly scored the piece to get the groove started. Then removed the clamps and cut very careful along the line without the ruler. Did this a few times until I could snap it. Trimmed piece shown below. Do this on the other (3) pieces. Now for some test fitting. Taped up the fronts which have now been cut to receive a 20mm cover strip. You'll see the backs do not align well at all. I put on my undersuit and boots and squeezed these around my leg, overlapping the back pieces to get a rough idea how tight the could be without making them too tight. Since I'm small, I wanted these to be as narrow as possible when viewed from the front. Another thing to watch is the back cut line. Try to do your cuts so the rear cut line is aligned with the cut line on the front of the shins. On mine, if I had cut an equal amount out of the rear of each piece, my back joint line would have been off center. So I had to cut mine unsymmetrically. This is trial and error and it took about 4 rounds of cuts to get it right. The other thing is at the rear, the tops won't align. You'll have to force them into place and tape them, the figure out how to make your cut lines. it will be ugly if you don't think about his before you start cutting. I'm not sure if this is an RS thing or my pieces were formed weird. Here are some pics after cutting and trying them on. Please let me know if they look okay. Note that the centerline of my knee cap is at the top of the piece. Is this correct? Finally I decided to try all this stuff on. Boy, I was not prepared for the effort involved here. This is really hard to put on for the first time. I had to do battle with those shoulder bell straps to get them snapped into place....eventually I won but was left sweaty with a cramp in my wrist. Also can't believe how damn hot this is. I was getting warm without half the legs and no bucket. Yikes! Here's what I realized needs to be adjusted from this first trial fit: 1. The weight of the torso and belt is pulling on my chest straps too much, causing a gap between the chest and ab plate. I think I'll have to shorten my elastic straps to fix this. 2. Definitely need to remove some return edge from the sides of the cod. It's digging into my thighs on each side. 3. Shoulder bells look too wide. Need to trim some material off and likely contour them like Christine is going to do so they follow the contour of the chest. 4. Biceps feel right to me. Do they seem to be placed correctly? 5. If biceps are OK, then I need to remove material from the wrists of my forearms. I can't bend my arm 90 degrees without them digging into my hand. 6. Gloves are too big. 7. Bells are rotating out a bit creating too much of a gap at the chest. How to fix this? Any other comments would be most helpful. -
Cricket's RS Stunt Build (for the Vertically Challenged)
fragarock replied to Cricket's topic in ANH Build Threads
Tow left forearms? Mind blown! The things you learn on this site are amazing. I agree with the idea that the bottom of the bells need to follow the contour of the chest. I noticed this and marked it on one of my posts....same pic you posted of them all standing in ranks. I didn't do that taper yet, was going to see how everything fit and hear what the pros out there thought about this taper. Sent from my SM-G935V using Tapatalk -
Cricket's RS Stunt Build (for the Vertically Challenged)
fragarock replied to Cricket's topic in ANH Build Threads
Hi Christine, I happen to be working on my bells as well today (at home with a sick kid). So you're last few posts couldn't have come at a better time. What I noticed on mine were they seemed to be really tapered in at the bottom, almost as of the were pinched. Both are like that so I'm surprised to hear yours aren't quite the same. Looking at the film stills you posted it does appear that they are supposed to have this pinched look at the bottoms. Just like Germain said, a bit of heating may help get that bottom pinch you're looking for. You could also try shortening your bottom elastic straps a bit to force the bottoms to pull in more. Here are some reference pics of mine. Your thread helped me identify which was the left....there's a tell-tale swoop on the ridge of one that matches Luke's left bell. That's the best evidence I've seen to identify left vs. right on these RS pieces. Here's the swoop from the film. -
Hi, I have a build thread going but had a detail question for anybody who's familiar with the RS TK kit. The tops of the shins don't have cut lines. Is there a certain return edge width required here? I presume there's no return edge on the bottom. Is this correct? How do you identify which pieces go together as they're not marked? Thanks for the help guys. Here are some reference pictures.
-
fragarock's RS Stunt build - Not to scale
fragarock replied to fragarock's topic in ANH Build Threads
Here's what I'm facing. This photo shows what I was originally going to do, align the bottoms, thinking I had to get the kidney notch in the right spot. This photo shows what I guess I have to do to make this correct. Align the tops. I can do this....re-drill out the original holes I had and patch the others...no big deal. The only issue is this will force the ab piece upwards. Which in turn literally pushes up the chest piece up into my throat. So I'm going to have to carve out more neck area on the chest. It also pushes the cod up a bit into the crotch which is getting a bit tight. Do I need to trim off some more of the kidney bottom to have it align with the ab bottom? Would require making a new notch. If the consensus is to have the tops aligned that's what I'll do. At this point I just want to have it centurion approvable. Thanks for your input.
